Creating a Multi-Page Table
Multi-page tables are very common in theses, dissertations, and treatises. These tables must have
the entire heading included above the first part of the table and “Table x – continued” (or some
variation, minus quotes) above each portion of the continued table. Column headings must also
be repeated for each portion of the continued table. This document illustrates a simple method to
achieve this formatting for tables that span two or more pages.
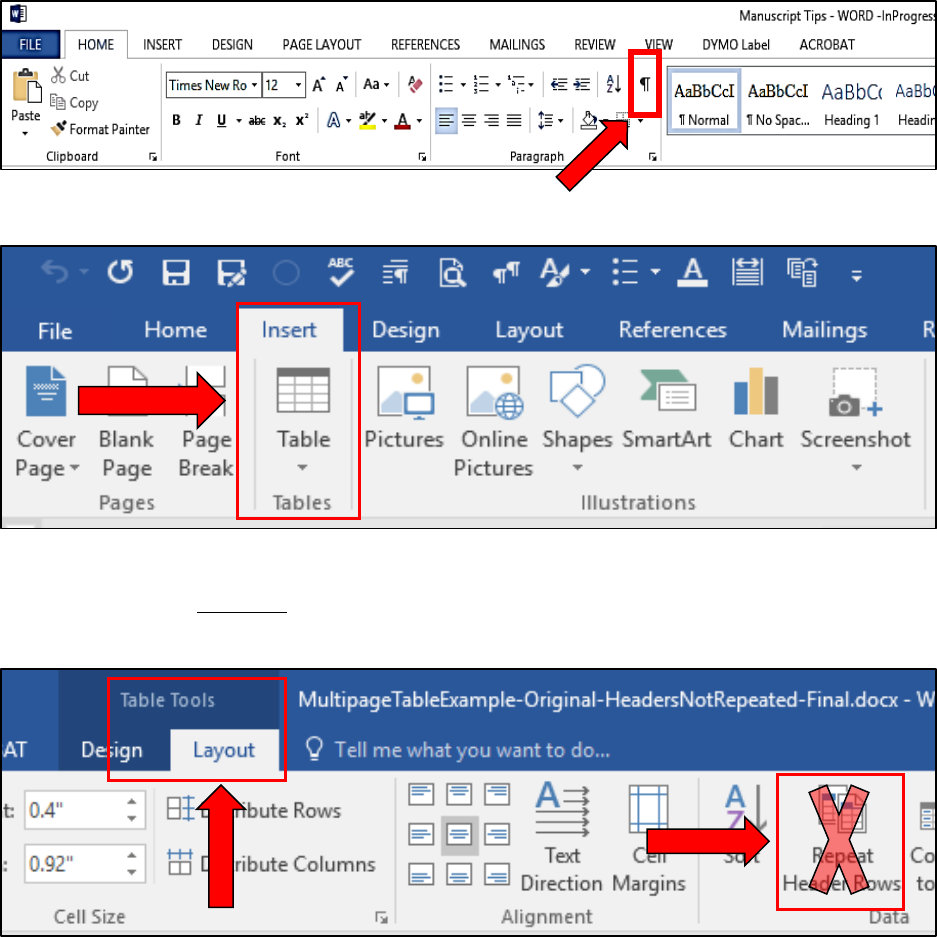
1. Enable Show Formatting.
Click on the pilcrow (¶), which will initiate Show Formatting and reveal the location of each
paragraph, tab, page and section break.
2. Create the entire multi-page table using Insert > Table.
3. Insert data into each cell. While column headings have to be at the top of each portion of the
continued table, DO NOT click on Repeat Header Rows. Column headings will be inserted
in Step 7.

2
Below is an example of an unformatted table that spans more than one page.
Note the two blank lines above
the table. The table heading will
be inserted on the first bank line.

3
4. Insert the table heading on the first blank line. The font and font size must be the same as the text in the body of the manuscript,
and line spacing must be single. (To ensure single line spacing, use the Paragraph menu to make sure Before and After are 0 and
Line Spacing is Single.)

4
5. In the continued portion of the table:
1 Place the cursor in the upper left cell.
2 Click on Split Table. This creates two tables by separating the table above the row in
which the cursor was placed.
Clicking on Split Table will also create a single blank line above the continued portion of the
table and will move the cursor to the newly created blank line above the table.
6. Insert another blank line above the table by pressing the Enter key once. In the first line,
type "Table 1 – continued" (or some variation, minus the quotes).
1
1
2

5
7. The final step is to insert the column headings in the continued part of the table.
a. Place the cursor in any cell of the top row.
b. Then click Insert Above, which will create the blank row for the column headings.
c. Copy the column headings from the first page of the table and paste them into the blank
row in the continued portion of the table.
9. For tables that span more than two pages, repeat Steps 5 to 7 for each portion of the
continued table.
