
Oracle® Communications Billing and
Revenue Management
Billing Care SDK Guide
Release 12.0
E90964-08
July 2022
Oracle Communications Billing and Revenue Management Billing Care SDK Guide, Release 12.0
E90964-08
Copyright © 2017, 2022, Oracle and/or its affiliates.
This software and related documentation are provided under a license agreement containing restrictions on
use and disclosure and are protected by intellectual property laws. Except as expressly permitted in your
license agreement or allowed by law, you may not use, copy, reproduce, translate, broadcast, modify, license,
transmit, distribute, exhibit, perform, publish, or display any part, in any form, or by any means. Reverse
engineering, disassembly, or decompilation of this software, unless required by law for interoperability, is
prohibited.
The information contained herein is subject to change without notice and is not warranted to be error-free. If
you find any errors, please report them to us in writing.
If this is software or related documentation that is delivered to the U.S. Government or anyone licensing it on
behalf of the U.S. Government, then the following notice is applicable:
U.S. GOVERNMENT END USERS: Oracle programs (including any operating system, integrated software,
any programs embedded, installed or activated on delivered hardware, and modifications of such programs)
and Oracle computer documentation or other Oracle data delivered to or accessed by U.S. Government end
users are "commercial computer software" or "commercial computer software documentation" pursuant to the
applicable Federal Acquisition Regulation and agency-specific supplemental regulations. As such, the use,
reproduction, duplication, release, display, disclosure, modification, preparation of derivative works, and/or
adaptation of i) Oracle programs (including any operating system, integrated software, any programs
embedded, installed or activated on delivered hardware, and modifications of such programs), ii) Oracle
computer documentation and/or iii) other Oracle data, is subject to the rights and limitations specified in the
license contained in the applicable contract. The terms governing the U.S. Government’s use of Oracle cloud
services are defined by the applicable contract for such services. No other rights are granted to the U.S.
Government.
This software or hardware is developed for general use in a variety of information management applications.
It is not developed or intended for use in any inherently dangerous applications, including applications that
may create a risk of personal injury. If you use this software or hardware in dangerous applications, then you
shall be responsible to take all appropriate fail-safe, backup, redundancy, and other measures to ensure its
safe use. Oracle Corporation and its affiliates disclaim any liability for any damages caused by use of this
software or hardware in dangerous applications.
Oracle, Java, and MySQL are registered trademarks of Oracle and/or its affiliates. Other names may be
trademarks of their respective owners.
Intel and Intel Inside are trademarks or registered trademarks of Intel Corporation. All SPARC trademarks are
used under license and are trademarks or registered trademarks of SPARC International, Inc. AMD, Epyc,
and the AMD logo are trademarks or registered trademarks of Advanced Micro Devices. UNIX is a registered
trademark of The Open Group.
This software or hardware and documentation may provide access to or information about content, products,
and services from third parties. Oracle Corporation and its affiliates are not responsible for and expressly
disclaim all warranties of any kind with respect to third-party content, products, and services unless otherwise
set forth in an applicable agreement between you and Oracle. Oracle Corporation and its affiliates will not be
responsible for any loss, costs, or damages incurred due to your access to or use of third-party content,
products, or services, except as set forth in an applicable agreement between you and Oracle.

Contents
Preface
Audience xv
Documentation Accessibility xv
Diversity and Inclusion xv
Part I About the Billing Care SDK
1
About Billing Care SDK
About the Billing Care SDK 1-1
About the references Directory 1-1
Installing the Billing Care SDK 1-2
2
About Billing Care Architecture
About Billing Care Architecture 2-1
About the Billing Care REST Framework 2-2
About Open Source Libraries Used by Billing Care 2-3
Part II Basic Billing Care SDK Components
3
Setting Up the Development Environment
About the Billing Care Development Environment 3-1
Configuring NetBeans IDE for Billing Care Development 3-1
Downloading and Installing NetBeans IDE 3-2
Configuring the NetBeans IDE Connection to WebLogic Server 3-2
Setting Up a Billing Care Customization Project 3-2
Creating the Billing Care SDK Directory Structure 3-2
Creating the Billing Care NetBeans IDE Project 3-4
iii

4
Customizing Billing Care
About Billing Care Customization Concepts 4-1
About Billing Care Modules 4-2
About Views 4-2
About View Models 4-2
About Data Binding between Views and View Models 4-2
About the customModule.properties File 4-2
About the Configuration.xml File 4-4
About the Registry File 4-4
Managing Billing Care Modules Using the Registry File 4-4
About Billing Care View Model JavaScript Framework 4-5
Access to the Open Account 4-5
About AJAX Calls 4-5
Object IDs 4-6
About Error Handling in REST Operations 4-6
Invoking Error Handing in Customizations 4-7
About Custom Resource Authorization 4-7
Performing Authorization in the Actions Menu 4-7
Performing Authorization on the UI 4-7
Performing Authorization on the REST Framework 4-8
Using REST Authorization without Obligations 4-8
Using REST Authorization with Obligations 4-8
5
Customizing Billing Care Templates
About Billing Care Templates 5-1
Customizing Templates 5-3
Removing Columns from a Template 5-4
Adding Columns to a Template 5-4
Extending the REST Framework to Support New Column Fields 5-5
Creating a customModule.properties File 5-6
Example 1: Event Template Customization 5-6
Example 2: Event Template Customization with New Fields 5-7
Example 3: Newsfeed Template Customization 5-10
6
Customizing Billing Care Themes and Logo
About Billing Care Themes and Logo 6-1
About Customizing Billing Care Themes 6-1
Adding a New Theme 6-2
Overriding Themes 6-2
iv
Setting Which Billing Care Theme to Use 6-3
Changing the Default Logo 6-3
7
Editing the Billing Care Configuration File
About the Billing Care Configuration File 7-1
Creating a Custom Configuration File 7-1
Default Configuration File Entries 7-2
8
Using an Exploded Archive during Customization
About Using an Exploded Archive 8-1
Configuring WebLogic Server to Use an Exploded Archive 8-1
Creating a Manifest for your Shared Library 8-2
Rebuilding your Project after Creating the Manifest File 8-3
Creating a New Deployment Plan for Billing Care with your Shared Library 8-3
Deploying your Shared Library on your Billing Care Domain 8-5
Redeploying Billing Care to Use your Shared Library 8-5
9
Packaging and Deploying Customizations
About Packaging and Deploying Customizations for Production 9-1
Creating Production Versions of the Manifest File and Deployment Plan 9-1
Using the Java JAR Utility to Package Your Shared Library 9-2
Deploying the Shared Library .war 9-2
Redeploying Billing Care to Use Your Shared Library 9-3
Part III Customizing Billing Care Screens and Fields
10
Customizing the Billing Care Account Home Page
Customizing the Billing Care Account Home Page 10-1
About Customizing the Billing Care Home Tab 10-1
Customizing the Billing Care Home Tab 10-2
Creating a Summary and Detailed Link View 10-3
Creating an All Bill Units Summary View 10-3
Creating a Bill Unit Summary View 10-4
Overriding the Billing Care Home Tab Theme 10-5
Configuring the Custom Home Tab in the Registry 10-6
Creating a HomeTabBillUnitsViewModel 10-6
About Customizing the Bills Graph 10-7
v

Customizing Bills Graph 10-7
Creating Custom Home Tab View Model 10-7
Creating Custom View Model HTML Template for Customizing Bills Graph 10-9
Configuring Custom View Models for Customizing Bills Graph in the Registry 10-9
11
Customizing the Billing Care Account Banner
About the Billing Care Account Banner 11-1
Customizing the Billing Care Account Banner 11-1
Creating Configuration Files for Account Banner Customization 11-2
Rearranging Account Banner Tiles 11-3
Removing Account Banner Tiles 11-3
12
Customizing the Balances Area
About Customizing the Balances Area 12-1
Replacing the Balances Area with Custom Account Information 12-2
Customizing the Balances Area 12-2
Creating a View for the Balances Area 12-2
Creating a Custom Balances Area View Model 12-2
Configuring the Custom Balances Area in the Registry 12-3
Customizing the Data Displayed in the Balances Area 12-3
Creating Custom View Model HTML Template for the Balances Area 12-4
Adding customBalancesView and CustomBalancesViewModel to the Registry 12-4
13
Adding Custom Payment Types
About Custom Payment Types 13-1
Creating Custom Payment Types in BRM 13-1
Creating Custom Payment Type Event Subclasses 13-2
Updating the /config/paymenttool Object with Custom Payment Types 13-3
Updating the /config/payment Object with Custom Payment Type Event 13-3
Customizing Billing Care to Support Custom BRM Payment Types 13-4
Generating XSD and JSON Files for Custom Payment Types 13-4
Extending the Billing Care Data Model with XSD and JSON Files 13-5
Adding the XSD and JSON Files to NetBeans Project 13-5
Enabling Custom Payment Types in Batch Payment Processing 13-5
Deploying Customizations 13-7
vi

14
Customizing the Make a Payment Screen
About the Make a Payment Screen 14-1
Customizing the Fields Displayed for a Payment Method 14-2
Creating a Custom View Model for a Payment Method 14-2
Configuring the Custom Payment Type in the Registry 14-3
15
Displaying Success Toast Messages in Billing Care
About Displaying Success Toast Messages 15-1
Adding Success Toast Messages to Billing Care Screens 15-1
Creating a Success Toast Message View 15-2
Creating a Custom View Model for Success Toast Messages 15-2
Creating a Custom View Model for Your Payment and Adjustment Screens 15-3
Configuring the Registry for Success Toast Messages 15-5
Specifying the Path to Check Mark Graphic 15-6
16
Customizing Purchase Deal and Assets Action Menu
About Customizing Purchase Deal Configuration and Assets Action Menu 16-1
Customizing Purchase Deal Configuration 16-1
Extending the Data Model With the XSD and Java Class files 16-2
Creating a Custom Purchase Deal Configuration View Model 16-3
Creating Custom Purchase Configure View Model HTML Templates 16-3
Customizing Assets Action Menu 16-4
Creating a Custom Asset View Model 16-4
Creating Custom Asset View Model HTML Templates 16-4
Deploying Customizations 16-5
17
Customizing Billing Care to Display Child Accounts
About Displaying Child Accounts 17-1
Customizing Billing Care to Display Child Accounts 17-1
Customizing the Organization Hierarchy Screen 17-2
Creating Custom View Models 17-3
Creating Custom View Model HTML Templates 17-3
Configuring a Custom Module in the Registry 17-3
Adding the Data Model JAR File 17-4
Deploying Customizations 17-4
vii

18
Customizing Billing Care Invoice Presentation
About Billing Care Invoice Presentation 18-1
Customizing Billing Care Invoice Presentation 18-1
Setting Up NetBeans IDE for Customizing Invoice Presentation 18-1
Presenting Invoices in a Dialog Box 18-2
Retrieving Invoices from Third-Party Repositories 18-3
19
Customizing Reason Codes List in Event Adjustments
About Displaying Reason Codes 19-1
Customizing Reason Codes List in Event Adjustments 19-1
Creating the Custom Event Adjustment View Model 19-2
Configuring the Custom Event Adjustment View Model in the Registry 19-3
Deploying Customizations 19-3
20
Restricting Debit and Credit Event Adjustment Options
About Debit and Credit Event Adjustments 20-1
Restricting Debit and Credit Adjustment for Events 20-1
Creating a Custom View Model for Restricting Debit and Credit Adjustments 20-2
Configuring the Custom View Model for Debit and Credit Adjustments 20-3
21
Customizing Billing Care to Display Only Event Adjustments
About Displaying Event Adjustments 21-1
Customizing Billing Care to Display Only Event Adjustments 21-1
Creating Custom View Models to Display Only Event Adjustments 21-2
Configuring Custom Bill and Bill Item View Models in the Registry 21-3
22
Customizing Account Creation Service Fields
About Customizing Account Creation 22-1
Creating Custom View Models 22-1
Extending the New Account Configuration View Model 22-2
Creating a Custom Service Configuration View Model 22-3
Creating a Custom Service View Model HTML Template 22-4
Extending the Service Validator for Custom Fields 22-4
Configuring a Custom Module in the Registry 22-5
Deploying Customizations 22-5
viii

23
Creating Custom Billing Care Credit Profiles
About Credit Profiles 23-1
Customizing Billing Care to Store Credit Profiles 23-1
Creating Custom Profile Storable Classes in BRM 23-2
Importing Credit Profile Class Definitions into BRM 23-2
Creating Credit Profile Objects Using Developer Center 23-2
Creating the Credit Profile Class and Field 23-2
Generating the Required JAR File and Infranet.properties 23-3
Extending the Billing Care Data Model with XSD and JSON Files 23-4
Adding the Required Files to the NetBeans Project 23-4
Updating the MANIFEST.MF File 23-5
Adding the Required View Module and Configuration Files 23-5
Adding the Required JAR and JSON Files 23-5
Deploying Customizations 23-5
24
Customizing the Billing Care Actions Menu
About the Billing Care Actions Menu 24-1
Mapping Label and Description Key Values to the Resource Bundle 24-2
About Customizing the Actions Menu 24-3
Setting Up NetBeans IDE for Customizing the Actions Menu 24-3
Removing Actions Menu Items 24-3
Removing an Existing Actions Menu Submenu 24-3
Removing an Existing Actions Menu 24-4
Rearranging Actions Menu Items 24-5
Rearranging Actions Menu Submenu Items 24-5
Rearranging Actions Menu Items 24-5
Renaming Actions Menu and Submenu Items 24-6
Renaming Actions Menu Submenu Items 24-6
Renaming Actions Menu Items 24-6
Adding Actions Menu Items 24-7
Adding Action Menu Items in Payment Suspense 24-8
25
Opening Custom Views From Landing Page
About Customizing the Landing Page 25-1
Customizing the Landing Page 25-1
Creating a Custom Landing Page View Model 25-1
Creating a Custom Landing Page View Model HTML Template 25-2
Opening Custom Views in Full Screen Mode 25-2
Creating a Custom Full Page View Model 25-3
ix

Creating a Custom Full Page View Model HTML Template 25-3
Creating a Custom Router View Model 25-3
Creating a Custom Router Helper 25-4
Configuring the Custom Full Page View Model in the Registry 25-4
Opening a Dialog Box From Landing Page 25-5
Creating a Custom Dialog View Model 25-5
Creating a Custom Dialog View Model HTML Template 25-5
Configuring the Custom Dialog View Model in the Registry 25-6
26
Customizing Billing Care Labels
About the Billing Care Resource Bundle 26-1
Customizing the Resource Bundle 26-1
Creating a Custom XLF File 26-1
Modifying Existing Labels 26-2
Adding New Labels 26-2
Creating Required JavaScript Files for Deployment 26-3
Localizing Billing Care into Other Languages 26-3
27
Customizing Billing Care to Disable Links in the Bills Tab
About Disabling Links 27-1
Disabling Links in the Bills Tab 27-1
Creating Custom View Models to Disable Links in the Bills Tab 27-2
Configuring Custom Bill, Charges, and Payment Detail View Models in the Registry 27-5
28
Separating Event Adjustment Amount and Percentage Fields
About Event Adjustments using Amount and Percentage 28-1
Separating Amount and Percentage Fields 28-1
Creating Custom View Model to Separate Amount and Percentage Fields 28-1
Adding CustomEventAdjustmentViewModel to the Registry 28-2
29
Embedding Billing Care Screens in External Applications
About Embeddable Billing Care Screens 29-1
Embedding Billing Care Screens 29-2
Understanding the index_embedded.html File 29-2
Configuring Your External Application to Access Billing Care 29-4
Configuring Security for External Application Access 29-4
x

Part IV Customizing Searches and Filters in Billing Care
30
Searching for Accounts by Payment ID
About Account Searches in Billing Care 30-1
Adding a Payment ID Field to the Account Search Screen 30-1
Naming the Custom Account Search Template in the CustomConfigurations.xml File 30-2
Creating a Custom Account Search Template 30-3
Creating a Custom Account Search View Model 30-4
Creating a Custom Search View Model 30-4
Creating a Custom Router View Model 30-4
Creating a Custom Router Helper 30-5
Creating a Custom Account Search View Model HTML Template 30-5
Replacing the Default Method for Showing Recently Opened Accounts 30-6
Configuring a Custom Module in the Registry 30-6
Creating a customized_en.xlf File Entry for Payment ID Search Field 30-7
Getting Payment Item POIDs from BRM 30-7
Deploying Customizations 30-8
31
Filtering Bundles Available for Purchase
About Filtering Bundles 31-1
Filtering Bundles List in Billing Care 31-1
Creating CustomPCMSubscriptionModule.java Class 31-1
Creating CustomSubscriptionWorker.java Class 31-2
Updating the customModule.properties File 31-2
32
Filtering Start and End Dates for Additional Purchase
About Customizing Purchase Configuration 32-1
Filtering Start and End Date Options 32-1
Creating a Custom Purchase Deal Configuration View Model 32-2
Configuring the Custom Purchase Configuration View Model in the registry 32-4
33
Customizing Search Filter for Suspended Payments
About Suspended Payment Search Filter 33-1
Adding Search Criteria 33-1
Creating a CustompaymentSuspenseSearch.xml File 33-2
Creating a CustomTemplatePaymentSuspenseWorker.java Class 33-3
Creating CustomPCMTemplateModule.java Class 33-3
xi

Creating a customModule.properties File 33-4
Updating Registry 33-4
Updating customPaymentSuspenseSearchView.html 33-5
Updating View Model 33-5
Localizing New Criteria into Other Languages 33-6
Creating Deployment Plan 33-6
Creating .war File 33-6
34
Exporting Billing Care Search Results
About Billing Care Search 34-1
Enabling Search Results Export with the SDK 34-1
Creating Custom Search Templates 34-1
Creating Custom Search View Models 34-2
Configuring Custom Search Modules in the Registry 34-2
Deploying Customizations 34-3
Part V Controlling Access to Billing Care Functionality
35
Limiting Event Adjustment Percentage Entered by CSRs
About Adjustments 35-1
Limiting Event Adjustments Entered by CSRs 35-1
Updating CustomExtendAdjustmentModule.java Class 35-1
Creating CustomAdjustmentWorker.java Class 35-2
Creating a customized_en.xlf File Entry for the Error Message 35-3
36
Setting Adjustment Limit for Event Adjustments
About Adjustment Limits 36-1
Setting Event Adjustment Limit for CSRs 36-1
Creating customAdjustmentResource.java Class 36-2
Creating the Custom Event Adjustment View Model 36-3
Configuring the Custom Event Adjustment View Model in the Registry 36-4
37
Enabling Authorization in Test Installations
About Enabling Authorization in Test Installations 37-1
Enabling Authorization in Test Installations 37-1
Modifying Default Authorization Policies 37-2
Adding Custom Authorization Resources and Actions 37-3
xii

Deploying Customizations 37-4
38
Restricting Bundle Validity Based on Roles
About Restricting Bundle Validity 38-1
Restricting Bundle Validity 38-1
Creating CustomAccountResource.java Class 38-2
Creating a Custom Purchase View Model 38-4
Configuring the Custom Purchase View Model in the Registry 38-5
39
Restricting Additional Bundles Purchase Based on Roles
About Restricting Bundles 39-1
Restricting Bundles Based on Roles 39-1
Creating the Custom Bundle Selection View Model 39-2
Configuring the Custom Bundle Selection View Model in the Registry 39-2
40
Making Notes Field Mandatory
Making Notes Mandatory for Additional Product Purchase 40-1
Creating a Custom Purchase Deal View Model 40-1
Configuring the Custom Purchase View Model in the Registry 40-2
Making Notes Mandatory for Event Adjustments 40-2
Creating a Custom Event Adjustment View Model 40-3
Configuring the Custom Event Adjustment View Model in the Registry 40-4
41
Customizing Suspended Payment Allocations
About Suspended Payment Allocation 41-1
Forbidding Partial Allocation of Suspended Payments 41-1
Creating a CustomPCMPaymentModule.java Class 41-2
Creating a Custom Payment Suspense View Model 41-2
Creating a customModule.properties File 41-2
Configuring a Custom Module in the Registry 41-3
Deploying Customizations 41-3
42
Disabling Event Adjustment Options Based on Roles
About Event Adjustment Options 42-1
Disabling Event Adjustment Options Based on User Roles 42-1
Creating a Custom View Model for Disabling Adjustment Options 42-2
xiii

Configuring the Custom View Model for Disabling Event Adjustment Options 42-4
Part VI Customizing the Billing Care REST API
43
Using Custom OAuth Providers with Billing Care REST API
About OAuth Token Management Tools 43-1
Creating a Custom Token Module 43-2
Adding a Custom OAuth Token Module to the customModule.properties File 43-4
44
Extending and Creating Billing Care REST Resources
About Extending and Creating Billing Care REST Resources 44-1
About Billing Care Sample SDK REST Customizations 44-2
Extending REST Services to Filter Custom Headers 44-2
Creating a Custom Storable Class in the BRM Data Dictionary 44-2
Processing Billing Care REST API Requests and Responses 44-3
Configuring WebLogic Server to Use an Exploded Archive 44-3
Sending a Test HTTP Request with the Custom Header 44-5
Extending REST Services 44-6
45
Extending REST API Response Objects
About Enriching REST API Response Objects 45-1
Enriching Response Objects 45-1
Example: Enriching the Response Object for the Account Module 45-2
46
Recording Billing Care REST API Request Failures
About Recording Billing Care REST API Request Failures 46-1
Enabling the Recording of REST Request Failures 46-1
Customizing REST Request Failure Details 46-2
Customizing the Request Record Logic 46-2
Customizing the Headers and Payload to Record 46-4
Overriding the Default Request Record Logic 46-4
xiv

Preface
This guide describes how to customize and extend Oracle Communications Billing Care.
Audience
This document is intended for developers and user interface designers.
Documentation Accessibility
For information about Oracle's commitment to accessibility, visit the Oracle Accessibility
Program website at http://www.oracle.com/pls/topic/lookup?ctx=acc&id=docacc.
Access to Oracle Support
Oracle customers that have purchased support have access to electronic support through My
Oracle Support. For information, visit http://www.oracle.com/pls/topic/lookup?ctx=acc&id=info
or visit http://www.oracle.com/pls/topic/lookup?ctx=acc&id=trs if you are hearing impaired.
Diversity and Inclusion
Oracle is fully committed to diversity and inclusion. Oracle respects and values having a
diverse workforce that increases thought leadership and innovation. As part of our initiative to
build a more inclusive culture that positively impacts our employees, customers, and
partners, we are working to remove insensitive terms from our products and documentation.
We are also mindful of the necessity to maintain compatibility with our customers' existing
technologies and the need to ensure continuity of service as Oracle's offerings and industry
standards evolve. Because of these technical constraints, our effort to remove insensitive
terms is ongoing and will take time and external cooperation.
xv


1
About Billing Care SDK
Learn about the contents included with the Oracle Communications Billing Care SDK.
Topics in this document:
• About the Billing Care SDK
• Installing the Billing Care SDK
About the Billing Care SDK
The Billing Care SDK provides tools, libraries, and samples that you can use to customize
Billing Care. Use the SDK with NetBeans IDE to set up a development environment for
customizing Billing Care. The SDK includes the directories listed in Table 1-1.
Table 1-1 Billing Care SDK Directories
Directory Description
libs
Contains the library JARs required to customize Billing Care.
references
Contains the default versions of the configuration and metadata files
used to customize Billing Care. See "About the references Directory"
for more information.
samples
Contains code and configuration file samples used to assist you in
customizing Billing Care. Each sample includes a README.txt file
describing the implementation being shown in the example.
About the references Directory
The references directory contains the default versions of the configuration and metadata files
used to customize Billing Care. You create new versions of many of the files in this directory
when customizing Billing Care. These custom files are packaged in the customizations
shared library you deploy to the Billing Care domain.
Table 1-2 lists the files included in the Billing Care SDK references directory.
Table 1-2 Billing Care SDK references Directory Files
File or Directory Description
ActionMenu.xml Contains the metadata describing the contents of the Action
menu in the main Billing Care toolbar. You work with this file to
add, remove, rename, or rearrange menu entries. When
customizing, create a CustomActionMenu.xml file.
See "Customizing the Billing Care Actions Menu" for more
information.
1-1

Table 1-2 (Cont.) Billing Care SDK references Directory Files
File or Directory Description
Configurations.xml
Contains flags controlling the display of specific account
attributes, timeout values, and BRM-related enum mappings
When customizing, create a CustomConfigurations.xml file.
BillingCareResources_en.xlf
Contains all text labels in the application. You can use this file
to change labels in the application. When customizing, create a
customized_en.xlf file.
See "Customizing Billing Care Labels" for more information.
eventtemplates
Contains the metadata describing the fields displayed for BRM
events (associated with bill items). You work with event
templates to display data from custom usage events or to alter
the default template. When you create custom event templates,
you must prefix template names with Custom.
See "Customizing Billing Care Templates" for more information.
newsfeedtemplates
Contains the metadata describing the data displayed in the
Newsfeed. You work with Newsfeed templates to alter the
default templates. When you create custom event templates,
you must prefix template names with Custom.
See "Customizing Billing Care Templates" for more information.
AuthorizationDataModel
Contains the Oracle Platform Security Services Entitlements
Server (OPSS) seed data describing the authorization policies
and resources.
registry.js
Contains the definitions for and association between Billing
Care views and view models (HTML and JavaScript). When
customizing, create a customRegistry.js file.
See "About the Registry File" for more information.
Installing the Billing Care SDK
Use the Billing Care installer (BillingCare_generic.jar) from Oracle Software Delivery
Cloud to install the Billing Care SDK and create the BillingCare_SDK folder on your
NetBeans IDE host. Alternatively, if you included the SDK when installing Billing Care,
copy the BillingCare_SDK folder from your Billing Care host to your NetBeans IDE
host.
See Billing Care Installation Guide for more information about downloading and
running the Billing Care installer.
Chapter 1
Installing the Billing Care SDK
1-2

2
About Billing Care Architecture
Learn about the Oracle Communications Billing Care architecture.
Topics in this document:
• About Billing Care Architecture
About Billing Care Architecture
Billing Care is an application deployed to an Oracle WebLogic Server domain.
Customizations are deployed to the same domain as a customizations shared library. A
Billing Care deployment plan, referencing this customizations shared library, implements your
customizations.
Users connect to Billing Care with a web browser where modules are presented for
performing billing and customer care operations. See "About Billing Care Modules" for more
information about modules.
Billing Care's REST framework communicates with web browsers, and Oracle
Communications Billing and Revenue Management (BRM) using a connection pool to the
Connection Manager.
Figure 2-1 shows the described architecture in a topological view.
2-1

Figure 2-1 Billing Care Topology
About the Billing Care REST Framework
The REST framework includes several modules used to perform billing and customer
care transactions with BRM. Each module consists of four tiers, each with its own set
of responsibilities:
• The Resource tier manages RESTful client requests and responses.
• The Module tier coordinates transformation of RESTful operations and payload
into BRM native formats.
• The Worker tier contains methods for converting data between Billing Care and
BRM formats.
• The PCM tier manages the connections between Billing Care and the BRM
Connection Manager.
Figure 2-2 shows the Billing Care REST framework tiers and a sample Account
module. The column on the left describes the tiers in general. The column on the right
provides a specific example of the tiers for the Account REST module where:
• The Account Resource is the Resource tier.
• The PCMAccountModule is the Module tier.
• The AccountWorker is the Worker tier.
• The PCM tier is represented as the same in both columns as connections to BRM
are shared by all resources.
Chapter 2
About Billing Care Architecture
2-2

Figure 2-2 Billing Care REST Framework
About Open Source Libraries Used by Billing Care
Billing Care is a web-based application built using the open source libraries listed in
Table 2-1. A description on how each library is used is provided. For more information on
each library, see the library specific documentation at the provided links.
Table 2-1 Open Source Libraries Used for Billing Care
Library Description
jQuery General purpose API and DOM manipulation. For more information
on jQuery, see:
https://jquery.com/
Underscore For inserting HTML pages (templates) into the application (browser
DOM). For more information on Underscore, see:
http://underscorejs.org/
RequireJS Dynamic loading of modules (JavaScript, HTML). For more
information on RequireJS, see:
http://underscorejs.org/
Knockout Provides data binding between JavaScript view models and HTML
views. Changes in the view are automatically reflected in the view
model, and vice versa. For more information on Knockout, see:
https://knockoutjs.com/
Jersey Provides the basis for the REST web services. For more information
on Jersey, see:
https://jersey.java.net/
Chapter 2
About Billing Care Architecture
2-3

Part II
Basic Billing Care SDK Components
This part describes the basic Billing Care SDK components that you use to customize Oracle
Communications Billing Care and the Billing Care REST API. In contains the following
chapters:
• Setting Up the Development Environment
• Customizing Billing Care
• Customizing Billing Care Templates
• Customizing Billing Care Themes and Logo
• Editing the Billing Care Configuration File
• Using an Exploded Archive during Customization
• Packaging and Deploying Customizations

3
Setting Up the Development Environment
Learn how to set up your Integrated Development Environment (IDE) for customizing Oracle
Communications Billing Care.
Topics in this document:
• About the Billing Care Development Environment
• Configuring NetBeans IDE for Billing Care Development
About the Billing Care Development Environment
You customize Billing Care using an IDE configured to work with the Oracle WebLogic Server
domain on which Billing Care is deployed. Typically, you connect to a development Billing
Care domain, perform your customizations, test, and then package and deploy your
customizations as a shared library to your production Billing Care domain. Billing Care
references this customizations shared library when rendering the user interface (UI) and
performing Billing Care operations.
To increase efficiency during development and testing, use an exploded archive deployment
of your customizations. Exploded archive deployments enable WebLogic Server to reference
customized files on a local file system instead of a deployed customizations shared library in
the domain. Changes can be made to the referenced files directly and seen in Billing Care
without having to package and deploy a customizations shared library each time changes are
made. See "Using an Exploded Archive during Customization" for more information on using
exploded archives during customization.
Oracle recommends NetBeans IDE for customizing Billing Care. The following sections
explain configuring NetBeans IDE for customizing Billing Care. For more information on
NetBeans IDE see:
https://netbeans.apache.org
Configuring NetBeans IDE for Billing Care Development
To use NetBeans IDE for Billing Care customization, you must complete the following tasks:
• Downloading and Installing NetBeans IDE
• Configuring the NetBeans IDE Connection to WebLogic Server
• Setting Up a Billing Care Customization Project
Additional information on configuring NetBeans IDE with your WebLogic Server host can be
found in Developing an Enterprise Application for Oracle WebLogic Server at:
https://netbeans.org/kb/docs/web/jsf-jpa-weblogic.html
3-1

Downloading and Installing NetBeans IDE
Download and install NetBeans IDE on the same server hosting your Billing Care
domain before configuring a connection to your Billing Care WebLogic server.
For detailed instructions, including additional software requirements, on downloading
and installing NetBeans IDE, see:
https://netbeans.org/community/releases/80/install.html
Configuring the NetBeans IDE Connection to WebLogic Server
After installing NetBeans IDE, you configure a connection to the running WebLogic
Server domain on which Billing Care is deployed. For information on installing Billing
Care and starting your domain see Oracle Communications Billing Care Installation
Guide.
To configure a NetBeans IDE connection to the Billing Care domain:
1. Start the NetBeans IDE.
2. Select the Services tab.
3. Right-click Servers and select Add Server.
4. In the Choose Server screen, select Oracle WebLogic Server. Provide a name
in the Name field and click Next.
5. In the Server Location screen, enter the path or browse to the wlserver folder of
the WebLogic Server installation containing the Billing Care domain, then click
Next.
6. In the Instance Properties screen, provide the path to the domain folder where
Billing Care is deployed in the Domain field.
7. Enter the Username and Password for your domain's administrative user, then
click Finish.
NetBeans IDE configures the connection to the domain. Verify that the connection
is successful by expanding the Servers node in the Services tab. Your domain
should be listed.
Setting Up a Billing Care Customization Project
You perform customizations to Billing Care in a NetBeans IDE project containing the
Billing Care SDK. Complete the following required tasks to set up your Billing Care
customization project:
• Creating the Billing Care SDK Directory Structure
• Creating the Billing Care NetBeans IDE Project
Creating the Billing Care SDK Directory Structure
The Billing Care customization NetBeans IDE project requires a specific directory
structure, described in Table 3-1, for proper packaging of the customizations shared
library you build and deploy to the Billing Care domain.
Chapter 3
Configuring NetBeans IDE for Billing Care Development
3-2

To create the required directory structure on your NetBeans IDE host:
1. Create a project directory (For example, myproject).
2. Within your project directory, create the following subdirectories listed in Table 3-1.
Table 3-1 Required Billing Care Customization Directories
Directory Description
myproject/web/custom Location for customRegistry.js and
customModule.properties used when overriding
the default modules.
myproject/web/custom/css
Location for required CSS files required by your
customizations.
myproject/web/custom/jsons
Location for any JSON files generated by the Data
Model Generator for custom UI elements.
myproject/web/custom/images
Recommended location for image files referenced
in your HTML and CSS files.
myproject/web/custom/js
Location for custom JavaScript files used by your
customizations.
myproject/web/custom/js/templates/area/configure
where area is the customization type.
Location for custom HTML files used by your
customizations. Create a unique subdirectory in
this folder for each customization type. For
example, create an accountCreation folder for
customizations done to the account creation HTML
file.
myproject/web/custom/js/validations/area/configure
where area is the customization type.
Location for custom validation files used by your
customizations. Create a unique subdirectory in
this folder for each customization type. For
example, create an accountCreation folder for
customizations done to the account creation
JavaScript files.
myproject/web/custom/js/viewmodels/area/configure
where area is the customization type.
Location for custom view model files used by your
customizations. Create a unique subdirectory in
this folder for each customization type. For
example, create an accountCreation folder for
customizations done to the account creation view
model files.
myproject/web/lib
You must copy the contents of the
BillingCare_SDK/libs folder into the
myproject/web/lib directory where myproject is the
project directory previously created. The libs
directory contains the jar files required for
customizing Billing Care provided by the Billing
Care installer. See "Installing the Billing Care SDK"
for information about installing the SDK.
myproject/web/META-INF
Location for the manifest file describing the name
and version of the shared library containing your
customizations.
myproject/web/resources/public/css Location of the overrides-login.css file where you
specify a custom logo image file for the Billing Care
login page.
Chapter 3
Configuring NetBeans IDE for Billing Care Development
3-3

Table 3-1 (Cont.) Required Billing Care Customization Directories
Directory Description
myproject/web/resources/public/images
Location where you copy your custom logo image
file used when overriding the default Oracle log on
the Billing Care login page.
myproject/web/resources/translation
Location of your custom resource bundle.
myproject/web/WEB-INF/classes/com
Location of the .class files compiled from any
custom Java code used in your customizations.
The directory structure in this directory reflects the
package name you use in your custom Java code.
myproject/web/WEB-INF/classes/custom Location of the customModule.properties file.
myproject/web/WEB-INF/classes/custom/configurations
Location where you place your
CustomConfigurations.xml and
CustomActionMenu.xml files.
myproject/src Create custom Java files in the src directory, within
any Java Package you want.
However, any REST web services you create for
Billing Care must be placed within the
com.oracle.communications.brm.cc.ws
package (myproject/src/com/oracle/
communications/brm/cc/ws). This will ensure
your REST web service can be deployed within the
customizations shared library.
Company-specific subpackages are supported and
recommended, for example:
com.oracle.communications.brm.cc.ws.com
pany
where company is your company's name.
Creating the Billing Care NetBeans IDE Project
After creating the Billing Care customization project directory structure and copying the
required jars into your myproject/web/lib directory, create a new project in NetBeans
IDE for your customizations.
To create a NetBeans IDE project for your Billing Care customizations:
1. Start the NetBeans IDE.
2. Select the Projects tab.
3. Right-click within the Projects tab and select New Project....
4. In the New Project window, select Java Web under Categories. Select Web
Application with Existing Sources under Projects.
5. Click Next.
6. In the Name and Location screen, enter the path or browse to the myproject
folder where myproject is the folder you previously created for your Billing Care
customizations. Specify a name and location in the Project Name and Project
Folder fields.
Chapter 3
Configuring NetBeans IDE for Billing Care Development
3-4

See "Creating the Billing Care SDK Directory Structure" for information on creating your
project folder.
7. Click Next.
8. In the Server and Settings screen, select the WebLogic Server you previously
connected to NetBeans IDE.
See "Configuring the NetBeans IDE Connection to WebLogic Server" for more
information on configuring your NetBeans IDE connection to your Billing Care domain.
9. Click Next.
10. In the Existing Sources and Libraries screen, verify the paths to your Web Page Folder,
WEB-INF Content, and Libraries Folder are correct.
11. Click Finish.
NetBeans IDE configures the new project. Verify that the project creation is successful by
confirming your project is listed in the Projects tab.
Chapter 3
Configuring NetBeans IDE for Billing Care Development
3-5

4
Customizing Billing Care
Learn customization concepts for Oracle Communications Billing Care.
Topics in this document:
• About Billing Care Customization Concepts
• About Billing Care Modules
• About the customModule.properties File
• About the Configuration.xml File
• About the Registry File
• About Billing Care View Model JavaScript Framework
• About Error Handling in REST Operations
• About Custom Resource Authorization
About Billing Care Customization Concepts
You customize Billing Care by modifying or creating configuration files, Java classes,
JavaScript, html, and CSS. Customizations are performed in NetBeans IDE, packaged into a
customizations shared library using the Java jar utility, and deployed to the Billing Care
domain as a referenced shared library.
To customize Billing Care, you perform the following tasks:
• Download and install the Billing Care SDK. See "Installing the Billing Care SDK" for
information.
• Download and install NetBeans IDE. See "Setting Up the Development Environment" for
more information.
• Configure a NetBeans IDE project for your customization. See "Setting Up a Billing Care
Customization Project" for more information.
• Connect NetBeans IDE to your development Billing Care domain. See "Configuring the
NetBeans IDE Connection to WebLogic Server" for more information.
• Perform your customizations.
• Package and deploy your customizations either as an exploded archive or web
application .war shared library to your Billing Care domain. See "Using an Exploded
Archive during Customization" and "Packaging and Deploying Customizations" for more
information.
• Test your customizations.
• Package production customizations in a .war file and deploy the shared library to all of
your Billing Care instances.
4-1

About Billing Care Modules
Billing Care is composed of unique functional modules. Each module includes an html
view and a JavaScript view model. Some modules may also contain a validation
definition specifying a module's field validation rules.
Module definitions are configured in the registry file where a module's view, view
model, and validation rules are defined. When you customize a Billing Care module,
you create a custom registry file (customRegistry.js) defining your module
configuration. See "About the Registry File" for more information.
About Views
A view is the visible, interactive manifestation of the view model, written in html. A view
is rendered by the web browser as the user interface (UI) for a module. It displays
information from the view model, triggers operations on the view model, and updates
itself when the data in the view model is changed.
About View Models
A view model is a JavaScript representation of the data and operations for your
module. A view model is independent of the controls (buttons, menus, fields) on your
page defined by your view html.
You can reuse a view model with multiple views because of this independence. For
example, UI interfaces for your customer service representatives (CSRs) and self-care
subscribers that expose similar functionality can use the same view model while using
unique views to provide different functions to each user depending on your business
requirements.
When you create a custom view model, you create the view model's JavaScript file to
support any custom functionality you add to Billing Care. The JavaScript file is
referenced in your customRegistry.js and packaged and deployed in your Billing
Care domain as part of the customizations shared library.
About Data Binding between Views and View Models
Data is synchronized between views and view models within a module through use of
the Knockout open source library. Data attributes in the view model are exposed as
Knockout Observables. The various html elements in the view bind themselves to
these Observables so that updates in both the server and UI are reflected in the other.
About the customModule.properties File
Configure Billing Care to override the default module logic with your customizations by
creating a customModule.properties file in the myproject/web/WEB-INF/classes/
custom folder, where myproject is your NetBeans IDE project folder containing your
Billing Care customizations.
You can override the default Billing Care logic in the following modules by specifying a
customized alternative for each of the following module keys in
customModule.properties:
Chapter 4
About Billing Care Modules
4-2

• account
• adjustment
• allocation
• billing
• billunit
• collection
• dispute
• item
• notes
• oauthtoken
• payment
• paymentmethod
• requestinfo
• search
• service
• status
• subscription
• template
• writeoff
Each override you configure must contain an entry of the following format:
billingcare.rest.
modulekey
.module = com.
company
.module.
custom
where:
• modulekey is the module for which you are overriding default logic.
• company is the name of the folder in your NetBeans IDE project myproject/src directory
structure where you place the source code for your overriding Java classes.
• custom is the subdirectory folder name in your NetBeans IDE project myproject/src
directory.
For example, if a company named
samplecompany
is overriding the default
account
module
with a custom account module named
CustomAccountModule
, use the following entry in
customModule.properties:
billingcare.rest.account.module = com.samplecompany.module.CustomAccountModule
This example assumes your custom module Java code is stored in the myproject/src/com/
samplecompany/modules directory.
See "Customizing Billing Care Templates" and "Extending and Creating Billing Care REST
Resources" for examples of when using a customModule.properties file are required.
Chapter 4
About the customModule.properties File
4-3

About the Configuration.xml File
The Configurations.xml file contains flags controlling the display of specific account
attributes, timeout values, and BRM-related ENUM mappings. See "Editing the Billing
Care Configuration File" for more information.
About the Registry File
The registry file (Registry.js) dynamically loads dependencies, which avoids the
inclusion of hard coded paths for dependencies in the Billing Care files. The registry
file provides a default configuration, which can be overwritten through the SDK.
To override the key and values of the Registry.js, create a customRegistry.js file with
the same given keys, but new values. Include only the entries that need to be
overridden in the customRegistry.js file.
Note:
The key names in the registry.js file changed between BRM 7.5 and BRM
12.0. Refer to the latest packaged registry.js file to view the registry key
changes and then update your custom code.
Managing Billing Care Modules Using the Registry File
The registry file is strictly a repository for describing a module. There is no logic within
the registry itself for invoking (displaying) the modules.
The following view model example shows the accountBanner module definition in the
default registry.js:
accountBanner: {
view: 'text!templates/home/accountBannerView.html',
viewmodel: 'viewmodels/home/accountBanner/AccountBannerViewModel'
}
Create a customRegistry.js file when:
• Replacing the view, view model, or validation logic used for a particular Billing
Care module. For example, your business requires a different adjustment REST
operation from the default Billing Care operation, which also changes the fields
defined in the UI. You can create your own view model (and optional validation
rules) and then create a customRegistry.js to reference your files.
All elements within Billing Care that provide access to the edited module now
automatically use your custom module.
• Adding custom modules to Billing Care. For example, you develop a new module
for a business requirement and add the module to Billing Care.
Because view model references retrieved through the registry are loaded using
RequireJS, they must conform to asynchronous module definition (AMD) format.
Chapter 4
About the Configuration.xml File
4-4

Note:
The Billing Care view models are core elements of the modules that form the body
of the application (Home tab, Bills tab, assets, News Feed) and Billing Care
overlays (dialog boxes).
Common functionality/behavior across the overlays in Billing Care, including
validation, data saving, and navigation between the pages within the overlay, has
been captured in a reusable overlay view model that you should use when you
create a custom overlay. This helps ensure that your module behaves similar to the
rest of Billing Care.
About Billing Care View Model JavaScript Framework
This section provides an overview of the Billing Care JavaScript framework used in view
models and how to use an account record key across modules.
Access to the Open Account
The current account record is key to most modules in Billing Care, and will be equally
important to any custom modules developed with the SDK. A view model representing the
open account can be accessed using the following JavaScript code:
globalAppContext.currentAccountViewModel
About AJAX Calls
To improve security, the Billing Care SDK requires all AJAX requests to include cross-site
request forgery (CSRF) tokens.
If you are using BRM 12.0 Patch Set 3 or later, you must add CSRF tokens to all of your
custom AJAX requests sent to the Billing Care SDK. Without the token, the Billing Care SDK
will not authorize your custom AJAX requests.
The following shows sample code for adding a CSRF token to an AJAX request:
$.ajax({
type: "GET",
dataType: "json",
url: urlToFetch,
beforeSend: function (xhr) {
util.setRequestHeader(xhr)
},
contentType: "application/json; charset=utf-8"
}).done(function (data) {
}).fail(function (errorThrown) {
}).always(function () {
});
Chapter 4
About Billing Care View Model JavaScript Framework
4-5

Object IDs
Objects in the BRM database contain a unique identifier called a POID. The Billing
Care REST framework refers to these identifiers as references or refs. Table 4-1
displays a POID and its equivalent reference ID.
Table 4-1 Example POID and Reference ID
POID Reference ID
0.0.0.1 /service/email12345 0.0.0.1+-service-email+12345
There are reference IDs throughout the Billing Care data model. POIDs are used when
interacting with BRM opcode input and output parameter lists (FLists), but reference
IDs are used in the JavaScript layer.
The POID format is not suitable for a web application, so the REST framework
provides two static utility methods (restIdFromPoid and poidFromRestId) for converting
a POID to/from its own REST format. Sample syntax on calling the methods is
provided below:
String BRMUtility.restIdFromPoid(String poid);
Poid BRMUtility.poidFromRestId(String restId);
About Error Handling in REST Operations
Error handling is a crucial aspect of Billing Care REST customization, and it has
multiple benefits, for example:
• Indicating the exact error to the application user
• Helping the application developer to debug the issues.
The default Billing Care REST operations return an ErrorInfo object with error code
and error message in case of any exception. The error object contains the following
components:
• errorCode - A key used to retrieve a localized error message from the Billing Care
resource bundle.
Note:
A custom error code must start from the 70000 series. For example,
70001, 70002, and so on.
• errorMessage - The raw error message from the Billing Care REST layer.
• isValidationError - A true value indicates the error is the result of a BRM validation
issue (for example, an invalid country is specified).
Chapter 4
About Error Handling in REST Operations
4-6

Invoking Error Handing in Customizations
Invoke method buildErrorInfo() in ExceptionHelper.java to build the ErrorInfo object and
return the error object to the caller of the REST services when extending the Billing Care
REST framework with custom classes.
The method buildErrorInfo() in ExceptionHelper.java takes error code, error message as
mandatory arguments and optional parameters like response status, boolean value to
indicate validation error, flist containing error parameters and list of error parameters in the
order mentioned.
By default, buildErrorInfo() builds and returns error info object with a boolean value of false
for isValidationError attribute and http response status of BAD REQUEST (400).
About Custom Resource Authorization
Your customizations may require authorization configuration in Oracle Platform Security
Services (OPSS). See "Securing WebLogic Resources" in Oracle Fusion Middleware
Administrator's Guide for Oracle Entitlements Server for more information about configuring
resource authorizations in OPSS and "Billing Care Security" for information on securing your
Billing Care installation.
The following sections provide general guidelines on how to perform authorization for
protected resources.
Performing Authorization in the Actions Menu
ActionsMenu.xml contains the tags <permission-key> and <action-key> to authorize menus.
For more information, see "Customizing the Billing Care Actions Menu".
Performing Authorization on the UI
To perform authorization on custom UI resources:
1. Define new ResourceTypes, Resources, and corresponding actions in the OPSS Server.
2. Add the new ResourceType to CustomConfigurations.xml.
For example, use the following definition when creating two new ResourceTypes that
control both your custom REST API (MyCustomRESTResourceType) and your custom
views (MyCustomViewResourceType):
<keyvals>
<key>authorizationResourceTypes</key>
<value>MyCustomRESTResourceType, MyCustomViewResourceType</value>
<desc>Add comma separated OPSS Resource Types(values) for authorization.
Define these resource types in OPSS.
Please note that the key should not be changed here.
</desc>
</keyvals>
3. Use the Billing Care JavaScript utility functions listed in Table 4-2 when performing
authorization on UI resources:
Chapter 4
About Custom Resource Authorization
4-7

Table 4-2 Billing Care JavaScript Utility Functions
Resource Description
util.getAllResourceGrants() Gets all resource grants for UI authorization.
util.getGrantedActionsByResource(
resourceName)
Gets granted actions for the given resourceName.
For example:
util.getGrantedActionsByResource('Paymen
tResource);
util.isGrantedResourceAction(actio
n, resourceName)
Checks whether the given action is granted for the
given resource.
For example:
util.isGrantedResourceAction('Make';'Pay
mentResource')
Performing Authorization on the REST Framework
To perform authorization on the REST framework:
1. Define ResourceTypes,Resources and corresponding actions in OPSS Server
2. In the REST resource operation that requires authorization, call
EnforcementUitl.checkAccess() by passing required subject,Application
Name,Action,Resource Type,Resource,Error and optional UIRequestValue objects
as parameters.
UIRequestValue parameters are optional and used for handling obligations.
Note:
EnforcementUitl.checkAccess() returns a ‘ErrorInfo' object with status 401
Unauthorized when there is no grant on the requested resource for the
specified action.
Using REST Authorization without Obligations
To use REST authorization without obligations:
Subject subject = Security.getCurrentSubject();
// create new error object
EnforcementError error = new EnforcementError(20020,"You are not authorized to
save credit profile");
EnforcementUtil.checkAccess(subject,
EnforcementConstants.APPLICATION,"make","CreditProfileResourceType","CreditProfil
eResource",error);
Using REST Authorization with Obligations
To use REST authorization with obligations:
Chapter 4
About Custom Resource Authorization
4-8

Subject subject = Security.getCurrentSubject();
// create new error objects
EnforcementError ERROR_MIN_AMOUNT_LIMIT = new EnforcementError(20014, "The amount fall
short of your authorized limit.");
EnforcementError ERROR_MAX_AMOUNT_LIMIT = new EnforcementError(20015, "The amount
exceeds your authorized limit.");
UIRequestValue minCurrencyLimit = new UIRequestValue("Minimum Currency Adjustment
Amount",
adjustment.getAmount(), ConstraintOperator.LESS_THAN,
ERROR_MIN_AMOUNT_LIMIT);
//If entered amount(UI value) is greater than OPSS 'max currency adjustment limit'
then throw error
UIRequestValue maxCurrencyLimit = new UIRequestValue("Maximum Currency Adjustment
Amount",
adjustment.getAmount(), ConstraintOperator.GREATER_THAN,
ERROR_MAX_AMOUNT_LIMIT);
Chapter 4
About Custom Resource Authorization
4-9

5
Customizing Billing Care Templates
Learn how to customize Oracle Communications Billing Care account search, event, and
Newsfeed templates.
Topics in this document:
• About Billing Care Templates
• Customizing Templates
• Example 1: Event Template Customization
• Example 2: Event Template Customization with New Fields
• Example 3: Newsfeed Template Customization
About Billing Care Templates
Templates define which columns Billing Care displays in account search, event, and
Newsfeed results tables and enable you to add and remove displayed data depending on
your business requirements. Event templates are specific to the Oracle Billing and Revenue
Management (BRM) /event storable class. You may use one or more event templates
depending on the supported events in BRM. A single template determines the displayed
columns in the Newsfeed, and displays data from the /newsfeed storable class. The account
search template is defined in the accountSearch.xml file.
See "Understanding Flists and Storable Classes" and "Creating Custom Fields and Storable
Classes" in BRM Developer's Guide for more information about BRM storable classes.
Templates can specify both BRM data in storable classes, and data from external sources. If
the data you want to display is not provided by default storable classes available in Billing
Care, extend the REST framework to retrieve the required data.
A template file contains four types of elements. Each
<columnHeader>
defined in the template
file contains a corresponding storable class
<column>
data definition of the type of data
contained in the column. The
<filter>
elements define search fields available to the user to
filter displayed data. The <sortbyFields> elements specifies field sorting behavior.
Table 5-1 lists the
<columnHeader>
properties in a template file.
Table 5-1 <columnHeader> Properties in Template Files
Property Description
alignment String specifying how to align column text with a cell
icon Boolean specifying if an image icon is used in the header
label String used as column header label
resizable Boolean specifying if the column width is resizable by user
sortable Boolean specifying if the results table is sortable by the column
5-1

Table 5-1 (Cont.) <columnHeader> Properties in Template Files
Property Description
tooltip String used for hover over tool tip for the column
visible Boolean specifying if the column is visible
width Width of column specified as percentage
Table 5-2 lists the
<column>
properties in a template file. See the
genericTemplate.xml file included in the SDK_home/references/eventtemplates,
where SDK_home is the Billing Care SDK installation directory, for an example of how
column properties are specified.
Table 5-2 <column> Properties in Template Files
Property Description
column name Specifies the ID used to map between the column header and
column definitions.
fields Specifies the BRM fields that will be displayed in the column.
format Specifies the format of the text to be displayed. Used exclusively
when type is text.
formula Optional. If specified, the formula is applied on the specified
<field> entries. Can be useful to perform math with multiple
fields and display the calculated result.
styles Specifies the CSS style for the data in a given column.
type Specifies the data type of the column. Billing Care performs
formatting appropriate to the data type. Supported data types
include:
• id
• date
• time
• currency
• text
• image
• multi
• Boolean
• enum
• duration
• phoneNumber
types Used when type is multi, this enables you to specify the data
types of the specified fields
Table 5-3 lists the
<filter>
properties in a template file. Each filter contains one or
more
<criteria>
definitions using the properties listed.
Note:
The filter definition applies only to events templates.
Chapter 5
About Billing Care Templates
5-2

Table 5-3 <filter> Properties in Template Files
Property Description
fieldGroups Groups listed
<criteria>
together into a single filter.
groupLabel Specifies the name of the grouped
<criteria>
.
groupOperator
Supports AND and OR values for setting the exclusivity of the
grouped
<criteria>
when filtering results.
inputType Specifies the type of data used in
<criteria>
.
visible Boolean specifying if a
<criteria>
is visible in Billing Care.
Table 5-4 lists the
<sortbyFields>
properties in a template file.
Table 5-4 <sortbyFields> Properties in Template Files
Property Description
defaultSort Specifies the default sorting behavior.
sortingOrder Specifies either ascending or descending sort order.
sortingPriority Lists the fields and priority (by order listed) used to sort displayed
results
Customizing Templates
You customize the columns displayed for events and in the Newsfeed by creating custom
template files and including these templates, and any required Java code extensions, in your
deployed customizations shared library.
The Billing Care SDK includes the default templates used by Billing Care in the SDK_home/
references/eventtemplates and SDK_home/references/newsfeedtemplates directories,
where SDK_home is the directory in which you installed the SDK. The account search
template is defined in the SDK_home/references/accountSearch.xml file.
The SDK_home/samples/SDKTemplatesCustomization directory includes sample
templates for customized events and the Newsfeed, and sample Java code for extending the
REST framework to retrieve additional data. Use these samples as guidelines when creating
custom templates and REST extensions. A README.txt file is provided with additional detail
on creating custom templates.
Customize Event and Newsfeed templates by:
• Removing Columns from a Template
• Adding Columns to a Template
• Extending the REST Framework to Support New Column Fields
• Creating a customModule.properties File
Example procedures for customizing templates are provided in the following reference
sections at the end of this chapter:
• Example 1: Event Template Customization
• Example 2: Event Template Customization with New Fields
Chapter 5
Customizing Templates
5-3

• Example 3: Newsfeed Template Customization
Removing Columns from a Template
Remove unwanted events and Newsfeed columns from displaying in Billing Care by
either deleting the column entries from the template file for or setting the visible
property for the column to false.
To remove a column from an event or Newsfeed template and prevent the column
from displaying in Billing Care:
1. Make a copy of a default event or Newsfeed template in your myproject/web/
WEB-INF/classes/custom/eventtemplates or myproject/web/WEB-INF/classes/
custom/newsfeedtemplates, where myproject is the directory for your NetBeans
IDE customization project. Preface the template name with Custom. For example,
to customize the template for the /event/delayed/session/telco/gsm/sms event,
use CustomserviceTelcoGsmSms_eventDelayedSessionTelcoGsm.xml.
2. Open your template file in a text editor.
3. Do one of the following:
• Remove both the
<columnHeader>
and storable class
<column>
elements from
your template for the column you want to remove.
• Set the
<columnHeader>
visible property to false for the column you want to
hide.
4. Save and close the file.
5. Do one of the following:
• If you are using an exploded archive for your shared library, log out of and
back into Billing Care to verify your updated template. See "About Using an
Exploded Archive" for more information about using exploded archives.
• Package your customizations shared library and deploy it to your Billing Care
domain. Redeploy Billing Care and login to verify your updated template. See
"Packaging and Deploying Customizations" for more information on packaging
and deploying your customizations.
Adding Columns to a Template
Add columns in an events or the Newsfeed template for display in Billing Care by
adding elements for the new columns in a template file. The new columns can contain
BRM fields in the /event or /newsfeed storable classes or custom classes. Custom /
event classes require extension of the REST framework to retrieve required data for
display.
To add additional columns in a template and display the column in Billing Care:
1. Make a copy of a default event or Newsfeed template (or create a template for a
custom event) in your myproject/web/WEB-INF/classes/custom/eventtemplates
or myproject/web/WEB-INF/classes/custom/newsfeedtemplates, where
myproject is the directory for your NetBeans IDE customization project. Preface
the template name with Custom. For example, to customize the template for the /
event/delayed/session/telco/gsm/sms event, use
CustomserviceTelcoGsmSms_eventDelayedSessionTelcoGsm.xml.
2. Open your template file in a text editor.
Chapter 5
Customizing Templates
5-4

3. Add both the
<columnHeader>
and storable class
<column>
elements from your template
for the new column you want to add.
4. Save and close the file.
5. If necessary, extend the REST framework to retrieve any data unavailable in the default
storable classes. See "Extending the REST Framework to Support New Column Fields"
for more information on extending the REST framework.
6. If necessary, create a customModule.properties entry specifying when Billing Care
should override a module's default logic with your customizations. See "Creating a
customModule.properties File" for more information.
7. Do one of the following:
• If you are using an exploded archive for your shared library, log out of and back into
Billing Care to verify your updated template. See "About Using an Exploded Archive"
for more information about using exploded archives.
• Package your customizations shared library and deploy it to your Billing Care
domain. Redeploy Billing Care and login to verify your updated template. See
"Packaging and Deploying Customizations" for more information on packaging and
deploying your customizations.
Extending the REST Framework to Support New Column Fields
Create custom Java classes to retrieve and display new fields for columns you add. The
following procedure provides an overview of the required classes. See the following
examples for sample classes:
• Example 2: Event Template Customization with New Fields
• Example 3: Newsfeed Template Customization
To add custom fields to an event template and customize the REST framework to support the
new field:
1. Create a custom event template in your NetBeans IDE customization project. See
"Adding Columns to a Template" for more information.
2. Create a custom event worker Java class in myproject/src/com/company/templates to
retrieve the data for the new field, where company is a folder named for your company,
that extends from
com.oracle.communications.brm.cc.modules.pcm.workers.TemplateEventWorker.
3. Create a custom event template factory Java class in myproject/src/com/company/
templates to return an instance of your custom worker from step 2.
4. Create a custom template module class in myproject/src/com/company/templates to
return an instance of your custom event template factory from step 3.
5. Compile your custom Java classes using NetBeans IDE.
6. Add your customization files to your NetBeans IDE project (myproject):
• Add the customModule.properties in the myproject/web/WEB-INF/classes/custom
folder.
• Add the custom template file in the myproject/web/WEB-INF/classes/custom/
eventtemplates folder.
7. Right-click your NetBeans IDE project and select Clean and Build.
8. Package and deploy your custom templates to your Billing Care domain.
Chapter 5
Customizing Templates
5-5

For more information, see "Packaging and Deploying Customizations".
9. Verify your changes in Billing Care.
Creating a customModule.properties File
Configure an entry in the customModule.properties file for each Billing Care module
where you override default logic with your customizations. See "About the
customModule.properties File" for more information on specifying custom module
behavior in customModule.properties.
Example 1: Event Template Customization
This example includes changing the events template for SMS usage. In this example
procedure:
• The new field
rum_name
is added to show the value of the BRM
PIN_FLD_RUM_NAME field. RUM refers to the ratable usage metric in BRM.
• The existing field
destination_network
is removed.
To customize the events template with the stated changes:
1. Create a CustomserviceTelcoGsmSms_eventDelayedSessionTelcoGsm.xml
template file in the myproject/web/custom/eventtemplates folder by copying the
default serviceTelcoGsmSms_eventDelayedSessionTelcoGsm.xml available in
the SDK_home/references/eventtemplates folder.
2. Add new
<columnHeader>
and
<column>
elements to
CustomserviceTelcoGsmSms_eventDelayedSessionTelcoGsm.xml.
Add the
<columnHeader>
in the
<column>
in the appropriate location. For example,
if you add the
<columnHeader>
as the fifth element, make sure you add the
<column>
as the fifth column element.
<columnHeader name="rum_name">
<label>Rum Name</label>
<width>10%</width>
<visible>true</visible>
<sortable>false</sortable>
<tooltip>Rum Name of the event</tooltip>
<resizable>true</resizable>
<alignment>center</alignment>
</columnHeader>
……..
<column name="rum_name">
<type>text</type>
<fields>rumName</fields>
</column>
3. Remove the existing
destination_network
column from the template by removing
the
<columnHeader>
and
<column>
elements named
destination_network
as
shown:
<columnHeader name="destination_network">
<label>DESTINATION_NETWORK</label>
<width>10%</width>
<visible>true</visible>
<sortable>true</sortable>
Chapter 5
Example 1: Event Template Customization
5-6

<tooltip>DESTINATION_NETWORK_HINT</tooltip>
<resizable>true</resizable>
<alignment>left</alignment>
</columnHeader>
……..
<column name="destination_network">
<type>text</type>
<styles>template-subtle-text</styles>
<fields>telcoInfo.destinationNetwork</fields>
<types>string</types>
</column>
4. Save your template file.
5. Add your customization files to your NetBeans IDE project folder (myproject), by adding
the custom template file in the myproject/web/WEB-INF/classes/custom/
eventtemplates folder.
6. Right-click your NetBeans IDE project and select Clean and Build.
7. Package and deploy your custom templates to your Billing Care domain.
For more information, see "Packaging and Deploying Customizations".
8. Verify your changes in Billing Care.
Example 2: Event Template Customization with New Fields
This example shows how to customize the REST code to support a new field. In this example
procedure:
• A custom template is created with new
<columnHeader>
and
<column>
elements to
display a new column called
adjustments
.
• The
destination_network
column is removed from the template.
• Required custom Java classes are coded to retrieve the new data for display in Billing
Care
To add and delete fields in the event template and customize the REST code to support the
new field:
1. Create a CustomserviceTelcoGsmSms_eventDelayedSessionTelcoGsm.xml
template file in the myproject/web/custom/eventtemplates folder by copying the default
serviceTelcoGsmSms_eventDelayedSessionTelcoGsm.xml available in the
SDK_home/references/eventtemplates folder.
2. Add a new
<columnHeader>
and
<column>
for Event Adjustments to the XML file.
Make sure you add the
<columnHeader>
and
<column>
in the appropriate location. For
example if you have added the
<columnHeader>
as the fifth element, make sure you add
the
<column>
as the fifth column element.
<columnHeader name="adjustments">
<label>Event Adjustments</label>
<width>10%</width>
<visible>true</visible>
<sortable>false</sortable>
<tooltip>Event Adjustments</tooltip>
<resizable>true</resizable>
<alignment>left</alignment>
Chapter 5
Example 2: Event Template Customization with New Fields
5-7

</columnHeader>
……..
<column name="adjustments">
<type>currency</type>
<format>{0}</format>
<fields>accountObj</fields>
<fields>id</fields>
</column>
3. Remove the existing
destination_network
column from the template by removing
the
<columnHeader>
and
<column>
elements named
destination_network
as
shown:
<columnHeader name="destination_network">
<label>DESTINATION_NETWORK</label>
<width>10%</width>
<visible>true</visible>
<sortable>true</sortable>
<tooltip>DESTINATION_NETWORK_HINT</tooltip>
<resizable>true</resizable>
<alignment>left</alignment>
</columnHeader>
……..
<column name="destination_network">
<type>text</type>
<styles>template-subtle-text</styles>
<fields>telcoInfo.destinationNetwork</fields>
<types>string</types>
</column>
4. Save your template file.
5. To add custom logic to retrieve the data needed for the adjustments column,
create a custom TemplateMyCustomEventWorker class.
In this example, a new BRM opcode AR_RESOURCE_AGGREGATION is called
to retrieve the adjustment made for an event, which overrides the
processFieldForColumnName() method of the default TemplateEventWorker
class. If the column name is adjustments, then the opcode
AR_RESOURCE_AGGREGATION is called:
public class TemplateMyCustomEventWorker extends TemplateEventWorker{
@Override
protected void processFieldForColumnName(ColumnarRecord.Entries.Cells viCol,
String storableClassType, FList flist, ColumnarRecord.Entries row, String
field, Object value) throws Exception {
if ("adjustments".equalsIgnoreCase(viCol.getName())) {
if (field.equals("id")) {
Poid acctPoid =flist.get(FldAccountObj.getInst());
Poid eventPoid =flist.get(FldPoid.getInst());
FList inputFlist = new FList();
inputFlist.set(FldPoid.getInst(),acctPoid);
inputFlist.set(FldPoid.getInst(),acctPoid);
FList eventInfo = new FList();
eventInfo.set(FldPoid.getInst(),eventPoid);
inputFlist.setElement(FldEvents.getInst(), 0, eventInfo);
FList outFlist = opcode(PortalOp.AR_RESOURCE_AGGREGATION,
inputFlist);
BigDecimal adjustAmount = getAdjustmenAmount(outFlist);
viCol.getArgs().add(adjustAmount.toString());
Chapter 5
Example 2: Event Template Customization with New Fields
5-8

}
}else {
super.processFieldForColumnName(viCol, storableClassType, flist, row,
field, value);
}
}
private BigDecimal getAdjustmenAmount(FList flist) throws EBufException {
BigDecimal amountAdjustValue = new BigDecimal(0);
if (flist.hasField(FldResults.getInst())) {
SparseArray resultsArray = flist.get(FldResults.getInst());
Enumeration results = resultsArray.elements();
while (results.hasMoreElements()) {
FList balFlist = (FList) results.nextElement();
if (balFlist.hasField(FldAdjusted.getInst()) &&
balFlist.hasField(FldResourceId.getInst())) {
Integer resourceId = balFlist.get(FldResourceId.getInst());
if (BEIDManager.isCurrency(resourceId) ) {
amountAdjustValue = balFlist.get(FldAdjusted.getInst());
break;
}
}
}
}
return amountAdjustValue;
}
}
6. Create a custom CustomTemplateFactory class and override its getTemplate() method
to return the TemplateMyCustomEventWorker class (instead of the default
TemplateEventWorker.java class):
public class CustomTemplateFactory extends TemplateFactory {
@Override
public TemplateBaseWorker getTemplateWorker(String templateType){
if(BillingCareConstants.EVENT.equalsIgnoreCase(templateType)){
return new TemplateMyCustomEventWorker();
}else {
return super.getTemplateWorker(templateType);
}
}
}
7. Create a custom template module class by extending the PCMTemplateModule class to
override the getTemplate() method to return the new CustomTemplateFactory:
public class CustomPCMTemplateModule extends PCMTemplateModule {
@Override
protected TemplateFactory getTemplateFactoryInstance(){
return new CustomTemplateFactory();
}
}
8. In the NetBeans IDE, create a new Java project with all the mentioned Java files and
XML files in the appropriate folders and include the jars required to compile and build the
project.
9. Add your customization files to your NetBeans IDE project folder (myproject):
• Add an entry in the customModule.properties in the myproject/web/WEB-INF/
classes/custom folder to override the default template module as follows:
Chapter 5
Example 2: Event Template Customization with New Fields
5-9

billingcare.rest.template.module=com
.
company
.
modules.CustomPCMTempla
teModule
where company is the company name used in your myproject/src directory.
• Add the custom template file in the myproject/web/WEB-INF/classes/custom/
eventtemplates folder.
10. Right-click your NetBeans IDE project and select Clean and Build.
11. Package and deploy your custom templates to your Billing Care domain.
For more information, see "Packaging and Deploying Customizations".
12. Verify your changes in Billing Care.
Example 3: Newsfeed Template Customization
The following procedure shows how to customize the Newsfeed template by providing
an example of adding a new column named
billStatus
. In this example procedure:
• A custom template is created with new
<columnHeader>
and
<column>
elements to
display a new column called billStatus.
• Required custom Java classes are coded to retrieve the new data for display in
Billing Care
To add a field in the Newsfeed template and customize the REST code to support the
new field:
1. Create a Customnewsfeed.xml template file in the myproject/web/custom/
newsfeedtemplates folder by copying the default newsfeed.xml available in the
SDK_home/reference/newsfeedtemplates folder.
2. Add a new
<columnHeader>
and
<column>
in the XML file Customnewsfeed.xml.
In this example, the field
object
is added as a BRM field to retrieve the billStatus
of a /bill object.
<columnHeader name="billStatus">
<label>Bill Status</label>
<width>10%</width>
<visible>true</visible>
<sortable>false</sortable>
<tooltip>Status of the Bill</tooltip>
<resizable>true</resizable>
<alignment>left</alignment>
</columnHeader>
……..
<column name="billStatus">
<type>text</type>
<fields>object</fields>
</column>
3. Save your template file.
4. Create a custom TemplateMyCustomNewsfeedWorker class to add custom logic
to retrieve the data needed for the billStatus column.
In this example, a new BRM opcode PCM_OP_READ_READS opcode is used to
retrieve the status of a bill object, then overrides the
processFieldForColumnName() method of the TemplateNewsfeedWorker
Chapter 5
Example 3: Newsfeed Template Customization
5-10

class. This method checks if the column name is billStatus. If so, then the method gets
the FLD_DUE amount by calling the opcode PCM_OP_READ_READS.
public class TemplateMyCustomNewsfeedWorker extends TemplateNewsFeedWorker {
@Override
protected void processFieldForColumnName(ColumnarRecord.Entries.Cells viCol,
String storableClassType, FList flist, ColumnarRecord.Entries row, String field,
Object value) throws Exception {
if ("billStatus".equalsIgnoreCase(viCol.getName())) {
if (flist.hasField(FldObject.getInst())) {
String billType = null;
billType = flist.get(FldObject.getInst()).getType();
if (billType != null && billType.equalsIgnoreCase("/bill")) {
FList billDueinputFList = new FList();
billDueinputFList.set(FldPoid.getInst(),
flist.get(FldObject.getInst()));
billDueinputFList.set(FldDue.getInst());
FList billDueOutputFList = opcode(PortalOp.READ_FLDS,
billDueinputFList);
BigDecimal billDue =
billDueOutputFList.get(FldDue.getInst());
if (!billDue.equals( BigDecimal.ZERO)) {
viCol.getArgs().add("Pending");
return;
} else {
viCol.getArgs().add("Paid");
return;
}
}
}else {
viCol.getArgs().add("");
}
}else {
super.processFieldForColumnName(viCol, storableClassType, flist, row,
field, value);
}
}
}
5. Create a custom CustomTemplateFactory Java class and override the getTemplate()
method to return the TemplateMyCustomNewsfeedWorker Java class (instead of the
default TemplateNewsfeedWorker Java class).
public class CustomTemplateFactory extends TemplateFactory {
@Override
public TemplateBaseWorker getTemplateWorker(String templateType){
if(BillingCareConstants.NEWSFEED.equalsIgnoreCase(templateType)){
return new TemplateMyCustomNewsfeedWorker();
} else {
return super.getTemplateWorker(templateType);
}
}
}
6. Create a custom template module class by extending the PCMTemplateModule Java
class and overriding its getTemplate() method:
public class CustomPCMTemplateModule extends PCMTemplateModule {
@Override
protected TemplateFactory getTemplateFactoryInstance(){
Chapter 5
Example 3: Newsfeed Template Customization
5-11

return new CustomTemplateFactory();
}
}
7. In the NetBeans IDE, create a new Java project with all the mentioned Java files
and XML files in the appropriate folders and include the jars required to compile
and build the project.
8. Add your customization files to your NetBeans IDE project folder (myproject):
• Add the customModule.properties in the myproject/web/WEB-INF/classes/
custom folder.
• Add the custom template file in the myproject/web/WEB-INF/classes/custom/
eventtemplates folder.
9. Right-click your NetBeans IDE project and select Clean and Build.
10. Package and deploy your custom templates to your Billing Care domain.
For more information, see "Packaging and Deploying Customizations".
11. Verify your changes in Billing Care.
Chapter 5
Example 3: Newsfeed Template Customization
5-12

6
Customizing Billing Care Themes and Logo
You can customize the appearance of Oracle Communications Billing Care by using themes
and changing the login screen logo.
Topics in this document:
• About Billing Care Themes and Logo
• About Customizing Billing Care Themes
• Adding a New Theme
• Overriding Themes
• Setting Which Billing Care Theme to Use
• Changing the Default Logo
About Billing Care Themes and Logo
Billing Care includes two theme cascading style sheet (CSS) that determine the Billing Care
look and feel. CSS enables you to alter Billing Care's appearance (for example, colors and
fonts) for your business needs. By default, theme_alta.css is enabled. An alternative theme
named theme_default.css is also included. An entry in the registry file specifies which CSS
file Billing Care uses.
Additionally, override CSS files can be used to change the appearance of specific elements in
Billing Care when needed. For example, the Billing Care login page uses a CSS that
specifies the displayed logo graphic file. See "Changing the Default Logo" for more
information on using a custom logo.
The Billing Care SDK includes sample CSS files named customTheme.css and
override.css in the SDK_home/samples/Themes/css directory, where SDK_home is the
directory where you installed the SDK. Use these files when creating custom themes and
overrides to change the Billing Care look and feel.
Note:
The theme_default.css and theme_alta.css files are not included in the Billing
Care SDK. To retrieve these files for customization, set the desired theme using the
registry file, then view and download the CSS using your browsers development
tools.
About Customizing Billing Care Themes
You can customize Billing Care in the following ways:
• Adding a New Theme
6-1

• Overriding Themes
• Setting Which Billing Care Theme to Use
Adding a New Theme
Add a new theme to Billing Care by creating a new CSS file and including it in your
customizations shared library. The SDK includes a sample custom theme named
customTheme.css in the SDK_home/samples/Themes/css directory, where
SDK_home is the directory where you installed the SDK. Use this sample theme when
creating your custom theme.
To add a new theme:
1. Create a new CSS file (for example, mytheme.css)
2. Copy your custom CSS file to the myproject/web/css directory where myproject is
the NetBeans IDE project directory containing your Billing Care customizations.
3. Set Billing Care to use your custom theme in the registry file and deploy your
custom theme to your Billing Care domain. See "Setting Which Billing Care Theme
to Use" for instructions on specifying a theme in the registry and deploying your
theme in the Billing Care domain.
Overriding Themes
You can override styles and add styles to the existing theme's CSS file. Billing Care
applies the registry's configured theme first, then applies any override theme
modifications. The SDK includes a sample override CSS file named override.css in
the SDK_home/samples/Themes/css directory, where SDK_home is the directory
where you installed the SDK.
To override and add styles to an existing theme:
1. Write a CSS file that overrides styles or adds styles (for example,
theme_custom.css).
2. In the customRegistry.js file, add an entry under cssFiles for your override CSS
file in the others parameter as shown in Example 6-1. See "About the Registry
File" for more information on how to create a custom registry file.
3. Copy your override CSS file to the myproject/web/css directory where myproject
is the NetBeans IDE project directory containing your Billing Care customizations.
4. Confirm Billing Care is configured to use your custom theme and overrides in the
registry file and deploy your overrides to the Billing Care domain. See "Setting
Which Billing Care Theme to Use" for instructions on specifying a theme in the
registry and deploying your theme to the Billing Care domain.
Example 6-1 Theme Override Registry File Example
var CustomRegistry= {
cssFiles: {
themeCss: 'css/theme_default.css', //switching among the
existing themes
others: ['css/theme_custom.css'] //then overriding/adding
to it }
};
Chapter 6
Adding a New Theme
6-2

Setting Which Billing Care Theme to Use
Switch between themes by adding an entry in customRegistry.js using the same key as
used in Registry.js, which points to the required theme's CSS file. See "About the Registry
File" for information on creating the customRegistry.js file and including it in your shared
library for deployment to your Billing Care domain.
Example 6-2 shows the entry in the registry file where a custom theme is specified.
Example 6-2 Billing Care Theme Registry Entry
var CustomRegistry= {
cssFiles: {
themeCss: 'css/theme_default.css'
}
};
To switch Billing Care themes:
1. Create a customRegistry.js file in a text editor. See "About the Registry File" for more
information on how to create a custom registry file.
2. Update the customRegistry.js file specifying your CSS file in the themeCss entry.
3. Save and close the file.
4. Do one of the following:
• If you are using an exploded archive for your shared library, log out of and back into
Billing Care to see the new theme. See "About Using an Exploded Archive" for more
information about using exploded archives.
• Package your customizations shared library and deploy it to your Billing Care
domain. Redeploy Billing Care and login to see the new theme. See "Packaging and
Deploying Customizations" for more information on packaging and deploying your
customizations.
Changing the Default Logo
By default, Billing Care displays the Oracle logo on the login page and in the header section
that appears after you login.
To change the default logo:
1. Copy your custom logo into the myproject/web/resources/public/images directory,
where myproject is the NetBeans IDE project directory containing your Billing Care
customizations.
2. To change the default logo that appears on the login page, do the following:
a. Using the NetBeans IDE text editor, create an overrides-login.css file in the
myproject/web/resources/public/css directory.
Ensure that the overrides-login.css file contains the location and size of your
custom logo image file as shown in Example 6-3.
b. Adjust the margin, width, height, and float values in overrides-login.css so that your
image renders properly.
c. Save and close the file.
Chapter 6
Setting Which Billing Care Theme to Use
6-3

3. To change the default logo in the header section that appears after you login, do
the following:
a. Using the NetBeans IDE text editor, create an overrides.css file in the
myproject/web/css directory.
b. Add the entries as shown in Example 6-3.
c. Change the following entry:
background: url("../images/imagefile") no-repeat;!important;
To this:
background: url(""../../resources/public/images/imagefile") no-
repeat !important;
where imagefile references your custom logo image file located in your
NetBeans project.
d. Adjust the margin, width, height, and float values in overrides.css so that your
image renders properly.
e. Save and close the file.
4. Do one of the following:
• If you are using an exploded archive for your shared library, log out of and
back into Billing Care to see the new theme. See "About Using an Exploded
Archive" for more information about using exploded archives.
• Package your customizations shared library and deploy it to your Billing Care
domain. Redeploy Billing Care and login to see the new theme. See
"Packaging and Deploying Customizations" for more information on packaging
and deploying your customizations.
Example 6-3 Sample overrides-login.css File
/**
This is the CSS where an SDK developer can do out of box logo header changes.
Below example shows how to override the oracle logo that comes with
default Billing Care package.
**/
#logoHeader{
height: auto;
}
.logo-oracle {
background: url("../images/imagefile") no-repeat;!important;
margin: -3px 24px 0 12px;
width: 100px;
height: 80px;
float: left;
}
where imagefile references your custom logo image file located in your NetBeans
project.
Chapter 6
Changing the Default Logo
6-4

7
Editing the Billing Care Configuration File
You can customize the Oracle Communications Billing Care interface by creating a custom
version of the Configurations.xml file.
Topics in this document:
• About the Billing Care Configuration File
• Creating a Custom Configuration File
• Default Configuration File Entries
About the Billing Care Configuration File
The Configurations.xml file controls the following elements of Billing Care:
• Mappings that determine what values are displayed for module keys. See Table 7-1.
• Flags for showing or hiding module elements. See Table 7-2.
• Threshold values for connection timeouts and pagination. See Table 7-3.
• Registry values that determine how Billing Care renders modules. See Table 7-4.
• Keyval categories displayed in the newsfeed. See Table 7-5.
Creating a Custom Configuration File
To change default behavior, create a CustomConfigurations.xml file, and package it in the
customizations shared library that you deploy to the Billing Care domain.
To create a CustomConfigurations.xml file:
1. Copy the SDK_home/references/Configurations.xml file to the myproject/web/custom/
configurations directory.
where:
• SDK_home is the directory in which you installed the Billing Care SDK.
• myproject is your NetBeans IDE Billing Care customizations project.
2. Open the CustomConfigurations.xml file, and edit the entries you want to change.
For a list of the default configuration file entries, see "Default Configuration File Entries".
3. Save and close the file.
4. Include the CustomConfigurations.xml file when you package your customizations
shared library for deployment to your Billing Care domain.
For more information on packaging and deploying your customizations, see "Packaging
and Deploying Customizations".
7-1

Default Configuration File Entries
The following tables show the default values in the Configurations.xml file.
Table 7-1 lists the configurable mappings and their default values.
Table 7-1 Mapping Values in Configuration File
Configuration Key and
Description
Default Values Types
account.contact.phone.ty
pes
Phone types displayed in
the Account Profile overlay.
Permits adding,
rearranging, and renaming
the phone types.
<mapping>
<key>account.contact.phone.types</key>
<map>
<id>1</id>
<key>HOME</key>
</map>
<map>
<id>2</id>
<key>WORK</key>
</map>
<map>
<id>3</id>
<key>FAX</key>
</map>
<map>
<id>4</id>
<key>PAGER</key>
</map>
<map>
<id>5</id>
<key>MOBILE</key>
</map>
<map>
<id>6</id>
<key>POP</key>
</map>
<map>
<id>7</id>
<key>SUPPORT</key>
</map>
<desc></desc>
</mapping>
id: Number.
key: String (must
match appropriate
key in the Billing
Care resource
bundle).
Chapter 7
Default Configuration File Entries
7-2

Table 7-1 (Cont.) Mapping Values in Configuration File
Configuration Key and
Description
Default Values Types
account.contact.types
Contact types displayed in
the Account Profile overlay.
Permits adding,
rearranging, and renaming
the contact types.
<mapping>
<key>account.contact.types</key>
<map>
<id>1</id>
<key>PRIMARY</key>
</map>
<map>
<id>2</id>
<key>ADDITIONAL</key>
</map>
<map>
<id>3</id>
<key>ACCOUNTHOLDER</key>
</map>
<desc></desc>
</mapping>
id: Number.
key: String (must
match appropriate
key in the Billing
Care resource
bundle).
account.customer.types
Customer types displayed
in the Account Profile
overlay.
Permits adding,
rearranging, and renaming
the customer types.
<mapping>
<key>account.customer.types</key>
<map>
<id>1</id>
<key>PLATINUM</key>
</map>
<map>
<id>2</id>
<key>GOLD</key>
</map>
<map>
<id>3</id>
<key>SILVER</key>
</map>
<map>
<id>4</id>
<key>BRONZE</key>
</map>
<desc></desc>
</mapping>
id: Number.
key: String (must
match appropriate
key in the Billing
Care resource
bundle).
Chapter 7
Default Configuration File Entries
7-3

Table 7-1 (Cont.) Mapping Values in Configuration File
Configuration Key and
Description
Default Values Types
account.locale.mapping
Because browser and BRM
language codes are
different, this configuration
acts like a mapping.
<mapping>
<key>account.locale.mapping</key>
<map>
<id>cs</id>
<key>cz</key>
</map>
<map>
<id>bg</id>
<key>bg_BG</key>
</map>
<map>
<id>hr</id>
<key>hr_HR</key>
</map>
<map>
<id>sl</id>
<key>sl_SI</key>
</map>
<map>
<id>nb</id>
<key>no</key>
</map>
<map>
<id>nn</id>
<key>no_NY</key>
</map>
<map>
<id>sv</id>
<key>sve</key>
</map>
<map>
<id>en_GB</id>
<key>en_UK</key>
</map>
<map>
<id>he</id>
<key>iw_IL</key>
</map>
<desc></desc>
</mapping>
id: String that
represents the
browser language.
key: String that
represents the BRM
language (BRM
locale value).
Chapter 7
Default Configuration File Entries
7-4
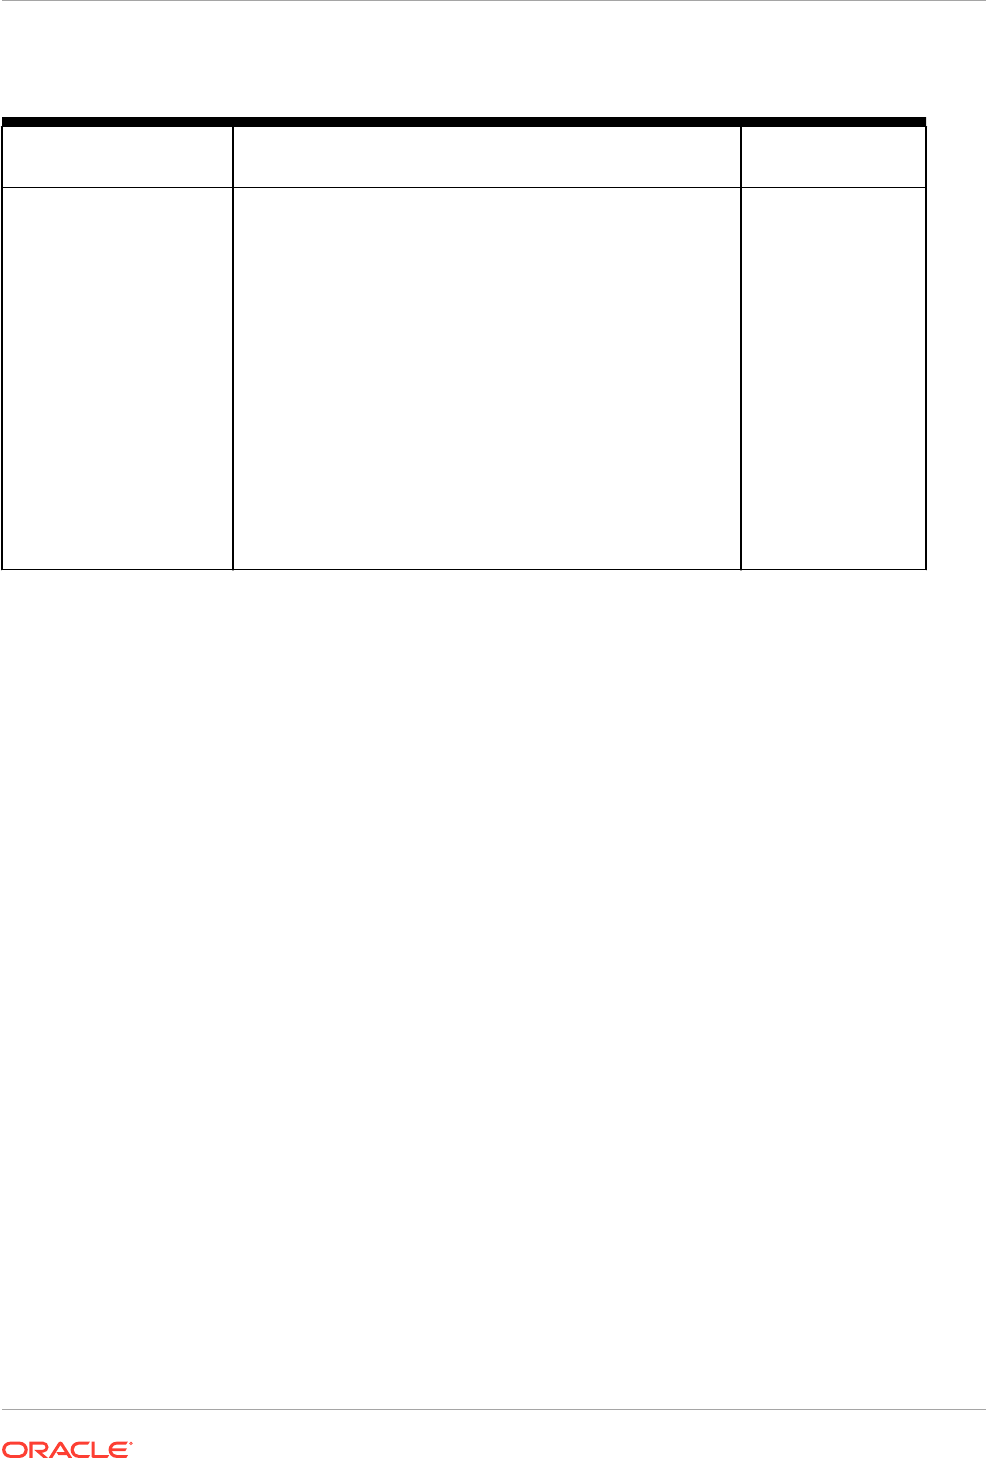
Table 7-1 (Cont.) Mapping Values in Configuration File
Configuration Key and
Description
Default Values Types
account.status.types
Status types displayed in
the Account Status overlay
and the account banner.
Permits rearranging and
renaming the status types.
<mapping>
<key>account.status.types</key>
<map>
<id>10100</id>
<key>ACTIVE</key>
</map>
<map>
<id>10102</id>
<key>INACTIVE</key>
</map>
<map>
<id>10103</id>
<key>CLOSED</key>
</map>
<desc></desc>
</mapping>
id: Number.
key: String (must
match appropriate
key in the Billing
Care resource
bundle).
Chapter 7
Default Configuration File Entries
7-5

Table 7-1 (Cont.) Mapping Values in Configuration File
Configuration Key and
Description
Default Values Types
account.taxExemptions.t
ypes
Tax exemption types
displayed in the Tax Setup
overlay.
Permits adding,
rearranging, and renaming
the tax exemptions.
Note: Make sure BRM
supports the tax exemption
when you add a new type.
<mapping>
<key>account.taxExemptions.types</key>
<map>
<id>0</id>
<key>FEDERAL</key>
</map>
<map>
<id>1</id>
<key>STATE</key>
</map>
<map>
<id>2</id>
<key>COUNTRY</key>
</map>
<map>
<id>3</id>
<key>CITY</key>
</map>
<map>
<id>4</id>
<key>SECONDARY_COUNTRY</key>
</map>
<map>
<id>5</id>
<key>SECONDARY_CITY</key>
</map>
<map>
<id>6</id>
<key>TERRITORY</key>
</map>
<map>
<id>7</id>
<key>SECONDARY_STATE</key>
</map>
<map>
<id>8</id>
<key>DISTRICT</key>
</map>
<map>
<id>9</id>
<key>SECONDARY_FEDERAL</key>
</map>
<desc></desc>
</mapping>
id: Number.
key: String (must
match appropriate
key in the Billing
Care resource
bundle).
Chapter 7
Default Configuration File Entries
7-6

Table 7-1 (Cont.) Mapping Values in Configuration File
Configuration Key and
Description
Default Values Types
billUnit.accountingTypes
Accounting types in the Bill
Unit overlay.
Permits adding,
rearranging, and renaming
the accounting types.
Note: By default, BRM
supports only balance
forward and open item
accounting. Before adding
an accounting type, do the
necessary customizations
in BRM.
<mapping>
<key>billUnit.accountingTypes</key>
<map>
<id>1</id>
<key>OPEN_ITEM</key>
</map>
<map>
<id>2</id>
<key>BALANCE_FORWARD</key>
</map>
<desc></desc>
</mapping>
id: Number.
key: String (must
match appropriate
key in the Billing
Care resource
bundle).
billUnit.billingFrequencyI
nMonths
Billing frequency in the Bill
Unit overlay.
Permits adding,
rearranging, and renaming
the billing frequency.
Example: An SDK
developer can add "6
months" as an option in the
drop-down.
<mapping>
<key>billUnit.billingFrequencyInMonths</key>
<map>
<id>1</id>
<key>MONTHLY</key>
</map>
<map>
<id>2</id>
<key>BI_MONTHLY</key>
</map>
<map>
<id>3</id>
<key>QUARTERLY</key>
</map>
<map>
<id>12</id>
<key>ANNUAL</key>
</map>
<desc></desc>
</mapping>
id: Number.
key: String (must
match appropriate
key in the Billing
Care resource
bundle).
billUnit.correctiveInvoice
Type
Corrective invoice types
supported for bill units.
<mapping>
<key>billUnit.correctiveInvoiceType</key>
<map>
<id>0</id>
<key>REPLACEMENT_INVOICE</key>
</map>
<map>
<id>4</id>
<key>CORRECTIVE_INVOICE</key>
</map>
<desc></desc>
</mapping>
id: Number.
key: String (must
match appropriate
key in the Billing
Care resource
bundle).
Chapter 7
Default Configuration File Entries
7-7

Table 7-1 (Cont.) Mapping Values in Configuration File
Configuration Key and
Description
Default Values Types
billunit.status
The status type that
represents the state of the
bill units in collections.
Permits rearranging and
renaming of the values.
<mapping>
<key>billunit.status</key>
<map>
<id>0</id>
<key>DEFUNCT</key>
</map>
<map>
<id>10100</id>
<key>ACTIVE</key>
</map>
<map>
<id>10200</id>
<key>INACTIVE</key>
</map>
<map>
<id>10300</id>
<key>CLOSED</key>
</map>
<desc></desc>
</mapping>
id: Number.
key: String (must
match appropriate
key in the Billing
Care resource
bundle).
collections.action.status
Displays the action status
for collections.
<mapping>
<key>collections.action.status</key>
<map>
<id>0</id>
<key>PENDING</key>
</map>
<map>
<id>1</id>
<key>CANCELLED</key>
</map>
<map>
<id>2</id>
<key>COMPLETED</key>
</map>
<map>
<id>5</id>
<key>WAITING_FOR_DEPENDENTS</key>
</map>
<desc></desc>
</mapping>
id: Number.
key: String (must
match appropriate
key in the Billing
Care resource
bundle).
Chapter 7
Default Configuration File Entries
7-8

Table 7-1 (Cont.) Mapping Values in Configuration File
Configuration Key and
Description
Default Values Types
device.sim.status
The state of the Subscriber
Identity Module (SIM) in
the device.
<mapping>
<key>device.sim.status</key>
<map>
<id>1</id>
<key>NEW</key>
</map>
<map>
<id>2</id>
<key>RELEASED</key>
</map>
<desc></desc>
</mapping>
id: Number.
key: String.
device.sim.networkEleme
nt
The available wireless
network element that is
used for associating the
SIM or the device number
(NUM) with the Telco
service.
<mapping>
<key>device.sim.networkElement</key>
<map>
<id>sample_network_element_1</id>
<key>SAMPLE_NETWORK_ELEMENT_1</key>
</map>
<map>
<id>sample_network_element_2</id>
<key>SAMPLE_NETWORK_ELEMENT_2</key>
</map>
<desc></desc>
</mapping>
id: String.
key: String.
device.num.status
The status type that
represents the state of the
device number.
<mapping>
<key>device.num.status</key>
<map>
<id>1</id>
<key>NEW</key>
</map>
<map>
<id>4</id>
<key>UNASSIGNED</key>
</map>
<desc></desc>
</mapping>
id: Number.
key: String.
device.num.category
The default number of
categories for the device
number.
<mapping>
<key>device.num.category</key>
<map>
<id>0</id>
<key>NONE</key>
</map>
<map>
<id>1</id>
<key>RESERVED</key>
</map>
<desc></desc>
</mapping>
id: Number.
key: String.
Chapter 7
Default Configuration File Entries
7-9

Table 7-1 (Cont.) Mapping Values in Configuration File
Configuration Key and
Description
Default Values Types
device.num.vanity
The value of the vanity key
that is used for the device
number.
<mapping>
<key>device.num.vanity</key>
<map>
<id>0</id>
<key>NONE</key>
</map>
<map>
<id>1</id>
<key>SAMPLE_VANITY_1</key>
</map>
<map>
<id>2</id>
<key>SAMPLE_VANITY_2</key>
</map>
<desc></desc>
</mapping>
id: Number.
key: String.
payment.debit.accountTy
pes
Direct debit accounting
types displayed in the
Payment Setup, Make
Payment, and Bill Unit
overlays.
Permits adding,
rearranging, and renaming
the direct debit types.
Note: Adding an
accounting type to Billing
Care also requires
customizations in BRM.
<mapping>
<key>payment.debit.accountTypes</key>
<map>
<id>1</id>
<key>ACCOUNT_TYPE_CHECKING</key>
</map>
<map>
<id>2</id>
<key>ACCOUNT_TYPE_SAVINGS</key>
</map>
<map>
<id>3</id>
<key>ACCOUNT_TYPE_CORPORATE</key>
</map>
<desc></desc>
</mapping>
id: Number.
key: String (must
match appropriate
key in the Billing
Care resource
bundle).
paymentMethods.invoice.
deliverPreferTypes
Invoice delivery
preferences in the Payment
Setup and Bill Unit
overlays.
Permits adding,
rearranging, and renaming
the delivery preferences.
Note: BRM supports the
key FAX with the ID 2 as a
preference type. You can
add this mapping to the
CustomConfigurations.x
ml file.
<mapping>
<key>paymentMethods.invoice.deliverPreferTypes</
key>
<map>
<id>0</id>
<key>EMAIL</key>
</map>
<map>
<id>1</id>
<key>POSTAL</key>
</map>
<desc></desc>
</mapping>
id: Number.
key: String (must
match appropriate
key in the Billing
Care resource
bundle).
Chapter 7
Default Configuration File Entries
7-10
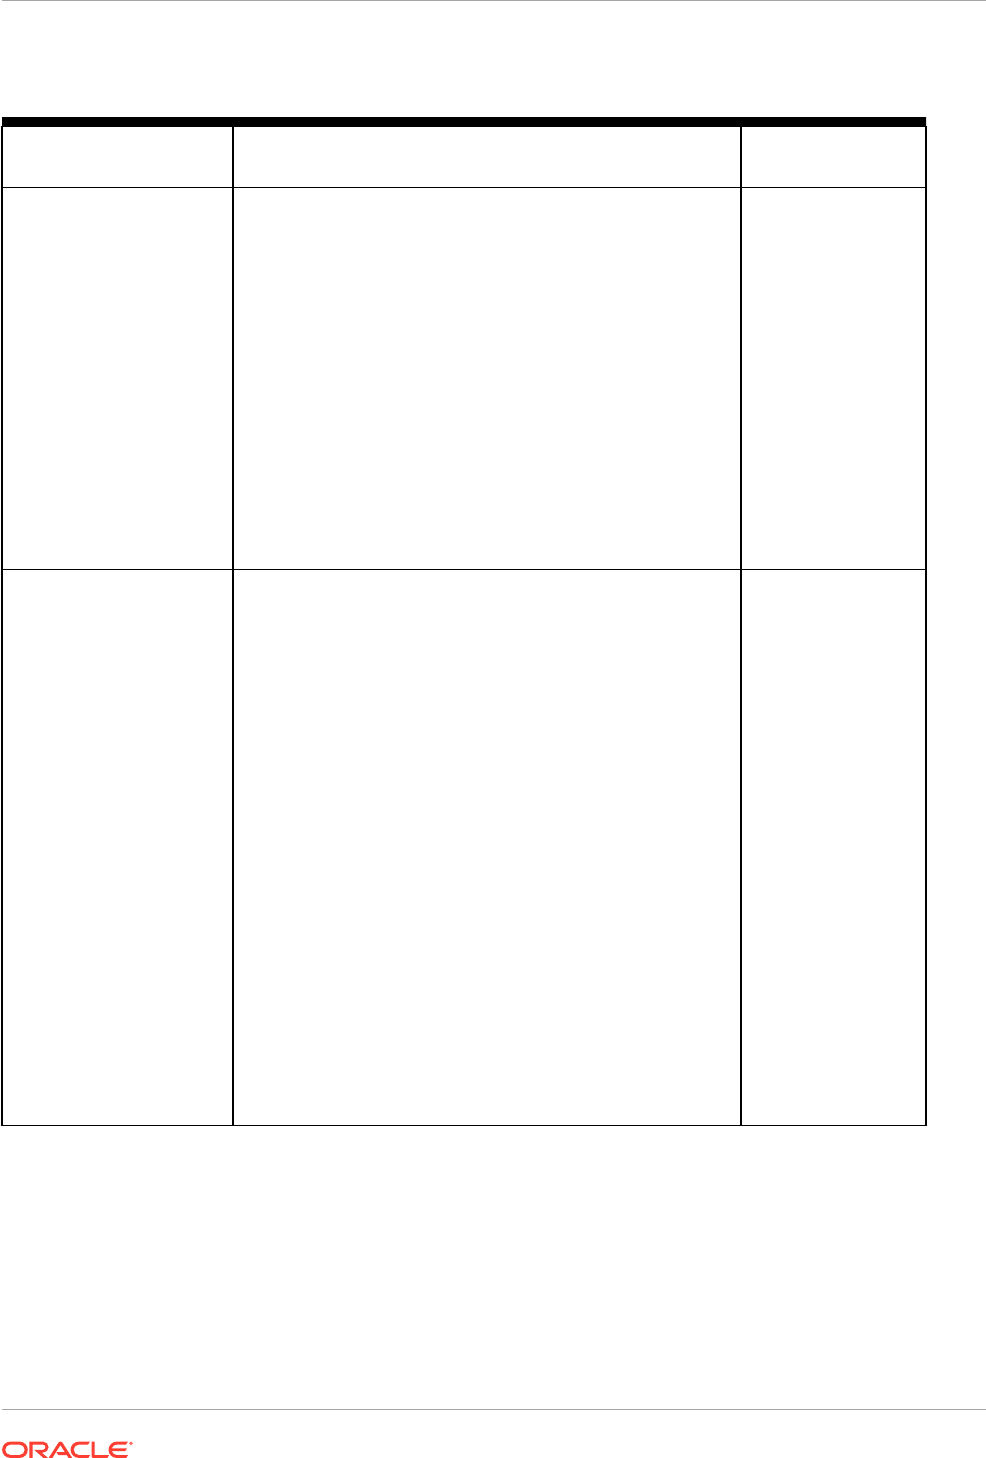
Table 7-1 (Cont.) Mapping Values in Configuration File
Configuration Key and
Description
Default Values Types
product.customization.de
layed.reasons
Reasons for product or
discount activation delays.
<mapping>
<key>product.customization.delayed.reasons</key>
<map>
<id>2</id>
<key>WAITING_FOR_NETWORK_CONFIGURATION</key>
</map>
<map>
<id>4</id>
<key>WAITING_FOR_MAINTENANCE</key>
</map>
<map>
<id>1</id>
<key>WAITING_FOR_INSTALLATION</key>
</map>
<desc></desc>
</mapping>
id: Number.
key: String (must
match appropriate
key in the Billing
Care resource
bundle).
serviceTypes.icons
Service icons to display in
the asset cards.
An icon exists for account
products and for GSM
services.
If no icon is provided for a
service, the default icon is
used.
The image can be placed
in any folder but must be in
the WAR file.
Optimum image dimension
is 116 x 116 pixels.
<mapping>
<key>serviceTypes.icons</key>
<map>
<id>serviceIp</id>
<key>resources/images/star-shape.png</key>
</map>
<map>
<id>serviceEmail</id>
<key>resources/images/star-shape.png</key>
</map>
<map>
<id>accountProduct</id>
<key>resources/images/hexagon-shape.png</key>
</map>
<map>
<id>serviceTelcoGsm</id>
<key>resources/images/audio-call.png</key>
</map>
<map>
<id>defaultService</id>
<key>resources/images/star-shape.png</key>
</map>
<desc></desc>
</mapping>
id: String.
key: Icon associated
with the specified
service.
Table 7-2 lists the configurable flags and their default values.
Chapter 7
Default Configuration File Entries
7-11

Table 7-2 Flags in Configuration File
Configuration Key and
Description
Default Values Types
accountbanner.showcurr
encycode
Flag that determines
whether the ISO currency
code (such as USD) is
displayed in the account
banner.
<flags>
<key>accountbanner.showcurrencycode</key>
<value>false</value>
<desc></desc>
</flags>
key: String.
value: Boolean.
If the value is true,
the code is displayed.
Default value is
false.
account.contact.showsal
utation
Flag that determines
whether the salutation field
is displayed in the account
profile, the account banner,
and all dialog titles.
<flags>
<key>account.contact.showsalutation</key>
<value>false</value>
<desc></desc>
</flags>
key: String.
value: Boolean.
If the value is true,
the field is displayed.
Default value is
false.
batch.payments.autoproc
ess
Flag that determines
whether batch payment
files uploaded in the UI are
automatically processed.
<flags>
<key>batch.payments.autoprocess</key>
<value>false</value>
<desc></desc>
</flags>
key: String.
value: Boolean.
If the value is true,
the files are
automatically
processed.
Default value is
false.
billinvoice.use.modaldial
og
Flag that determines
whether invoices viewed in
Billing Care are display in a
dialog box.
<flags>
<key>billinvoice.use.modaldialog</key>
<value>false</value>
<desc></desc>
</flags>
key: String.
value: Boolean.
If the value is true,
invoices are display
in a dialog box.
Default value is
false.
graph.notes.indicators
Flag that determines
whether notes indicators
are displayed on top of
graphs.
When accounts have lots
of activity or lots of notes,
too many indicators may
be shown. Setting this
value to false enables you
to remove the indicators,
reducing visual clutter.
<flags>
<key>graph.notes.indicators</key>
<value>true</value>
<desc></desc>
</flags>
key: String.
value: Boolean.
If the value is false,
the indicators are not
displayed.
Default value is true.
Chapter 7
Default Configuration File Entries
7-12

Table 7-2 (Cont.) Flags in Configuration File
Configuration Key and
Description
Default Values Types
request.record.failure
Flag that determines
whether to record in the
BRM database all Billing
Care REST API
transactions that failed.
Only requests that are
changing resources are
recorded.
<flags>
<key>request.record.failure</key>
<value>false</value>
<desc></desc>
</flags>
key: String.
value: Boolean.
If the value is true,
failed transactions
are recorded.
Default value is
false.
Table 7-3 lists the configurable thresholds and their default values.
Table 7-3 Thresholds in Configuration File
Configuration Key and
Description
Default Values Types
accountsearch.limit
Number of account search
results shown by default.
The number of search
results shown can be
increased or decreased by
editing the value field.
Note: The limit set for the
account search results
must be a non-zero
positive integer.
<thresholds>
<key>accountsearch.limit</key>
<value>50</value>
<desc>
</desc>
</thresholds>
key: String.
value: Number.
assets.servicetypes.size
Maximum number of
service types shown by
default in Assets section.
Additional service types
can be shown by clicking a
Show More link.
<thresholds>
<key>assets.servicetypes.size</key>
<value>6</value>
<desc></desc>
</thresholds>
key: String.
value: Number.
balances.services.size
Maximum number of
services shown by default
in Balances section.
Additional services can be
shown by clicking a Show
More link.
<thresholds>
<key>balances.services.size</key>
<value>4</value>
<desc></desc>
</thresholds>
key: String.
value: Number.
batch.payments.threshol
d
Maximum percentage of
payments in a batch that
can be suspended. If this
value is exceeded, batch
processing stops.
<thresholds>
<key>batch.payments.threshold</key>
<value>50</value>
<desc></desc>
</thresholds>
key: String.
value: Number.
Chapter 7
Default Configuration File Entries
7-13

Table 7-3 (Cont.) Thresholds in Configuration File
Configuration Key and
Description
Default Values Types
collections.pagination
Maximum number of
collections bill units
displayed in a table on a
page.
For example, if 150 records
exist, only the first 25 are
initially displayed. When
you click Show More, the
next 25 are retrieved and
appended to the initial
results. You can repeat this
to retrieve the remaining
records.
<thresholds>
<key>collections.pagination.size</key>
<value>25</value>
<desc></desc>
</thresholds>
key: String.
value: Number.
creditcard.alert.expiryday
s
Number of days before
credit card expiration that
an alert is shown in the
card tile in Make Payment
and Payment Setup
overlays.
<thresholds>
<key>creditcard.alert.expirydays</key>
<value>60</value>
<desc></desc>
</thresholds>
key: String.
value: Number.
devicesearch.limit
Number of records to be
retrieved in device search
dialog. By default, 50
records are displayed. The
number of search results
shown can be increased or
decreased by editing the
value field.
Note:The limit set for the
device search results must
be a non-zero positive
integer.
<thresholds>
<key>deviceearch.limit</key>
<value>50</value>
<desc>
</desc>
</thresholds>
key: String.
value: Number.
package.alert.expirydays
Number of days before
expiration a package can
be purchased during
account creation or add-on
package purchase.
<thresholds>
<key>package.alert.expirydays</key>
<value>60</value>
<desc></desc>
</thresholds>
key: String.
value: Number.
Chapter 7
Default Configuration File Entries
7-14

Table 7-3 (Cont.) Thresholds in Configuration File
Configuration Key and
Description
Default Values Types
pagination.size
Maximum number of
records initially displayed in
a table on a page.
For example, if 150 records
exist, only the first 50 are
initially displayed. When
you click Show More, the
next 50 are retrieved and
appended to the initial
results. Clicking Show
More one more time
retrieves the final 50. All
150 records are now
displayed.
<thresholds>
<key>pagination.size</key>
<value>50</value>
<desc></desc>
</thresholds>
key: String.
value: Number.
paymentsuspense.pagin
ation.size
Maximum number of
records initially displayed in
a table on a page in the
payment suspense search
results.
For example, if 50 records
exist, only the first 25 are
initially retrieved and
displayed. To see the next
25 records, you must click
Show More.
<thresholds>
<key>paymentsuspense.pagination.size</key>
<value>25</value>
<desc></desc>
</thresholds>
key: String.
value: Number.
pcm.connection.timeout
Maximum number of
milliseconds in which an
opcode must return results
before the connection
times out.
If you change this value,
you must restart the server
to reinitialize the
connection pool.
<thresholds>
<key>pcm.connection.timeout</key>
<value>15000</value>
<desc></desc>
</thresholds>
key: String.
value: Number.
recent.records.size
Maximum number of
recently opened accounts
displayed in the Search
overlay.
<thresholds>
<key>recent.records.size</key>
<value>5</value>
<desc></desc>
</thresholds>
key: String.
value: Number.
session.timeout.advance
warningtime
Advance warning time for
session time out in
seconds.
<thresholds>
<key>session.timeout.advancewarningtime</key>
<value>60</value>
<desc></desc>
</thresholds>
key: String.
value: Number.
Chapter 7
Default Configuration File Entries
7-15

Table 7-3 (Cont.) Thresholds in Configuration File
Configuration Key and
Description
Default Values Types
roles.batchsize
Maximum number of roles
that can be retrieved in a
batch when a search
operation is performed to
find roles; for example,
roles with permissions to
manage suspended
payments.
Note: There will no visible
changes to the UI for any
change made for role batch
size retrieval.
<thresholds>
<key>roles.batchsize</key>
<value>100</value>
<desc></desc>
</thresholds>
key: String.
value: Number.
Table 7-4 lists the configurable registry keys and their default values.
Table 7-4 Registry Entries in Configuration File
Configuration Key and
Description
Default Values Types
accountBannerSections
Sections displayed in the
account banner.
Permits rearranging (by
modifying the order of the
registry keys), deleting,
and adding sections.
See "Customizing the
Billing Care Account
Banner".
<keyvals>
<key>accountBannerSections</key>
<value>accountBannerContact,accountBannerAccountInfo
,accountBannerCollections,accountBannerBillUnits,acc
ountBannerVIPInfo</value>
<desc></desc>
</keyvals>
key: String.
value: Comma-
separated strings.
Chapter 7
Default Configuration File Entries
7-16

Table 7-4 (Cont.) Registry Entries in Configuration File
Configuration Key and
Description
Default Values Types
accountCreation.package
List
Name of the package list
containing the packages
displayed during account
creation. Default is CSR.
To enable Billing Care to
display a different package
list, replace the default
package list name with one
of the following package list
names:
•
default, which
displays packages
from the default-new
package list
• Any custom package
list name
If no package list name is
specified, packages from
the default-new package
list are displayed.
<keyvals>
<key>accountCreation.packageList</key>
<value>CSR</value>
<desc></desc>
</keyvals>
key String.
value: String.
Chapter 7
Default Configuration File Entries
7-17

Table 7-4 (Cont.) Registry Entries in Configuration File
Configuration Key and
Description
Default Values Types
accountCreation.tabs
Account creation
framework configuration
used to render train stops
and labels for the footer.
The key is also used as a
registry entry to fetch views
or view models for the
corresponding train stops.
<keyvals>
<key>accountCreation.tabs</key>
<value>
[{"key": "generalInfo", "value":{
"label":"PROFILE",
"msg":"COMPLETE_PROFILE_THEN",
"title":"PROFILE_SHORT_DESCRIPTION"
}
},
{"key": "accountCreationSelect", "value":{
"label":"SELECT",
"msg":"SELECT_THEN"
}
},
{"key": "accountCreationConfigure", "value":
{
"label" : "CONFIGURE",
"msg" : "COMPLETE_CONFIGURATION_THEN",
"title": "CONFIGURE_SHORT_DESCRIPTION"
}
},
{"key": "accountCreationPay", "value": {
"label" : "PAY",
"msg" :
"COMPLETE_PAYMENTINFORMATION_THEN",
"title": "PAY_SHORT_DESCRIPTION"
}
}]
</value>
<desc></desc>
</keyvals>
key: String.
value: String.
accountCreation.tagsMa
pping
Mapping for tagging a
package.
<keyvals>
<key>accountCreation.tagsMapping</key>
<value>[{"key": ".*GSM.*|.*[Mm]obile.*",
"value":"Mobile"},
{"key": ".*[Cc]able.*", "value":"Cable,TV"},
{"key": ".*[Ff]iber.*|.*[Ww]eb.*|.*GPRS.*",
"value": "Internet"},
{"key": ".*[Cc]orporate.*", "value":
"Corporate"},
{"key": ".*[Tt]ax.*", "value": "Tax"},
{"key": "*", "value": "Uncategorized"}]
</value>
<desc></desc>
</keyvals>
key: String.
value: Regular
expression.
The key is a regular
expression to match
the package name or
Uncategorized, and
the value is the tag
name. If a package
name matches the
regular expression, it
is tagged with the
corresponding tags.
Packages that do not
match mapping rules
are categorized
under the "*" pattern
value.
Chapter 7
Default Configuration File Entries
7-18

Table 7-4 (Cont.) Registry Entries in Configuration File
Configuration Key and
Description
Default Values Types
authorizationResourceTy
pes
Custom authorization
resource types.
The resource types should
be defined in OPSS.
<keyvals>
<key>authorizationResourceTypes</key>
<value></value>
<desc></desc>
</keyvals>
key String.
value: Comma-
separated string.
Note: The key should
not be changed here.
batchPaymentsDateForm
at
Format of batch payment
date.
The default supports the
following date formats:
23-December-30
23-December-2030
To abbreviate the month,
change MMMM to MMM,
which supports the
following date formats:
23-Dec-30
23-Dec-2030
To use four digits instead of
two for the date, change y
to yyyy.
<keyvals>
<key>batchPaymentsDateFormat</key>
<value>d-MMMM-y</value>
<desc></desc>
</keyvals>
key: String.
value: String.
batchPaymentsDirectory
Name
Batch payment parent
directory name.
<keyvals>
<key>batchPaymentsDirectoryName</key>
<value>BatchPaymentFiles</value>
<desc></desc>
</keyvals>
key: String.
value: String.
batchPaymentsTabs
List of tabs displayed in the
batch payments page.
<keyvals>
<key>batchPaymentsTabs</key>
<value>[{"id": "active", "label": "ACTIVE"},
{"id": "history", "label": "HISTORY"}]</value>
<desc></desc>
</keyvals>
id: String.
key: String.
Chapter 7
Default Configuration File Entries
7-19

Table 7-4 (Cont.) Registry Entries in Configuration File
Configuration Key and
Description
Default Values Types
batchPaymentTypes
Supported batch payment
types.
By default, the following
payment types are
supported:
• Cash
• Check
• Failed
• Interbank transfer
• Postal order
• Wire transfer
<keyvals>
<key>batchPaymentTypes</key>
<value>[{"type": "Cash Payment Batch","code":
"10011","templateName":"cash_payment_template.pit"},
{"type": "Check Payment Batch","code":
"10012","templateName":"check_payment_template.pit"}
,{"type": "Wire-Transfer Payment Batch","code":
"10013","templateName":"wire-
transfer_payment_template.pit"},{"type": "Inter
Bank Payment order Payment Batch","code":
"10014","templateName":"interbankpayorder_payment_te
mplate.pit"},{"type": "Postal order Payment
Batch","code":
"10015","templateName":"postalorder_payment_template
.pit"},{"type": "Failed Payment Batch","code":
"10017","templateName":"failed_payment_template.pit"
}]</value>
<desc></desc>
</keyvals>
key: String.
value: String
(includes payment
type, payment ID,
and the name of a
template file (.pit) for
batch processing).
brmserver.timezone
The time zone
configuration for displaying
the time in Billing Care.
Use one of these options
for the time zone:
•
Location: Enter the
timezone name (from
the tz database) in the
format area/location,
such as America/
New_York. Use this
format if your timezone
supports Daylight
Saving Time (DST).
•
UTC Offset: Enter the
UTC offset value, such
as +0430. Use this
format if the timezone
is fixed.
If the value is empty, the
WebLogic Server's
timezone is used.
<keyvals>
<key>brmserver.timezone</key>
<value>America/Los_Angeles</value>
<desc></desc>
</keyvals>
key: String.
value: String.
collections.icon
Displays the Collections
icon.
<keyvals>
<key>collections.icon</key>
<value>[{"key": "*", "value":"resources/images/
collections.png"}]</value>
<desc></desc>
</keyvals>
key: String.
value: Complex array
containing an icon.
Chapter 7
Default Configuration File Entries
7-20

Table 7-4 (Cont.) Registry Entries in Configuration File
Configuration Key and
Description
Default Values Types
cssFiles
All available CSS files.
"activeTheme" : true
represents the active
theme.
<keyvals>
<key>cssFiles</key>
<value>{"availablethemes": [{"name" :"css/
theme_.css" ,"activeTheme" : true}, {"name" :"css/
theme_default.css", "activeTheme" : false}]}</value>
<desc></desc>
</keyvals>
key: String.
value: Boolean.
financialSetup.tabs
Used to configure the page
navigator.
Order of each entry is the
order in which the tabs are
shown.
<keyvals>
<key>financialSetup.tabs</key>
<value>[{"key": "paymentMethods", "editable":
false, "subcontent":[{"key":"newPaymentMethod",
"editable": true}, {"key":"editPaymentMethod",
"editable": true}]} ,{"key":"billUnits","editable":
false,"subcontent":[{"key":"newBillUnit",
"editable": true},{"key": "editBillUnit",
"editable": true}]},{"key": "taxSetup", "editable":
true}]</value>
<desc></desc>
</keyvals>
key: String.
value: Boolean.
"editable": true
shows the Apply or
Cancel link with a
save message after
saving.
"editable": false
shows the Close
button.
organizationHierarchyTy
pes
Organization hierarchy
types include the name, ID,
and icon.
<keyvals>
<key>organizationHierarchyTypes</key>
<value>
[
{"key": "site", "value":
{"name":"SITE","value": 1,"icon":"resources/images/
site.png"}},
{"key": "legalEntity", "value":
{"name":"LEGAL_ENTITY","value": 2,"icon":"resources/
images/legal-entity.png"}},
{"key": "billingAccount", "value": {"name" :
"BILLING_ACCOUNT","value": 3,"icon" : "resources/
images/billing-account.png"}},
{"key": "serviceAccount", "value": {"name" :
"SERVICE_ACCOUNT","value": 4,"icon" : "resources/
images/service-accounts.png"}}
]
</value>
<desc></desc>
</keyvals>
key: String.
value: Complex array
containing type, ID,
and an icon.
Chapter 7
Default Configuration File Entries
7-21

Table 7-4 (Cont.) Registry Entries in Configuration File
Configuration Key and
Description
Default Values Types
paymentsuspense.exclud
edpaymenttypes
Comma-separated list of
payment types excluded
from the payment
suspense flow.
By default, credit card and
direct debit payment types
(that is, 10003, 10005) are
excluded because they are
BRM-initiated.
<keyvals>
<key>paymentsuspense.excludedpaymenttypes</key>
<value>10003,10005</value>
<desc></desc>
</keyvals>
key: String.
value: String.
paymentSuspense.reaso
nMapping
Mapping for two-tier
suspense reason filtering.
The key is a regular
expression to match the
detailed reason
description, and the value
is the higher-level reason.
If a reason description
matches the regular
expression, the reason is
grouped with
corresponding higher-level
reasons. Otherwise, it is
grouped under
Uncategorized.
If an icon property is
available in a resource
path, corresponding
grouped payments are
shown with it. Otherwise,
uncategorized icons are
shown by default.
Note: The "*" key should
be the last entry in the
value because it is the
broadest group.
<keyvals>
<key>paymentSuspense.reasonMapping</key>
</value>[
{"key": ".*[Tt]echnical.*",
"value":"Technical", "icon": "resources/images/
unable-to-process-icon.png"}
,
{"key": ".*[Bb]usiness.*",
"value":"Business", "icon": "resources/images/
business-rule-match-icon.png"}
,
{"key": ".*[Mm]ultiple.*", "value": "Unable
to Process", "icon": "resources/images/unable-to-
process-icon.png"}
,
{"key": "*", "value": "Unclassified",
"icon": "resources/images/unable-to-process-
icon.png"}
]</value>
<desc></desc>
</keyvals>
key:
Regular
expression.
value: String.
Chapter 7
Default Configuration File Entries
7-22

Table 7-4 (Cont.) Registry Entries in Configuration File
Configuration Key and
Description
Default Values Types
paymentTypes
Registry keys for rendering
payment type views in the
Bill Unit screen, Payment
Methods screen, and Make
Payment dialog box.
This is also used for
retrieving localized values
from XLF files.
Though paymentTypes
has an entry for invoice,
when this is used in the
Make Payment dialog box,
invoice payments are
ignored while the payment
method view is rendered.
Note: Do not change these
values unless you are
removing a payment type
not used in your
environment.
<mapping>
<key>paymentTypes</key>
<map>
<id>10003</id>
<key>creditCard</key>
</map>
<map>
<id>10005</id>
<key>directDebit</key>
</map>
<map>
<id>10001</id>
<key>invoice</key>
</map>
<map>
<id>10018</id>
<key>sepa</key>
</map>
<map>
<id>0</id>
<key>noPaymentMethod</key>
</map>
<desc></desc>
</mapping>
id: Number.
key: String (must
match appropriate
key in the Billing
Care resource
bundle).
purchase.bundleTagsMa
pping
Mapping for tagging the
bundle.
<keyvals>
<key>purchase.bundleTagsMapping</key>
<value>[{"key": ".*GSM.*|.*[Mm]obile.*",
"value":"Mobile"},
{"key": ".*[Cc]able.*", "value":"Cable,TV"},
{"key": ".*[Ff]iber.*|.*[Ww]eb.*|.*GPRS.*",
"value": "Internet"},
{"key": ".*[Cc]orporate.*", "value":
"Corporate"},
{"key": ".*[Tt]ax.*", "value": "Tax"},
{"key": ".*[Dd]iscount*.", "value":
"Discounts"},
{"key": ".*[Ii]nternet*.", "value":
"Internet"},
{"key": "*", "value": "Uncategorized"}]
</value>
<desc></desc>
</keyvals>
key: Regular
expression.
value: String.
The key is a regular
expression to match
the bundle name or
Uncategorized, and
the value is the tag
name.
If a bundle name
matches the regular
expression, the
bundle is tagged with
the corresponding
tags.
Bundles that do not
match mapping rules
are categorized
under the "*" pattern
value.
Chapter 7
Default Configuration File Entries
7-23

Table 7-4 (Cont.) Registry Entries in Configuration File
Configuration Key and
Description
Default Values Types
purchase.packageList
Name of the package list
containing the packages
displayed during purchase
of an add-on package.
Default is default.
To enable Billing Care to
display a different package
list, replace the default
package list name with one
of the following package list
names:
•
CSR, which displays
packages from the
default-new package
list
• Any custom package
list name
If no package list name is
specified, packages from
the default-new package
list are displayed.
<keyvals>
<key>purchase.packageList</key>
<value>default</value>
<desc></desc>
</keyvals>
key: String.
value: String.
Default value is
default.
Other possible value
is CSR.
If the package list
name is not
specified, packages
from the default-new
list are displayed.
purchase.tabs
Product catalog framework
configuration used to
render the train stops and
labels for the footer.
The keys are also used as
registry entries to fetch
views or view models for
the corresponding train
stops.
<keyvals>
<key>purchase.tabs</key>
<value>
[
{"key": "purchaseSelection", "value":{
"label":"SELECT",
"msg":"SELECT_PURCHASE",
"title":"SELECT_SHORT_DESCRIPTION"
}
}
,
{"key": "purchaseConfiguration", "value":
{
"label" : "CONFIGURE",
"msg" : "COMPLETE_CONFIGURATION_THEN",
"title": "CONFIGURE_SHORT_DESCRIPTION",
"disabled": true
}
}
]
</value>
<desc></desc>
</keyvals>
key: String.
value: Complex
string containing a
label, message, and
title.
Chapter 7
Default Configuration File Entries
7-24

Table 7-4 (Cont.) Registry Entries in Configuration File
Configuration Key and
Description
Default Values Types
search.options
<keyvals>
<key>search.options</key>
<value>[{"searchTemplateKey": "accountSearch",
"searchTemplateName":"SEARCH_OPTION_ACCOUNTS",
"defaultSearch": true}]</value>
<desc></desc>
</keyvals>
key: String.
value: String.
searchTemplateKey
acts as the value of
the search drop-
down option.
The value of
searchTemplateKey
(that is,
accountSearch) acts
as the search
template name
The
searchTemplateNam
e value corresponds
to the text of the
search drop-down
option.
The value of
searchTemplateNam
e (that is,
SEARCH_OPTION_
ACCOUNTS)
corresponds to a key
in the resource
bundle.
Table 7-5 lists the configurable keyval categories and their default values.
Chapter 7
Default Configuration File Entries
7-25
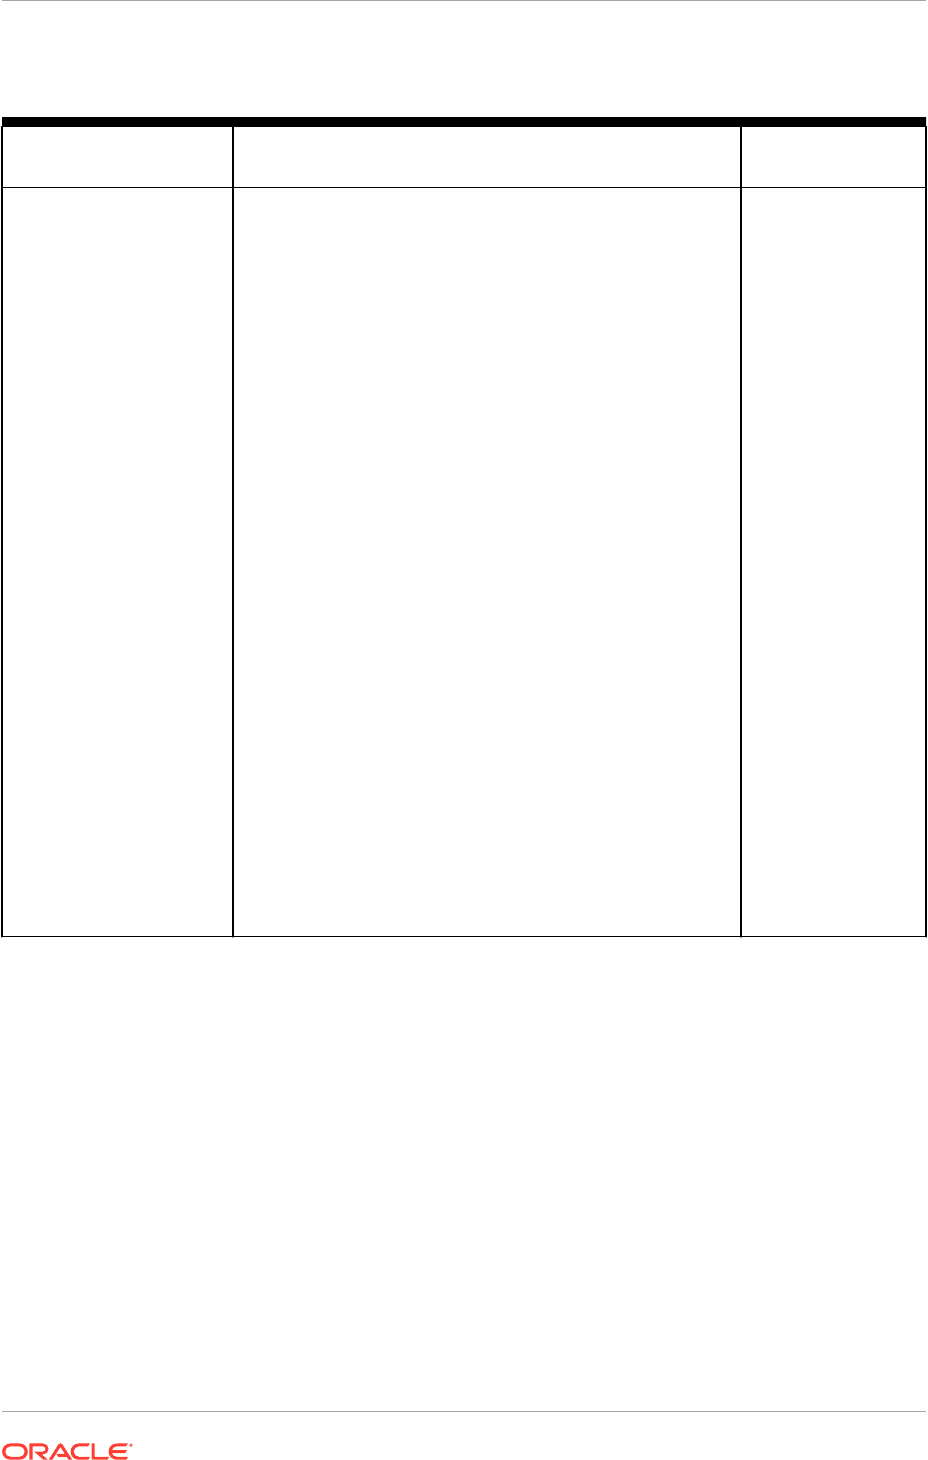
Table 7-5 Keyvals in Configuration File
Configuration Key and
Description
Default Value Type
newsfeed.categories
<keyvals>
<key>newsfeed.categories</key>
<value>[{"key":"ALL","newsfeedTypes":
"ADJUSTMENT:true, NCR_ADJUSTMENT:true,
OPEN_DISPUTE:true, CLOSED_DISPUTE:true,
WRITEOFF:true, REFUND:true, COLLECTIONS:true,
PAYMENT:true, PAYMENT_REVERSAL:true,
PAYMENT_METHOD_ASSIGNMENT_CHANGE:true,
PAYINFO:true, NAMEINFO:true, ACCT_STATUS:true,
BILLINFO:true, BILLINFO_CREATED:true,
BILLINFO_DELETED:true, DEFERRED:true,
SRVC_STATUS:true, SRV_TO_DEV:true, PURCHASE:true,
CANCEL:true, CORRECTIVE_BILL:true,
RECURRING_CHARGE:true, BILL_ISSUED:true,
BILL_ISSUED_MID_CYCLE:true, ONE_TIME_CHARGE:true",
"selected": true},{"key": "AR", "newsfeedTypes":
"ADJUSTMENT:true, NCR_ADJUSTMENT:true,
OPEN_DISPUTE:true, CLOSED_DISPUTE:true,
WRITEOFF:true, REFUND:true, COLLECTIONS:true"},
{"key":"PAYMENTS","newsfeedTypes": "PAYMENT:true,
PAYMENT_REVERSAL:true,
PAYMENT_METHOD_ASSIGNMENT_CHANGE:true,
PAYINFO:true"},{"key":"CHARGES","newsfeedTypes":
"PURCHASE:true, CANCEL:true, CORRECTIVE_BILL:true,
RECURRING_CHARGE:true, BILL_ISSUED:true,
BILL_ISSUED_MID_CYCLE:true, ONE_TIME_CHARGE:true"},
{"key":"ACCOUNT","newsfeedTypes": "NAMEINFO:true,
ACCT_STATUS:true, DEFERRED:true, SRVC_STATUS:true,
SRV_TO_DEV:true, BILLINFO:true,
BILLINFO_CREATED:true, BILLINFO_DELETED:true"}]</
value>
<desc></desc>
</keyvals>
key: String.
value: String (must
match appropriate
key in the Billing
Care resource
bundle).
See "Customizing
Billing Care
Templates".
Chapter 7
Default Configuration File Entries
7-26

8
Using an Exploded Archive during
Customization
Learn how to use an exploded archive when customizing Oracle Communications Billing
Care.
Topics in this document:
• About Using an Exploded Archive
• Configuring WebLogic Server to Use an Exploded Archive
About Using an Exploded Archive
You deploy Billing Care customizations as a customizations shared library to the same Oracle
WebLogic Server domain where Billing Care is running. During customization, Oracle
recommends using an exploded archive containing your shared library. An exploded archive
represents your customizations in a local file system instead of a packaged archive (.war).
Using an exploded archive of your customizations enables you to update your customizations
and automatically deploy them to the Billing Care domain without having to package your
customizations shared library after each change. Your Billing Care customizations can be
viewed by logging out and back in to Billing Care in the web browser.
Use exploded archives during development and testing of your customizations. For
production instances of Billing Care, package your customizations as a .war file and deploy
this file using WebLogic Server administration tools to your Billing Care domain. See
"Packaging and Deploying Customizations" for more information on packaging and deploying
production customizations.
See Creating Shared Java EE Libraries and Optional Packages in Oracle Fusion Middleware
Developing Applications for Oracle WebLogic Server .
Configuring WebLogic Server to Use an Exploded Archive
To use an exploded archive with WebLogic Server, configure your Billing Care domain with
the location of your previously created NetBeans IDE project. The project location acts as the
exploded archive of the customizations shared library and is used by Billing Care to display
your customizations.
Configure WebLogic Server to use your exploded archive shared library by completing the
following procedures:
• Creating a Manifest for your Shared Library
• Creating a New Deployment Plan for Billing Care with your Shared Library
• Deploying your Shared Library on your Billing Care Domain
• Redeploying Billing Care to Use your Shared Library
8-1

Creating a Manifest for your Shared Library
WebLogic Server requires a manifest file (MANIFEST.mf) for your exploded archive.
The manifest includes information about the customizations shared library contained in
the exploded archive including the entries listed in Table 8-1.
See the following link for additional information on manifest files:
https://docs.oracle.com/javase/8/docs/technotes/guides/jar/
jar.html#JAR_Manifest
Table 8-1 MANIFEST.mf Entries for Billing Care Customization
Entry Description
Manifest-Version Numerical version of the manifest file
Built-By Name of library builder
Specification-Title String that defines the title of the extension specification
Specification-Version String that defines the version of the extension specification
Implementation-Title String that defines the title of the extension implementation
Implementation-Version String that defines the version of the extension implementation
Implementation-Vendor String that defines the vendor of the extension implementation
Extension-Name String that defines a unique of the extension
To create a MANIFEST.mf file for your exploded archive:
1. Start NetBeans IDE.
2. Select the Files tab.
3. Expand the project directory to view the myproject/web/META-INF/ directory
where myproject is the previously created project directory.
4. Right-click the META-INF folder and select New.
5. Select Other.
6. Under Categories, select Other.
7. Under File Types, select Empty File.
8. Click Next.
9. In the File Name field, enter MANIFEST.MF.
10. Click Finish.
The MANIFEST.MF file is shown in the NetBeans IDE text editor.
11. Create your manifest file with the entries shown in Table 8-1. A sample manifest
file is shown in Example 8-1.
Chapter 8
Configuring WebLogic Server to Use an Exploded Archive
8-2

Note:
Oracle recommends you use Specification-Title and Extension-Name values
clearly identifying your shared library as a development version.
12. Click File, then Save.
Example 8-1 Sample MANIFEST.MF File for Billing Care Customizations
Manifest-Version: 1.0
Built-By: Oracle
Specification-Title: BillingCareSDKDevelopment
Specification-Version: 1.0
Implementation-Title: Custom SDK WAR file for Billing Care
Implementation-Version: 1.0
Implementation-Vendor: Oracle
Extension-Name: BillingCareSDKDevelopment
Rebuilding your Project after Creating the Manifest File
Rebuild your Billing Care customization project in NetBeans IDE after creating and saving
your manifest file.
To rebuild your project in NetBeans IDE:
1. Click the Projects tab.
2. Right-click your project.
3. Select Clean and Build.
Creating a New Deployment Plan for Billing Care with your Shared Library
Create a new Billing Care deployment plan that includes your customizations shared library.
The deployment plan includes an entry for your customizations shared library referencing the
exploded archive NetBeans IDE project. When the Billing Care application starts, the
exploded archive contents are also loaded providing access to your customizations.
See "Deployment Plans" in Oracle Fusion Middleware Developing Applications for Oracle
WebLogic Server for more information on deployment plans.
To create a new deployment plan:
1. Start NetBeans IDE.
2. Select the Files tab.
3. Right-click the myproject folder and select New.
4. Select Other.
5. Under Categories, select Other.
6. Under File Types, select Empty File.
7. Click Next.
8. In the File Name field, enter a name for your deployment plan with an .xml extension.
For example:
billingCareSDKDeploymentPlan.xml
Chapter 8
Configuring WebLogic Server to Use an Exploded Archive
8-3

9. Click Finish.
The deployment plan is shown in the NetBeans IDE text editor.
10. Create your deployment plan using the sample shown in Example 8-2.
Note:
Use the same string in the Custom-LibraryName element in your
deployment plan as the Extension-Name parameter in the
MANIFEST.MF file you previously created. For example, the string in the
sample files provided is:
BillingCareSDKDevelopment
11. Click File, then Save.
Example 8-2 Sample Billing Care Customizations Deployment Plan
<?xml version="1.0" encoding="UTF-8"?>
<deployment-plan xmlns="http://xmlns.oracle.com/weblogic/deployment-plan"
xmlns:xsi="http://www.w3.org/2001/XMLSchema-instance" xsi:schemaLocation="http://
xmlns.oracle.com/weblogic/deployment-plan http://xmlns.oracle.com/weblogic/
deployment-plan/1.0/deployment-plan.xsd" global-variables="false">
<application-name>BillingCare.war</application-name>
<variable-definition>
<variable>
<name>Custom-ImplementationVersion</name>
<value xsi:nil="false">1.0</value>
</variable>
<variable>
<name>Custom-SpecificationVersion</name>
<value xsi:nil="false">1.0</value>
</variable>
<variable>
<name>Custom-LibraryName</name>
<value xsi:nil="false">BillingCareSDKDevelopment</value>
</variable>
<variable>
<name>Custom-ExactMatch</name>
<value xsi:nil="false">true</value>
</variable>
<variable>
<name>Custom-ContextPath</name>
<value />
</variable>
</variable-definition>
<module-override>
<module-name>BillingCare.war</module-name>
<module-type>war</module-type>
<module-descriptor external="true">
<root-element>weblogic-web-app</root-element>
<uri>WEB-INF/weblogic.xml</uri>
<variable-assignment>
<name>Custom-LibraryName</name>
<xpath>/weblogic-web-app/library-ref/library-name</xpath>
</variable-assignment>
</module-descriptor>
</module-override>
</deployment-plan>
Chapter 8
Configuring WebLogic Server to Use an Exploded Archive
8-4

Deploying your Shared Library on your Billing Care Domain
After creating your manifest file and new deployment plan for Billing Care, deploy the
exploded archive shared library to your Billing Care domain.
To deploy your shared library to your Billing Care domain:
1. In your browser, navigate to the Administration Console of your Billing Care domain.
2. Log in using administrative credentials for the Billing Care domain.
3. In Domain Structure, click Deployments.
4. Select the BillingCare deployment and click Stop, then Force Stop Now to stop Billing
Care.
5. In the Control tab, click Install in the Deployments table.
6. In the Path: field, enter (or browse to) the location of the web directory of your NetBeans
IDE project containing your Billing Care project. For example, myproject/web, where
myproject is the Billing Care project directory.
Confirm that the option for web is selected.
7. Click Next.
8. In the Choose targeting style screen, select Install this deployment as a library.
9. Click Next.
10. In the Optional Settings screen, enter the Name using the same string used in the
Custom-LibraryName element in your deployment plan and the Extension-Name
parameter in the MANIFEST.MF file you previously created. For example, the string in
the sample files provided is:
BillingCareSDKDevelopment
11. Click Next.
12. In the Review your choices and click Finish screen, click Finish.
Confirm in the Deployments screen that your customizations shared library is deployed
to your Billing Care domain as in an Active state.
Redeploying Billing Care to Use your Shared Library
After deploying the exploded archive as a customizations shared library, redeploy Billing Care
using the new deployment plan created in "Creating a New Deployment Plan for Billing Care
with your Shared Library". Redeploying Billing Care using the new deployment plan
configures Billing Care to use the exploded archive customizations shared library in your
NetBeans IDE project and restarts Billing Care.
After successful deployment, customize Billing Care by editing the configuration files in the
NetBeans IDE project.
To redeploy Billing Care:
1. In your browser, navigate to the Administration Console of your Billing Care domain.
2. Log in using administrative credentials for the Billing Care domain.
3. In Domain Structure, click Deployments.
Chapter 8
Configuring WebLogic Server to Use an Exploded Archive
8-5

4. In the Control tab, select BillingCare in the Deployments table.
5. Click Update.
6. In the Update Application Assistant screen, select Redeploy this application
using the following deployment files:.
7. For the Deployment plan path:, click Change Path.
8. Enter (or browse to) the location where your new deployment plan (for example,
the myproject folder) is and select the new deployment plan, then click Next.
9. In the Review your choices screen, click Finish.
Confirm in the Deployments screen that Billing Care redeploys successfully and
is in an Active state.
Chapter 8
Configuring WebLogic Server to Use an Exploded Archive
8-6

9
Packaging and Deploying Customizations
Learn how to deploy Oracle Communications Billing Care customizations to production Billing
Care domains.
Topics in this document:
• About Packaging and Deploying Customizations for Production
• Creating Production Versions of the Manifest File and Deployment Plan
• Using the Java JAR Utility to Package Your Shared Library
• Deploying the Shared Library .war
• Redeploying Billing Care to Use your Shared Library
About Packaging and Deploying Customizations for Production
After testing and verifying your Billing Care customizations, create a packaged archive (.war)
file of your exploded archive shared library to deploy in your production Billing Care domain.
Using a .war containing your customizations enables you to quickly deploy your
customizations to multiple Billing Care instances.
Deploying customizations to production environments requires that you complete the
following procedures:
• Creating Production Versions of the Manifest File and Deployment Plan
• Using the Java JAR Utility to Package Your Shared Library
• Deploying the Shared Library .war
• Redeploying Billing Care to Use Your Shared Library
Creating Production Versions of the Manifest File and
Deployment Plan
Before running the jar command, create production versions of the manifest file and
deployment plan.
To create production manifest and deployment plan files:
1. In a terminal session, change directory to the myproject/web/META-INF directory, where
myproject is the NetBeans IDE project directory containing your Billing Care
customizations.
2. Create a copy of the MANIFEST.MF file in the myproject/build/web directory in the
myproject/web/META-INF directory named manfiest.txt.
3. Open the manifest.txt file in an editor.
4. Edit the values of the Custom-LibraryName and the Extension-Name parameters to a
string for your production shared library. For example:
9-1

BillingCareCustomizations
See "Creating a Manifest for your Shared Library" for more information on creating
a manifest file for your shared library.
5. Save and close the manifest.txt file.
6. Copy the edited manifest.txt file to the myproject/build/web directory.
7. Create a copy of the deployment plan you created for your exploded archive
shared library deployment in "Creating a New Deployment Plan for Billing Care
with your Shared Library" named prodplan.xml. Use this deployment plan for your
production Billing Care deployments.
8. Edit the Custom-LibraryName element in prodplan.xml using the same string
you provided in step 4.
Note:
Use the same string in the Custom-LibraryName element in your
deployment plan as the Extension-Name parameter in the
MANIFEST.MF file you previously created. For example, the string in this
procedure is:
BillingCareCustomizations
9. Save and close the prodplan.xml file.
Using the Java JAR Utility to Package Your Shared Library
The JAR command packages all of the required contents of your exploded archive
shared library into a .war file that can be deployed in the Oracle WebLogic Server
Administration Console.
For more information on the Java JAR utility see:
https://docs.oracle.com/javase/7/docs/technotes/tools/windows/jar.html
To create your BillingCareCustomizations.war using the jar utility:
1. In a terminal session, change directory to the myproject/build/web directory,
where myproject is the NetBeans IDE project directory containing your Billing Care
customizations.
2. Verify that the manifest.txt file is in the directory.
3. Run the following JAR command to package the manifest.txt file and the
subfolders contained in your myproject/web directory into a .war file:
jar cfm BillingCareCustomizations.war manifest.txt css custom js lib
resources WEB-INF
4. Verify that the BillingCareCustomizations.war is created.
Deploying the Shared Library .war
After creating your BillingCareCustomization.war and production deployment plan,
deploy the .war in your Billing Care domain.
Chapter 9
Using the Java JAR Utility to Package Your Shared Library
9-2

To deploy your shared library in your Billing Care domain:
1. In your browser, navigate to the Administration Console of your Billing Care domain.
2. Log in using administrative credentials for the Billing Care domain.
3. In Domain Structure, click Deployments.
4. Select the BillingCare deployment and click Stop, then Force Stop Now to stop Billing
Care.
5. In the Control tab, click Install in the Deployments table.
6. In the Path: field, enter (or browse to) the location of the BillingCareCustomization.war.
Confirm that the option for BillingCareCustomization.war is selected.
7. Click Next.
8. In the Choose targeting style screen, select Install this deployment as a library.
9. Click Next.
10. In the Optional Settings screen, enter the Name using the same string used in the
Custom-LibraryName element in your deployment plan and the Extension-Name
parameter in the MANIFEST.MF file you previously created. For example, the string used
in this chapter is:
BillingCareCustomizations
11. Click Next.
12. In the Review your choices and click Finish screen, click Finish.
Confirm in the Deployments screen that your shared library is deployed in your Billing
Care domain and is in an Active state.
Redeploying Billing Care to Use Your Shared Library
After deploying the BillingCareCustomizations.war, redeploy Billing Care using the
production deployment plan. Redeploying Billing Care using the production plan restarts and
configures Billing Care to use the .war shared library you previously deployed.
To redeploy Billing Care:
1. In your browser, navigate to the Administration Console of your Billing Care domain.
2. Log in using administrative credentials for the Billing Care domain.
3. In Domain Structure, click Deployments.
4. In the Control tab, select BillingCare in the Deployments table.
5. Click Update.
6. In the Update Application Assistant screen, select Redeploy this application using
the following deployment files:.
7. For the Deployment plan path:, click Change Path.
8. Enter (or browse to) the location where your production prodplan.xml deployment plan is
and select the production deployment plan.
9. Click Next.
10. In the Review your choices screen, click Finish.
Chapter 9
Redeploying Billing Care to Use Your Shared Library
9-3

Confirm in the Deployments screen that Billing Care redeploys successfully and
is in an Active state.
Chapter 9
Redeploying Billing Care to Use Your Shared Library
9-4

Part III
Customizing Billing Care Screens and Fields
This part includes instructions for customizing the screens and fields in Oracle
Communications Billing Care GUI. It contains the following chapters:
• Customizing the Billing Care Account Home Page
• Customizing the Billing Care Account Banner
• Customizing the Balances Area
• Adding Custom Payment Types
• Customizing the Make a Payment Screen
• Displaying Success Toast Messages in Billing Care
• Customizing Purchase Deal and Assets Action Menu
• Customizing Billing Care to Display Child Accounts
• Customizing Billing Care Invoice Presentation
• Customizing Reason Codes List in Event Adjustments
• Restricting Debit and Credit Event Adjustment Options
• Customizing Billing Care to Display Only Event Adjustments
• Customizing Account Creation Service Fields
• Creating Custom Billing Care Credit Profiles
• Customizing the Billing Care Actions Menu
• Opening Custom Views From Landing Page
• Customizing Billing Care Labels
• Customizing Billing Care to Disable Links in the Bills Tab
• Separating Event Adjustment Amount and Percentage Fields
• Embedding Billing Care Screens in External Applications

10
Customizing the Billing Care Account Home
Page
You can use the Oracle Communications Billing Care SDK to customize the Billing Care
account home page.
Topics in this document:
• Customizing the Billing Care Account Home Page
• About Customizing the Billing Care Home Tab
• About Customizing the Bills Graph
Customizing the Billing Care Account Home Page
You can customize the Billing Care account home page in the following ways:
• Add links to the Billing Care Home tab for switching between a summary and detailed
view of a customer's account balance. See "About Customizing the Billing Care Home
Tab".
• Customize the data displayed in the Bills graph. See "About Customizing the Bills
Graph".
About Customizing the Billing Care Home Tab
The Billing Care Home tab provides a high-level overview of an account's assets, account
history, current balances, and News Feed of account and status change activity. The Bill Unit
section of the Home tab displays detailed information about the amount due for a bill, such as
the amount past due, the unallocated payments, the unallocated accounts receivable, the
amount owed for this billing cycle, and the total due.
You can customize the Billing Care Home tab to display:
• Summary account balance information in its Bill Unit section
• Detailed account balance information in its Bill Unit section
• Links for switching between the summary and detailed views on the Home tab
For example, Figure 10-1 shows a Home tab with links for switching between summary and
detailed views of a bill unit.
10-1

Figure 10-1 Home Tab with Sample Summary and Detailed Links
Adding the ability to switch between the summary view and the detailed view requires
you to create the resources used by the Bill Unit section. For example, you need to
create multiple views, a view model, and a custom CSS file for displaying a bill unit's
account balance information correctly. See "Customizing Billing Care" for more
information about customizing Billing Care resources
The Billing Care SDK includes sample Home tab customizations, including a
README.txt file explaining the samples, in the SDK_home/samples/
HomeTabCustomization directory, where SDK_home is the directory in which you
installed the Billing Care SDK. Use these samples when developing your own
customizations.
Customizing the Billing Care Home Tab
To customize the Billing Care Home tab to display summary and detailed bill unit
information:
1. Create a view that contains links to the summary and detailed views. See
"Creating a Summary and Detailed Link View".
2. Create a view for displaying summary information for all bill units in an account.
See "Creating an All Bill Units Summary View".
3. Create a view for displaying summary information for a single bill unit. See
"Creating a Bill Unit Summary View".
4. Create a custom view model for the Billing Care Home tab. See "Creating a
HomeTabBillUnitsViewModel".
5. Override the registry values for the Billing Care Home tab. See "Configuring the
Custom Home Tab in the Registry".
6. Modify the appearance of the Billing Care Home tab. See "Overriding the Billing
Care Home Tab Theme".
Chapter 10
About Customizing the Billing Care Home Tab
10-2

Creating a Summary and Detailed Link View
Create a view that displays the links to your summary bill unit view and detailed bill unit view.
These links should appear at the top of the Billing Care Home tab. See "About Views" for
more information about views.
To create a view that displays the Summary and Detailed links:
1. Create a switchLinkView.html file in the myproject/projectname/web/custom/
templates/ directory.
2. Add criteria to the view for displaying a Summary link and a Detailed link. For example:
<div id="switchViewHeader" class="bu-switch-view-section">
<div id="switchLinks" style="display:flex; justify-content:space-
around">
<a href="javascript:void(0);" id="summary_link" class="sidebar-news-
feed-link" data-bind="click: $root.viewSwitched">Summary</a>
<a href="javascript:void(0);" id="detailed_link" class="sidebar-
news-feed-link" data-bind="click: $root.viewSwitched">Detailed</a>
</div>
</div>
3. Save the file in your NetBeans IDE project.
Creating an All Bill Units Summary View
Billing Care uses an HTML view file to render the Bill Unit section of the Home tab. When an
account contains multiple bill units, the Bill Unit section displays a panel that details the
amount due for all bill units. You can create a custom view that displays summary information
for all bill units, such as the total account balance for all bill units.
A sample allBillUnitSummaryView.html file is provided in the SDK_home/samples/
HomeTabCustomization/web/custom/templates directory. Use this sample to create a view
for displaying summary information for all bill units in an account.
To create a view for displaying summary balance information for all bill units in an account:
1. Create an allBillUnitSummaryView.html file in the myproject/web/custom/js/
viewmodels/templates/area/ directory, where area is the customization type.
2. Define the fields to display in the summary view for all bill units in an account.
For example, this shows how to add a Total Account Balance field that displays the total
account balance for all bill units.
Note:
In this example, the Total Account Balance field is the custom field. The other
code is mandatory for the Billing Care SDK to work and should not be changed.
<div class="css_table streatch_width marginTop10px">
<div class="css_table marginBottom10px">
<div class="css_row">
Chapter 10
About Customizing the Billing Care Home Tab
10-3

<h3 class="css_cell text_left_align tab_heading
marginBottom6px"
role="heading" id="homeTab_AllBillUnitsWithCnt"
data-bind = "text : '<%= homeTab.ALL_BILL_UNITS %> (' +
numBillingUnits() + ')' " >
</h3>
</div>
</div>
<!-- Custom field : START -->
<div class="tab-area-table-section-3-left tab-area-table-
section-3-left-no-margin marginTop10px marginBottom10px">
<div class="tab-area-table-left fontBold">Total Account
Balance
</div>
<div class="tab-area-table-right-note">
</div>
<div class="tab-area-table-right redColor numberFormat"
id="totalAccountBalance" data-bind="text :
totalAccountBalance">
</div>
</div>
<!-- Custom field : END -->
<div id="bu_footer_all" class="css_row streatch_width tab-area-
section-more tab-area-section-more-2" data-bind="visible :
showAllBUFooter ">
<a role="button" id="makePymt" title="<%=
homeTab.MAKE_PAYMENT_TITLE %>"
tabindex="0" class="cmd-button"
data-bind="click : openMakePaymentsDlg ,event: {keypress :
openMakePaymentsDlgOnKeypress},authorize_command:{make:'hide',
resource:PAYMENT_RESOURCE, action:MAKE_ACTION}">
<%= homeTab.MAKE_PAYMENT %>
</a>
</div>
</div>
3. Save the file in your NetBeans IDE project.
Creating a Bill Unit Summary View
Billing Care uses an HTML view file to render the Bill Unit section of the Home tab.
When an account contains a single bill unit, the Bill Unit section displays a detailed
view of the amount due for the bill unit. You can create a custom view for the Bill Unit
section that displays summary information for a bill unit, as shown in Figure 10-2.
Chapter 10
About Customizing the Billing Care Home Tab
10-4

Figure 10-2 Bill Unit Summary Information
A sample BillUnitSummaryView.html file is provided in the SDK_home/samples/
HomeTabCustomization/web/custom/templates directory. Use this sample to create a view
for displaying summary information for a bill unit.
To create a view for displaying summary balance information for a bill unit:
1. Create a BillUnitSummaryView.html file in the myproject/web/custom/js/viewmodels/
templates/area/ directory, where area is the customization type.
2. Add criteria to the view for displaying summary account balance information, such as the
amount due and total due.
3. Save the file in your NetBeans IDE project.
Overriding the Billing Care Home Tab Theme
You must override the appearance of the Billing Care Home tab to make room for the new
Detailed and Summary links you created in "Creating a Summary and Detailed Link View".
See "Customizing Billing Care Themes and Logo" for more information about CSS files.
A sample override CSS file named override.css is provided in the SDK_home/samples/
Themes/css directory, where SDK_home is the directory in which you installed the SDK. Use
this sample to create a custom CSS file.
To override the theme used by the Billing Care Home tab:
1. Create an override.css file in the myproject/web/css directory, where myproject is the
NetBeans IDE project directory containing your Billing Care customizations.
2. Add entries to the CSS file for overriding styles in the Billing Care Home tab.
.bu-switch-view-section {
border-bottom: 1px solid #CCC4C4;
padding: 10px 0 10px 0;
width: 100%;
}
3. In the customRegistry.js file, add an entry under cssFiles for your override CSS file in
the others parameter. For example:
var CustomRegistry= {
cssFiles: {
themeCss: 'css/theme_default.css',
Chapter 10
About Customizing the Billing Care Home Tab
10-5

others: ['css/override.css']
};
Configuring the Custom Home Tab in the Registry
After creating the required views and custom view model, create a custom module
entry in the customRegistry.js file to use when opening the Billing Care Home tab.
Billing Care uses the custom views and view model instead of the default entries when
rendering the Home tab.
A sample customRegistry.js file is provided in the SDK_home/samples/
HomeTabCustomization/web/custom directory, where SDK_home is the Billing Care
SDK installation directory. Use this sample to create the customRegistry.js file with
your custom views.
To add an entry in the customRegistry.js file:
1. Create a customRegistry.js file in myproject/web/custom by copying the
reference registry file.
2. Define the custom views and view models in the file. For example:
var CustomRegistry = {
homeTabBillUnits: {
viewmodel: 'custom/viewmodels/
CustomHomeTabBillUnitsViewModel.js'
},
summaryViews: {
switchView: 'text!../custom/templates/switchLinkView.html',
allBUSummaryView: 'text!../custom/templates/
allBillUnitSummaryView.html',
individualBUSummaryView: 'text!../custom/templates/
billUnitSummaryView.html',
},
};
3. Save the file in your NetBeans IDE project.
Creating a HomeTabBillUnitsViewModel
Billing Care uses the HomeTabBillUnitsViewModel.js file to define what fields to
display in the Billing Care Home tab. The fields defined in the view model are bound in
the HTML file used to render the custom view or page. See "About View Models" for
more information about Billing Care view models.
A sample CustomHomeTabBillUnitsViewModel.js file is provided in the SDK_home/
samples/HomeTabCustomization/web/custom/viewmodels directory. Use this
sample create a custom view model.
To create a custom view model for the Billing Care Home tab:
1. Create a CustomHomeTabBillUnitsViewModel.js file in the myproject/web/
custom/js/viewmodels/customHomeTab directory, where myproject is the folder
containing your NetBeans IDE project.
2. Define the custom fields in this file, as required.
Chapter 10
About Customizing the Billing Care Home Tab
10-6

3. Save the file in your NetBeans IDE project.
About Customizing the Bills Graph
The Bills graph provides a visual overview of account activity, including billing and customer
interactions. The horizontal axis shows information about the last 12 bills and the bill in
progress. The vertical axis shows account information regarding customer communication
and A/R.
You can customize the information displayed in the Bills graph based on your requirements.
Customizing Bills Graph
To customize the Bills graph:
1. Create a custom view model to define the override for the default Home tab. See
"Creating Custom Home Tab View Model".
2. Create a custom view model to define the override for the Bills graph based on your
requirements. For example, create a file named CenterViewModel.js in the
myproject/web/custom/viewmodels directory, where myproject is the folder containing
your NetBeans IDE project. See "About View Models" for more information on creating
view models.
3. Create a custom view model HTML template for overriding the Bills graph. See "Creating
Custom View Model HTML Template for Customizing Bills Graph".
4. Create a customRegistry.js file configuring Billing Care to use your custom view
models. See "Configuring Custom View Models for Customizing Bills Graph in the
Registry".
5. Package and deploy your customization to your Billing Care domain using one of the
methods described in "Using an Exploded Archive during Customization" or "Packaging
and Deploying Customizations".
Creating Custom Home Tab View Model
Billing Care uses HomeTabBillUnitsViewModel to determine how to the display the Home
tab. To change the Home tab, create a custom view model, such as
CustomHomeTabBillUnitsViewModel, that contains overrides for the default display.
To create a custom Home tab view model:
1. Create the CustomHomeTabBillUnitsViewModel.js file in the myproject/web/custom/
viewmodels/homeTab directory.
2. Open the CustomHomeTabBillUnitsViewModel.js file using a text editor and add the
following code:
define([
'jquery',
'underscore',
'knockout',
'knockout-mapping',
Registry.base.viewmodel,
'viewmodels/hometab/HomeTabBillUnitsViewModel'
],
function ($, _, ko, komapping, BaseViewModel, HomeTabBillUnitsViewModel)
{
Chapter 10
About Customizing the Bills Graph
10-7

function CustomHomeTabBillUnitsViewModel() {
HomeTabBillUnitsViewModel.apply(this, arguments);
var self = this;
/* This function overrides OOTB renderGraph function to replace the
Bills graph and balances
* section from the desired custom view.
*/
self.renderGraph = function () {
/* This is the function which renders the custom View model (
referred to CenterSectionViewModel in the CustomRegistry)
* replacing the bills graph section.
*/
self.renderCenterSection();
/* This is the function which renders the custom View ( referred
to customView in the CustomRegistry balances entry)
* replacing the OOTB balances section.
*/
self.renderBalances();
};
self.renderCenterSection = function(){
// The centerSection is the CustomRegistry entry which refers to
the
Custom section replacing OOTB Bills Graph Section.
require([CustomRegistry.centerSection.viewmodel,
CustomRegistry.centerSection.view],
function (CurrentViewModel, page) {
var template = _.template(page);
// HTML id where the Bills and Graph is attach to DOM is
"chartContent"
// The custom view needs to be attached to same place for
replacing OOTb Bills Graph section
var mainDiv = document.getElementById("chartContent");
$(mainDiv).empty();
var viewElem = $(mainDiv).get(0);
ko.cleanNode(viewElem);
$(mainDiv).append(template);
var currentVM = new CurrentViewModel();
// This initialize method will contain basic steps to
render
the CustomViewModel
currentVM.initialize();
ko.applyBindings(currentVM, viewElem);
});
};
}
CustomHomeTabBillUnitsViewModel.prototype = new
HomeTabBillUnitsViewModel();
return CustomHomeTabBillUnitsViewModel;
}
);
3. Save the file in your NetBeans IDE project.
Chapter 10
About Customizing the Bills Graph
10-8

Creating Custom View Model HTML Template for Customizing Bills Graph
Billing Care uses an HTML view file to customize the Bills graph in the Home tab. The
template file contains the override for the Bills graph as defined in the custom view model.
To create a custom view model HTML template for customizing the Bills graph:
1. Create the centerView.html file in the myproject/web/custom/templates directory.
2. Define the override for the center section of the Home tab by using the centerView.html
file.
3. Save the file in your NetBeans IDE project.
Configuring Custom View Models for Customizing Bills Graph in the
Registry
Create custom entries in your customRegistry.js file. Billing Care uses the custom view
models instead of the default entries and renders the custom Bills graph in the Home tab.
To configure the custom view model entries to customize the Bills Graph section in the
registry:
1. Create a customRegistry.js file in myproject/web/custom/ directory.
2. Define the custom view models in this file:
var CustomRegistry = {
homeTabBillUnits: {
viewmodel: 'custom/viewmodels/homeTab/CustomHomeTabBillUnitsViewModel.js' //
CustomViewModel which will handle replacing of the OOTB Hometab bills graph
with custom view
},
centerSection : {
view: 'text!../custom/templates/centerView.html', // This is the custom
view which would replace the OOTB bills graph section
viewmodel: 'custom/viewmodels/CenterViewModel.js' // This is the custom
view model which handles rendering of custom view replacing the OOTB bills
graph section
}
};
3. Save the file in your NetBeans IDE project.
Chapter 10
About Customizing the Bills Graph
10-9

11
Customizing the Billing Care Account Banner
Learn how to customize the Oracle Communications Billing Care Account Banner.
Topics in this document:
• About the Billing Care Account Banner
• Customizing the Billing Care Account Banner
• Rearranging Account Banner Tiles
• Removing Account Banner Tiles
About the Billing Care Account Banner
The Account Banner displays the following default set of views as tiles in the Billing Care
interface listed in Table 11-1.
Table 11-1 Default Billing Care Account Banner Tiles
Tile Registry Key Description
accountBannerContact Displays account contact information
accountBannerAccountInfo Displays account information such as plan and status
accountBannerCollections Displays account collections information
accountBannerBillUnits Displays a summary of account bill unit information
accountBannerVIPInfo Displays account VIP status if applicable
Each tile displays the information from the Billing Care module responsible for the type of
data. For example, the accountBannerContact tile displays data from the account module.
The
accountBannerSections
key in the Billing Care registry file contains the list of tiles to
display in the Account Banner.
Customizing the Billing Care Account Banner
Customize the Account Banner tiles by:
• Rearranging Account Banner Tiles
• Removing Account Banner Tiles
Creating custom tiles requires the creation of the resources required by the tile. For example,
you may need to create a custom module, or view model and possibly CSS, to display
custom tile information correctly. See "About Billing Care Modules" for more information on
Billing Care modules and the resources you need to create when using custom tiles.
The Billing Care SDK includes sample Account Banner customizations, including a
README.txt file explaining the samples, in the SDK_home/samples/AccountBanner
11-1

directory, where SDK_home is the directory where you installed the Billing Care SDK.
Use these samples when developing your own Account Banner customizations.
Creating Configuration Files for Account Banner Customization
The Account Banner tiles displayed, and their display order, are defined in the Billing
Care configuration file, Configurations.xml. This file includes key values specifying
which tiles to display, and their order, in the accountBannerSections key as shown in
Example 11-1.
Example 11-1 Configurations.xml accountBannerSections Sample
<configuration key="accountBannerSections">
<value>accountBannerContact,accountBannerAccountInfo,accountBannerCollections,acc
ountBannerBillUnits,accountBannerVIPInfo</value>
</configuration>
Each value represents a tile and is a key in the default registry file, registry.js. The
registry.js file defines views and view models. For example, Example 11-2 shows the
view definition in the registry for the accountBannerVIPInfo tile.
Example 11-2 registry.js Account Banner Tile Entry Sample
accountBannerVIPInfo: {
view: 'text!templates/home/accountBanner/vipInfoView.html'
}
The Billing Care SDK includes the default configuration file (Configurations.xml) and
the default registry file (registry.js) in the SDK_home/references directory, where
SDK_home is the location where you installed the SDK.
To customize the Account Banner, you create a custom version of the Billing Care
configuration file named CustomConfigurations.xml, and a custom version of the
registry file named customRegistry.js. The custom configuration file specifies your
tiles to display and their display order. The custom registry file includes view and view
model definitions for each tile you want to display.
To customize the account banner:
1. Copy the default Configurations.xml file from SDK_home/references to a
custom configuration file named CustomConfigurations.xml in your
myproject/web/WEB-INF/classes/custom/configurations directory, where
myproject is your NetBeans IDE project containing your Billing Care
customizations.
2. Copy the default registry.js file from SDK_home/references to a custom registry
file named customRegistry.js in your myproject/web/custom directory, where
myproject is your NetBeans IDE project containing your Billing Care
customizations.
3. Edit the accountBannerSections key in the CustomConfigurations.xml file with
your customizations as described in the following sections.
4. If adding new tiles, define the view and view model for your new tiles in the
customRegistry.js file.
5. Add your customization files to your NetBeans IDE project (myproject):
Chapter 11
Customizing the Billing Care Account Banner
11-2

• Add the CustomConfigurations.xml file in the myproject/web/WEB-INF/custom/
configurations folder.
• Add the customRegistry.js file in the myproject/web/custom/ folder.
• Add any new view html files to support your custom tile in the myproject/web/custom
folder.
• Add any new JavaScript to support your custom view model in the myproject/web/js
directory.
• Add any new CSS to support your custom view in the myproject/web/css directory.
Custom CSS must be properly configured in the registry to override the default CSS.
See "Overriding Themes" for more information on overriding the default CSS.
6. Right-click your NetBeans IDE project and select Clean and Build.
7. Package and deploy your Account Banner customizations to your Billing Care domain.
For more information, see "Packaging and Deploying Customizations".
8. Verify your changes in Billing Care.
Rearranging Account Banner Tiles
The tile display order in the Account Banner is defined by the order of the listed values in the
accountBannerSections key in the CustomConfigurations.xml file.
To rearrange the tile order in the Account Banner:
1. Open the CustomConfigurations.xml file in your myproject/web/WEB-INF/custom/
configurations directory, where myproject is your NetBeans IDE project containing your
Billing Care customizations with an editor.
2. Edit the accountBannerSections key in the CustomConfigurations.xml file listing the
Account Banner tiles in the order you want displayed in Billing Care.
For example, if you want the accountBannerVIPInfo tile to be displayed first change the
following accountBannerSections key value from:
<value>accountBannerAccountInfo,accountBannerContact,accountBannerCollections,accou
ntBannerBillUnits,accountBannerVIPInfo</value>
to:
<value>accountBannerVIPInfo,
accountBannerAccountInfo,accountBannerContact,accountBannerCollections,accountBanne
rBillUnits</value>
3. Save and close your CustomConfigurations.xml file.
4. Right-click your NetBeans IDE project and select Clean and Build.
5. Package and deploy your Account Banner customizations to your Billing Care domain.
For more information, see "Packaging and Deploying Customizations".
6. Verify your changes in Billing Care.
Removing Account Banner Tiles
The tiles displayed in the Account Banner are defined by the included values in the
accountBannerSections key in the CustomConfigurations.xml file.
Chapter 11
Rearranging Account Banner Tiles
11-3

To remove a tile from the Account Banner:
1. Open the CustomConfigurations.xml file in your myproject/web/WEB-INF/
classes/custom/configurations directory, where myproject is your NetBeans IDE
project containing your Billing Care customizations with an editor.
2. Edit the accountBannerSections key in the CustomConfigurations.xml file,
removing the Account Banner tiles you do not want displayed in Billing Care.
For example, to remove the
accountBannerVIPInfo
tile, change the following
accountBannerSections key value from:
<value>accountBannerAccountInfo,accountBannerContact,accountBannerCollections
,accountBannerBillUnits,accountBannerVIPInfo</value>
to:
<value>accountBannerAccountInfo,accountBannerContact,accountBannerCollections
,accountBannerBillUnits</value>
3. Save and close your CustomConfigurations.xml file.
4. Right-click your NetBeans IDE project and select Clean and Build.
5. Package and deploy your Account Banner customizations to your Billing Care
domain.
For more information, see "Packaging and Deploying Customizations".
6. Verify your changes in Billing Care.
Chapter 11
Removing Account Banner Tiles
11-4

12
Customizing the Balances Area
You can use the Oracle Communications Billing Care SDK to customize the Balances area in
the Billing Care account home page.
Topics in this document:
• About Customizing the Balances Area
• Replacing the Balances Area with Custom Account Information
• Customizing the Data Displayed in the Balances Area
About Customizing the Balances Area
The Balances area of the Billing Care account home page shows what the customer owes
and what credit limits the customer has. It shows the customer's currency balance, which is
shown in green and has a currency symbol, and noncurrency balance, which is shown in
blue.
Figure 12-1 shows the Balances area for a sample customer.
Figure 12-1 Balances Area in Account Home Page
You can customize the Balances area in the following ways:
• Remove it completely and replace it with custom account information. See "Replacing the
Balances Area with Custom Account Information".
• Customize the data that is displayed in it. See "Customizing the Data Displayed in the
Balances Area".
12-1

Replacing the Balances Area with Custom Account
Information
You can remove the Balances area from the Billing Care account home page and
display custom account information instead. This requires you to create the resources
used by the Balances area. For example, you need to create a view and view model
for displaying your custom account information correctly. See "Customizing Billing
Care" for more information about customizing Billing Care resources.
The Billing Care SDK includes sample Balances area customizations, including a
README.txt file explaining the samples, in the SDK_home/samples/
BalancesCustomization directory, where SDK_home is the directory in which you
installed the Billing Care SDK. Use these samples when developing your own
customizations.
Customizing the Balances Area
To remove the Balances area from the Billing Care account home page and display
custom account information instead:
1. Create a view for displaying your custom account information . See "Creating a
View for the Balances Area".
2. Create a custom view model for your custom account information. See "Creating a
Custom Balances Area View Model".
3. Override the registry values for the Billing Care Balances tab. See "Configuring
the Custom Balances Area in the Registry".
Creating a View for the Balances Area
Billing Care uses an HTML view file to render the Balances area of the account home
page. You can create a custom view that displays custom account information rather
than balance information.
A sample balances.html file is provided in the SDK_home/samples/
BalancesCustomization/web/custom/templates directory. Use this sample to create
a view for displaying your custom account information.
To create a view for the Balances area:
1. Create a balances.html file in the myproject/web/custom/js/viewmodels/
templates/area/configure directory, where area is the customization type.
2. Define the fields to display in your view.
3. Save the file in your NetBeans IDE project.
Creating a Custom Balances Area View Model
Billing Care uses the balances.js file to define what fields to display in the Billing Care
Balances area. The fields defined in the view model are bound in the HTML file used
to render the custom view or page. See "About View Models" for more information
about Billing Care view models.
Chapter 12
Replacing the Balances Area with Custom Account Information
12-2

A sample balances.js file is provided in the SDK_home/samples/
BalancesCustomization/web/custom/viewmodels directory. Use this sample create a
custom view model.
To create a custom view model for the Billing Care Home tab:
1. Create a balances.js file in the myproject/web/custom/js/viewmodels/
BalancesCustomization directory, where myproject is the folder containing your
NetBeans IDE project.
2. Define the custom fields in this file, as required.
3. Save the file in your NetBeans IDE project.
Configuring the Custom Balances Area in the Registry
After creating your custom view and view model, create a custom module entry in the
customRegistry.js file to use when displaying the Balances area on the Billing Care account
home page. Billing Care uses the custom view and view model instead of the default entries
when rendering the Balances area.
A sample customRegistry.js file is provided in the SDK_home/samples/
BalancesCustomization/web/custom directory, where SDK_home is the Billing Care SDK
installation directory. Use this sample to create the customRegistry.js file with your custom
views.
To add an entry in the customRegistry.js file:
1. Create a customRegistry.js file in myproject/web/custom by copying the reference
registry file.
2. Define the custom view and view model in the file. For example:
var CustomRegistry = {
balances: {
view: 'text!../custom/templates/customView.html',
viewmodel: 'custom/viewmodels/CustomViewModel.js'
},
};
3. Save the file in your NetBeans IDE project.
Customizing the Data Displayed in the Balances Area
To customize the data that is displayed in the Balances area:
1. Create a custom view model to define the override for the Balances area based on your
requirement, such as CustomBalancesViewModel.js, in the myproject/web/custom/
viewmodels directory. See "About View Models" for information on creating the view
models.
2. Create a custom Balances view model HTML Template. See "Creating Custom View
Model HTML Template for the Balances Area".
3. Create a customRegistry.js file configuring Billing Care to use your custom view model.
See "Adding customBalancesView and CustomBalancesViewModel to the Registry".
Chapter 12
Customizing the Data Displayed in the Balances Area
12-3

4. Package and deploy your customization to your Billing Care domain using one of
the methods described in "Using an Exploded Archive during Customization" or
"Packaging and Deploying Customizations".
Creating Custom View Model HTML Template for the Balances Area
Billing Care uses an HTML view file to customize the Balances area in the Home tab.
The template file contains the override for the Balances area as defined in the custom
view model.
To create a custom view model HTML template for customizing Balances area:
1. Create the customBalancesView.html file in the myproject/web/custom/
templates directory.
2. Define the override for the Balances area in the customBalancesView.html file
in HTML required for rendering in this file.
3. Save the file in your NetBeans IDE project.
Adding customBalancesView and CustomBalancesViewModel to the
Registry
Create a custom entry in your customRegistry.js file. Billing Care uses the custom
view model instead of the default entry and renders the Balances section in the Home
tab. See "About the Registry File" for more information.
To configure custom view model to customize the Balances area in the registry:
1. Create a customRegistry.js file in myproject/web/custom/ directory.
2. Define the custom view model in this file:
var CustomRegistry = {
balances: {
view: 'text!../custom/templates/customBalancesView.html', // This is the
custom
view which would replace the OOTB balances section
viewmodel: 'custom/viewmodels/CustomBalancesViewModel.js' // This is the
custom
view model which handles rendering of custom view replacing the OOTB
balances
section
},
};
3. Save the file in your NetBeans IDE project.
Chapter 12
Customizing the Data Displayed in the Balances Area
12-4

13
Adding Custom Payment Types
You can add the custom payment types that you configured in Oracle Communications Billing
and Revenue Management (BRM) to Oracle Communications Billing Care.
Topics in this document:
• About Custom Payment Types
• Creating Custom Payment Types in BRM
• Customizing Billing Care to Support Custom BRM Payment Types
• Generating XSD and JSON Files for Custom Payment Types
• Extending the Billing Care Data Model with XSD and JSON Files
• Adding the XSD and JSON Files to NetBeans Project
• Enabling Custom Payment Types in Batch Payment Processing
• Deploying Customizations
About Custom Payment Types
Billing Care supports the following default payment types:
• Credit Card
• Debit Card
• Cash
• Check
• Wire-Transfer
• Interbank Payment Order
• Postal Order
BRM supports the creation of custom payment types, such as cryptocurrency, required by
your business. Use the SDK to customize Billing Care to support custom payment types
configured in your BRM. Adding custom BRM payment types to Billing Care enables the
payment type to be selected when creating new accounts, adding payment methods, or
processing manual payments.
Creating Custom Payment Types in BRM
Create custom BRM payment types using the Oracle Communications Billing and Revenue
Management Developer Center. This section provides a high level overview of the process
including a general overview on how to create and update the required objects and classes.
For detailed information on using the Developer Center to create custom payment types see
"Creating Custom Fields and Storable Classes" in Oracle Communications Billing and
Revenue Management Developer's Guide.
13-1

To create a custom payment type in BRM:
1. Create the custom payment type payment and reversal event subclasses. See
"Creating Custom Payment Type Event Subclasses" for more information.
2. Update the BRM /config/paymenttool object with the required custom payment
fields. See "Updating the /config/paymenttool Object with Custom Payment Types"
for more information.
3. Update the BRM /config/payment object with the custom payment type payment
and reversal events. See "Updating the /config/payment Object with Custom
Payment Type Event" for more information.
Creating Custom Payment Type Event Subclasses
To create the custom payment type event subclasses:
1. Start Developer Center.
2. Open the Class Browser.
3. Select the /event/billing/payment, /event/billing/reversal, and /event/billing/
refund classes sequentially.
4. Create the following new subclasses in the above classes:
• /event/billing/payment/external
• /event/billing/reversal/external
• /event/billing/refund/external
• /event/billing/payment/external/payment_type
• /event/billing/reversal/external/payment_type
• /event/billing/refund/external/payment_type
where payment_type is the name of your custom payment type.
5. Commit the new subclasses.
To add the required fields to the new custom payment type subclasses:
1. Select the /event/billing/payment/external/payment_type class.
2. Add the required fields for the custom payment type to the payment subclass. For
example, if you are creating a new check payment type, add the
PIN_FLD_CHECK_ID field.
3. Commit the subclass changes to the database.
4. Select the /event/billing/reversal/external/payment_type class.
5. Add the required fields for the custom payment type to the reversal subclass. For
example, if you are creating a new check payment type, add the
PIN_FLD_CHECK_ID field.
6. Select the /event/billing/refund/external/payment_type class.
7. Add the required fields for the custom payment type to the refund subclass. For
example, if you are creating a new check payment type, add the
PIN_FLD_CHECK_ID field.
8. Commit the subclass changes to the database.
Chapter 13
Creating Custom Payment Types in BRM
13-2

Updating the /config/paymenttool Object with Custom Payment Types
Billing Care uses the /config/paymenttool object configuration to determine each payment
type's required fields. Update this object with the required fields for your custom payment
type after creating the subclasses.
To update the /config/paymenttool object:
1. In the Object Browser, select /config/paymenttool.
2. Find the /config/paymenttool object with a FLD_NAME value of PaymentTool payment
Types: Default.
3. Copy the /config/paymenttool object into the Opcode Work Bench.
4. Add the required custom payment type fields to the object. Example 13-1 shows a
sample flist for a new payment type with ID 11000 named External Check. This payment
type has a new field called PIN_FLD_CHECK_ID.
5. Use WRITE_FLDS with flag=32 to update the object with the new fields for your custom
payment type.
Example 13-1 Sample /config/paymenttool fields for External Check Payment Type
0 PIN_FLD_POID POID [0] 0.0.0.1 /config/paymenttool 8398 0
0 PIN_FLD_PAY_TYPES ARRAY [11000] allocated 2, used 2
1 PIN_FLD_NAME STR [0] "External Check"
1 PIN_FLD_PAYMENTTOOL_FIELDS ARRAY [0] allocated 4, used 4
2 PIN_FLD_BATCH_TYPE INT [0] 0
2 PIN_FLD_COLUMN_NAME STR [0] "check_No"
2 PIN_FLD_FIELD_NAME STR [0] "PIN_FLD_CHECK_ID"
2 PIN_FLD_PURPOSE INT [0] 0
1 PIN_FLD_PAYMENTTOOL_FIELDS ARRAY [1] allocated 4, used 4
2 PIN_FLD_BATCH_TYPE INT [0] 1
2 PIN_FLD_COLUMN_NAME STR [0] "check_No"
2 PIN_FLD_FIELD_NAME STR [0] "PIN_FLD_CHECK_ID"
2 PIN_FLD_PURPOSE INT [0] 1
Updating the /config/payment Object with Custom Payment Type Event
BRM stores payment events in the /config/payment object. Update this object with the new
payment, reversal, and refund events you created for custom payment type.
To update the /config/payment object:
1. In the Object Browser, select /config/payment.
2. Copy the /config/payment object into the Opcode Work Bench.
3. Add the required custom payment events to the object. Example 13-2 shows a sample
flist for a new /event/billing/payment/external/check and /event/billing/refund/
external/check events.
4. Use WRITE_FLDS with flag=32 to update the object with the new fields for your custom
payment type.
5. Stop and start your BRM services.
Example 13-2 Sample /config/paymenttool fields for External Check Payment Type
0 PIN_FLD_POID POID [0] 0.0.0.1 /config/payment 200 0
0 PIN_FLD_PAY_TYPES ARRAY [11000] allocated 4, used 4
Chapter 13
Creating Custom Payment Types in BRM
13-3

1 PIN_FLD_PAYINFO_TYPE STR [0] "/payinfo"
1 PIN_FLD_PAYMENT_EVENT_TYPE STR [0]
"/event/billing/payment/external/check"
1 PIN_FLD_REFUND_EVENT_TYPE STR [0]
"/event/billing/refund/external/check"
1 PIN_FLD_OPCODES ARRAY [0] allocated 4, used 4
2 PIN_FLD_EVENT_TYPE STR [0] ""
2 PIN_FLD_FLAGS INT [0] 0
2 PIN_FLD_NAME STR [0] "PCM_OP_INVALID"
2 PIN_FLD_OPCODE INT [0] 0
1 PIN_FLD_OPCODES ARRAY [1] allocated 4, used 4
2 PIN_FLD_EVENT_TYPE STR [0] ""
2 PIN_FLD_FLAGS INT [0] 0
2 PIN_FLD_NAME STR [0] "PCM_OP_INVALID"
2 PIN_FLD_OPCODE INT [0] 0
1 PIN_FLD_OPCODES ARRAY [2] allocated 4, used 4
2 PIN_FLD_EVENT_TYPE STR [0] ""
2 PIN_FLD_FLAGS INT [0] 0
2 PIN_FLD_NAME STR [0] "PCM_OP_INVALID"
2 PIN_FLD_OPCODE INT [0] 0
Customizing Billing Care to Support Custom BRM Payment
Types
The Billing Care SDK includes a sample custom payment type customization in the
SDK_home/samples/CustomPaymentMethodType directory, where SDK_home is
the directory where you installed the SDK. Use this sample to assist you in
customizing Billing Care with custom payment types.
Generating XSD and JSON Files for Custom Payment
Types
Customizing the Billing Care Actions menu requires creating a custom XML
configuration file (CustomActionMenu.xml). This file contains the configuration for
your custom menu structure.
To customize Billing Care invoice presentation:
1. Copy the default ActionMenu.xml file from SDK_home/references to a custom
file named CustomActionMenu.xml in your myproject/web/WEB-INF/custom/
configurations directory, where myproject is your NetBeans IDE project
containing your Billing Care customizations.
2. Customize the Actions menu using the CustomActionMenu.xml file as
described in the following sections.
3. Save and close the CustomActionMenu.xml file.
4. Right-click your NetBeans IDE project and select Clean and Build.
5. Package and deploy your invoice presentation customizations to your Billing Care
domain.
For more information, see "Packaging and Deploying Customizations".
6. Verify your changes in Billing Care.
Chapter 13
Customizing Billing Care to Support Custom BRM Payment Types
13-4

Extending the Billing Care Data Model with XSD and JSON Files
The Billing Care SDK includes a Data Model Generator utility for generating the required XSD
and JSON files containing the custom payment type definitions. The Data Model Generator is
located in the SDK_home/samples/data_model_generator directory. Use this sample to
assist you in customizing Billing Care with custom payment types.
Note:
The Data Model Generator utility requires an Infranet.properties file configured
with BRM connection information in the local user's home directory. The utility
connects to the BRM system defined in this file to retrieve the object configuration
before generating the required XSD and JSON files. See "Configuring Additional
Settings in the Infranet.properties File" in Billing Care Installation Guide for more
information.
To create the required XSD and JSON files for your custom payment type:
1. Open a command-line interface on the system where the Billing Care SDK is installed.
2. Change to the SDK_home/samples/data_model_generator directory.
3. Run the DatamodelGenerator.bat (Windows) or DataModelGenerator.sh (Linux) script
to generate the XSD and JSON files.
The Data Model Generator outputs the extensionDataModel.jar containing the XSD files
and an XSD file containing the definition of your custom payment type. Add these files to your
NetBeans IDE project. See "Adding the XSD and JSON Files to NetBeans Project" for more
information on adding the files to your project.
Adding the XSD and JSON Files to NetBeans Project
To add the extensionDataModel.jar containing the XSD files for your custom payment type,
and the JSON files created by the Data Model Generator:
1. Add the extensionDataModel.jar to your Billing Care customization NetBeans IDE
project using the NetBeans Library Manager.
2. Copy the JSON file to myproject/web/custom/jsons where myproject is the project
directory of your Billing Care customizations NetBeans IDE project.
3. Deploy your custom payment type customizations. See "Deploying Customizations" for
more information.
Enabling Custom Payment Types in Batch Payment Processing
Batch payment files using custom payment types require the creation of a template file (.pit)
before processing by Billing Care. Default template files are provided in SDK_home/
references/paymentbatchtemplates. Use a default template to create a template file
supporting your custom payment types.
To create a custom payment type template file for batch processing:
Chapter 13
Extending the Billing Care Data Model with XSD and JSON Files
13-5

1. Copy an existing default template file from the SDK references directory.
2. Rename the file for your custom payment type.
3. Open the file in a text editor.
4. Update the template file by customizing the sections described in Table 13-1 as
needed. You must provide a unique Batch Name for your custom payment type
batch file. Example 13-3 shows sample template file for a custom external
payment batch.
5. Copy the custom payment type batch file into the Middleware_home/
BatchPaymentTemplates directory, where Middleware_home is the home
directory of the Oracle WebLogic Server installation where Billing Care is installed.
This is the default location for unprocessed batch payment files. The Billing Care
installation enables you to specify an alternative location. Confirm with your
administrator to determine where your templates folder is located.
Table 13-1 Configurable Fields in Batch Payment Template File
Section Description
Import Contains the Batch Name, Data Type, and Start Row fields used
to identify the batch type, data type, and file row to start
processing at.
Delimiter Contains a list of supported delimiters. Set the delimiter used in
your custom payment type batch file by changing the value of
the proper delimiter to 1. By default, the delimiter is set to Tab.
Header Contains fields used to specify whether to import the file header,
and the header start and end rows.
Footer Contains fields used to specify whether to import the file footer,
and the footer start and end rows.
Example 13-3 Sample Custom External Check Payment Batch Template File
# Modifying this file is not recommended.
[Import]
Batch Name External Check Payment Batch
Data Type 0
Start Row 1
[Delimiter]
Comma 0
Consecutive 0
Other 0
Semicolon 0
Space 0
MultiSpaces 0
Tab 1
OtherSep
Qualifier \"
[Link]
[Header]
ImportHeaderData 0
HeaderStart Row 1
HeaderEnd Row 1
[Header Link]
[Footer]
ImportFooterData 0
FooterStart Row 1
Chapter 13
Enabling Custom Payment Types in Batch Payment Processing
13-6


14
Customizing the Make a Payment Screen
You can use the Oracle Communications Billing Care SDK to customize the fields displayed
in the Billing Care Make a Payment screen according to the selected payment method.
Topics in this document:
• About the Make a Payment Screen
• Customizing the Fields Displayed for a Payment Method
About the Make a Payment Screen
The Billing Care Make a Payment screen displays different fields based on the payment
method selected by the user. For example, a credit card payment method contains the Card
number, CVV2/CID, and Card expiration fields, but the check payment method contains the
Check Date, Check Number, Bank Code, and Bank Account Number fields. Figure 14-1
shows the fields for the check payment method.
Figure 14-1 Check Payment Type Fields
You can customize the Make a Payment screen in one or more of the following ways:
• Modify or remove existing fields based on the payment method
• Add custom fields based on the payment method
• Specify whether a field is optional or mandatory
• Specify the valid range of dates for fields with a date data type
14-1

• Validate whether a user has entered all required information for a specified
payment method
Customizing the Fields Displayed for a Payment Method
The Billing Care SDK includes sample payment customizations, including a
README.txt file explaining the samples, in the SDK_home/samples/
ValidationOnPaymentInfo directory, where SDK_home is the directory where you
installed the Billing Care SDK. Use these samples when developing your own payment
customizations.
To customize which fields are displayed in the Make a Payment screen based on the
payment method:
1. Create a custom view model for the Make a Payment screen. See "Creating a
Custom View Model for a Payment Method".
2. Override the registry value for the Billing Care payment type. See "Configuring the
Custom Payment Type in the Registry".
3. Package and deploy your payment type changes. See "Packaging and Deploying
Customizations".
Creating a Custom View Model for a Payment Method
Billing Care uses AutoGeneratedUIViewModel.js to render the UI fields specific to
each payment method. Customizing the Billing Care fields displayed for each payment
method requires overriding the default view model behavior.
A sample CustomAutoGeneratedUIVM.js file is provided in the SDK_home/samples/
ValidationOnPaymentInfo/web/custom/viewmodels/payment directory. The sample
file does the following based on the field name or payment method:
• For check payment methods, changes the bankCode field to a drop-down list of
bank names. It does this by using the oj-select-single tag. For more information,
see "Select (Single)" in OJET Cookbook Forms.
• Specifies that fields with a string data type are mandatory. It does this by using
the required attribute.
• Specifies a valid date range of 15 days before the current date through 15 days
after the current date for all fields with a date data type.
• Validates that users have entered values into all mandatory fields. It does this by
overriding the isValid function.
To create a custom view model for a Billing Care payment type:
1. Create the CustomAutoGeneratedUIVM.js file in the myproject/web/custom/
viewmodels directory, where myproject is the folder containing your NetBeans
IDE project.
2. Make your changes to the preAddElement function, which is called after the DOM
element is created but before it is added to the actual DOM.
The README.txt file in SDK_home/samples/ValidationOnPaymentInfo contains
details on how the preAddElement function works and the functions it accepts.
3. Save the file in your NetBeans IDE project.
Chapter 14
Customizing the Fields Displayed for a Payment Method
14-2

Configuring the Custom Payment Type in the Registry
Create a custom module entry in the customRegistry.js file to use when rendering the Make
a Payment screen for a particular payment method.
A sample customRegistry.js file is provided in the SDK_home/samples/
ValidationOnPaymentInfo/web/custom directory, where SDK_home is the Billing Care SDK
installation directory. Use this sample to create the customRegistry.js file with your custom
view model.
To add an entry in the customRegistry.js file:
1. Create a customRegistry.js file in myproject/web/custom by copying the reference
registry file.
2. Specify to use your custom view model. For example:
varCustomRegistry = {
customPaymentType: {
customViewModel: '../custom/viewmodels/payment/
CustomAutoGeneratedUIVM'
}
};
3. Close and save the customRegistry.js file.
4. Save the file in your NetBeans IDE project.
Chapter 14
Customizing the Fields Displayed for a Payment Method
14-3

15
Displaying Success Toast Messages in Billing
Care
You can customize Oracle Communications Billing Care to display a toast message when a
user submits a payment or adjustment successfully.
Topics in this document:
• About Displaying Success Toast Messages
• Adding Success Toast Messages to Billing Care Screens
About Displaying Success Toast Messages
Billing Care displays error messages when an adjustment or payment transaction fails. If
there is no message and control moves to the next screen, it implicitly means that the
transaction was successful.
To have Billing Care explicitly display success messages for these transactions, customize
Billing Care to display a Success toast message after each successful adjustment or
payment. Success toast messages appear at the top of the page and then disappear after a
few seconds.
Figure 15-1 shows a sample toast message for a successful adjustment.
Figure 15-1 Sample Success Toast Message
Adding Success Toast Messages to Billing Care Screens
To add Success toast messages to your Billing Care payment and adjustment screens:
1. Create a custom view HTML file for rendering the Success toast message. See "Creating
a Success Toast Message View".
2. Create a custom view model for each payment and adjustment screen in which to display
the Success toast message. See "Creating a Custom View Model for Your Payment and
Adjustment Screens".
3. Create a custom view model for the Success toast message. See "Creating a Custom
View Model for Success Toast Messages".
4. Override the registry values for your custom view and view models. See "Configuring the
Registry for Success Toast Messages".
15-1

5. Update the path to the green check mark graphic in the overrides.css file. See
"Specifying the Path to Check Mark Graphic".
6. Package and deploy your Billing Care SDK. See "Packaging and Deploying
Customizations".
The Billing Care SDK includes a sample Success toast message, including a
README.txt file explaining the sample, in the SDK_home/samples/
CustomToastMessages directory, where SDK_home is the directory where you
installed the Billing Care SDK. Use these samples when developing your own
customizations.
Creating a Success Toast Message View
Create an HTML view file for rendering the Success toast message on Billing Care
screens. For more information about views, see "About Views".
A sample toastMessagesView.html file is provided in the SDK_home/samples/
CustomToastMessages/web/custom/templates/toastMessages directory. Use this
sample to create your own custom HTML file.
To create a view for rendering the Success toast message:
1. Create a toastMessagesView.html file in your myproject/web/custom/
templates/toastMessages/ directory.
2. In the file, specify the type of message to display on the Billing Care screen. To do
so, use the oj-messages component and set its display attribute to notification.
For example:
<divid="successMsg" style="display:none;">
<oj-messages id="oj-messages-id"
messages="[[messagesDataprovider]]" display="notification"
position='{"my":{"vertical" :"top", "horizontal":
"center"},
"at": {"vertical": "top", "horizontal": "center"}}'>
</oj-messages>
</div>
For more information about the oj-messages component, see "Messages" in
OJET Cookbook Forms.
3. Save the file in your NetBeans IDE project.
Creating a Custom View Model for Success Toast Messages
Create a view model that specifies the text to display in the Success toast message as
well as how long Billing Care waits before closing the message.
A sample toastMessagesViewModel.js file is provided in the SDK_home/samples/
CustomToastMessages/web/custom/js/viewmodels/toastMessages directory. The
sample view model file specifies to do the following:
• Display the text "message Successful" in the Success toast message, where
message is the Billing Care screen-dependent text defined in the payment or
Chapter 15
Adding Success Toast Messages to Billing Care Screens
15-2
adjustment view model (see "Creating a Custom View Model for Your Payment and
Adjustment Screens").
• Automatically close the Success toast message after 6000 milliseconds (6 seconds).
To create a custom view model for the Success toast message:
1. Create the toastMessagesViewModel.js file in your myproject/web/custom/js/
viewmodels/toastMessages directory, where myproject is the folder containing your
NetBeans IDE project.
2. In the file's successMessageData function, specify the text to display and how long to
wait before closing the message:
this.successMessageData=function(){
return [{
summary: message + " Successful",
autoTimeout: parseInt(6000)
}];
}.bind(this);
3. Save the file in your NetBeans IDE project.
Creating a Custom View Model for Your Payment and Adjustment Screens
To customize a Billing Care adjustment or payment screen to display a Success toast
message, create a custom view model that contains overrides for the default display.
The Billing Care SDK includes sample custom view models for the payment and adjustment
screens listed in Table 15-1. The sample files are located in SDK_home/samples/
CustomToastMessages/web/custom/js/viewmodels/path, where path is the view model
directory and file name in Table 15-1. The sample files specify the screen-specific text to
include in the toast message, such as Adjustment, Payment, or Suspense Payment.
Table 15-1 Payment and Adjustment Screens that Support Success Toast Messages
Billing Care Screen View Model Directory and File Name
Account Adjustment screen
See "Making Currency Adjustment" in
Billing Care Online Help.
accountAdjustment/
CustomAccountAdjustmentViewModel.js
Allocate Adjustment screen with
Advanced View
See "Allocating Currency Adjustments"
in Billing Care Online Help.
allocateAdjustment/
CustomAllocateAdjustmentAdvancedViewModel.js
Allocate Adjustment screen with Simple
View
See "Allocating Currency Adjustments"
in Billing Care Online Help.
allocateAdjustment/
CustomAllocateAdjustmentViewModel.js
Bill Adjustment screen
See "Adjusting a Bill" in Billing Care
Online Help.
allocateBillAdjustment/
CustomAllocateBillAdjustmentViewModel.js
Chapter 15
Adding Success Toast Messages to Billing Care Screens
15-3

Table 15-1 (Cont.) Payment and Adjustment Screens that Support Success Toast
Messages
Billing Care Screen View Model Directory and File Name
Allocate Payment screen with
Advanced View
See "Allocating a Payment" in Billing
Care Online Help.
allocatePayment/
CustomAllocatePaymentAdvancedViewModel.js
Allocate Payment screen with Simple
View
See "Allocating a Payment" in Billing
Care Online Help.
allocatePayment/CustomAllocatePaymentViewModel.js
Make a Payment screen
See "Making a Payment" in Billing Care
Online Help.
allocatePayment/CustomMakePaymentViewModel.js
Bill Adjustment screen
See "Adjusting a Bill" in Billing Care
Online Help.
billAdjustment/CustomBillAdjustmentViewModel.js
Event Adjustment screen
See "Adjusting an Event" in Billing Care
Online Help.
eventAdjustment/CustomEventAdjustmentViewModel.js
Item Adjustment screen
See "Adjusting an Item" in Billing Care
Online Help.
itemAdjustment/CustomItemAdjustmentViewModel.js
Make a Payment screen
See "Making a Payment" in Billing Care
Online Help.
makePayment/CustomMakePaymentViewModel.js
Make a Suspense Payment screen
See "Working with Suspended
Payments" in Billing Care Online Help.
makePaymentSuspense/
CustomMakePaymentSuspenseOverlayViewModel.js
Noncurrency Adjustment screen
See "Making a Noncurrency
Adjustment" in Billing Care Online Help.
nonCurrencyAdjustment/
CustomNonCurrencyAdjustmentViewModel.js
To create a custom view model for a Billing Care payment or adjustment screen:
1. Create a custom view model file (myproject/web/custom/js/viewmodels/path
directory, where path is the view model directory and file name in Table 15-1).
2. Set message to the screen-specific text you want displayed in the Success toast
message. For example:
functionCustomEventAdjustmentViewModel() {
EventAdjustmentViewModel.apply(this, arguments);
var self = this;
self.msg = null;
// This is to enable rendering a toast message on successful
'event adjustment' action
self.showToastMessages = function (data) {
Chapter 15
Adding Success Toast Messages to Billing Care Screens
15-4

var message = "Adjustment";
// example for calling custom methods to render the success toast
message
self.msg = new ToastMessageVM(message);
self.msg.loadMessage();
};
}
3. Save the file in your NetBeans IDE project.
Configuring the Registry for Success Toast Messages
To configure Billing Care to use your custom view and view models when rendering the
payment and adjustment screens:
1. Create a customRegistry.js file in myproject/web/custom by copying the reference
registry file.
Note:
A sample customRegistry.js file is provided in the SDK_home/samples/
CustomToastMessages/web/custom directory.
2. Specify to use your custom view and view models for the payment and adjustment
screens.
The following shows sample entries in the customRegistry.js file for overriding the toast
message view, the toast message view model, all adjustment view models, and all
payment view models:
varCustomRegistry = {
toastMessages: {
view: '../custom/templates/toastMessages/
toastMessagesView.html',
viewmodel: '../custom/js/viewmodels/toastMessages/
ToastMessagesViewModel'
},
makePayment: {
viewmodel: '../custom/js/viewmodels/makePayment/
CustomMakePaymentViewModel'
},
allocatePayment: {
simpleviewmodel: '../custom/js/viewmodels/allocatePayment/
CustomAllocatePaymentViewModel',
advancedviewmodel: '../custom/js/viewmodels/allocatePayment/
CustomAllocatePaymentAdvancedViewModel'
},
makePaymentSuspense: {
overlayviewmodel: '../custom/js/viewmodels/makePaymentSuspense/
CustomMakePaymentSuspenseOverlayViewModel'
},
itemAdjustment: {
Chapter 15
Adding Success Toast Messages to Billing Care Screens
15-5

viewmodel: '../custom/js/viewmodels/itemAdjustment/
CustomItemAdjustmentViewModel'
},
eventAdjustment: {
viewmodel: '../custom/js/viewmodels/eventAdjustment/
CustomEventAdjustmentViewModel'
},
accountAdjustment: {
viewmodel: '../custom/js/viewmodels/accountAdjustment/
CustomAccountAdjustmentViewModel'
},
billAdjustment: {
viewmodel: '../custom/js/viewmodels/billAdjustment/
CustomBillAdjustmentViewModel'
},
allocateBillAdjustment: {
viewmodel: '../custom/js/viewmodels/allocateBillAdjustment/
CustomAllocateBillAdjustmentViewModel'
},
allocateAdjustment: {
simpleviewmodel: '../custom/js/viewmodels/allocateAdjustment/
CustomAllocateAdjustmentViewModel',
advancedviewmodel :'../custom/js/viewmodels/
allocateAdjustment/CustomAllocateAdjustmentAdvancedViewModel'
},
nonCurrencyAdjustment: {
viewmodel: '../custom/js/viewmodels/nonCurrencyAdjustment/
CustomNonCurrencyAdjustmentViewModel'
}
};
3. Save the customRegistry.js file in your NetBeans IDE project.
Specifying the Path to Check Mark Graphic
The Billing Care SDK includes a sample green check mark graphic that you can
include in your toast messages. The sample graphic is located in the SDK_home/
samples/CustomToastMessages/web/custom/resources/images directory.
You can include this graphic in your toast messages or create your own graphic. You
can also change the colors, font size, and border used in the toast message.
To specify the path to the check mark graphic:
1. Copy the contents from the sample overrides.css file to your myproject/web/
custom/css/overrides.css file.
2. In the file, update the background-image URL to the relative path of your graphic:
.oj-messages-notification .oj-message-header {
background-image: url(../resources/images/green-check.png);
background-color: #d7efdf;
font-size: large;
height: 40px;
Chapter 15
Adding Success Toast Messages to Billing Care Screens
15-6

background-repeat: no-repeat;
background-position: left;
3. (Optional) Make any other customizations to the toast message.
4. Save and close the file.
Chapter 15
Adding Success Toast Messages to Billing Care Screens
15-7

16
Customizing Purchase Deal and Assets
Action Menu
You can customize how you configure deals and display the Actions menu in Oracle
Communications Billing Care.
Topics in this document:
• About Customizing Purchase Deal Configuration and Assets Action Menu
• Customizing Purchase Deal Configuration
• Customizing Assets Action Menu
• Deploying Customizations
About Customizing Purchase Deal Configuration and Assets
Action Menu
You configure new or additional deals added to an account by clicking Configure in the
Purchase Catalogue screen. Your deals may require additional fields for capturing custom
configuration attributes during the purchase.
You can customize Billing Care to add custom fields for configuring the deal purchase and
display the newly added custom fields in the assets action menu by using the Billing Care
SDK.
For more information, see the following:
• Customizing Purchase Deal Configuration
• Customizing Assets Action Menu
Customizing Purchase Deal Configuration
The Billing Care SDK includes the sample SDK in the SDK_home/samples/
PurchaseDealAndAssetsActionMenuCustomization directory, where SDK_home is the
directory where you installed the SDK. Extend the sample with additional fields if required by
your business. Use this sample to assist you in customizing the deal purchase configuration
in Billing Care.
To customize the purchase deal configuration:
1. Extend the Billing Care data model by creating the custom data model JAR file (for
example,customDataModel.jar) and add the JAR file to your Billing Care customization
NetBeans IDE project. See "Extending the Data Model With the XSD and Java Class
files" for more information.
2. Create custom purchase configuration view models to override the default purchase
configuration flow. See "Creating a Custom Purchase Deal Configuration View Model" for
more information.
16-1

3. Create a custom view model HTML template to display the fields in the Configure
screen during deal purchase. See "Creating Custom Purchase Configure View
Model HTML Templates" for more information.
4. Deploy your custom payment type projects to your application server. See
"Deploying Customizations" for more information.
Extending the Data Model With the XSD and Java Class files
To extend the data model with the XSD and Java class files:
1. Create the customPurchaseBundle.xsd file by using the sample
customPurchaseBundle.xsd file in the SDK_home/samples/
PurchaseDealAndAssetsActionMenuCustomization/customSchema/
directory. The sample customPurchaseBundle.xsd file includes the following
custom fields: productDescription and overridingAmount.
2. Create the jaxb_bindings.xml file by using the sample jaxb_bindings.xml file in
the SDK_home/samples/PurchaseDealAndAssetsActionMenuCustomization/
customSchema/ directory.
3. Generate a JAXB class from the schema by using XJC (XJC is available as part of
Java):
Note:
It is assumed that the jaxb_bindings.xml and
customPurchaseBundle.xsd files are available in the same directory in
which the customPurchaseBundle XSD schema is stored.
xjc path_of_XSD_file -p package_path -b bindings_file
where:
• path_of_XSD_file is the path to the customPurchaseBundle.xsd file.
• package_path is the path to the Billing Care package.
• bindings_file is the path to the jaxb_bindings.xml file.
For example:
xjc . -p com.oracle.communications.brm.cc.model -b jaxb_bindings.xml
The customPurchaseBundle.java file is created in the directory in which the
jaxb_bindings.xml and customPurchaseBundle.xsd files are stored.
4. Create a Java class file by running the following command:
javac java_file_Path -cp path to dataModel.jar
where path to dataModel.jar is the path to the dataModel.jar available in Billing
Care.
For example:
javac com\oracle\communications\brm\cc\model\* -cp ..\..\lib\dataModel.jar
The CustomPurchaseBundle.class file is generated.
Chapter 16
Customizing Purchase Deal Configuration
16-2

5. Do one of the following:
• If you already have a customized data model JAR file, add the
CustomPurchaseBundle.class to that JAR file.
• If the customized data model JAR is not available, create a customDataModel.jar by
running the following command:
jar -cf customDataModel.jar com\*
6. Copy the customized data model jar file (for example,customDataModel.jar) to your
Billing Care customization NetBeans IDE project myproject/web/lib directory where
myproject is the project directory of your Billing Care customizations NetBeans IDE
project.
Creating a Custom Purchase Deal Configuration View Model
Billing Care uses the PurchaseConfigurationViewModel and PurchaseViewModel to
define the purchase configuration flow for the deal purchase. You must create these view
models containing the override functions.
The PurchaseConfigurationViewModel contains the processBundlePurchasePayload()
function, which captures the values entered in the custom fields in the Configure page and
adds it to the accountModel as array. The PurchaseViewModel contains the
purchaseBundle() function, which retrieves the data and calls the Custom REST Resource.
The CustomAccountResource handles the custom REST call by accepting the
customPurchaseBundle from the user interface.
See "About View Models" for more information about Billing Care view models.
The sample CustomPurchaseConfigurationViewModel.js and
CustomPurchaseViewModel.js files are provided in the SDK_home/samples/
PurchaseDealAndAssetsActionMenuCustomization/web/custom/viewmodels directory.
These samples contain the necessary override functions to add custom fields for purchase
deal configuration. Use these samples to create the custom purchase deal configuration view
models.
To create the purchase deal configuration view models with the override functions:
1. Create a CustomPurchaseConfigurationViewModel.js file in myproject/web/custom/
viewModels directory, where myproject is the folder containing your NetBeans IDE
project.
2. Create a CustomPurchaseViewModel.js file in myproject/web/custom/viewModels
directory.
3. Save the files in your NetBeans IDE project.
Creating Custom Purchase Configure View Model HTML Templates
Billing Care uses an HTML view file to render the Configure screen in the purchase flow. You
must create a custom purchase configuration view model HTML template to display any
additional fields during new or additional deals purchase configuration. The template file
contains the additional fields defined in the custom purchase configuration view model
created in "Creating a Custom Purchase Deal Configuration View Model".
A sample purchaseConfigureAdditionalFieldsView.html file is provided in the SDK_home/
samples/PurchaseDealAndAssetsActionMenuCustomization directory. This sample
defines how to render additional attributes for the purchase configuration. Use this sample to
Chapter 16
Customizing Purchase Deal Configuration
16-3

create a custom purchase configuration HTML template for displaying the additional
fields required for the deal purchase configuration.
To create a purchase configuration HTML template for rendering the additional fields
you need to capture:
1. Create a purchaseConfigureAdditionalFieldsView.html file in myproject/web/
custom/templates directory.
2. Define the new fields in HTML required for rendering in this file.
3. Save the file in your NetBeans IDE project.
Customizing Assets Action Menu
The Billing Care SDK includes a sample custom assets action menu in the
SDK_home/samples/PurchaseDealAndAssetsActionMenuCustomization
directory. Use this sample to assist you in customizing the assets action menu to
display the newly added custom fields for purchasing deals in Billing Care.
To customize the assets action menu:
1. Create a custom asset view model to override the default assets action menu
view. See "Creating a Custom Asset View Model" for more information.
2. Create custom view model HTML templates for customizing the assets action
menu. See "Creating Custom Asset View Model HTML Templates" for more
information.
3. Deploy your custom payment type projects to your application server. See
"Deploying Customizations" for more information.
Creating a Custom Asset View Model
Billing Care uses AssetViewModel to define the assets action menu. You must create
a custom asset view model containing the override editProductParams() function.
The editProductParams() function renders links for each product in the assets card to
edit the product details.
See "About View Models" for more information about Billing Care view models.
The sample CustomAssetViewModel.js is provided in the SDK_home/samples/
PurchaseDealAndAssetsActionMenuCustomization/web/custom/viewmodels
directory. This sample contains the necessary overrides for the default assets action
menu. Use this sample to create the custom view models for retrieving and displaying
the custom fields in the assets action menu.
To create the asset view model with the override functions:
1. Create a CustomAssetViewModel.js file in myproject/web/custom/viewModels
directory, where myproject is the folder containing your NetBeans IDE project.
2. Save the file in your NetBeans IDE project.
Creating Custom Asset View Model HTML Templates
Billing Care uses an HTML view file to customize the assets action menu. You must
create a custom asset view model HTML template to display any custom fields that
you added for the deal purchase configuration. The template file contains the
Chapter 16
Customizing Assets Action Menu
16-4

additional fields defined in the custom asset view model created in "Creating a Custom Asset
View Model".
The sample editProductParametersView.html and
customAssetsActionMenuOptions.html files are provided in the SDK_home/samples/
PurchaseDealAndAssetsActionMenuCustomization directory. The
editProductParametersView.html file defines how to render the additional attributes when
the custom Change Product Parameters entry is selected from the assets action menu. The
customAssetsActionMenuOptions.html file defines the assets action menu options to be
displayed. Use these samples to create the custom asset view HTML templates for
customizing the assets action menu.
In the sample customAssetsActionMenuOptions.html file, the custom menu entry to be
displayed is added in the <!-- Custom Menu Entry for Assets Action Menu SDK : START -->
section. In the sample editProductParametersView.html file, the product parameters for the
custom menu are listed in the "<!-- Dialog Contents for the Product Parameters : Added for
Assets Actions Menu SDK : START -->" section.
To create a asset view HTML template:
1. Create a editProductParametersView.html file in myproject/web/custom/templates
directory.
2. Define the new fields in HTML required for rendering in this file.
3. Save the file in your NetBeans IDE project.
4. Create a customAssetsActionMenuOptions.html file in myproject/web/custom/
templates directory.
5. Define the new fields in HTML required for rendering in this file.
6. Save the file in your NetBeans IDE project.
Deploying Customizations
Package and deploy your customizations using one of the methods described in "Using an
Exploded Archive during Customization" or "Packaging and Deploying Customizations".
Chapter 16
Deploying Customizations
16-5

17
Customizing Billing Care to Display Child
Accounts
You can customize Oracle Communications Billing Care to display child accounts in the
Organization Hierarchy screen of the parent account.
Topics in this document:
• About Displaying Child Accounts
• Customizing Billing Care to Display Child Accounts
• Customizing the Organization Hierarchy Screen
• Creating Custom View Models
• Creating Custom View Model HTML Templates
• Configuring a Custom Module in the Registry
• Adding the Data Model JAR File
• Deploying Customizations
About Displaying Child Accounts
By default, Billing Care does not display the list of child accounts from the parent account.
However, you can customize Billing Care to display the list of child accounts in the
Organization Hierarchy screen of the parent account by using the Billing Care SDK. This lets
you view the list of child accounts and also navigate to the child accounts from the parent
account.
You can view the list of child accounts by clicking the Show Children link in the Organization
Hierarchy screen of the parent account.
Customizing Billing Care to Display Child Accounts
This section provides a high level overview of the process on how to customize Billing Care
to display the list of child accounts in the Organization Hierarchy screen.
To customize Billing Care to display child accounts:
1. Create a java class to retrieve the child accounts from Oracle Communications Billing
and Revenue Management (BRM) and display them from the Organization Hierarchy
screen of the parent account. See "Customizing the Organization Hierarchy Screen" for
more information.
2. Create custom view models to define the display of the Organization Hierarchy screen.
See "Creating Custom View Models" for more information.
17-1

3. Create custom view model HTML templates to display the link to the child
accounts in the Organization Hierarchy screen of the parent account. See
"Creating Custom View Model HTML Templates" for more information.
4. Create a customRegistry.js file configuring Billing Care to use the custom view
models created in step 2. See "Configuring a Custom Module in the Registry" for
more information.
5. Add the data model JAR file to your NetBeans IDE project. See "Adding the Data
Model JAR File" for more information.
6. Deploy your customization to your Billing Care domain. See "Deploying
Customizations" for more information.
Customizing the Organization Hierarchy Screen
Customize the Organization Hierarchy screen by creating a custom resource class
containing the logic to retrieve and display all the child accounts for a parent account.
To customize the Organization Hierarchy screen:
1. Create a CustomHierarchyResource.java file in myproject/projectname/src/
java/com/rest/sdk, where myproject is the folder containing your NetBeans IDE
project, using the sample shown in Example 17-1.
You can extend the REST framework to call BRM opcodes (for example,
PCM_OP_SEARCH) to retrieve the child account details from BRM by using
account numbers. See "Extending and Creating Billing Care REST Resources" for
more information about extending the REST framework.
2. Save the file in your NetBeans IDE project.
3. Copy the file to com.oracle.communications.brm.cc.ws package
(myproject/src/com/oracle/communications/brm/cc/ws).
Example 17-1 Sample CustomHierarchyResource.java Class
/** * Sample REST Web Service with basic examples.
*
*/
@Path("hierarchy")
public class CustomHierarchyResource {
/**
* sample rest API
* @return String
*/
@Path("/children/{id}")
@GET
@Produces({"application/xml", "application/json"})
public String getChildAccountsInHierarchy(@PathParam("id") String id) {
logger.entering("CustomHierarchyResource",
"getChildAccountsInHierarchy");
try {
//method implementation to fetch child accounts goes here. Refer to
documentation for more details.
System.out.println("Custom Hierarchy Resource "+id);
} catch (ApplicationException e) {
ExceptionHelper.handleException(e);
}
logger.exiting("CustomHierarchyResource",
"getChildAccountsInHierarchy");
Chapter 17
Customizing the Organization Hierarchy Screen
17-2

return id;
}
}
Creating Custom View Models
Billing Care uses view model to define the display of the Organization Hierarchy screen. You
must create the custom view models, CustomOrganizationHierarchyViewModel and
ShowAllChildrenOverlayViewModel, containing overrides for the default Organization
Hierarchy screen. See "About View Models" for more information about Billing Care view
models.
The sample customOrganization HierarchyViewModel.js and
showAllChildrenOverlayViewModel.js files are provided in the SDK_home/samples/web/
custom/js/viewmodel directory. Use the samples to create the custom view models for
displaying child accounts.
To create custom view models:
1. Create the customOrganization HierarchyViewModel.js and
showAllChildrenOverlayViewModel.js files in the myproject/web/custom/js/
viewmodels/area/configure directory, where area is the customization type.
2. Save the files in your NetBeans IDE project.
Creating Custom View Model HTML Templates
Billing Care uses the HTML view files to customize the Organization Hierarchy screen view.
You must create view model HTML templates to display the Show Children link. The
template files contain the additional fields defined in the
customOrganizationHierarchyViewModel.js and showAllChildrenOverlayViewModel.js
created in "Creating Custom View Models".
The sample customOrganizationHierarchyView.html and
showAllChildrenOverlayView.html files are provided in the SDK_home/samples/web/
custom/js/templates/ directory. Use these samples to create the HTML templates for
customizing the Organization Hierarchy screen.
To create custom view model HTML templates:
1. Create customOrganizationHierarchyView.html and
showAllChildrenOverlayView.html files in the myproject/web/custom/js/templates/
area/configure directory.
2. Define the new fields in HTML required for rendering in this file.
3. Save the file in your NetBeans IDE project.
Configuring a Custom Module in the Registry
Create a custom organization hierarchy module entry in your customRegistry.js file for
displaying child accounts from the parent account. Billing Care uses the custom module
instead of the default entry and renders the Organization Hierarchy screen containing your
custom fields. See "About the Registry File" for more information.
To create a custom module entry in the registry:
Chapter 17
Creating Custom View Models
17-3

1. Create a customRegistry.js file in myproject/web/custom/.
2. Define the custom organization hierarchy module in this file. Example 17-2 shows
a definition of the custom organization hierarchy module in the registry using the
SDK samples.
3. Save the file in your NetBeans IDE project.
Example 17-2 Sample Custom Organization Hierarchy Registry Entry
var CustomRegistry = {
organizationHierarchy: {
view: 'text!templates/customOrganizationHierarchyView.html',
viewmodel: 'viewmodel/CustomOrganizationHierarchyViewModel',
removeFromHierarchyOverlayView:
'text!templates/organizationHierarchy/overlays/
removeFromHierarchyOverlayView.html',
removeFromHierarchyOverlayViewModel: 'overlayviewmodels/
organizationHierarchy/RemoveFromHierarchyOverlayViewModel',
showAllChildrenOverlayView:
'text!templates/showAllChildrenOverlayView.html',
showAllChildrenOverlayViewModel:
'viewmodel/ShowAllChildrenOverlayViewModel'
}};
Adding the Data Model JAR File
To add the data model JAR file to your NetBeans IDE project, copy the
extensionDataModel.jar from SDK_home/libs to your Billing Care customization
NetBeans IDE project (myproject/web/lib).
Deploying Customizations
Package and deploy your customizations using one of the methods described in
"Using an Exploded Archive during Customization" or "Packaging and Deploying
Customizations".
Chapter 17
Adding the Data Model JAR File
17-4

18
Customizing Billing Care Invoice Presentation
You can customize how Oracle Communications Billing Care retrieves and presents invoices
for display.
Topics in this document:
• About Billing Care Invoice Presentation
• Customizing Billing Care Invoice Presentation
• Presenting Invoices in a Dialog Box
• Retrieving Invoices from Third-Party Repositories
About Billing Care Invoice Presentation
Billing Care retrieves invoices from external invoice repositories, such as Oracle Business
Intelligence Publisher (BIP), and displays the supported invoice formats (for example, PDF
and html) in the web browser. When a user views an invoice, Billing Care retrieves the
invoice identifier for the active bill unit from Oracle Communications Billing and Revenue
Management (BRM) and sends a request to the invoice repository to present the invoice
document.
By default, BRM integrates with BIP for generating and storing PDF invoices of customer bill
units retrievable in Billing Care. See "Designing and Generating Invoices in Oracle Business
Intelligence Publisher 11g" in Oracle Communications Billing and Revenue Management
Designing and Generating Invoices for more information on this integration.
Customizing Billing Care Invoice Presentation
Customize Billing Care invoice presentation in the following ways using the Billing Care SDK:
• Presenting Invoices in a Dialog Box
• Retrieving Invoices from Third-Party Repositories
The Billing Care SDK includes sample invoice presentation customizations in the SDK_home/
samples/InvoiceRepository directory, where SDK_home is the directory where you installed
the SDK. Use the samples as guidelines for developing your own customizations.
Setting Up NetBeans IDE for Customizing Invoice Presentation
Customizing Billing Care invoice presentation requires overriding default view model
(BillInvoiceViewModel.js) behavior and adding the custom JavaScript to the customizations
shared library deployed to the Billing Care domain. See "About Billing Care Modules" for
more information on how view models use JavaScript to perform functions.
See "Setting Up the Development Environment" for information on setting up NetBeans IDE.
See "Packaging and Deploying Customizations" for more information on packaging and
deploying your invoice presentation changes.
18-1

To customize Billing Care invoice presentation:
1. Create a customModule.properties file in your myproject/web/WEB-INF/
classes/custom/ directory, where myproject is your NetBeans IDE project
containing your Billing Care customizations. This file will contain a reference to the
location of the custom Java classes you create.
2. Copy the default registry.js file from SDK_home/references to a custom registry
file named customregistry.js in your myproject/web/custom directory. This file
contains the billInvoice module definition using your custom view model
(JavaScript).
3. Customize invoice presentation by creating the Java classes and necessary
resources (JavaScript view model) as described in the following sections.
4. Add your customization files to your NetBeans IDE project (myproject). Add new
JavaScript to support your custom view model in the myproject/web/js/
viewmodels/billinvoice directory.
5. Right-click your NetBeans IDE project and select Clean and Build.
6. Package and deploy your invoice presentation customizations to your Billing Care
domain.
For more information, see "Packaging and Deploying Customizations".
7. Verify your changes in Billing Care.
Presenting Invoices in a Dialog Box
The default invoice presentation displays PDF invoices in an iframe (inline frame)
within the active Billing Care browser window. Billing Care also supports presentation
of invoices in a dialog box.
To present invoices in a dialog box:
1. In a text editor, open your CustomConfigurations.xml file. This file contains
configuration entries for Billing Care behavior. See "Creating a Custom
Configuration File" for more information on creating a custom configuration file in
your NetBeans IDE project.
2. Set the value for the billinvoice.use.modaldialog flag to true as shown:
<flags>
<key>billinvoice.use.modaldialog</key>
<value>false</value>
<desc>If value is true then displays the bill invoice in a modal
dialog.</desc>
</flags>
3. Save the configuration file.
4. Do one of the following:
• If you are using an exploded archive for your shared library, log out of and
back into Billing Care to see the new theme. See "About Using an Exploded
Archive" for more information about using exploded archives.
• Package your customizations shared library and deploy it to your Billing Care
domain. Redeploy Billing Care and login to see the new theme. See
"Packaging and Deploying Customizations" for more information on packaging
and deploying your customizations.
Chapter 18
Presenting Invoices in a Dialog Box
18-2

5. Verify your changes in Billing Care.
Retrieving Invoices from Third-Party Repositories
By default, Billing Care retrieves invoices from BIP. The logic to retrieve an invoice identifier
for the active bill unit and request the PDF invoice from BIP are contained in the
PCMBillModule class. This class contains the following methods:
• getInvoicePDF(String id)
Contains the code to invoke the worker method to retrieve Invoice ID and template name
from bill Id passed from BRM.
• runReport (String invoiceId,String templateName)
This method is called from the getInvoicePDF method. It contains the code to retrieve the
PDF invoice from BIP using the invoice id and template name by calling the BI Publisher
web service.
To use an invoice repository other than BIP, override the getInvoicePDF and runReport
methods in the PCMBillModule class.
The override implementation was depend on how your invoice repository's API for retrieving
and sending invoices to external clients. A simple REST example is included in the SDK and
includes:
• A sample Java class (CustomPCMBillModule.java), which extends runReport to
connect to a basic local invoice file system repository. This class is located in the
SDK_home/samples/InvoiceRepository/rest/src/com/oracle directory.
• A test resource Java class to use with CustomPCMBillModule.java, which provides a
local file PDF for retrieval. This class is located in the SDK_home/samples/
InvoiceRepository/TestResource/src/com/oracle directory.
To retrieve an invoice from a repository other than BIP:
1. Create a CustomPCMBillModule.java file in the myproject/src/ directory, where
myproject is your NetBeans IDE project containing your Billing Care customizations, to
override the original PCMBillModule.
Use the sample provided in the SDK as an example. Your implementation will depend on
your invoice repository's API.
2. Compile your custom classes using NetBeans IDE.
3. Add your customization files to your NetBeans IDE project (myproject):
• Add an entry in the customModule.properties in the myproject/web/WEB-INF/
classes/custom folder to override the default billing module as follows:
billingcare.rest.billing.module=com
.
company
.
modules.CustomPCMBillModule
where company is the company name used in your myproject/src directory.
4. Right-click your NetBeans IDE project and select Clean and Build.
5. Package and deploy your invoice presentation customizations to your Billing Care
domain.
For more information, see "Packaging and Deploying Customizations".
6. Verify your changes in Billing Care.
Chapter 18
Retrieving Invoices from Third-Party Repositories
18-3

19
Customizing Reason Codes List in Event
Adjustments
You can customize the Oracle Communications Billing Care Event Adjustments dialog box to
display specific reason codes.
Topics in this document:
• About Displaying Reason Codes
• Customizing Reason Codes List in Event Adjustments
• Creating the Custom Event Adjustment View Model
• Configuring the Custom Purchase View Model in the Registry
• Deploying Customizations
About Displaying Reason Codes
By default, all the reason codes configured for adjustments are displayed in the Event
Adjustment dialog box. When you perform adjustments for events, you can select a reason
code from this list to specify the reason for the adjustment.
Customizing Reason Codes List in Event Adjustments
You can customize the Event Adjustment dialog box using OPSS policies to display only
specific reason codes in the list.
To customize the reason codes list displayed in the Event Adjustments dialog box:
1. Create a custom ResourceType and Resource for reason codes in the OPSS Server. For
example, ReasonCodeResourceType, ReasonCodeResource.
2. Define the reason codes as corresponding actions for the ResourceType in the OPSS
Server.
You can specify Reason ID as the action name when you define the actions.
3. Add the new ResourceType to the CustomConfigurations.xml file. For example:
<keyvals>
<key>authorizationResourceTypes</key>
<value>ReasonCodeResourceType</value>
<desc>Add comma separated OPSS Resource Types(values) for authorization.
Also these resource types should be defined in OPSS.
Please note that the key should not be changed here.
</desc>
</keyvals>
4. Create a custom view model to define the display of Event Adjustment dialog box. See
"Creating the Custom Event Adjustment View Model" for more information.
19-1

5. Create a customRegistry.js file to configure Billing Care to use the custom view
model that you created. See "Configuring the Custom Event Adjustment View
Model in the Registry" for more information.
6. Deploy your custom event adjustment project to your application server. See
"Deploying Customizations" for more information.
Creating the Custom Event Adjustment View Model
Billing Care uses view model to define the display of the screens in Billing Care. You
must create the custom view model, CustomEventAdjustmentViewModel,
containing the details to customize the display of reason codes in the Event
Adjustment dialog box.
See "About View Models" for more information about Billing Care view models.
To create the custom event adjustment view model:
1. Create the customEventAdjustmentViewModel.js file in myproject/web/custom/
viewmodels directory, where myproject is the folder containing your NetBeans
IDE project.
2. Add the following code in the customEventAdjustmentViewModel.js file using a
text editor:
define(['jquery', 'knockout',
'viewmodels/ARActions/adjustments/EventAdjustmentViewModel'
],
function($, ko, EventAdjustmentViewModel) {
function customEventAdjustmentViewModel() {
EventAdjustmentViewModel.apply(this, arguments);
self = this;
self.notesReasonCodes = ko.computed(function() {
if (self.domainId() !== null) {
self.selectedReasonCode("");
reasonCodes =
Configurations.getReasonCodes(self.domainId());
filterReasonCodes = [];
for (i = 0; i < reasonCodes.length; i++) {
if(util.isGrantedResourceAction(reasonCodes[i].ReasonID,
"ReasonCodeResource")){ //Use newly created resource here
filterReasonCodes.push(reasonCodes[i]);
}
}
}
return filterReasonCodes;
});
}
customEventAdjustmentViewModel.prototype = new
EventAdjustmentViewModel();
return customEventAdjustmentViewModel;
});
3. Save the file in your NetBeans IDE project.
Chapter 19
Creating the Custom Event Adjustment View Model
19-2

Configuring the Custom Event Adjustment View Model in the
Registry
After creating the required custom view model, create a custom event adjustment view model
entry in the customRegistry.js file. Billing Care uses the custom event adjustment view
model instead of the default event adjustment view model during adjustments and renders
the Event Adjustment dialog box containing your customization.
To create the custom event adjustment view model entry in the registry:
1. Create a customRegistry.js file in myproject/web/custom/ directory.
2. Define the custom event adjustment view model in this file. For example:
eventAdjustment: {
viewmodel: 'custom/viewmodels/customEventAdjustmentViewModel.js'
}
3. Save the file in your NetBeans IDE project.
Deploying Customizations
Package and deploy your customizations using one of the methods described in "Using an
Exploded Archive during Customization" or "Packaging and Deploying Customizations".
Chapter 19
Configuring the Custom Event Adjustment View Model in the Registry
19-3

20
Restricting Debit and Credit Event Adjustment
Options
You can customize Oracle Communications Billing Care to restrict debit and credit adjustment
options in the Event Adjustment dialog box based on user roles.
Topics in this document:
• About Debit and Credit Event Adjustments
• Restricting Debit and Credit Adjustment for Events
• Creating a Custom View Model for Restricting Debit and Credit Adjustments
• Configuring the Custom View Model for Debit and Credit Adjustments
About Debit and Credit Event Adjustments
To perform debit or credit event adjustments, you enter the adjustment amount in the
Adjustment field in the Event Adjustment dialog box. For credit adjustment, you enter a
positive amount or percentage. For debit adjustment or to increase the amount due, you
enter a negative amount. You can restrict the debit or credit event adjustments based on user
roles by customizing Billing Care using the SDK and OPSS policies.
Restricting Debit and Credit Adjustment for Events
You can customize the Event Adjustment dialog box using OPSS policies to restrict the debit
and credit adjustment options for events based on user roles.
To customize debit and credit adjustment options in the Event Adjustment dialog box:
1. Define a new ResourceType in the OPSS Server. For example,
AdjustmentActionResourceType.
2. Define the debit and credit options as corresponding actions for the ResourceType in the
OPSS Server.
3. Add the new ResourceType to the CustomConfigurations.xml file. For example:
<keyvals>
<key>authorizationResourceTypes</key>
<value>AdjustmentActionResourceType</value>
<desc>Add comma separated OPSS Resource Types(values) for authorization.
Also these resource types should be defined in OPSS.
Please note that the key should not be changed here.
</desc>
</keyvals>
4. Create a custom view model to define the display of Event Adjustment dialog box. See
"Creating a Custom View Model for Restricting Debit and Credit Adjustments" for more
information.
20-1

5. Create a customRegistry.js file to configure Billing Care to use the custom view
model that you created. See "Configuring the Custom View Model for Debit and
Credit Adjustments" for more information.
6. Deploy your customizations using one of the methods described in "Using an
Exploded Archive during Customization" or "Packaging and Deploying
Customizations".
Creating a Custom View Model for Restricting Debit and
Credit Adjustments
Billing Care uses view model to define the display of the screens in Billing Care. You
must create or update the custom view model, CustomEventAdjustmentViewModel,
and add the details containing the logic to check if the adjustment is a debit or credit
adjustment and determine if that adjustment is allowed for the specific user role.
See "About View Models" for more information about Billing Care view models.
To create a custom model for customizing debit and credit event adjustment options:
1. Create or update the customEventAdjustmentViewModel.js file in
myproject/web/custom/viewmodels directory, where myproject is the folder
containing your NetBeans IDE project.
2. Add the following code in the customEventAdjustmentViewModel.js file using a
text editor:
define(['jquery', 'knockout',
'viewmodels/ARActions/adjustments/EventAdjustmentViewModel'
],
function($, ko, EventAdjustmentViewModel) {
function customEventAdjustmentViewModel() {
EventAdjustmentViewModel.apply(this, arguments);
self = this;
self.isValid = function () {
var actionName;
if (self.adjustmentAmount().indexOf(')') > -1)
actionName = "Debit"; // write debit action name
created in OPSS
else
actionName = "Credit"; // write credit action name
created in OPSS
if (self.note.isValid() && self.validator &&
self.validator.form()) {
//Write resourcename which include credit and debit actions
if (!util.isGrantedResourceAction(actionName,
"customResource"))
{
alert(actionName + " adjustment is not
allowed");
return false;
}
return true;
}
return false;
};
Chapter 20
Creating a Custom View Model for Restricting Debit and Credit Adjustments
20-2

}
customEventAdjustmentViewModel.prototype = new
EventAdjustmentViewModel();
return customEventAdjustmentViewModel;
});
3. Save the file in your NetBeans IDE project.
Configuring the Custom View Model for Debit and Credit
Adjustments
After creating or updating the required custom view model, ensure that the custom event
adjustment view model entry is created in the customRegistry.js file. Billing Care uses the
custom event adjustment view model instead of the default event adjustment view model
during adjustments and renders the Event Adjustment dialog box containing your
customization.
To create the custom event adjustment view model entry in the registry:
1. Create a customRegistry.js file in myproject/web/custom/ directory.
2. Define the custom event adjustment view model in this file. For example:
eventAdjustment: {
viewmodel: 'custom/viewmodels/customEventAdjustmentViewModel.js'
}
3. Save the file in your NetBeans IDE project.
Chapter 20
Configuring the Custom View Model for Debit and Credit Adjustments
20-3

21
Customizing Billing Care to Display Only
Event Adjustments
You can customize Oracle Communications Billing Care to display only event adjustments in
the Bills section for performing adjustments.
Topics in this document:
• About Displaying Event Adjustments
• Customizing Billing Care to Display Only Event Adjustments
• Creating Custom View Models to Display Only Event Adjustments
• Configuring Custom Bill and Bill Item View Models in the Registry
About Displaying Event Adjustments
By default, Billing Care display all the adjustment options, such as bill, item, and event, for
performing adjustments. However, you can customize Billing Care to display only the list of
event adjustment options and hide bill and item adjustment options by using the Billing Care
SDK. This lets you perform only event adjustments for the selected account.
Customizing Billing Care to Display Only Event Adjustments
You can customize Billing Care using OPSS policies to display only event adjustments for
performing adjustments.
To customize Billing Care to display only event adjustments:
1. Create a custom ResourceType and Resource for event adjustments in the OPSS server.
For example, AdjustmentResourceType, AdjustmentResource.
2. Define Make as the corresponding action for the custom ResourceType in the OPSS
server.
3. Add the new ResourceType to the CustomConfigurations.xml file. For example:
<key>authorizationResourceTypes</key>
<value>customResourceType</value>
<desc>Add comma separated OPSS Resource Types(values) for
authorization.
Also these resource types should be defined in OPSS.
Please note that the key should not be changed here.
</desc>
</keyvals>
See "Editing the Billing Care Configuration File" for customization of the
configurations.xml file.
4. Create custom view models containing overrides to hide bill and item adjustments. See
"Creating Custom View Models to Display Only Event Adjustments" for more information.
21-1

5. Create a customRegistry.js file configuring Billing Care to use the custom view
models that you created. See "Configuring Custom Bill and Bill Item View Models
in the Registry" for more information.
6. Deploy your customizations using one of the methods described in "Using an
Exploded Archive during Customization" or "Packaging and Deploying
Customizations".
Creating Custom View Models to Display Only Event
Adjustments
Billing Care uses view model to define the display of the Item Adjustment, Bill
Adjustment, and Event Adjustment dialog boxes. You must create the custom view
models, CustomBillItemChargesViewModel and CustomBillChargesViewModel,
containing overrides to hide bill and item adjustments. See "About View Models" for
more information about Billing Care view models.
To create custom view models to display only event adjustments:
1. Create the customBillItemChargesViewModel.js and
customBillChargesViewModel.js files in the myproject/web/custom/js/
viewmodels directory, where myproject is the folder containing your NetBeans
IDE project.
2. Add the following code in the customBillItemChargesViewModel.js file using a
text editor:
define(['jquery', 'knockout',
'viewmodels/billMainPanel/BillItemChargesViewModel'
],
function($, ko, BillItemChargesViewModel) {
function CustomBillItemChargesViewModel() {
BillItemChargesViewModel.apply(this, arguments);
self = this;
self.showARActionMenu = function(data, event) {
self.__proto__.showARActionMenu(data,event);
// write custom action name and resource. Item
adjustment
can be hide by not granting make permission to customResource.
if (!util.isGrantedResourceAction("make",
"customResource")){
$("#billItemFlyoverNewAdjustment").hide();
}
};
}
CustomBillItemChargesViewModel.prototype = new
BillItemChargesViewModel();
return CustomBillItemChargesViewModel;
});
3. Save the file in your NetBeans IDE project.
4. Add the following code in the customBillChargesViewModel.js file using a text
editor:
Chapter 21
Creating Custom View Models to Display Only Event Adjustments
21-2

define(['jquery', 'knockout',
'viewmodels/billtab/BillChargesViewModel'
],
function($, ko, BillChargesViewModel) {
function customBillChargesViewModel() {
BillChargesViewModel.apply(this, arguments);
$(function() {
var myVar = setInterval(function() {
if ($('#adjustbillListMenu').length > 0)
{
// write custom action name and resource. Bill
adjustment
//can be hide by not granting make permission to
customResource.
if (!util.isGrantedResourceAction("make",
"customResource")) {
$('#adjustbillListMenu').remove();
if
($("#actionsmenu").next().children("li.ui-menu-item").length < 1) {
$("#actionsmenu").children("span").remove();
}
clearInterval(myVar);
}
}, 20);
});
}
customBillChargesViewModel.prototype = new
BillChargesViewModel();
return customBillChargesViewModel;
});
5. Save the file in your NetBeans IDE project.
Configuring Custom Bill and Bill Item View Models in the
Registry
After creating CustomBillItemChargesViewModel and CustomBillChargesViewModel
view models, create custom view model entries in the customRegistry.js file to use when
performing adjustments. Billing Care uses the custom bill tab view model and bill item
charges view model instead of the default entries when rendering the Adjustments screen.
To create custom view model entries in a customRegistry.js file:
1. Create a customRegistry.js file in myproject/web/custom by copying the reference
registry file.
2. Define the entries referencing the custom view models in this file. For example:
billTab: {
billChargesViewModel:'custom/js/viewmodels/customBillChargesViewModel.js'
},
Chapter 21
Configuring Custom Bill and Bill Item View Models in the Registry
21-3

billItemCharges: {
viewmodel: 'custom/js/viewmodels/customBillItemChargesViewModel.js'
}
3. Save the file in your NetBeans IDE project.
Chapter 21
Configuring Custom Bill and Bill Item View Models in the Registry
21-4

22
Customizing Account Creation Service Fields
You can add custom account creation fields to Oracle Communications Billing Care for
capturing required service configuration information.
Topics in this document:
• About Customizing Account Creation
• Creating Custom Search View Models
• Creating a Custom Service View Model HTML Template
• Extending the Service Validator for Custom Fields
• Configuring a Custom Module in the Registry
• Deploying Customizations
About Customizing Account Creation
Users create new subscriber accounts by clicking New Account on the Billing Care home
page. New accounts require creating new subscriber profiles, selecting offers, and
configuring services and payments. Your offers may require additional fields for capturing
custom service configuration attributes during account creation.
Use the Billing Care SDK to customize new account service configuration to capture such
information. For example, use the SDK to add fields for capturing mailbox message limits to
set when configuring a messaging service. The SDK includes a sample for adding fields to
account creation in SDK_home/samples/AccountCreation_CustomizeServices, where
SDK_home is the Billing Care SDK installation directory.
Adding custom service configuration fields requires:
1. Creating Custom View Models
2. Creating a Custom Service View Model HTML Template
3. Extending the Service Validator for Custom Fields
4. Configuring a Custom Module in the Registry
5. Deploying Customizations
Creating Custom View Models
Billing Care renders account creation screens using view models that define graphical
elements including service configuration fields. See "About View Models" for a description of
view models. Adding additional fields for account creation requires:
• Extending the New Account Configuration View Model
• Creating a Custom Service Configuration View Model
22-1

Both view models must be included in your NetBeans IDE project in the
myproject/web/custom/viewmodels/accountCreation/configure folder where
myproject is the base directory of your Net Beans IDE project. See "Setting Up the
Development Environment" for more information on setting up your project.
Extending the New Account Configuration View Model
Billing Care uses NewAccountConfigureViewModel.js during account creation to
identify configurable services. This file selects a registry key based on the service
being configured and maps this registry key to a module (view, view model, and
validator) configuration defined in the registry. Billing Care then renders the
appropriate service configuration screen based on the mapped module during account
creation.
Adding additional fields to capture during service configuration requires extending
NewAccountConfigureViewModel.js with additional registry keys for custom
services. This enables Billing Care to select the correct registry key defining the
custom service configuration.
A sample CustomNewAccountConfigureViewModel.js file is provided in the
SDK_home/samples/AccountCreation_CustomizeServices/web/custom/js/
viewmodels/accountCreation/configure directory.
To extend NewAccountConfigureViewModel.js:
1. Create a CustomNewAccountConfigureViewModel.js file in myproject/web/
custom/js/viewmodels/area/configure where myproject is the folder containing
your NetBeans IDE project and area is the customization type.
2. Define new registry keys that map to Oracle Communications Billing and Revenue
Management (BRM) service types. Example 22-1 shows an additional registry key
definition for /service/email.
3. Save the file in your NetBeans IDE project.
Example 22-1 Sample New Account Configure View Model
define(['knockout', 'underscore', 'viewmodels/accountCreation/configure/
NewAccountConfigureViewModel'], function(ko, _, NewAccountConfigureViewModel) {
function CustomNewAccountConfigureViewModel() {
NewAccountConfigureViewModel.apply(this, arguments);
var self = this;
/**
* Get registryKey for service type from the activePageKey.
* @param {type} apKey
* @returns {String}
*/
self.getRegistryKeyForServiceType = function(apKey){
var registryKey = null;
if(apKey != null && apKey.indexOf("/service/telco") !== -1){
registryKey = "telcoServiceConfiguration";
}else if(apKey != null && apKey.indexOf("/service/email") !== -1){
registryKey = "emailServiceConfiguration";
}
return registryKey;
};
}
Chapter 22
Creating Custom View Models
22-2

CustomNewAccountConfigureViewModel.prototype = new NewAccountConfigureViewModel();
return CustomNewAccountConfigureViewModel;
});
Creating a Custom Service Configuration View Model
Billing Care uses a service configuration view model to define what fields to capture during
service configuration. The fields defined in the service configuration view model are bound in
the HTML file used to render the service configuration screen. You must create a custom
service configuration view model to capture additional fields during account creation for any
custom services.
A sample CustomEmailServiceConfigurationViewModel.js file is provided in the
SDK_home/samples/AccountCreation_CustomizeServices/web/custom/js/viewmodels/
accountCreation/configure directory. This sample defines three mailbox attributes usable
for a custom messaging service. Use this sample to create a custom service configuration
view model for defining the fields required by your service.
To create a custom service configuration view model defining the additional fields you need to
capture:
1. Create a CustomServiceConfigurationViewModel.js file in myproject/web/custom/js/
viewmodels/area/configure where myproject is the folder containing your NetBeans IDE
project and area is the customization type.
2. Define the new fields required for capture in this file.
3. Define the BRM service type using the @class property in the self.isValid function in this
file. Following are the supported @class services:
com.oracle.communications.brm.cc.model.ServiceEmailType
com.oracle.communications.brm.cc.model.ServiceBroadbandType
com.oracle.communications.brm.cc.model.ServiceDataType
com.oracle.communications.brm.cc.model.ServiceLdapType
com.oracle.communications.brm.cc.model.ServiceMmsType
com.oracle.communications.brm.cc.model.ServiceEmailType
com.oracle.communications.brm.cc.model.ServiceProviderType
com.oracle.communications.brm.cc.model.ServiceSpcontentType
com.oracle.communications.brm.cc.model.ServiceInstantchatType
com.oracle.communications.brm.cc.model.ServicePsmcontentproviderType
com.oracle.communications.brm.cc.model.ServiceContentproviderType
com.oracle.communications.brm.cc.model.ServiceConfchatType
com.oracle.communications.brm.cc.model.ServiceProviderProdType
com.oracle.communications.brm.cc.model.ServiceInternettvType
com.oracle.communications.brm.cc.model.ServiceAdminClientType
com.oracle.communications.brm.cc.model.ServiceCableType
com.oracle.communications.brm.cc.model.ServiceVideochatType
com.oracle.communications.brm.cc.model.ServiceCloudType
com.oracle.communications.brm.cc.model.ServiceStreamType
com.oracle.communications.brm.cc.model.ServiceTelephonyType
com.oracle.communications.brm.cc.model.ServiceContentType
com.oracle.communications.brm.cc.model.ServicePcmClientType
com.oracle.communications.brm.cc.model.ServiceIpType
com.oracle.communications.brm.cc.model.ServiceSsgType
Chapter 22
Creating Custom View Models
22-3

com.oracle.communications.brm.cc.model.ServiceFaxType
com.oracle.communications.brm.cc.model.ServiceSettlementType
com.oracle.communications.brm.cc.model.ServiceVpdnType
com.oracle.communications.brm.cc.model.ServiceTelcoType
com.oracle.communications.brm.cc.model.ServiceTelcoVoipType
com.oracle.communications.brm.cc.model.ServiceTelcoGprsType
com.oracle.communications.brm.cc.model.ServiceTelcoGsmType
4. Save the file in your NetBeans IDE project.
Creating a Custom Service View Model HTML Template
Billing Care uses an HTML view file to render the service configuration screen during
account creation. You must create a custom service view model HTML template to
display any additional fields during service configuration. The template file contains the
additional fields defined in the custom service configuration view model created in
"Creating a Custom Service Configuration View Model".
A sample customEmailServiceConfigView.html file is provided in the SDK_home/
samples/AccountCreation_CustomizeServices/web/custom/templates/
accountCreation/configure directory where SDK_home is the Billing Care SDK
installation directory. This sample defines how to render three mailbox attributes
usable for a custom messaging service and the data binding values. Use this sample
to create a custom service configuration HTML template for displaying the fields
required by your service.
To create a custom service configuration HTML template for rendering the additional
fields you need to capture:
1. Create a CustomServiceConfigView.html file in myproject/web/custom/
templates/area/configure where myproject is the folder containing your NetBeans
IDE project and area is the customization type.
2. Define the new fields in HTML required for rendering in this file.
3. Save the file in your NetBeans IDE project.
Extending the Service Validator for Custom Fields
Billing Care uses a JavaScript-based validator for validating field entry in the service
configuration screen during account creation. You must create a custom field validator
for any additional fields you add in your HTML template to assure that entered values
are properly formatted. The registry key entry that defines the custom module includes
the validator JavaScript file.
A sample CustomEmailServiceFieldsValidatory.js file is provided in the SDK_home/
samples/AccountCreation_CustomizeServices/web/custom/js/validations/
accountCreation/configure directory. This sample defines the required format of
each custom field and the error message that appears if the user enters an incorrect
format. Use this sample to create a custom service fields validator for your service.
To create a custom service fields validator:
1. Create a CustomServiceFieldsValidator.js file in myproject/web/custom/js/
validations/area/configure where myproject is the folder containing your
NetBeans IDE project and area is the customization type.
Chapter 22
Creating a Custom Service View Model HTML Template
22-4

2. Define the required field validations in this file.
3. Save the file in your NetBeans IDE project.
Configuring a Custom Module in the Registry
After creating the required custom view models, HTML template, and validator, create a
custom account creation module entry in the customRegistry.js file to use when creating a
new account. Billing Care uses the custom account creation module instead of the default
entry during account creation and renders the service configuration screen containing your
custom fields.
A sample customRegistry.js file is provided in the SDK_home/samples/
AccountCreation_CustomizeServices/web/custom directory. This sample defines the
custom account creation module containing the previously referenced sample view models,
HTML template, and validator.
To create a custom account creation module entry in the customRegistry.js file:
1. Create a customRegistry.js file in myproject/web/custom/ where myproject is the folder
containing your NetBeans IDE project.
2. Define the custom account creation module in this file. Example 22-2 shows a definition
of the custom account creation module in the registry using the SDK samples.
3. Save the file in your NetBeans IDE project.
Example 22-2 Sample Custom Account Creation Module Registry Entry
var CustomRegistry = {
accountCreationConfigure: {
viewmodel: '../custom/js/viewmodels/accountCreation/configure/
CustomNewAccountConfigureViewModel',
emailServiceConfiguration:{
view: 'text!../custom/templates/accountCreation/configure/
customEmailServiceConfigView.html',
viewmodel: '../custom/js/viewmodels/accountCreation/configure/
CustomEmailServiceConfigurationViewModel',
validator: '../custom/js/validations/accountCreation/configure/
CustomEmailServiceFieldsValidator'
}
}
};
Deploying Customizations
Package and deploy your customizations using one of the methods described in "Using an
Exploded Archive during Customization" or "Packaging and Deploying Customizations".
Chapter 22
Configuring a Custom Module in the Registry
22-5

23
Creating Custom Billing Care Credit Profiles
You can customize Oracle Communications Billing Care to store subscriber credit profiles.
Topics in this document:
• About Credit Profiles
• Customizing Billing Care to Store Credit Profiles
• Creating Custom Profile Storable Classes in BRM
• Extending the Billing Care Data Model with XSD and JSON Files
• Adding the Required Files to the NetBeans Project
• Deploying Customizations
About Credit Profiles
Billing Care uses credit profiles to store subscriber information related to credit worthiness
including social security numbers and credit scores. By default, Billing Care does not store or
display credit profile information. You customize Billing Care to display credit profile
information stored in Oracle Communications Billing and Revenue Management (BRM) using
the SDK.
Customizing Billing Care to Store Credit Profiles
Support for credit profiles requires customizations in both BRM and Billing Care.
To add credit profile support in Billing Care:
1. Create the required credit profile objects in BRM either by importing the sample
configuration provided by the SDK, or manually creating the objects using Oracle
Communications Billing and Revenue Management Developer Center. See "Creating
Custom Profile Storable Classes in BRM" for more information.
2. Generate the required XSD and JSON files using the Data Model Generator utility. See
"Extending the Billing Care Data Model with XSD and JSON Files" for more information.
3. Add the generated XSD and JSON files, and Java JAR file to your NetBeans IDE project.
See "Adding the Required Files to the NetBeans Project" for more information.
4. Deploy your custom payment type projects to your application server. See "Deploying
Customizations" for more information.
The Billing Care SDK includes a sample credit profile customization in the SDK_home/
samples/EndToEndUseCase directory. The credit profile sample stores only the social
security number and credit score. Extend the sample with additional fields if required by your
business. Use this sample to assist you in customizing Billing Care with credit profile support
23-1

Creating Custom Profile Storable Classes in BRM
Credit profile support requires creating the credit profile object in the BRM database
where Billing Care stores subscriber credit profile data. The SDK sample includes a
PODL file containing the credit profile object definitions which can be imported into
BRM using the pin_deploy utility. Alternatively, you can create the required objects
manually using Developer Center.
To create the credit profile object in the BRM database, select one of the following
methods:
• Importing Credit Profile Class Definitions into BRM
• Creating Credit Profile Objects Using Developer Center
Importing Credit Profile Class Definitions into BRM
To import the sample PODL definition file into BRM:
1. Copy the credit_profileObj.podl file located in SDK_home/samples/
EndToEndUseCase/BRM_CreditProfileObject to your BRM_home/test folder,
where BRM_home is the home directory of your BRM installation.
2. Run the following command:
pin_deploy create credit_ProfileObj.podl
3. Start Developer Center.
4. Open the Class Browser and verify that the /profile/credit_check object is
present.
The SDK sample includes a pre-compiled JAR file that must be added to your
NetBeans IDE project for Billing Care to use the new credit profile class. This JAR is
located in the SDK_home/samples/EndToEndUseCase/web/WEB-INF/lib folder.
Creating Credit Profile Objects Using Developer Center
Use Developer Center to manually create the credit profile object and fields in BRM.
See "Creating the Credit Profile Class and Field " for more information on using
Developer Center to create the required object and fields.
If you choose to create the credit profile class manually, you must use the Generate
Custom Fields Source utility to create source files containing the new custom fields.
Compile these source files into a JAR file and add the JAR file to your NetBeans IDE
project. See "Generating the Required JAR File and Infranet.properties" for more
information on generating the required JAR file.
Creating the Credit Profile Class and Field
Create the credit profile object and fields in BRM using Developer Center. This section
provides a high level overview of the process including a general overview on how to
create and update the required objects. For detailed information on using the
Developer Center to create a custom credit profile see "Creating Custom Fields and
Chapter 23
Creating Custom Profile Storable Classes in BRM
23-2

Storable Classes" in Oracle Communications Billing and Revenue Management Developer's
Guide.
To create the credit profile class:
1. Start Developer Center.
2. Open the Class Browser.
3. Create the /profile/credit_check class.
4. Commit the new class.
To create the required fields for the new credit profile class:
1. Open the Storable Class Editor.
2. Create the required fields listed in Table 23-1 for the credit profile class.
Table 23-1 /profile/credit_check Class Fields
Field Type
PIN_FLD_CREDIT_INFO SUBSTRUCT
PIN_FLD_SSN STRING
PIN_FLD_CREDIT_SCORE INT
3. Commit the subclass changes to the database.
To add the created fields to the new credit profile class:
1. Open the Class Browser.
2. Select the /profile/credit_check class.
3. Add the fields listed in Table 23-1 to the credit profile class.
4. Commit the subclass changes to the database.
Generating the Required JAR File and Infranet.properties
To create the required JAR containing the compiled credit profile Java source code:
1. Open the Class Browser.
2. Select the /profile/credit_check class.
3. Select File and then select Generate Custom Fields Source. See "Making Custom
Fields Available to Your Applications" in BRM Developer's Guide.
The utility generates the required Java class files and the
InfranetPropertiesAdditions.properties file.
4. Copy the contents of the InfranetPropertiesAdditions.properties file into the
Infranet.properties file located in the home directory of the Billing Care WebLogic
Server administrative user.
5. Compile the Java class files into a JAR file named Custom.jar. Include the SDK_home/
libs/pcm.jar file in the classpath option when compiling.
Chapter 23
Creating Custom Profile Storable Classes in BRM
23-3

Extending the Billing Care Data Model with XSD and JSON
Files
The Billing Care SDK includes a Data Model Generator utility for generating the
required XSD and JSON files containing the credit profile definitions. The Data Model
Generator is located in the SDK_home/samples/data_model_generator directory.
Note:
The Data Model Generator utility requires an Infranet.properties file
configured with BRM connection information in the local user's home
directory. The utility connects to the BRM system defined in this file to
retrieve the object configuration before generating the required XSD and
JSON files. See "Configuring Additional Settings in the Infranet.properties
File" in Billing Care Installation Guide for more information.
To create the required XSD and JSON files for credit profile:
1. Open a command-line interface on the system where the Billing Care SDK is
installed.
2. Change to the SDK_home/samples/data_model_generator directory.
3. Run the DatamodelGenerator.bat (Windows) or DataModelGenerator.sh (Linux)
script to generate the XSD and JSON files.
The Data Model Generator outputs the extensionDataModel.jar containing the XSD
files and an XSD file containing the definition of your custom payment type. Add these
files to your NetBeans IDE project. See "Adding the Required Files to the NetBeans
Project" for more information on adding the files to your project.
Adding the Required Files to the NetBeans Project
The EndToEndUseCase sample includes sample customized JavaScript view modules
(views, view models, validators, and HTML view template files) for Billing Care to
properly render the credit profile in the account banner. Additionally, the sample also
includes customized Action Menu and Configuration XML files enabling the entry and
display of credit profile fields.
Sample JavaScript and configuration files can be customized to your needs. See
"About Billing Care Modules" for more information on customizing view modules. See
"Customizing the Billing Care Actions Menu" and "Editing the Billing Care
Configuration File" for more information about customizing the configuration files.
The following sections indicate the locations for where the sample files should be
added in your NetBeans IDE project. Place customized versions of the view module or
configuration files in the same locations. See "Setting Up a Billing Care Customization
Project" for more information on creating the proper project directory structure.
Chapter 23
Extending the Billing Care Data Model with XSD and JSON Files
23-4

Updating the MANIFEST.MF File
To update the NetBeans IDE project MANIFEST.MF file:
1. Open your project's MANIFEST.MF file and append the contents of the SDK_home/
samples/EndToEndUseCase/src/conf/MANIFEST.MF to the end of the file.
2. Save the file.
Adding the Required View Module and Configuration Files
To add the sample view module and configuration files to your NetBeans IDE project, copy
the files located in SDK_home/samples/EndToEndUseCase/ into their corresponding
NetBeans IDE project directories.
For example, copy the SDK_home/samples/EndToEndUseCase/web/custom directory to
your myproject/web/custom directory.
Adding the Required JAR and JSON Files
To add required JAR files to your NetBeans IDE project:
1. Copy the extensionDataModel.jar and Custom.jar to your Billing Care customization
NetBeans IDE project myproject/web/lib directory where myproject is the project
directory of your Billing Care customizations NetBeans IDE project.
2. Copy the JSON file to myproject/web/custom/jsons where myproject is the project
directory of your Billing Care customizations NetBeans IDE project.
Deploying Customizations
Package and deploy your customizations using one of the methods described in "Using an
Exploded Archive during Customization" or "Packaging and Deploying Customizations".
Chapter 23
Deploying Customizations
23-5

24
Customizing the Billing Care Actions Menu
You can use the Oracle Communications Billing Care SDK to customize the Billing Care
Actions menu.
Topics in this document:
• About the Billing Care Actions Menu
• About Customizing the Actions Menu
• Removing Actions Menu Items
• Rearranging Actions Menu Items
• Renaming Actions Menu and Submenu Items
• Adding Actions Menu Items
• Adding Action Menu Items in Payment Suspense
About the Billing Care Actions Menu
The Billing Care Actions menu is defined in XML format. Example 24-1 shows a sample
portion of the XML Actions menu definition file. The
<menu>
tags represent a menu, and the
<item>
tags inside
<menu>
tags represent the submenus of that menu.
Example 24-1 Sample Portion of the Actions Menu Definitions XML File
<?xml version="1.0" encoding="UTF-8" standalone="yes"?>
<menu-definition xmlns="http://xmlns.oracle.com/cgbu/schemas/BusinessObjs">
<menu id="menu-general">
<header-key>actions_menu.ACCOUNT</header-key>
<contents>
<item id="menu-item-account-profile">
<label-key>actions_menu.ACCOUNT_PROFILE</label-key>
<description-key>actions_menu.ACCOUNT_PROFILE_SHORT_DESCRIPTION</
description-key>
<!--"permission-key" and "action-key" are used for enabling/disabling
menu using Authorization
The corresponding values should not be modified.
This applies to every entry in the xml
-->
<permission-key>AccountResource</permission-key>
<action-key>View</action-key>
<version>1.0</version>
</item>
<item id="menu-item-account-status">
<label-key>actions_menu.ACCOUNT_STATUS</label-key>
<description-key>actions_menu.ACCOUNT_STATUS_SHORT_DESCRIPTION</
description-key>
<permission-key>AccountResource</permission-key>
<action-key>Transition</action-key>
<version>1.0</version>
</item>
</contents>
24-1

</menu>
<menu id="menu-pay">
<header-key>actions_menu.PAYMENTS</header-key>
<contents>
<item id="menu-item-make-payment">
<label-key>actions_menu.MAKE_PAYMENT</label-key>
<description-key>actions_menu.MAKE_PAYMENT_SHORT_DESCRIPTION</
description-key
<permission-key>PaymentResource</permission-key>
<action-key>Make</action-key>
<version>1.0</version>
</item>
<item id="menu-item-allocate-payment">
<label-key>actions_menu.ALLOCATE</label-key>
<description-key>actions_menu.ALLOCATE_SHORT_DESCRIPTION</
description-key>
<permission-key>PaymentResource</permission-key>
<action-key>Allocate</action-key>
<version>1.0</version>
</item>
</contents>
</menu>
</menu-definition>
The following Actions menu element definitions are provided to assist you with
customizing the Actions menu:
• action-key holds the action value for the corresponding resource (for example,
Make, Allocate, and so on).
• contents.item.label-key represents the resource bundle key for entries within the
submenus.
• description-key represents a submenu description that appears below a menu
label.
• header-key represents the resource bundle key for the entries in the Actions
menu (Account, Payments, and so on) and the header within the submenus.
• id is used as the element ID for the menus and anchor links representing the
menu entries. This may be useful for the associated JavaScript code that you can
write for custom menu entries.
• label-key represents the menu label.
• permission-key reflects the authorization key that controls access to the menu
entry. This is used to hold the resource value (for example, PaymentResource,
AdjustmentResource, and so on).
Mapping Label and Description Key Values to the Resource Bundle
The label-key and description-key values use either the text string included within the
tag, or a referenced value mapped to the Billing Care resource bundle. When mapping
these keys to the resource bundle, use the following format:
actions_menu.trans-unit ID
where trans-unit ID represents the label defined in the resource bundle. See
"Customizing Billing Care Labels" for more information on customizing the resource
bundle for your environment.
Chapter 24
About the Billing Care Actions Menu
24-2

About Customizing the Actions Menu
You can customize the Actions menu in the following ways:
• Removing Actions Menu Items
• Rearranging Actions Menu Items
• Renaming Actions Menu and Submenu Items
• Adding Actions Menu Items
The Billing Care SDK includes a sample Actions menu customization in the SDK_home/
samples/ActionMenu directory. Use this sample to assist you in customizing the Actions
menu.
Setting Up NetBeans IDE for Customizing the Actions Menu
Customizing Billing Care Actions menu requires creating a custom XML configuration file
(CustomActionMenu.xml). This file contains the configuration for your custom menu
structure.
To customize Billing Care invoice presentation:
1. Copy the default ActionMenu.xml file from SDK_home/references to a custom file
named CustomActionMenu.xml in your myproject/web/WEB-INF/custom/
configurations directory.
2. Customize the Actions menu by using the CustomActionMenu.xml file as described in
the following sections.
3. Save and close the CustomActionMenu.xml file.
4. Right-click your NetBeans IDE project and select Clean and Build.
5. Package and deploy your invoice presentation customizations to your Billing Care
domain.
For more information, see "Packaging and Deploying Customizations".
6. Verify your changes in Billing Care.
Removing Actions Menu Items
Use the following procedures to remove Actions menu items:
• Removing an Existing Actions Menu Submenu
• Removing an Existing Actions Menu
Removing an Existing Actions Menu Submenu
To remove an existing Actions menu submenu:
1. Open the CustomActionMenu.xml file in an editor.
2. Delete the corresponding
<item>
element in CustomActionMenu.xml for the submenu
you want to remove.
Chapter 24
About Customizing the Actions Menu
24-3

For example, to remove Account Status from Account menu, remove the
following
<item>
element:
<item id="menu-item-account-status">
<label-key>actions_menu.ACCOUNT_STATUS</label-key>
<permission-key>AccountResource</permission-key>
<action-key>Transition</action-key>
<version>1.0</version>
</item>
3. Save and close the CustomActionMenu.xml file.
4. Right-click your NetBeans IDE project and select Clean and Build.
5. Package and deploy your invoice presentation customizations to your Billing Care
domain.
For more information, see "Packaging and Deploying Customizations".
6. Verify your changes in Billing Care.
Removing an Existing Actions Menu
To remove an existing menu:
1. Open the CustomActionMenu.xml file in an editor.
2. Delete the corresponding
<menu>
block for the menu you want to remove.
For example, to remove the Account menu, remove the following
<menu>
element:
<menu id="menu-general">
<header-key>actions_menu.ACCOUNT</header-key>
<contents>
<item id="menu-item-account-profile">
<label-key>actions_menu.ACCOUNT_PROFILE</label-key>
<!--"permission-key" and "action-key" are used for enabling/
disabling menu using Authorization
The corresponding values should not be modified.
This applies to every entry in the xml
-->
<permission-key>AccountResource</permission-key>
<action-key>View</action-key>
<version>1.0</version>
</item>
<item id="menu-item-account-status">
<label-key>actions_menu.ACCOUNT_STATUS</label-key>
<permission-key>AccountResource</permission-key>
<action-key>Transition</action-key>
<version>1.0</version>
</item>
</contents>
</menu>
3. Save and close to CustomActionMenu.xml file.
4. Package and deploy your invoice presentation customizations to your Billing Care
domain.
For more information, see "Packaging and Deploying Customizations".
5. Verify your changes in Billing Care.
Chapter 24
Removing Actions Menu Items
24-4

Rearranging Actions Menu Items
Use the following procedures to remove Actions menu items:
• Rearranging Actions Menu Submenu Items
• Rearranging Actions Menu Items
Rearranging Actions Menu Submenu Items
To rearrange Actions menu submenu items:
1. Open the CustomActionMenu.xml file in an editor.
2. Change the order of corresponding submenu <item> tags.
For example, to get Account Status first and then Account Profile second in the
Account menu:
<menu id="menu-general">
<header-key>actions_menu.ACCOUNT</header-key>
<contents>
<!-- Account status comes first -->
<item id="menu-item-account-status">
<label-key>actions_menu.ACCOUNT_STATUS</label-key>
<permission-key>AccountResource</permission-key>
<action-key>Transition</action-key>
<version>1.0</version>
</item>
<item id="menu-item-account-profile">
<label-key>actions_menu.ACCOUNT_PROFILE</label-key>
<!--"permission-key" and "action-key" are used for enabling/
disabling menu using Authorization
The corresponding values should not be modified.
This applies to every entry in the xml
-->
<permission-key>AccountResource</permission-key>
<action-key>View</action-key>
<version>1.0</version>
</item>
</contents>
</menu>
3. Save and close to CustomActionMenu.xml file.
4. Right-click your NetBeans IDE project and select Clean and Build.
5. Package and deploy your invoice presentation customizations to your Billing Care
domain.
For more information, see "Packaging and Deploying Customizations".
6. Verify your changes in Billing Care.
Rearranging Actions Menu Items
To rearrange Actions menu items:
1. Open the CustomActionMenu.xml file in an editor.
Chapter 24
Rearranging Actions Menu Items
24-5

2. Change the order of corresponding
<menu>
tags to the order you want the menus
to be displayed.
For example, to get Payments as the first menu and Account as the second
menu:
<menu id="menu-pay">
<!--content of Payments menu -->
</menu>
<menu id="menu-general">
<!--content of Account menu -->
</menu>
3. Save and close to CustomActionMenu.xml file.
4. Right-click your NetBeans IDE project and select Clean and Build.
5. Package and deploy your invoice presentation customizations to your Billing Care
domain.
For more information, see "Packaging and Deploying Customizations".
6. Verify your changes in Billing Care.
Renaming Actions Menu and Submenu Items
Use the following procedures to rename Actions menu items:
• Renaming Actions Menu Submenu Items
• Renaming Actions Menu Items
Renaming Actions Menu Submenu Items
To rename an Actions menu submenu item:
1. Open the CustomActionMenu.xml file in an editor.
2. Change the value of
<label-key>
for the submenu item you want to rename.
3. Save and close to CustomActionMenu.xml file.
4. Right-click your NetBeans IDE project and select Clean and Build.
5. Package and deploy your invoice presentation customizations to your Billing Care
domain.
For more information, see "Packaging and Deploying Customizations".
6. Verify your changes in Billing Care.
Renaming Actions Menu Items
To rename an Actions menu item:
1. Open the CustomActionMenu.xml file in an editor.
2. Change the value of
<header-key>
for the menu item you want to rename. Note
the header key for the menu changed.
3. Save and close to CustomActionMenu.xml file.
Chapter 24
Renaming Actions Menu and Submenu Items
24-6

4. Find the header key in the resource bundle and follow the steps in "Customizing the
Resource Bundle" to rename the Actions menu items.
5. Right-click your NetBeans IDE project and select Clean and Build.
6. Package and deploy your invoice presentation customizations to your Billing Care
domain.
For more information, see "Packaging and Deploying Customizations".
7. Verify your changes in Billing Care.
Adding Actions Menu Items
Adding Actions menu and submenu items requires you to add new
<menu>
and
<item>
elements in your CustomActionMenu.xml file and create a custom view model to support
your new menus and submenus.
To add Actions menu or submenu items:
1. Open the CustomActionMenu.xml file in an editor.
2. Add new
<menu>
and
<item >
elements as required under the
<!-- existing content
remains -->
comment.
For example:
<!-- Custom block to be added in the CustomActionsMenu.xml -->
<menu id="menu-pay">
<header-key>actions_menu.PAYMENTS</header-key>
<contents>
<!-- existing content remains -->
<!-- Add a new menu item under payments -->
<item id="menu-item-new-custom-item">
<label-key>New Custom Menu Item</label-key>
<permission-key>PaymentResource</permission-key>
<!-- If we are not using ant existing action-key, this
NewCustomActionKey must be configured in the OPSS environment -->
<action-key>NewCustomActionKey</action-key>
<version>1.0</version>
</item>
</contents>
</menu>
3. Create a new custom view model file to support the new Actions menu items you
created (for example, customMenuViewModel.js) in the myproject/web/js directory
where myproject is the NetBeans IDE project containing your Billing Care customizations.
4. Write and bind click events in the custom view model file using the same ids that you
used in the CustomActionMenu.xml file:
$('#menu-item-new-custom-item').click(function(e){
//implementation goes here.
}
);
5. If your menu or submenu additions require custom logic, extend Billing Care using the
SDK to support the required functions. See "Extending and Creating Billing Care REST
Resources" for more information on extending Billing Care.
6. Copy the default registry.js file from SDK_home/references to a custom registry file
named customRegistry.js in your myproject/web/custom directory, where myproject is
Chapter 24
Adding Actions Menu Items
24-7

your NetBeans IDE project containing your Billing Care customizations. This file
contains the module definition using your custom view model (JavaScript).
7. Add the definition for your custom view model in the customRegistry.js file,
located in your myproject/web/custom directory.
For example:
var CustomRegistry = {
customActionMenus: {
viewmodel: 'viewmodels/customMenuViewModel'
}
};
8. Right-click your NetBeans IDE project and select Clean and Build.
9. Package and deploy your invoice presentation customizations to your Billing Care
domain.
For more information, see "Packaging and Deploying Customizations".
10. Verify your changes in Billing Care.
Adding Action Menu Items in Payment Suspense
The Payment Suspense action menu can be customized with additional menu items.
To add custom Payment Suspense action menu items, use the same procedure
described in "Adding Actions Menu Items".
The Billing Care SDK includes a sample Payment Suspense Actions menu
customization in the SDK_home/samples/PaymentSuspenseDetailsActionsMenu
directory. Use this sample to assist you in customizing the Payment Suspense
Actions menu.
Chapter 24
Adding Action Menu Items in Payment Suspense
24-8

25
Opening Custom Views From Landing Page
You can customize Oracle Communications Billing Care to open custom views in full screen
mode or dialog boxes from the landing page.
Topics in this document:
• About Customizing the Landing Page
• Customizing the Landing Page
• Opening Custom Views in Full Screen Mode
• Opening a Dialog Box From Landing Page
About Customizing the Landing Page
Billing Care displays default views and pages in full screen mode. You can customize Billing
Care to open custom views and pages from the landing page in full screen mode by using the
Billing Care SDK and routers. You can also open a custom dialog box from the landing page
by using the Billing Care SDK.
Customizing the Landing Page
To add custom buttons to the landing page for opening a custom view or dialog box, you must
customize the landing page.
To customize the landing page:
1. Create a custom landing page view model for extending the default landing page. See
"Creating a Custom Landing Page View Model".
2. Create a custom landing page view model HTML template for displaying custom buttons
on the landing page. See "Creating a Custom Landing Page View Model HTML
Template".
Creating a Custom Landing Page View Model
Billing Care uses a landing page view model to define the buttons displayed in the landing
page. The buttons are bound in the HTML file used to render the landing page. To add
custom buttons to the landing page, create a custom landing page view model.
A sample LandingPageExtensionViewModel.js file is provided in the SDK_home/samples/
LandingPageCustomizations/web/custom/js/viewmodels/home directory. This sample
defines the custom buttons and methods to open custom views or pages (in full screen
mode) and dialog boxes from the landing page. Use this sample to extend the landing page
view model for defining the custom views, pages, or dialog boxes required by your service.
To create a custom landing page view model:
25-1

1. Create a LandingPageExtensionViewModel.js file in the myproject/web/
custom/js/viewmodels/home directory, where myproject is the folder containing
your NetBeans IDE project.
2. Define the custom buttons, as required.
3. Save the file in your NetBeans IDE project.
Creating a Custom Landing Page View Model HTML Template
Billing Care uses an HTML view file to render the landing page. To display your
custom buttons for opening custom views, pages, or dialog boxes, you create a
custom landing page view model HTML template.
A sample LandingPageExtensionView.html file is provided in the SDK_home/
samples/LandingPageCustomizations/web/custom/templates/home directory.
This sample defines how to render the custom buttons in the landing page. Use this
sample to create a custom landing page HTML template for opening the custom views
or dialog boxes from the landing page.
To create a custom landing page view model HTML template:
1. Create a LandingPageExtensionView.html file in the myproject/web/custom/js/
templates/home directory.
2. Define the custom buttons in HTML required for rendering in this file.
3. Save the file in your NetBeans IDE project.
Opening Custom Views in Full Screen Mode
You can add custom views or pages and directly open them from the landing page in
full screen mode.
To open custom views in full screen mode:
1. Customize the landing page, if you have not done so already. See "Customizing
the Landing Page".
2. Create a custom view model to define your custom view or page. See "Creating a
Custom Full Page View Model".
3. Create a custom view model HTML template to render your custom view or page
in the full screen mode. See "Creating a Custom Full Page View Model HTML
Template".
4. Create a custom router view model to call the custom router helper when users
click the custom button that you created. See "Creating a Custom Router View
Model".
5. Create a custom router helper to add a router-specific functions that display the
custom view in full screen mode when users click the custom button. See
"Creating a Custom Router Helper ".
6. Create a customRegistry.js file to configure Billing Care to use the custom view
models that you created. See "Configuring the Custom Full Page View Model in
the Registry".
Chapter 25
Opening Custom Views in Full Screen Mode
25-2

7. Package and deploy your customization to your Billing Care domain using one of the
methods described in "Using an Exploded Archive during Customization" or "Packaging
and Deploying Customizations".
Creating a Custom Full Page View Model
Billing Care uses the view model to define the fields to capture in your custom view or page.
The fields defined in the view model are bound in the HTML file used to render the custom
view or page. You must create a custom view model to define your custom view or page.
A sample customFullPageViewModel.js file is provided in the SDK_home/samples/
LandingPageCustomizations/web/custom/js/viewmodels/customFullPage directory. Use
this sample to extend the default view model for defining the custom view or page required by
your service.
To create a custom full page view model:
1. Create a customFullPageViewModel.js file in the myproject/web/custom/js/
viewmodels/customFullPage directory.
2. Define the custom fields in this file as required.
3. Save the file in your NetBeans IDE project.
Creating a Custom Full Page View Model HTML Template
Billing Care uses an HTML view file to render your custom view or page. You must create a
custom full page view model HTML template to display the custom view or page in the full
screen mode. The template file contains the custom fields as defined in the custom full page
view model created in "Creating a Custom Full Page View Model".
A sample customFullPageView.html file is provided in the SDK_home/samples/
LandingPageCustomizations/web/custom/templates/customFullPage directory. Use this
sample to create a custom full page HTML template for rendering the custom views or pages
you want to view in the full screen mode.
To create a custom full page view model HTML template:
1. Create a customFullPageView.html file in the myproject/web/custom/js/templates/
customFullPage directory.
2. Define the custom fields in HTML required for rendering in this file.
3. Save the file in your NetBeans IDE project.
Creating a Custom Router View Model
Billing Care uses a router view model to call the route helper, a set of router-specific
functions, to complete the routing request. You can define these functions to open the custom
view or page in the full screen mode.
You can use the sample customRouterViewModel.js file in the SDK_home/samples/
LandingPageCustomizations/web/custom/js/viewmodels/router directory to create your
router view model.
To create a custom router view model:
1. Create a customRouterViewModel.js file in the myproject/web/custom/js/viewmodels/
router directory.
Chapter 25
Opening Custom Views in Full Screen Mode
25-3

2. Define the functions for opening the custom view or page in the full screen mode
as required.
3. Save the file in your NetBeans IDE project.
Creating a Custom Router Helper
You must create a custom router helper to view your custom views or pages in the full
screen mode. You can use the sample customRouterHelper.js file in the SDK_home/
samples/LandingPageCustomizations/web/custom/js/viewmodels/router directory
to create your router helper.
To create a custom router helper:
1. Create a customRouterHelper.js file in the myproject/web/custom/js/
viewmodels/router directory.
2. Define the functions for opening the custom view or page in the full screen mode
as required.
3. Save the file in your NetBeans IDE project.
Configuring the Custom Full Page View Model in the Registry
After creating the required custom view model, create a custom module entry in the
customRegistry.js file to use when opening the custom views or pages. Billing Care
uses the custom view model instead of the default entry when rendering the specific
screen.
A sample customRegistry.js file is provided in the SDK_home/samples/
LandingPageCustomizations/web/custom directory. Use this sample to create the
customRegistry.js file containing your custom view model.
To create a custom view model entry in the registry:
1. Create a customRegistry.js file in myproject/web/custom by copying the
reference registry file.
2. Define the custom view models in the file. For example:
var CustomRegistry = {
landingPageView: {
viewExtension: 'text!custom/../../custom/templates/home/
landingPageExtensionView.html',
viewmodel: '../custom/js/viewmodels/home/
LandingPageExtensionViewModel'
},
router: {
viewmodel: '../custom/js/viewmodels/router/
customRouterViewModel'
},
customFullPage: {
view: 'text!../custom/templates/customFullPage/
customFullPageView.html',
viewmodel: '../custom/js/viewmodels/customFullPage/
customFullPageViewModel'
Chapter 25
Opening Custom Views in Full Screen Mode
25-4

}
};
3. Save the file in your NetBeans IDE project.
Opening a Dialog Box From Landing Page
You can open a custom dialog box by clicking the custom button on the landing page.
To open a custom dialog box from the landing page:
1. Create a custom landing page view model and custom landing page view model HTML
template for displaying custom button on the landing page. See "Customizing the
Landing Page".
2. Create a custom dialog view model to define your custom dialog box. See "Creating a
Custom Dialog View Model".
3. Create a custom dialog view model HTML template for rendering your custom dialog box.
See "Creating a Custom Dialog View Model HTML Template".
4. Create a customRegistry.js file to configure Billing Care to use the custom view model
that you created. See "Configuring the Custom Dialog View Model in the Registry".
5. Package and deploy your customization to your Billing Care domain using one of the
methods described in "Using an Exploded Archive during Customization" or "Packaging
and Deploying Customizations".
Creating a Custom Dialog View Model
Billing Care uses the view model to define the fields to capture in your custom dialog box.
The fields defined in the view model are bound in the HTML file used to render the custom
dialog box. You must create a custom view model to define your custom dialog box.
A sample customDialogViewModel.js file is provided in the SDK_home/samples/
LandingPageCustomizations/web/custom/js/viewmodels/customDialogView directory.
Use this sample to extend the default view model for defining the custom dialog box required
by your service.
To create a custom dialog view model:
1. Create a customDialogViewModel.js file in the myproject/web/custom/js/viewmodels/
customDialogView directory.
2. Define the custom fields in this file as required.
3. Save the file in your NetBeans IDE project.
Creating a Custom Dialog View Model HTML Template
Billing Care uses an HTML view file to render your custom dialog box. You must create a
custom dialog view model HTML template to display the custom dialog box in full screen
mode. The template file contains the custom fields as defined in the custom dialog view
model created in "Creating a Custom Dialog View Model".
A sample customDialogView.html file is provided in the SDK_home/samples/
LandingPageCustomizations/web/custom/templates/customDialogView directory. Use
Chapter 25
Opening a Dialog Box From Landing Page
25-5

this sample to create a custom dialog HTML template for rendering the custom dialog
box you want to view from the landing page.
To create a custom dialog view model HTML template:
1. Create a customDialogView.html file in the myproject/web/custom/js/
templates/customDialogView directory.
2. Define the custom fields in HTML required for rendering in this file.
3. Save the file in your NetBeans IDE project.
Configuring the Custom Dialog View Model in the Registry
After creating the required custom view model, create a custom module entry in the
customRegistry.js file to use when opening the custom dialog box. Billing Care uses
the custom view model instead of the default entry when rendering the specific screen.
A sample customRegistry.js file is provided in the SDK_home/samples/
LandingPageCustomizations/web/custom directory. Use this sample to create the
customRegistry.js file containing your custom view model.
To create a custom dialog view model entry in the registry:
1. Create a customRegistry.js file in myproject/web/custom by copying the
reference registry file.
2. Define the custom view models in the file. For example:
var CustomRegistry = {
landingPageView: {
viewExtension: 'text!custom/../../custom/templates/home/
landingPageExtensionView.html',
viewmodel: '../custom/js/viewmodels/home/LandingPageExtensionViewModel'
},
customDialogView: {
view: 'text!../custom/templates/customDialogView/
customDialogView.html',
viewmodel: '../custom/js/viewmodels/customDialogView/
customDialogViewModel'
}
};
3. Save the file in your NetBeans IDE project.
Chapter 25
Opening a Dialog Box From Landing Page
25-6

26
Customizing Billing Care Labels
You can use the SDK to customize Oracle Communications Billing Care labels.
Topics in this document:
• About the Billing Care Resource Bundle
• Customizing the Resource Bundle
• Localizing Billing Care into Other Languages
About the Billing Care Resource Bundle
Billing Care uses an XML Localization Interchange File Format (XLF) file resource bundle for
customization of Billing Care labels and localization. The default English language XLF file
(BillingCareResources_en.xlf) is available in the SDK_home/references folder, where
SDK_home is the directory where you installed the SDK. This file contains Billing Care key-
value mappings for Billing Care labels, organized into functional group elements.
Customizing the Resource Bundle
Customize the Billing Care labels by creating a custom XLF file containing your label values.
After creating your XLF file, use the orai18n-js.jar, included in the Billing Care SDK, to
generate the required JavaScript files for the customizations shared library deployed in the
Billing Care domain.
The following XLF customizations are supported:
• Modifying Existing Labels
• Adding New Labels
Creating a Custom XLF File
Label customizations are configured in a custom XLF file.
To create a custom XLF file:
1. Create the customized_en.xlf file in your myproject/web/resources/translation/
directory, where myproject is your NetBeans IDE project containing your Billing Care
customizations.
2. Open the customized_en.xlf file in an editor and add the following text:
<?xml version="1.0" encoding="utf-8" ?>
<xliff version="1.0">
<file original="test_en.js" source-language="EN-US" target-language="EN-US"
datatype="JavaScript">
<header/>
<body>
</body>
26-1

</file>
</xliff>
Modifying Existing Labels
Modify an existing label by adding a group element in your custom XLF file containing
<trans-unit>
elements for the labels you are changing. <
trans-unit>
elements
specify the source and target of a label to modify. For more information on the <
trans-
unit>
element, see:
http://docs.oasis-open.org/xliff/v1.2/os/xliff-core.html#trans-unit
Example 26-1 shows a sample <
trans-unit>
element.
Example 26-1 Sample trans-unit Element for Modifying an Existing Label
<group id="common" restype="common">
<trans-unit id="INVALID_VALUE" translate="yes">
<source>Invalid MODIFIED</source>
<target>Invalid MODIFIED</target>
</trans-unit>
</group>
To modify existing labels:
1. In the body section of the customized_en.xlf file, add a group element with the
same name as the label you want to update (for example,
common
).
2. Add a <
trans-unit>
element using the same label name as the default label you
are modifying.
3. Add the new custom label (for example,
Invalid MODIFIED
).
4. Save your customized_en.xlf file.
Adding New Labels
Add new labels by adding a
custom_extensions
group containing your new labels in
your customized_en.xlf file.
Example 26-2 shows a sample new
<group>
element.
Example 26-2 Sample group Element for Adding New Label
<group>
<group id="custom_extensions" restype="sdk">
<trans-unit id="TEST_CUSTOM" translate="yes">
<source>Custom New Value</source>
<target>Custom New Value</target>
</trans-unit>
</group>
To add a new label:
1. Add a new
<group>
element with a custom_extensions
<group id>
value in your
customized_en.xlf file inside the
<body>
element. See the
BillingCareResources_en.xlf file for group element examples.
Chapter 26
Customizing the Resource Bundle
26-2

Note:
The
<group id>
must be custom_extensions.
2. Add the new labels inside your
<group>
element.
3. Save your customized_en.xlf file.
Creating Required JavaScript Files for Deployment
After completing your label customizations, generate the required JavaScript files to add to
your customizations shared library deployed to the Billing Care domain.
To generate the required JavaScript files:
1. Add the customized_en.xlf and default BillingCareResources_en.xlf files to the
myproject/web/resources/translation folder, where myproject is the NetBeans IDE
project folder containing your Billing Care customizations.
2. Open a shell or command window, and change directory to the myproject/web/
resources/translation folder.
3. Enter the following command using an absolute path to orai18n-js.jar.
java –jar full_path/orai18n-js.jar –from XLF –to JS -file
BillingCareResources_en.xlf Customized_en.xlf
where full_path is the directory where orail8n-js.jar is stored. This JAR is included in the
SDK_home/libs directory.
Two JavaScript files are created. One file contains the default resources of Billing Care,
and the other file contains your customizations.
4. Delete the BillingCareResources_en.xlf file.
5. Package and deploy your resource bundle customizations to your Billing Care domain.
For more information, see "Packaging and Deploying Customizations".
6. Verify your changes in Billing Care.
Localizing Billing Care into Other Languages
You can customize Billing Care to use alternative language labels by translating the
BillingCareResources_en.xlf file into another language. For example, create a file named
BillingCareResources_is.xlf to localize Billing Care in Icelandic.
To configure Billing Care with an alternative language localization:
1. Translate the BillingCareResources_en.xlf file into a version specific to the language
you are enabling. For example, create a file named BillingCareResources_XX.xlf,
where XX is the two-character language code you are enabling.
2. Copy the BillingCareResources_XX.xlf file to the myproject/web/resources/
translation directory, where myproject is your NetBeans IDE project directory containing
your Billing Care customizations.
3. Run the conversion utility using orail8n-js.jar to create the JavaScript for the language
you are enabling:
Chapter 26
Localizing Billing Care into Other Languages
26-3

java -jar full_path/orai18n-js.jar -from XLF -to JS -file
BillingCareResources_XX.xlf
where full_path is the directory where orail8n-js.jar is stored. This JAR is included
in the SDK_home/libs directory.
4. Package and deploy your resource bundle customizations to your Billing Care
domain.
For more information, see "Packaging and Deploying Customizations".
5. Verify your changes in Billing Care.
Chapter 26
Localizing Billing Care into Other Languages
26-4

27
Customizing Billing Care to Disable Links in
the Bills Tab
Learn how to customize Oracle Communications Billing Care to disable the Charges not
related to services link and the link to child accounts in the Bills tab, My Charges area, and
Payment Details dialog box.
Topics in this document:
• About Disabling Links
• Disabling Links in the Bills Tab
• Creating Custom View Models to Disable Links in the Bills Tab
• Configuring Custom Bill, Charges, and Payment Detail View Models in the Registry
About Disabling Links
By default, Billing Care displays the link to child accounts in the Bills tab, My Charges area,
and Payment Details dialog box to navigate to the child accounts and the Charges not
related to services link in the My Charges area to view the account-level charges.
However, you can customize Billing Care to disable these links displayed in the parent
account by using the Billing Care SDK.
Disabling Links in the Bills Tab
You can customize Billing Care using the Billing Care SDK to disable the following:
• Link to the child accounts in the Bills tab and Payment Details dialog box.
• Charges not related to services link in the My Charges area in the Bills tab.
To customize Billing Care to disable links in the Bills tab:
1. Create a custom ResourceType and Resource in the OPSS server for disabling links. For
example, BillsResourceType, BillsResource.
2. Define the corresponding action for the custom ResourceType in the OPSS server.
3. Add the new ResourceType to the CustomConfigurations.xml file. For example:
<key>authorizationResourceTypes</key>
<value>BillsResourceType</value>
<desc>Add comma separated OPSS Resource Types(values) for
authorization.
Also these resource types should be defined in OPSS.
Please note that the key should not be changed here.
</desc>
</keyvals>
27-1

See "Editing the Billing Care Configuration File" for customization of the
configurations.xml file.
4. Create custom view models containing overrides to hide the link in the Bills tab.
See "Creating Custom View Models to Disable Links in the Bills Tab" for more
information.
5. Create a customRegistry.js file configuring Billing Care to use the custom view
models that you created. See "Configuring Custom Bill, Charges, and Payment
Detail View Models in the Registry" for more information.
6. Deploy your customizations using one of the methods described in "Using an
Exploded Archive during Customization" or "Packaging and Deploying
Customizations".
Creating Custom View Models to Disable Links in the Bills
Tab
Billing Care uses view model to define the display of the Bills tab, My Charges area,
and Payment Details dialog box. You must create or update the custom view models,
CustomPaymentDetailsViewModel , CustomBillDetailsViewModel, and
CustomBillChargesViewModel, containing overrides to disable Charges not related
to services link and link to child accounts in these screens. See "About View Models"
for more information about Billing Care view models.
To create custom view models to disable links in the Bills tab:
1. Create or update the customPaymentDetailsViewModel.js ,
customBillDetailsViewModel.js , and customBillChargesViewModel.js files in
the myproject/web/custom/js/viewmodels directory, where myproject is the folder
containing your NetBeans IDE project.
2. To disable link to child accounts, do the following:
a. Add the following code in the customPaymentDetailsViewModel.js file using
a text editor:
define(['jquery', 'knockout',
'viewmodels/payment/allocations/PaymentDetailsViewModel'
],
function($, ko, PaymentDetailsViewModel) {
function customPaymentDetailsViewModel() {
PaymentDetailsViewModel.apply(this, arguments);
$(function() {
var myVar = setInterval(function() {
if ($("strong:contains(Associated to)").length >
0)
{
if
(!util.isGrantedResourceAction("parentAccountLink", "customResource")){
$("strong:contains(Associated
to)").each(function() {
$(this).next().off("click");
});
}
clearInterval(myVar);
}
Chapter 27
Creating Custom View Models to Disable Links in the Bills Tab
27-2

}, 20);
});
}
customPaymentDetailsViewModel.prototype = new PaymentDetailsViewModel();
return customPaymentDetailsViewModel;
});
b. Save the file in your NetBeans IDE project.
c. Add the following code in the customBillDetailsViewModel.js file using a text editor:
define(['jquery', 'knockout',
'viewmodels/billtab/BillDetailsViewModel'
],
function($, ko, BillDetailsViewModel) {
function customBillDetailsViewModel() {
BillDetailsViewModel.apply(this, arguments);
$(function() {
var myVar = setInterval(function() {
if ($("a#childAccountLink").length > 0)
{
if
(!util.isGrantedResourceAction("parentAccountLink", "customResource")) {
$("a#childAccountLink").each(function(index)
{
$(this).off("click");
});
}
clearInterval(myVar);
}
}, 20);
});
}
customBillDetailsViewModel.prototype = new
BillDetailsViewModel();
return customBillDetailsViewModel;
});
d. Save the file in your NetBeans IDE project.
e. Add the following code in the customBillChargesViewModel.js file using a text
editor:
define(['jquery', 'knockout',
'viewmodels/billtab/BillChargesViewModel'
],
function($, ko, BillChargesViewModel) {
function customBillChargesViewModel() {
BillChargesViewModel.apply(this, arguments);
$(function() {
var myVar = setInterval(function() {
if ($('#adjustbillListMenu').length > 0)
{
if (!
util.isGrantedResourceAction("parentAccountLink", "customResource")) {
if ($("a#parentAccountLink").length > 0) {
$("a#parentAccountLink").off("click");
});
}
clearInterval(myVar);
Chapter 27
Creating Custom View Models to Disable Links in the Bills Tab
27-3

}
}, 20);
});
}
customBillChargesViewModel.prototype = new
BillChargesViewModel();
return customBillChargesViewModel;
});
f. Save the file in your NetBeans IDE project.
3. To disable Charges not related to services link in the My Charges area, do the
following:
a. Update the code in the customBillChargesViewModel.js file using a text
editor as follows:
define(['jquery', 'knockout',
'viewmodels/billtab/BillChargesViewModel'
],
function($, ko, BillChargesViewModel) {
function customBillChargesViewModel() {
BillChargesViewModel.apply(this, arguments);
$(function() {
var myVar = setInterval(function() {
if ($('#adjustbillListMenu').length > 0 || $
("a#parentAccountLink").length >
0)
{
if (!
util.isGrantedResourceAction("parentAccountLink", "customResource")) {
if ($("a#parentAccountLink").length > 0)
{
$
("a#parentAccountLink").off("click");
});
}
clearInterval(myVar);
}
}, 20);
});
$(function() {
var myVar = setInterval(function() {
if ($('#accountChargesHeader').length > 0 )
{
if (!
util.isGrantedResourceAction("otherCharges", "customResource")){
$('#accountChargesHeader').remove();
$('#accountCharges').remove();
}
clearInterval(myVar);
}
}, 40);
});
$(function() {
Chapter 27
Creating Custom View Models to Disable Links in the Bills Tab
27-4

var myVar = setInterval(function() {
if ($('#otherAccountChargesHeader').length > 0 )
{
if (!util.isGrantedResourceAction("otherCharges",
"customResource")){
$('#otherAccountChargesHeader').remove();
$('#otherAccountCharges').remove();
}
clearInterval(myVar);
}
}, 40);
});
}
customBillChargesViewModel.prototype = new
BillChargesViewModel();
return customBillChargesViewModel;
});
b. Save the file in your NetBeans IDE project.
c. Add the following function to the code in the customBillDetailsViewModel.js file
using a text editor:
self.openChildAccount = function(data, event) {
if (!util.isGrantedResourceAction("parentAccountLink",
"customResource")) {
return false;
}
self.__proto__.openChildAccount(data, event);
};
d. Save the file in your NetBeans IDE project.
Configuring Custom Bill, Charges, and Payment Detail View
Models in the Registry
After creating or updating the CustomPaymentDetailsViewModel ,
CustomBillDetailsViewModel, and CustomBillChargesViewModel view models, create
the custom view model entries in the customRegistry.js file to use the custom view models
when displaying bill and payment details. Billing Care uses the custom bill tab and payment
details view models instead of the default entries when displaying the bill and payment
details.
To create the bill tab, bill charges, and payment details view model entries in a
customRegistry.js file:
1. Create a customRegistry.js file in myproject/web/custom .
2. Define the entries referencing the custom view models in this file. For example:
billTab: {
billChargesViewModel:
'custom/js/viewmodel/customBillChargesViewModel.js'
billDetailsViewModel:
'custom/js/viewmodels/CustomBillDetailsViewModel.js'
Chapter 27
Configuring Custom Bill, Charges, and Payment Detail View Models in the Registry
27-5

}
allocatePaymentDetails: {
viewmodel: 'custom/js/viewmodels/CustomPaymentDetailsViewModel.js'
}
3. Save the file in your NetBeans IDE project.
Chapter 27
Configuring Custom Bill, Charges, and Payment Detail View Models in the Registry
27-6

28
Separating Event Adjustment Amount and
Percentage Fields
Learn how to customize the Oracle Communications Billing Care Event Adjustment dialog
box to provide separate adjustment amount and percentage fields.
Topics in this document:
• About Event Adjustments using Amount and Percentage
• Separating Amount and Percentage Fields
• Creating Custom View Model to Separate Amount and Percentage Fields
• Adding CustomEventAdjustmentViewModel to the Registry
About Event Adjustments using Amount and Percentage
The Billing Care Event Adjustment dialog box provides only one field, the Adjustment field,
in which to enter an adjustment amount or percentage for an event.
You can customize the dialog box to display separate amount adjustment and percent
adjustment fields by using the Billing Care SDK. You can also make the fields independent of
each other, such that entering a value in one field disables the other field.
Separating Amount and Percentage Fields
To separate the amount and percentage fields in the Event Adjustment dialog box:
1. Create a custom view model for the Event Adjustment dialog box. See "Creating Custom
View Model to Separate Amount and Percentage Fields".
2. Create a customRegistry.js file that configures Billing Care to use your custom view
model. See "Adding CustomEventAdjustmentViewModel to the Registry".
3. Package and deploy your customization to your Billing Care domain using one of the
methods described in "Using an Exploded Archive during Customization" or "Packaging
and Deploying Customizations".
Creating Custom View Model to Separate Amount and
Percentage Fields
Billing Care uses the EventAdjustmentViewModel.js file to determine what fields to display
in the Event Adjustment dialog box. The fields defined in the view model are bound in the
HTML file used to render the custom view or page. To change what fields are displayed,
create a custom view model, such as CustomEventAdjustmentViewModel.js, that
overrides the dialog box's default display. See "About View Models" for more information
about Billing Care view models.
28-1

To create a custom view model for the Event Adjustment dialog box:
1. Create a CustomEventAdjustmentViewModel.js file in the myproject/web/
custom/viewmodels/ARActions/adjustments directory, where myproject is the
folder containing your NetBeans IDE project.
2. Open the CustomEventAdjustmentViewModel.js file using a text editor and
define your custom fields. For example:
define(['jquery', 'knockout',
'viewmodels/ARActions/adjustments/EventAdjustmentViewModel'],
function ($, ko, EventAdjustmentViewModel) {
function CustomEventAdjustmentViewModel() {
EventAdjustmentViewModel.apply(this, arguments);
self = this;
self.percentValue = 0;
self.amountValue = 0;
self.adjustmentPercentage = ko.observable(0).extend({notify:
"always"}).extend({numeric: 2});
self.amountStateController = ko.computed(function
() {
if ((Number(self.adjustmentAmount()) === 0) &&
(Number(self.adjustmentPercentage())
=== 0)) {
self.enablePercentage(true);
self.enableAmount(true);
} else if (Number(self.adjustmentPercentage())
=== 0) {
self.enablePercentage(false);
self.enableAmount(true);
} else {
self.enablePercentage(true);
self.enableAmount(false);
}
});
}
CustomEventAdjustmentViewModel.prototype = new
EventAdjustmentViewModel();
return CustomEventAdjustmentViewModel;
}
);
3. Save the file in your NetBeans IDE project.
Adding CustomEventAdjustmentViewModel to the Registry
Configure Billing Care to override the default EventAdjustmentViewModel with your
custom view model when rendering the Event Adjustment dialog box. To do so, add
the name and path to your custom view model to the customRegistry.js file. For more
information about the registry file, see "About the Registry File".
To add CustomEventAdjustmentViewModel to the registry:
1. Create a customRegistry.js file in the myproject/web/custom/ directory.
Chapter 28
Adding CustomEventAdjustmentViewModel to the Registry
28-2

2. Add the following lines to the file:
eventAdjustment: {
viewmodel: 'custom/viewmodels/ARActions/adjustments/
CustomEventAdjustmentViewModel'
}
3. Save the file in your NetBeans IDE project.
Chapter 28
Adding CustomEventAdjustmentViewModel to the Registry
28-3

29
Embedding Billing Care Screens in External
Applications
You can use the SDK to embed Oracle Communications Billing Care screens in external
applications such as customer relationship management (CRM) applications or online
account management interfaces.
Topics in this document:
• About Embeddable Billing Care Screens
• Embedding Billing Care Screens
• Configuring Security for External Application Access
About Embeddable Billing Care Screens
Billing Care supports embedding screens into CRM applications and online account
management interfaces using inline frames (iframe) or pop-up windows. Embedding screens
gives external applications direct access to Billing Care functionality without requiring
complex integration.
Subscriber information stored in your Oracle Communications Billing and Revenue
Management (BRM) system, and Billing Care account management screens, can be
displayed in external applications without creating custom interfaces for retrieving such data
or performing account management actions.
Use this functionality to expose Billing Care screens in your application's business workflow.
For example, configure your CRM application to display the Billing Care payments interface
when adding a new payment type for a subscriber.
The following Billing Care screens can be exposed and embedded in external applications:
• Account Adjustment
• Account Profile
• Account Status
• Account Transactions Graph
• Account Transactions Table
• Billing Information
• Financial Setup (including Payment Methods)
• Make a Payment
• Payments Summary
• Purchased Products
• Write Off Account
• Purchase Package/Purchase Deal
29-1

See the relevant chapter in Oracle Communications Billing Care Online Help for more
information on each screen and what account actions can be performed.
Embedding Billing Care Screens
Embedding Billing Care screens in external applications requires the following:
• Understanding the index_embedded.html File
• Configuring Your External Application to Access Billing Care
You can embed Billing Care screens in test installations not using Oracle Identity and
Access Management (IAM) when developing your external application integration.
User authentication and resource authorization are not required with test installations.
Billing Care displays the requested screen without requiring credentials. See "About
Test Installations" and "Configuring WebLogic Server for a Test Installation" in Oracle
Communications Billing Care Installation Guide for more information on test
installations.
Production Billing Care installations require IAM. An external application and its users
must be authenticated and authorized by Billing Care before embedded screens can
be displayed. See "Configuring Security for External Application Access" for
information on embedding Billing Care screens in external applications in production
installations.
Understanding the index_embedded.html File
External applications call the index_embedded.html file when retrieving a Billing Care
screen for display. By default, Billing Care exposes this file without additional
configuration on the application server.
This file contains the information required by Billing Care to render the requested
screen properly for the queried account. External applications send Billing Care an
index_embedded.html URL request containing a unique query string for the required
screen, and the account or bill numbers for the subscriber using the following format:
https://host:port/bc/index_embedded.html#query_string
where:
• host is the Billing Care application host.
• port is the port on which Billing Care is listening on.
• query_string is the string containing the desired embeddable screen and account
and bill details. You can use either account ID or account number, and bill ID or bill
number in the request.
If you are using account ID and bill ID in the request, the query_string format is:
Screen?accountId
=
BRM_db#+-account+AccountID&billId=BRM_db+-bill+BillID
where:
• Screen is the requested screen for the queried account.
• BRM_db# is the BRM database number containing the queried account or bill.
• AccountID is the unique BRM subscriber account ID to query.
• BillID is the bill ID to query when requesting bill-related screens.
Chapter 29
Embedding Billing Care Screens
29-2

For example, to request the Billing Information overlay for the BRM bill number
0.0.0.1-1115086, owned by the BRM account number 0.0.0.1-1117902, use the following URL
request:
https://example.com:7001/bc/index_embedded.html#overlay/billDetails?
accountId=0.0.0.1+-account+1117902&billId=0.0.0.1+-bill+1115086
If you are using account number and bill number in the request, the query_string format is:
Screen?accountId=AccountNumber&billId=BillNumber
For example, to request the Billing Information overlay for the BRM bill number B1-8839,
owned by the BRM account number 123456, use the following URL request:
https://example.com:7001/bc/index_embedded.html#overlay/billDetails?
accountId=123456&billId=B1-8839
Note:
Embedded screens do not include the Billing Care application banner, search
functionality, or Actions menu.
Table 29-1 lists the URL request strings used to call each embeddable Billing Care screen.
Table 29-1 Sample URL Request Query Strings for Embeddable Billing Care Screens
Screen Sample URL Query String Used by External Application
Account Adjustment
https://example.com:7001/bc/index_embedded.html#overlay/
accountAdjustment?accountId
=
BRM_db+-account+AccountID
Account Profile
https://example.com:7001/bc/index_embedded.html#overlay/
generalInfo?accountId
=
BRM_db+-account+AccountID
Account Status
https://example.com:7001/bc/index_embedded.html#overlay/
accountStatusChange?accountId
=
BRM_db+-account+AccountID
Account Transactions
Table
https://example.com:7001/bc/index_embedded.html
#
newsfeed?
accountId
=
BRM_db+-account+AccountID
Account Transactions
Graph
https://example.com:7001/bc/index_embedded.html#billUnitGraph?
accountId
=
BRM_db+-account+AccountID
Billing Information
https://example.com:7001/bc/index_embedded.html
#
/billDetails?
accountId
=
BRM_db+-account+AccountID&billId
=
BRM_db+-bill+BillID
If only the account ID is passed then the Bill in progress bill is shown. If any specific
bill must shown, the bill id must be passed.
Financial Setup
https://example.com:7001/bc/index_embedded.html#overlay/
paymentMethods?accountId
=
BRM_db+-account+AccountID
Make a Payment
https://example.com:7001/bc/index_embedded.html#overlay/
makePayment?accountId
=
BRM_db+-account+AccountID
Payments Summary
https://example.com:7001/bc/index_embedded.html#newsfeed/payments?
accountId
=
BRM_db+-account+AccountID
Purchased Products
https://example.com:7001/bc/index_embedded.html#customerAssets?
accountId
=
BRM_db+-account+AccountID
Chapter 29
Embedding Billing Care Screens
29-3

Table 29-1 (Cont.) Sample URL Request Query Strings for Embeddable Billing Care Screens
Screen Sample URL Query String Used by External Application
Write Off Account
https://example.com:7001/bc/index_embedded.html#overlay/
writeOffAccount?accountId
=
BRM_db+-account+AccountID
Purchase Package/
Purchase Deal
https://example.com:7001/bc/index_embedded.html#overlay/purchase?
accountId
=
BRM_db+-account+AccountID
Configuring Your External Application to Access Billing Care
Configure external applications to request an embeddable Billing Care screen by
creating a link on the application's screen, from where users initiate the request. For
example, create a clickable text, image, or button on your application's screen with an
html href attribute containing the embeddable screen overlay listed in Table 29-1.
Example 29-1 contains sample html code for a text link which opens the Account
Status screen in a new window.
Example 29-1 Sample Account Status Screen Link Code
<a href ="http://example.com:7001/bc/index_embedded.html#overlay/
accountStatusChange?accountId=0.0.0.1+-account+1117902"
onclick="openWindow(this.href);
return false;">Click to open Account status Dialog</a>
Configuring Security for External Application Access
Production Billing Care installations use Oracle Identity and Access Management
(IAM) for authenticating users using single sign on (SSO) and authorizing access to
Billing Care screens and resources. You must configure the required authentication
and authorization policies in IAM before embedding Billing Care screens in external
applications in production environments. Doing so enables embedded screens to be
displayed without requiring Billing Care user credentials and ensures that a failed
permissions error message is not displayed in the embedded screen.
Note:
With configured IAM, Billing Care returns an error message if the user or
external application does not have the correct permissions to access or view
the requested embedded screen. For example, if the external user or
application has not been configured with access to the Billing Care payments
resource the following error message error message is displayed:
You do not have permission to make payments
Billing Care enforces a single security configuration of user access and resource
permissions for both the native Billing Care application and any embedded screens
exposed within external applications.
Chapter 29
Configuring Security for External Application Access
29-4

See "Billing Care Pre-Installation Tasks" in Oracle Communications Billing Care Installation
Guide for more information on installing the required IAM components for a secure Billing
Care installation, and "Implementing Billing Care Security" in Oracle Communications Billing
and Revenue Management Security Guide for more information on how to configure
authentication and authorization for external users and applications.
Chapter 29
Configuring Security for External Application Access
29-5

Part IV
Customizing Searches and Filters in Billing
Care
This part describes how to customize the search and filter functionality in Oracle
Communications Billing Care. It contains the following chapters:
• Searching for Accounts by Payment ID
• Filtering Bundles Available for Purchase
• Filtering Start and End Dates for Additional Purchase
• Customizing Search Filter for Suspended Payments
• Exporting Billing Care Search Results

30
Searching for Accounts by Payment ID
You can customize the Oracle Communications Billing Care account search screen to
support searches by Payment ID.
Topics in this document:
• About Account Searches in Billing Care
• Adding a Payment ID Field to the Account Search Screen
• Naming the Custom Account Search Template in the CustomConfigurations.xml File
• Creating a Custom Account Search Template
• Creating a Custom Account Search View Model
• Creating a Custom Search View Model
• Creating a Custom Router View Model
• Creating a Custom Router Helper
• Creating a Custom Account Search View Model HTML Template
• Replacing the Default Method for Showing Recently Opened Accounts
• Configuring a Custom Module in the Registry
• Creating a customized_en.xlf File Entry for Payment ID Search Field
• Getting Payment Item POIDs from BRM
• Deploying Customizations
About Account Searches in Billing Care
The Billing Care account search screen includes multiple fields on which searches can be
performed. For example, you can search for accounts by entering account numbers, last
names, or addresses in designated fields on the screen. The default account search screen
does not, however, support searches by payment ID.
Adding a Payment ID Field to the Account Search Screen
To enable users to search for accounts by payment ID, you can add a Payment ID field to the
account search screen.
To add a Payment ID field to the Billing Care account search screen:
1. Specify the name of the custom account search template in the
CustomConfigurations.xml file. See "Naming the Custom Account Search Template in
the CustomConfigurations.xml File".
2. Create the custom account search template containing the payment ID search criteria.
See "Creating a Custom Account Search Template".
30-1

3. Create a custom account search view model to override the default Billing Care
account search behavior. See "Creating a Custom Account Search View Model".
4. Create a custom search view model to display the related payment details when
an account is opened from the results of a search based on payment ID. See
"Creating a Custom Search View Model".
5. Create a custom router view model to accept a query parameter and route to a
custom router helper function when users search for an account by payment ID.
See "Creating a Custom Router View Model".
6. Create a custom router helper to add a function that displays the related payment
details when an account is opened from the results of a search based on payment
ID. See "Creating a Custom Router Helper ".
7. Create the account search view model HTML template to display the new
Payment ID search field. See "Creating a Custom Account Search View Model
HTML Template".
8. Replace the default method for listing the most recently opened account in the
account search screen. See "Replacing the Default Method for Showing Recently
Opened Accounts".
9. Create a customRegistry.js file configuring Billing Care to use the custom
account search view model created in step 3. See "Configuring a Custom Module
in the Registry".
10. Create a customized_en.xlf file containing a localizable value for the new
Payment ID search field in the Billing Care account search screen. See "Creating
a customized_en.xlf File Entry for Payment ID Search Field".
11. Configure Billing Care to get the appropriate payment item Portal object ID (POID)
from BRM when users search for an account by payment ID. See "Getting
Payment Item POIDs from BRM".
Naming the Custom Account Search Template in the
CustomConfigurations.xml File
Before creating a custom search template to search for accounts by payment ID, you
must specify the template's name in the custom Billing Care configuration file.
To name the custom account search template in the CustomConfigurations.xml file:
1. If your system does not have a CustomConfigurations.xml file, create the file.
See "Creating a Custom Configuration File".
2. Open the CustomConfigurations.xml file in an editor.
Note:
By default, the CustomConfigurations.xml file is in the myproject/web/
custom/configurations/ directory, where myproject is your NetBeans
IDE Billing Care customizations project.
3. In the file's search.options key, specify a name for your custom account search
template.
Chapter 30
Naming the Custom Account Search Template in the CustomConfigurations.xml File
30-2

Example 30-1 shows the search.options key with My Custom Search specified as the
search template name:
4. Set the default search option using the defaultSearch attribute.
5. Save the file in your NetBeans IDE project.
Example 30-1 CustomConfigurations.xml search.options Key with "My Custom
Search" as Search Template Name
[{"searchTemplateKey": "accountSearch",
"searchTemplateName":"SEARCH_OPTION_ACCOUNTS", "defaultSearch": false},
{"searchTemplateKey": "CustomAccountSearch", "searchTemplateName":"My Custom Search",
"defaultSearch": true}]
Creating a Custom Account Search Template
The Billing Care account search screen uses a template that defines what search fields to
display. To add the Payment ID field in the account search screen, you must create a custom
account search template containing the Payment ID field in the filter element in your
NetBeans IDE project.
For more information on customizing templates, see "Customizing Billing Care Templates".
When creating your custom account search template, use the reference accountSearch.xml
template file located in the SDK_home/references directory.
To create an account search template with the Payment ID field:
1. Create a custom account search template file for the account search screen by using the
reference example in myproject/src/custom.
Use a descriptive name for your file such as CustomAccountSearch.xml.
2. Define the Payment ID criteria in the filter element.
Example 30-2 shows the code to add for the Payment ID filter.
3. Add a column in the CustomAccountSearch.xml file to store payment item POIDs,
which are used to open the appropriate payment details overlay for accounts returned by
searches based on payment IDs.
Example 30-3 shows the code to add for the payment item POID column.
4. Save the file in your NetBeans IDE project.
Example 30-2 Payment ID Filter
<criteria name="paymentID">
<label></label>
<inputType>Text</inputType>
<width>245</width>
<placeHolder>PAYMENTID</placeHolder>
<fieldKey>payment.transId</fieldKey>
<storableClass>eventBillingPayment</storableClass>
<visible>true</visible>
Example 30-3 Payment Item POID Column
<column name="eventId">
<type>text</type>
<fields>itemObj</fields>
</column>
Chapter 30
Creating a Custom Account Search Template
30-3

<columnHeader name="eventId">
<label>EVENT_ID_UC</label>
<width>15%</width>
<visible>true</visible>
<sortable>false</sortable>
<tooltip>EVENT_ID_UC</tooltip>
<resizable>false</resizable>
<alignment>left</alignment>
</column>
Creating a Custom Account Search View Model
Billing Care uses an account search view model to define account search behavior.
Create a custom account search view model containing the Payment ID search filter
by using the sample customAccountSearch.js file. This sample contains the override
functions to add payment ID criteria to the custom account search template.
To create a custom account search view model:
1. Copy the SDK_home/samples/AccountSearchCustomization/web/custom/js/
viewmodels/search/customAccountSearch.js file to the myproject/web/
custom/js/viewmodels/area/configure directory.
where area is the customization type (for example, accountSearch for
customizations done to account search view model files).
2. Include the customAccountSearch.js file when you package your customizations
shared library for deployment to your Billing Care domain.
For more information, see "Packaging and Deploying Customizations".
Creating a Custom Search View Model
Billing Care uses a search view model to open an account from the results of an
account search.
Create a custom search view model to support searches based on payment IDs by
using the sample customSearchViewModel.js file in the Billing Care SDK. This
sample contains code that displays the payment details overlay when an account is
opened from the results of a search based on a payment ID.
To create a custom search view model:
1. Copy the SDK_home/samples/AccountSearchCustomization/web/custom/js/
viewmodels/customSearchViewModel.js file to the myproject/web/custom/js/
viewmodels/area/configure directory.
2. Include the customSearchViewModel.js file when you package your
customizations shared library for deployment to your Billing Care domain.
For more information, see "Packaging and Deploying Customizations".
Creating a Custom Router View Model
Billing Care uses a router view model to route patterns to a function.
Create a custom router view model to support searches based on payment IDs by
using the sample customRouterViewModel.js file in the Billing Care SDK. This
Chapter 30
Creating a Custom Account Search View Model
30-4

sample contains code that overrides the default open account router URL to accept a
payment item POID as a query parameter when an account search is based on a payment
ID.
To create a custom router view model:
1. Copy the SDK_home/samples/AccountSearchCustomization/web/custom/js/
viewmodels/customRouterViewModel.js file to the myproject/web/custom/js/
viewmodels/area/configure directory.
2. Include the customRouterViewModel.js file when you package your customizations
shared library for deployment to your Billing Care domain.
For more information, see "Packaging and Deploying Customizations".
Creating a Custom Router Helper
In Billing Care, a router helper routes the router view model request to a function that opens
an account.
Create a custom router helper to support searches based on payment IDs by using the
sample customRouterHelper.js file in the Billing Care SDK. This sample contains code that
routes the router view model request to a function that displays the related payment details
when an account is opened from the results of a search based on payment ID.
To create a custom router helper:
1. Copy the SDK_home/samples/AccountSearchCustomization/web/custom/js/routers/
customRouterHelper.js file to the myproject/web/custom/js/viewmodels/area/
configure directory.
2. Include the customRouterHelper.js file when you package your customizations shared
library for deployment to your Billing Care domain.
For more information, see "Packaging and Deploying Customizations".
Creating a Custom Account Search View Model HTML Template
Billing Care uses an HTML view file to render the account search screen during. You must
create a custom account search view model HTML template to display the Payment ID
search field.
A sample customAccountSearch.html file is provided in the SDK_home/samples/
AccountSearchCustomization/web/custom/templates/search directory. Use this sample
to create a custom account search HTML template for displaying the Payment ID search field
and the required data binding.
To create a custom account search HTML template for rendering the Payment ID field:
1. Create a customAccountSearch.html file in the myproject/web/custom/js/templates/
area/configure directory.
2. Define the Payment ID field in HTML required for rendering in this file.
3. Save the file in your NetBeans IDE project.
Chapter 30
Creating a Custom Router Helper
30-5

Replacing the Default Method for Showing Recently Opened
Accounts
When you open an account from the default search results and then return to the
search screen, the recently opened account is listed at the bottom of the screen.
To continue listing the most recently opened account after customizing the account
search template, replace the RecentRecordsModel.js file in your NetBeans IDE
Billing Care customizations project with the sample customRecentRecordsModel.js
file. This sample contains an updated method that supports the recently opened
account feature in the custom account search flow.
To replace the default method for showing recently opened accounts:
1. Copy the SDK_home/samples/AccountSearchCustomization/web/custom/js/
viewmodels/customRecentRecordsModel.js file to the myproject/web/
custom/js/viewmodels/area/configure directory.
2. Include the customRecentRecordsModel.js file when you package your
customizations shared library for deployment to your Billing Care domain.
For more information, see "Packaging and Deploying Customizations".
Configuring a Custom Module in the Registry
After creating the required custom account search view model, create a custom
module entry in the customRegistry.js file to use when searching for accounts. Billing
Care uses the custom account search module instead of the default entry when
rendering the account search screen.
A sample registry.js file is provided in the SDK_home/references directory, where
SDK_home is the directory in which you installed the Billing Care SDK. Use this
sample to create the customRegistry.js file containing your custom account search
module.
To create a custom account search module entry in a customRegistry.js file:
1. Create a customRegistry.js file in myproject/web/custom by copying the
reference registry file.
2. Define the custom account search module referencing the custom view model and
HTML template previously created.
Example 30-4 shows a definition of the custom account creation module in the
registry.
3. Save the file in your NetBeans IDE project.
Example 30-4 Sample Custom Account Search Module Registry Entry
var CustomRegistry = {
customAccountSearch: {
view : 'text!../custom/templates/search/customAccountSearch.html',
viewmodel: '../custom/js/viewmodels/search/customAccountSearch'
}
search: {
viewmodel: '../custom/js/viewmodels/customSearchViewModel'
}
Chapter 30
Replacing the Default Method for Showing Recently Opened Accounts
30-6

router: {
viewmodel: '../custom/js/viewmodels/customRouterViewModel'
}
recentRecords: {
recentRecordsModel: '../../../custom/js/viewmodels/customRecentRecordsModel'
}
};
Creating a customized_en.xlf File Entry for Payment ID Search
Field
You must provide a localized English entry for the Payment ID search field in the
customized_en.xlf file to provide a translatable text string in Billing Care.
For more information on the customized_en.xlf file and how to add a new entry, see
"Customizing Billing Care Labels".
Example 30-5 shows a sample entry for the Payment ID field to add in the
customized_en.xlf file.
Example 30-5 Sample Payment ID XLF Entry
<trans-unit id="PAYMENT_ID_UC" translate="yes">
<source>Payment ID</source>
<target>Payment ID</target>
<note from="dev">
Comments for file
</note>
</trans-unit>
Getting Payment Item POIDs from BRM
When users search for an account by payment ID, Billing Care must get the payment item
POID so that it can display the appropriate payment details when the account is opened.
To configure Billing Care to get payment item POIDs from BRM:
1. Add a customModule.properties file containing the following entry to the
myproject/web/WEB-INF/classes/custom directory:
billingcare.rest.template.module = rest.CustomPCMTemplateModule
This entry instructs Billing Care to load the CustomPCMTemplateModule class instead
of the default PCMTemplateModule class.
The SDK_home/samples/AccountSearchCustomization/src/java/custom/
customModule.properties sample file contains this entry, where SDK_home is the
directory in which you installed the Billing Care SDK.
For more information about the custom module properties file, see "About the
customModule.properties File".
2. Create a custom PCMTemplateModule Java class named
CustomPCMTemplateModule and override its getRecordsForTemplate() method to
return the TemplateMyCustomAccountSearchWorker Java class instead of the default
TemplateAccountSearchWorker Java class.
Chapter 30
Creating a customized_en.xlf File Entry for Payment ID Search Field
30-7

For a sample of the required override code, see the SDK_home/samples/
AccountSearchCustomization/src/java/rest/
CustomPCMTemplateModule.java sample class.
Note:
Save the custom class in the rest folder containing the sample class.
For more information, see "Customizing Billing Care Templates".
3. Create a custom template worker Java class named
TemplateMyCustomAccountSearchWorker that gets the corresponding
payment item POID from BRM when users search for accounts by payment ID.
For a sample of the required override code, see the SDK_home/samples/
AccountSearchCustomization/src/java/rest/
TemplateMyCustomAccountSearchWorker.java sample class.
Note:
Save the custom class in the rest folder containing the sample class.
For more information, see "Customizing Billing Care Templates".
Deploying Customizations
Package and deploy your customizations using one of the methods described in
"Using an Exploded Archive during Customization" or "Packaging and Deploying
Customizations".
Chapter 30
Deploying Customizations
30-8

31
Filtering Bundles Available for Purchase
You can customize Oracle Communications Billing Care to filter the bundles displayed in the
Purchase Catalog screen.
Topics in this document:
• About Filtering Bundles
• Filtering Bundles List in Billing Care
• Creating CustomPCMSubscriptionModule.java Class
• Creating CustomSubscriptionWorker.java Class
• Updating the customModule.properties File
About Filtering Bundles
In BRM, the PCM_OP_CUST_POL_GET_DEALS opcode enables you to retrieve a
customized list of bundles from the BRM database for customer purchase. Similarly, you can
retrieve the bundles from the BRM database and filter the list of bundles available for
purchase in Billing Care by using the Billing Care SDK. For example, you can customize
Billing Care to display only the manually added discount bundles in the bundles list.
Filtering Bundles List in Billing Care
To filter the bundles list in Billing Care:
1. Create a custom template model to override the default subscription flow. See "Creating
CustomPCMSubscriptionModule.java Class " for more information.
2. Create a custom template worker class to add custom logic to the subscription flow. See
"Creating CustomSubscriptionWorker.java Class" for more information.
3. Add your customization files to your NetBeans IDE project. See "Updating the
customModule.properties File" for more information.
4. Deploy your customizations using one of the methods described in "Using an Exploded
Archive during Customization" or "Packaging and Deploying Customizations".
Creating CustomPCMSubscriptionModule.java Class
Create a custom subscription module class, CustomPCMSubscriptionModule.java, and
override the getBundles( ) method.
To create the CustomPCMSubscriptionModule.java class:
1. Create the CustomPCMSubscriptionModule.java file in myproject/projectname/src/
java/com/rest/sdk, where myproject is the folder containing your NetBeans IDE project
and projectname is the name of your custom project.
2. Override the getBundles( ) method as shown in this example:
31-1

@Override public BundleList getBundles(String id, String expand) {
//method code
}
3. Save the file in your NetBeans IDE project.
Creating CustomSubscriptionWorker.java Class
Create a custom template worker class containing logic to retrieve and filter the
bundles available for purchase.
To create the CustomSubscriptionWorker.java class:
1. Create the CustomSubscriptionWorker.java file in myproject/projectname/src/
java/com/rest/sdk.
2. Override the following methods as appropriate:
• convertToInputFListToGetBundleList( ). This method takes the service type
as input and returns the input flist. For example, you can pass "0.0.0.1+-
service-email+62503" as an input to retrieve only the bundles that are
associated with the service type, email.
• invokeOpcodeToGetBundleList( ).This method takes the flist returned by the
convertToInputFListToGetBundleList( ) method as input and triggers the
PCM_OP_CUST_POL_GET_DEALS opcode to return the output flist.
• convertToOutputFListToGetBundleList( ). This method takes the flist
returned by the invokeOpcodeToGetBundleList( ) method and a flag that
indicates whether charge or discount offers to be retrieved as input and
returns the list of bundles associated with the service type.
3. Save the file in your NetBeans IDE project.
Updating the customModule.properties File
Create or update the custom module property file to override the default subscription
module logic with your customizations.
To update the custom module property file:
1. Open the customModule.properties file in myproject/projectname/src/java/
custom.
2. Add the following entry:
billingcare.rest.subscription.module=com.rest.sdk.CustomPCMSubscriptionModule
3. Save the file in your NetBeans IDE project.
Chapter 31
Creating CustomSubscriptionWorker.java Class
31-2

32
Filtering Start and End Dates for Additional
Purchase
You can customize Oracle Communications Billing Care to filter the Purchase, Recurring
(cycle), and Usage start and end dates that are displayed during additional purchase
configuration.
Topics in this document:
• About Customizing Purchase Configuration
• Filtering Start and End Date Options
• Creating a Custom Purchase Deal Configuration View Model
• Configuring the Custom Purchase Configuration View Model in the registry
About Customizing Purchase Configuration
You configure new or additional products or services added to an account by clicking
Configure in the Purchase Catalogue screen. In the Configure screen, multiple start and
end date options are displayed for configuring activation, recurring cycles, and usage of the
selected product or service.
You can customize Billing Care to filter these start and end date options to display only
calendar days for the start date and the number of months for the end date by using the
Billing Care SDK. You can also hide the Recurring (cycle) and Usage sections by using the
Billing Care SDK.
Filtering Start and End Date Options
You can customize the purchase configuration screen using the Billing Care SDK to display
only the specific start and end date options for activation, recurring fees, and usage of the
selected additional product or service.
To filter start and end date options:
1. Create a custom purchase configuration view model to override the default purchase
configuration flow. See "Creating a Custom Purchase Deal Configuration View Model" for
more information.
2. Configure the custom purchase configuration view model entry in the customRegistry.js
file to use the custom view model that you created. See "Configuring the Custom
Purchase Configuration View Model in the registry" for more information.
3. Deploy your custom project to your application server by using one of the methods
described in "Using an Exploded Archive during Customization" or "Packaging and
Deploying Customizations".
32-1

Creating a Custom Purchase Deal Configuration View
Model
Billing Care uses view model to define the display of the screens in Billing Care. You
must create or update the custom view model,
CustomPurchaseConfigurationViewModel, and add the details containing the logic
to filter Purchase, Recurring (cycle), and Usage start and end dates.
See "About View Models" for more information about Billing Care view models.
To create a custom purchase deal configuration view model:
1. Create or update the customPurchaseConfigurationViewModel.js file in
myproject/web/custom/viewmodels directory, where myproject is the folder
containing your NetBeans IDE project.
2. Add the following code in the customPurchaseConfigurationViewModel.js file
using a text editor:
define(['knockout',
'jquery',
'underscore',
Registry.accountCreation.wizardBase,
Registry.accountCreationConfigure.purchaseConfiguration.validator,
'viewmodels/accountCreation/configure/PurchaseConfigurationViewModel',
'ojs/ojcore', 'ojs/ojknockout', 'ojs/ojdatetimepicker',
'ojs/ojcheckboxset', 'knockout-extension'],
function (ko, $, _, WizardBaseViewModel,
ProductCustomizationValidator, PurchaseConfigurationViewModel, oj) {
function CustomPurchaseConfigurationViewModel() {
PurchaseConfigurationViewModel.apply(this, arguments);
...
...
}
CustomPurchaseConfigurationViewModel.prototype = new
PurchaseConfigurationViewModel();
return CustomPurchaseConfigurationViewModel;
}
);
// Below observable arrays hold the options to be shown in the Product
Configuration Screen
// Each entry in the Observable Array is stored as an Object which has
three attributes
// label : the text which will be shown in the UI dropdown
// value : this attribute stores the value of the option used in viewmodel
to create the JSON to be sent to REST
// disable : this attribute tells the dropdown whether it will be enabled
to click or not
// The SUPERSET for the dropdown options in OOTB is below.
// ([
// {label: util.getLocalizedValue(productCustomization, 'TODAY'),
value:TODAY,disable: ko.observable(false)},
// {label: util.getLocalizedValue(productCustomization, 'NEVER'),
value:NEVER,disable: ko.observable(false)},
// {label: util.getLocalizedValue(productCustomization,
'WHEN_PURCHASE_ACTIVATION_BEGINS'),value:WHEN_PURCHASE_ACTIVATION_BEGINS,
disable: ko.observable(false)},
Chapter 32
Creating a Custom Purchase Deal Configuration View Model
32-2

// {label: util.getLocalizedValue(productCustomization,
'CALENDAR_DAY'),value:CALENDER_DAY, disable: ko.observable(false)},
// {label: util.getLocalizedValue(productCustomization,
'DELIMITER_OPTION'),value:'-1', disable: ko.observable(true)},
// {label: util.getLocalizedValue(productCustomization,
'CYCLES_AFTER_ACTIVATION'),value:CYCLES_AFTER_ACTIVATION, disable:
ko.observable(false)},
// {label: util.getLocalizedValue(productCustomization,
'MONTHS_AFTER_ACTIVATION'),value:MONTHS_AFTER_ACTIVATION, disable:
ko.observable(false)},
// {label: util.getLocalizedValue(productCustomization,
'DAYS_AFTER_ACTIVATION'),value:DAYS_AFTER_ACTIVATION, disable:
ko.observable(false)},
// {label: util.getLocalizedValue(productCustomization,
'HOURS_AFTER_ACTIVATION'),value:HOURS_AFTER_ACTIVATION, disable:
ko.observable(false)},
// {label: util.getLocalizedValue(productCustomization,
'MINUTES_AFTER_ACTIVATION'),value:MINUTES_AFTER_ACTIVATION, disable:
ko.observable(false)},
// {label: util.getLocalizedValue(productCustomization,
'SECONDS_AFTER_ACTIVATION'),value:SECONDS_AFTER_ACTIVATION, disable:
ko.observable(false)}
// ]);
// The values which are used in VM for JSON creation are :
// NOTE : do not override these variables
// var TODAY = "today";
// var CALENDAR_DAY = "calendar-day";
// var NEVER = "never";
// var SECONDS_AFTER_ACTIVATION = "seconds";
// var MINUTES_AFTER_ACTIVATION = "minutes";
// var DAYS_AFTER_ACTIVATION = "days";
// var HOURS_AFTER_ACTIVATION = "hours";
// var MONTHS_AFTER_ACTIVATION = "months";
// var CYCLES_AFTER_ACTIVATION = "cycles";
// var
WHEN_PURCHASE_ACTIVATION_BEGINS="when-purchase-activation-begins";
self.productActivationDateOptions - observable array which should be
overridden dropdown options for Product Activation
self.productDeactivationDateOptions - observable array which should be
overridden dropdown options for Product De-activation
self.productStartCycleDateOptions - observable array which should be
overridden dropdown options for Cycle/Recurring Start
self.productStopCycleDateOptions - observable array which should be
overridden dropdown options for Cycle/Recurring Stop
self.productStartUsageDateOptions - observable array which should be
overridden dropdown options for Usage Start
self.productStopUsageDateOptions - observable array which should be
overridden dropdown options for Usage Stop
3. Modify the following entries in the file as required to filter the date options displayed in the
Configure screen:
• productActivationDateOptions
• productDeactivationDateOptions
• productStartCycleDateOptions
• productStopCycleDateOptions
• productStartUsageDateOptions
Chapter 32
Creating a Custom Purchase Deal Configuration View Model
32-3

• productStopUsageDateOptions
For example, if product deactivation list in the Configure screen has to be modified
to include only CYCLES_AFTER_ACTIVATION and
MONTHS_AFTER_ACTIVATION options, override the
productDeactivationDateOptions entry in the file to include only these options:
self.productDeactivationDateOptions = ko.observableArray([
{label: util.getLocalizedValue(productCustomization,
'CYCLES_AFTER_ACTIVATION'), value: 'cycles', disable: ko.observable(false)},
{label: util.getLocalizedValue(productCustomization,
'MONTHS_AFTER_ACTIVATION'), value: 'months', disable: ko.observable(false)},
]);
4. (Optional) To hide the complete Recurring (cycle) section, set the
showProductConfigureCycleSection entry in the file to false:
self.showProductConfigureCycleSection = ko.observable(false);
5. (Optional) To hide the complete Usage section, set the
showProductConfigureUsageSection entry in the file to false:
self.showProductConfigureUsageSection = ko.observable(false);
// BRM mandates that -
// Cycle/Usage START is always greater than or equal to Purchase START
// Cycle/Usage END is always less than or equal to Purchase END
// If Cycle/Usage section is hidden, then their START and END must be
set
same
// as that of Purchase START and END
// Override Cycle/Usage variables as below to map it to Purchase
self.cycleStart = ko.computed(function(){
return self.purchaseStart();
});
self.cycleEnd = ko.computed(function(){
return self.purchaseEnd();
});
self.cycleEndRelativeValue = ko.computed(function(){
return self.purchaseDeactivationRelativeValue();
});
self.usageStart = ko.computed(function(){
return self.purchaseStart();
});
self.usageEnd = ko.computed(function(){
return self.purchaseEnd();
});
self.usageEndRelativeValue = ko.computed(function(){
return self.purchaseDeactivationRelativeValue();
});
6. Save the file in your NetBeans IDE project.
Configuring the Custom Purchase Configuration View Model
in the registry
After creating the required custom view model, create a custom purchase
configuration view model entry in the customRegistry.js file. Billing Care uses the
custom purchase configuration view model instead of the default view model during
Chapter 32
Configuring the Custom Purchase Configuration View Model in the registry
32-4

additional product purchase and renders the Configure screen containing your customization.
To create the custom purchase configuration view model entry in the registry:
1. Create a customRegistry.js file in myproject/web/custom/ directory.
2. Define the custom purchase configuration view model in this file. For example:
accountCreationConfigure: {
purchaseConfiguration:
{
viewmodel: "custom/viewmodels/
CustomPurchaseConfigurationViewModel.js"
},
},
3. Save the file in your NetBeans IDE project.
Chapter 32
Configuring the Custom Purchase Configuration View Model in the registry
32-5

33
Customizing Search Filter for Suspended
Payments
You can customize the Oracle Communications Billing Care search filter to find suspended
payments.
Topics in this document:
• About Suspended Payment Search Filter
• Adding Search Criteria
• Creating a CustompaymentSuspenseSearch.xml File
• Creating a CustomTemplatePaymentSuspenseWorker.java Class
• Creating CustomPCMTemplateModule.java Class
• Creating a customModule.properties File
• Updating Registry
• Updating customPaymentSuspenseSearchView.html
• Updating View Model
• Localizing New Criteria into Other Languages
• Creating Deployment Plan
• Creating .war File
About Suspended Payment Search Filter
Oracle Communications Billing and Revenue Management (BRM) automatically suspends
subscriber payments that do not include sufficient information to associate the payment with
an account. For example, BRM suspends payments made to unidentifiable accounts or
incorrect bill numbers.
You can use the Payment filter to find suspended payments. To narrow your suspended
payment search results, use the filters provided under Payment, Suspense, and Account
groups. Each search group has a set of default search criteria. See the discussion about
working with suspended payments in Oracle Communications Billing Care Online Help for
more information on searching suspended payments.
Adding Search Criteria
Search filter includes groups and criteria. You can add custom criteria to the following groups
to customize search filter:
• Payment
• Suspense
• Account
33-1

To add search criteria to search groups:
1. Create a template with new search criteria. See "Creating a
CustompaymentSuspenseSearch.xml File" for more information.
2. Create a java class file to add custom logic. See "Creating a
CustomTemplatePaymentSuspenseWorker.java Class" for more information.
3. Create a custom template module class file to override default search criteria. See
"Creating CustomPCMTemplateModule.java Class" for information.
4. Create a properties file to mention the custom Template Module class. See
"Creating a customModule.properties File" for more information.
5. Add an entry in the registry to override the out-of-the-box view and filter files. See
"Updating Registry" for more information.
6. Add new criteria for payment suspense search to the interface. See "Updating
customPaymentSuspenseSearchView.html" for more information.
7. Edit view model to handle new criteria. See "Updating View Model" for more
information.
8. Localize the new criteria to other languages. See "Localizing New Criteria into
Other Languages" for more information.
9. Create a deployment plan for your customizations. See "Creating Deployment
Plan" for more information.
10. Create a .war file to deploy your customizations. See "Creating .war File" for more
information.
Creating a CustompaymentSuspenseSearch.xml File
Create a copy of the default template paymentSuspenseSearch.xml file and add
new search criteria to the filter section of the file.
To create a custom payment suspense search template:
1. Copy paymentSuspenseSearch.xml file from SDK_home/BillingCareSDK/
references/paymentsuspensetemplates directory to myproject/projectname/src/
java/custom/paymentsuspensetemplates directory,
where:
• SDK_home is the Billing Care SDK installation directory
• myproject is the folder containing your NetBeans IDE project
• projectname is the name of your custom project. For example,
SuspenseSearchFilter.
2. Rename the copied XML file to CustompaymentSuspenseSearch.xml.
3. Edit CustompaymentSuspenseSearch.xml and add the new search criteria in
the filter section of the XML file. Example 33-1 shows an example of adding bank
account criteria to the filter.
4. Save the file in your NetBeans IDE project.
Example 33-1 Sample Search Criteria in CustompaymentSuspenseSearch.xml
<filter>
………
Chapter 33
Creating a CustompaymentSuspenseSearch.xml File
33-2

………
………
<criteria name="bankAccountNo">
<inputType>Text</inputType>
<fieldKey>checkInfo.bankAccountNo</fieldKey>
<storableClass>/event/billing/payment</storableClass>
</criteria>……..
…….. ……
</filter>
Note:
Ensure the storable class for new criteria is base class. In this example, base class
is /event/billing/payment. Do not add the subclass directly, such as /event/billing/
payment/check.
Creating a CustomTemplatePaymentSuspenseWorker.java
Class
Create a custom template worker class containing logic to search suspense payments based
on new criteria. A sample CustomTemplatePaymentSuspenseWorker.java file is provided
in the SDK_home/BillingCareSDK/samples/PaymentSuspenseSearchFilter /src/java/
custom/com/rest/sdk directory.
To create a custom payment suspense worker class:
1. Create a CustomTemplatePaymentSuspenseWorker.java file in myproject/
projectname/src/java/com/rest/sdk.
2. Override buildPaymentSuspenseInputFList and constructFilterForInputFlist as
shown in the sample CustomTemplatePaymentSuspenseWorker.java file.
3. Add the custom storable classes for the payment based on the new payment criteria
subclass. Example 33-2 shows an example of adding bank account criteria to the filter.
4. Save the file in your NetBeans IDE project.
Example 33-2 Sample Custom Payment Suspense Storable Class
if (strKey.contains("cashInfo")) {
if (!storableClass.equals("") && !storableClass.equals("/
cash")) {
return null;
}
storableClass = "/cash";
Creating CustomPCMTemplateModule.java Class
Create a custom template module class and override the getRecordsForTemplate() method.
To create a custom template module class:
1. Create CustomPCMTemplateModule.java file in myproject/projectname//src/java/com/
rest/sdk.
Chapter 33
Creating a CustomTemplatePaymentSuspenseWorker.java Class
33-3

2. Override the getRecordsForTemplate() method as shown in Example 33-3.
3. Call CustomTemplatePaymentSuspenseWorker.java class as shown in
Example 33-4.
4. Save the file in your NetBeans IDE project.
Example 33-3 Override getRecordsForTemplate()
@Override public List<ColumnarRecord> getRecordsForTemplate(String
templateType, String id, String secondaryId, int offset, int limit,
SearchCriterias searchCriteria, List<GenericTemplate.SortbyFields> sortByFields)
{ PortalContext ctx = null; try { BaseOps baseOps =
getBaseOps(); if (baseOps instanceof PCMBaseOps) { ctx
= BRMUtility.getConnection(); ((PCMBaseOps)
baseOps).setContext(ctx); }
Example 33-4
if (templateType.equalsIgnoreCase("paymentsuspensesearch")) {
templateWorker = new CustomTemplatePaymentSuspenseWorker();
}
Creating a customModule.properties File
Create a custom module property file to override the default module logic with your
customizations.
To create a custom module property file:
1. Create customModule.properties file in myproject/projectname/src/java/
custom.
2. Add the following entry:
billingcare.rest.template.module = com.rest.sdk.CustomPCMTemplateModule
3. Save the file in your NetBeans IDE project.
Updating Registry
After creating the required custom view model, add a custom module entry in the
customRegistry.js file to include the new criteria to the filter. Use the correct registry
key to add the custom module in the customRegistry.js file.
The available registry keys are:
• paymentFilter
• suspenseFilter
• accountFilter
To add an entry in the customRegistry.js file:
1. Edit the customRegistry.js file in myproject/projectname/web/custom.
2. Add an entry as shown in Example 33-5. In this example, the customRegistry
contains accountFilter registry key because the new criteria is added to account
group of filter section.
3. Save the file in your NetBeans IDE project.
Chapter 33
Creating a customModule.properties File
33-4

Example 33-5 Sample Custom Payment Suspense Module Registry Entry to Filter
Accounts
var CustomRegistry = { paymentSuspenseSearch: {
view: 'text!../custom/templates/paymentSuspense/
customPaymentSuspenseSearchView.html',
accountFilter: 'custom/viewmodels/paymentSuspense/
customPaymentSuspenseSearchAccountFilterViewModel.js'
}
};
Updating customPaymentSuspenseSearchView.html
Customize customPaymentSuspenseSearchView.html to add a new criteria for payment
suspense search.
To add new criteria for payment suspense search in the
customPaymentSuspenseSearchView.html file:
1. Edit the customPaymentSuspenseSearchView.html file in myproject/projectname/web/
custom/templates/paymentSuspense.
2. Add new criteria for payment suspense search as shown in Example 33-6.
3. Save the file in your NetBeans IDE project.
Example 33-6 Sample Custom Payment Suspense Search View Criteria
<div class="oj-row filter-header">
<div class="oj-col oj-lg-12">
<label id="payment-filter-bank-account-number-label" data-
bind="text: bankAccountNoHeading, attr: {'for': 'selected-bill-account-number'}"
class="payment-suspense-search-filter-label"></label>
</div>
</div>
<div class="oj-row">
<div class="oj-col oj-lg-12">
<div id="selected-bank-account-number" class="items-wrapper"
data-bind="foreach: bankAccountNo">
<div class="token-item">
<span data-bind="text: $data, attr: {title: $data}"></
span>
<i class="icon" tabindex="0" data-
bind="click: $parent.removeBankAccountNo, event:
{ keyup : $parent.removeBankAccountNoOnEnterOrSpace} "></i>
</div>
</div>
</div>
</div>
Updating View Model
Update the view model to handle new criteria. For example, update
CustomPaymentSuspenseSearchAccountFilterViewModel.js to handle new criteria in
account group. If a criteria is added to suspense or payment group then update the
corresponding custom view model.
The available filter view models are:
• PaymentSuspenseSearchPaymentFilterViewModel
Chapter 33
Updating customPaymentSuspenseSearchView.html
33-5

• PaymentSuspenseSearchSuspenseFilterViewModel
• PaymentSuspenseSearchAccountFilterViewModel
To update a view model:
1. Go to myproject/projectname/web/custom/viewmodels/paymentSuspense.
2. Edit view model to handle new criteria as shown in Example 33-7:
3. Save the file in your NetBeans IDE project.
Example 33-7 Sample Custom Payment Suspense Search Account Filter View
Model
define(['jquery', 'knockout',
'viewmodels/paymentSuspense/PaymentSuspenseSearchAccountFilterViewModel'
],
function ($, ko,PaymentSuspenseSearchAccountFilterViewModel) {
function customPaymentSuspenseSearchAccountFilterViewModel() {
PaymentSuspenseSearchAccountFilterViewModel.apply(this,
arguments);
….
..}
Note:
The reset and sync functions should be available in all view models. Entries
present in each function are dependent on the search criteria. You can
change the name of the function and entries as per search criteria.
Localizing New Criteria into Other Languages
Localize the new criteria headings and label into other languages. See "Customizing
the Resource Bundle" for more information.
Creating Deployment Plan
Create a production deployment plan named plan.xml for your production Billing Care
deployment. See "Packaging and Deploying Customizations" for more information.
Creating .war File
Create a .war file containing your customizations to deploy to multiple Billing Care
instances. See "Packaging and Deploying Customizations" for more information.
Chapter 33
Localizing New Criteria into Other Languages
33-6

34
Exporting Billing Care Search Results
You can enable the export of Oracle Communications Billing Care accounts, events, and
payments search results to PDF files by using the SDK.
Topics in this document:
• About Billing Care Search
• Enabling Search Results Export with the SDK
• Creating Custom Search Templates
• Creating Custom Search View Models
• Configuring Custom Search Modules in the Registry
• Deploying Customizations
About Billing Care Search
Billing Care provides search functionality for querying accounts, subscriber events, and
payments. By default, Billing Care search results cannot be exported. Results are viewable
only in the Billing Care application.
Enabling Search Results Export with the SDK
The SDK provides the ability to expose an embedded export link on Billing Care search
results screens. Use the SDK to enable export links in the Billing Care search screens.
The Billing Care SDK includes sample search results export implementation in the
SDK_home/samples/SaveSearchResults directory. Use the samples as a guideline for
enabling search results export.
To enable search results export to PDF in Billing Care:
1. Create custom search templates with the element saveResults set to true to enable the
Export link. See "Creating Custom Search Templates" for more information.
2. Create custom search view models containing the savetoFile function. See "Creating
Custom Search View Models" for more information.
3. Create a customRegistry.js file configuring Billing Care to use the custom search view
models created in step 2. See "Configuring Custom Search Modules in the Registry" for
more information.
4. Deploy your customizations to your application server. See "Deploying Customizations"
for more information.
Creating Custom Search Templates
Each Billing Care search screen (accounts, events, and payments) uses a template that
defines what information to display. By default, the saveResults element is set to false in
34-1

each search template, which hides the Export link. To enable the Export link in each
search screen, you must create custom search templates for each search screen you
want to enable export for in your NetBeans IDE project.
See "Customizing Billing Care Templates" for more information on customizing
templates.
The SDK includes sample accounts, events, and payments search templates in
SDK_home/samples/SaveSearchResults/src/java/custom. Use this sample as an
example on how to configure Billing Care to enable only complete allocation of
suspended payments.
To enable the search screen Export link Billing Care:
1. Create custom template files for each search screen using the SDK samples in
myproject/src/custom where myproject is the folder containing your NetBeans
IDE project.
2. In each search screen XML template file set the saveResults element to true.
3. Save the file in your NetBeans IDE project.
Creating Custom Search View Models
Billing Care uses search view models to define search screen behavior. You must
create custom accounts, events, and payments view models containing the savetoFile
function to enable search results export to PDF.
See "About View Models" for more information about Billing Care view models.
The following sample view models in the SDK_home/samples/
SaveSearchResults/web/js/viewmodels directory contain the savetoFile function for
enabling search results export:
• CustomEventsViewModel.js
• CustomPaymentSuspenseSearchViewModel.js
• CustomSearchViewModel.js
Use the sample view models to create your custom models.
To create a custom search view models with enabled Export links:
1. Create the required custom search view model JavaScript files in myproject/web/
custom/js/viewmodels/area/configure where myproject is the folder containing
your NetBeans IDE project and area is the customization type (for example,
search).
2. Include the savetoFile function in your custom search view models.
3. Save the file in your NetBeans IDE project.
Configuring Custom Search Modules in the Registry
After creating the required custom search view models, create custom module entries
in the customRegistry.js file to use when using Billing Care search screens. Billing
Care uses the custom search modules instead of the default entries when searching.
Chapter 34
Creating Custom Search View Models
34-2

A sample customRegistry.js file is provided in the SDK_home/samples/
SaveSearchResults/web/custom directory where SDK_home is the Billing Care SDK
installation directory. This sample defines the custom search modules containing the search
results export functionality.
To create custom search module entries in the customRegistry.js file:
1. Create a customRegistry.js file in myproject/web/custom/ where myproject is the folder
containing your NetBeans IDE project.
2. Define the custom search modules in this file. Example 34-1 shows a definition of custom
modules for accounts, events, and payments module in the registry using the SDK
samples.
3. Save the file in your NetBeans IDE project.
Example 34-1 Sample Custom Search Modules Registry Entry
var CustomRegistry = {
search: {
viewmodel: 'viewmodels/CustomSearchViewModel'
},
events: {
viewmodel: 'viewmodels/CustomEventsViewModel'
},
paymentSuspenseSearch: {
viewmodel: 'viewmodels/CustomPaymentSuspenseSearchViewModel'
}
};
Deploying Customizations
Package and deploy your customizations using one of the methods described in "Using an
Exploded Archive during Customization" or "Packaging and Deploying Customizations".
Chapter 34
Deploying Customizations
34-3

Part V
Controlling Access to Billing Care
Functionality
This part describes how to limit user access to screens, fields, and functionality in Oracle
Communications Billing Care. It contains the following chapters:
• Limiting Event Adjustments Entered by CSRs
• Setting Adjustment Limit for Event Adjustments
• Enabling Authorization in Test Installations
• Restricting Bundle Validity Based on Roles
• Restricting Additional Bundles Purchase Based on Roles
• Making Notes Mandatory for Additional Product Purchase
• Customizing Suspended Payment Allocations
• Disabling Event Adjustment Options Based on Roles

35
Limiting Event Adjustment Percentage
Entered by CSRs
You can limit the event adjustment percentage entered by CSRs using the Oracle
Communications Billing Care SDK and OPSS policies.
Topics in this document:
• About Adjustments
• Limiting Event Adjustments Entered by CSRs
• Updating CustomExtendAdjustmentModule.java Class
• Creating CustomAdjustmentWorker.java Class
• Creating a customized_en.xlf File Entry for the Error Message
About Adjustments
Typically, CSRs perform the adjustments to satisfy an unhappy customer or correct a
problem. For example, a CSR might give an adjustment when the entire monthly fee is
charged for a service that was unavailable for a few days. You customize Billing Care to limit
the percentage of event adjustment allowed for a CSR by using the SDK and OPSS policies.
Limiting Event Adjustments Entered by CSRs
To limit the event adjustment percentage entered by a CSR:
1. Add an obligation for the OPSS authorization policy; for example, Maximum Adjustment
Amount Percentage. For more information on adding obligations, see the OPSS
documentation.
2. Update the CustomExtendAdjustmentModule.java class file to override the default
event adjustment flow. See "Updating CustomExtendAdjustmentModule.java Class" for
more information.
3. Create a custom adjustment worker class to add custom logic. See "Creating
CustomAdjustmentWorker.java Class" for more information.
4. Create or update the customized_en.xlf file to add an error code and message for
limiting adjustments. See "Creating a customized_en.xlf File Entry for the Error Message"
for more information.
Updating CustomExtendAdjustmentModule.java Class
Update the CustomExtendAdjustmentModule.java class to override the adjustEvent ( )
method.
To update the CustomExtendAdjustmentModule.java class:
35-1

1. Open the CustomExtendAdjustmentModule.java file in myproject/
projectname/src/java/com/rest/sdk.
2. Override the adjustEvent ( ) method as shown in this example:
@Override
public void adjustEvent(AdjustmentEvent adjustEvent) {
CustomAdjustmentWorker worker = new CustomAdjustmentWorker();
boolean isAllowed;
isAllowed = worker.isAllowedForAdjustment(adjustEvent);
if (isAllowed) {
super.adjustEvent(adjustEvent);
} else {
ExceptionHelper.buildErrorInfo(70001,
"More than allowed Percentage", Response.Status.BAD_REQUEST);
}
}
3. Save the file in your NetBeans IDE project.
Creating CustomAdjustmentWorker.java Class
Create a custom template worker class containing logic to calculate the percentage of
adjustment allowed and limit the adjustment amount entered by a CSR in Billing Care
if it is more than the percentage allowed.
To create the CustomAdjustmentWorker.java Class:
1. Create the CustomAdjustmentWorker.java file in myproject/src/java/com/rest/
sdk.
2. Extend AdjustmentWorker as shown in this example:
public class CustomAdjustmentWorker extends AdjustmentWorker {
/*
*Check if the amount is more than allowed percentage
*/
public boolean isAllowedForAdjustment(AdjustmentEvent adjustEvent){
boolean isAllowed = true;
//Get total amount available for adjustment from BRM
BigDecimal availableAmountForAdjustment =
getAvailableAmountForEventAdjustment(adjustEvent);
//String configured as obligation in OPSS Admin
String obligationString = "Maximum Adjustment Amount Percentage";
Subject subject = Security.getCurrentSubject();
String action = "Make";
Map<String, String> env = new HashMap<>(0);
Map<String, String> obligationNameValueMap = new HashMap<>();
Integer obligationPer = 0;
//Getting obligation allowed percentage value from OPSS
String resourceString = "BillingCare" + "/" +
"AdjustmentCurrencyResourceType" + "/" + "AdjustmentResource";
try {
PepResponse response =
PepRequestFactoryImpl.getPepRequestFactory().newPepRequest(subject, action,
Chapter 35
Creating CustomAdjustmentWorker.java Class
35-2

resourceString, env).decide();
Map<String, Obligation> obligations = response.getObligations();
for (String name : obligations.keySet()) {
obligationNameValueMap = obligations.get(name).getStringValues();
obligationPer =
Integer.parseInt(obligationNameValueMap.get(obligationString));
break;
}
} catch (PepException ex) {
Logger.getLogger(AdjustmentWorker.class.getName()).log(Level.SEVERE, null,
ex);
}
//Calculate the allowed amount using obligationPer retrieved from OPSS and
availableAmountForAdjustment retrieved from BRM
double allowedAmountInDouble = (obligationPer *
availableAmountForAdjustment.doubleValue()) / 100;
BigDecimal allowedAmount = new BigDecimal(allowedAmountInDouble);
//If amount is greater than allowed amount return false
//Note: Please handle the decimal case as per the requirement if only first
2 decimal needed etc..
if(adjustBill.getAmount().compareTo(allowedAmount)==1)
{
isAllowed=false;
}
return isAllowed;
}
Note:
The JAR files required for this customization are available in the SDK_home/
libs directory.
3. Save the file in your NetBeans IDE project.
Creating a customized_en.xlf File Entry for the Error Message
You must provide a localized English entry for the new adjustment error code and message in
the customized_en.xlf file to provide a translatable text string in Billing Care. For more
information on the customized_en.xlf file and how to add a new entry, see "Customizing
Billing Care Labels".
This example shows a sample entry for the error code and message to add in the
customized_en.xlf file:
<?xml version="1.0" encoding="utf-8" ?>
<xliff version="1.0">
<file original="test_en.js" source-language="EN-US"
target-language="EN-US" datatype="JavaScript">
<header/>
<body>
<group id="errors" restype="errors">
Chapter 35
Creating a customized_en.xlf File Entry for the Error Message
35-3

<trans-unit id="70001" translate="yes">
<source>More than allowed Percentage.</source>
<target>More than allowed Percentage.</target>
</trans-unit>
</group>
</body>
</file>
</xliff>
Note:
For custom error codes, the series must start from 70000; for example,
70001,70002, and so on.
Chapter 35
Creating a customized_en.xlf File Entry for the Error Message
35-4

36
Setting Adjustment Limit for Event
Adjustments
You can customize Oracle Communications Billing Care to set the maximum adjustment limit
based on the currency resources used for event adjustments.
Topics in this document:
• About Adjustment Limits
• Setting Event Adjustment Limit for CSRs
• Creating customAdjustmentResource.java Class
• Creating the Custom Event Adjustment View Model
• Configuring the Custom Event Adjustment View Model in the Registry
About Adjustment Limits
Typically, customer service representatives (CSRs) perform the adjustments by providing the
adjustment amount to be applied for the customer. You can set an adjustment limit for a CSR
to control the adjustment amount entered by the CSR. For event adjustments, you can
customize Billing Care to set the maximum adjustment limit allowed for a CSR based on the
currency resources used for the adjustments. For example, you can set an adjustment limit
of $10 for USD and 5 euro for EUR for a CSR to perform event adjustments.
Setting Event Adjustment Limit for CSRs
To set the event adjustment limit for a CSR:
1. If not already created, create a custom ResourceType and Resource (for example,
AdjustmentResourceType, AdjustmentResource) with the adjustment action in the OPSS
Server and add the ResourceType to the CustomConfigurations.xml file. See "Creating
a Custom Configuration File" for more information.
2. Add an obligation (for example, Maximum Adjustment Limit) in the custom adjustment
resource with a string (for example, 840, the currency code for US dollars) for a policy
using OPSS. For more information on adding obligations, see the OPSS documentation.
3. Set the maximum adjustment limit you want to allow for the CSR for a currency resource
as the obligation value in the OPSS Server. For example, $10 for USD.
4. Create a custom REST resource to validate the adjustment amount entered in the Event
Adjustment dialog box. See "Creating customAdjustmentResource.java Class" for more
information.
5. Create or update the CustomEventAdjustmentViewModel.js class file to override the
default event adjustment flow. See "Creating the Custom Event Adjustment View Model"
for more information.
36-1

6. Configure the custom view model entry in the customRegistry.js file to use the
custom view model that you created or updated. See "Configuring the Custom
Event Adjustment View Model in the Registry" for more information.
7. Deploy your customizations using one of the methods described in "Using an
Exploded Archive during Customization" or "Packaging and Deploying
Customizations".
8. Verify the changes in Billing Care by doing the following:
a. Log into Billing Care as a CSR who has adjustments action granted and
maximum adjustment limit set.
b. In the Events dialog box, select events and click Adjust.
The Event Adjustment dialog box appears.
c. Select an adjustment option and enter the adjustment amount you want to
adjust.
If the amount entered is less than the obligation value, the specified amount is
adjusted. If the amount entered is more than the obligation value, an error
message is displayed. For example: "For this currency you have exceed Max
adjustment limit."
Creating customAdjustmentResource.java Class
You can override the existing event adjustment flow with your customization by using
REST resources. Create a custom resource Java class to validate the event
adjustment amount against the obligation value.
To create the customAdjustmentResource.java class:
1. Create the customAdjustmentResource.java class file in myproject/
projectname/src/java/com/oracle/communications/brm/cc/ws/account, where
myproject is your NetBeans IDE Billing Care customizations project and
projectname is the name of your custom project.
2. Add the following code in the customAdjustmentResource.java class file using a
text editor:
//Create a custom REST with class named as "customAdjustmentResource"
// Add method "adjustEvent" which takes parameter "AdjustmentEvent"
//This custom REST validates entered amount to adjust with the obligation
and
then calls the OOTB REST resource.
@Path("customadjustment")
public class CustomAdjustmentResource {
@Context
HttpServletRequest servletRequest;
@Path("/event")
@POST
@Consumes({MediaType.APPLICATION_JSON, MediaType.APPLICATION_XML})
public void eventAdjustment(AdjustmentEvent adjustEvent) throws
JSONException, IOException {
UIRequestValue maxAdjustmentLimit = new
UIRequestValue(adjustEvent.getResourceId().toString(),
adjustEvent.getAmount(),
ConstraintOperator.GREATER_THAN,
Chapter 36
Creating customAdjustmentResource.java Class
36-2

new EnforcementError(40010,"For this currency you have
exceed Max adjustment limit."));
//Checks if user is not super csr and UI value is greater than OPSS
obligation value and throws error "For this currency you have exceed Max
limit."
if (!EnforcementUtil.isResourceGranted(servletRequest, subject,
"BillingCare", EnforcementConstants.SUPERUSER_RESOURCE)) {
EnforcementUtil.checkAccess(subject, "BillingCare", "adjustment",
"AdjustmentResourceType","AdjustmentResource",
new EnforcementError(20000, "You do not have permission to perform an
adjustment."), maxAdjustmentLimit);
}
}
/*
*After validating maximum validity end month criteria invoke out of the
box code to perform adjustment.
*/
}
3. Save the file in your NetBeans IDE project.
Creating the Custom Event Adjustment View Model
Billing Care uses view model to define the display of the screens in Billing Care. You must
create or update the custom view model, CustomEventAdjustmentViewModel, containing
the details to set the adjustment limit for CSRs performing event adjustments.
See "About View Models" for more information about Billing Care view models.
To create the custom event adjustment view model:
1. Create or update the customEventAdjustmentViewModel.js file in the myproject/web/
custom/viewmodels directory, where myproject is the folder containing your NetBeans
IDE project.
2. Add the following code in the customEventAdjustmentViewModel.js file using a text
editor:
define(['knockout', 'jquery', 'underscore',
Registry.accountCreation.wizardBase,
'viewmodels/ARActions/adjustments/EventAdjustmentViewModel'],
function (ko, $, _, WizardBaseViewModel, EventAdjustmentViewModel) {
customEventAdjustmentViewModel.prototype = new
WizardBaseViewModel();
function customEventAdjustmentViewModel() {
EventAdjustmentViewModel.apply(this, arguments);
var self = this;
self.persistData = function (eventAdjustmentObj) {
var ajaxDef = $.ajax({
type: "POST",
url: baseURL + "/customadjustment/event/",
data: ko.toJSON(eventAdjustmentObj),
contentType: "application/json; charset=utf-8",
dataType: "json",
processData: false
});
Chapter 36
Creating the Custom Event Adjustment View Model
36-3

ajaxDef.done(function (completeResponse) {
});
ajaxDef.fail(function (errorThrown) {
alert(errorThrown.responseJSON.errorMessage);
});
return ajaxDef;
};
}
return customEventAdjustmentViewModel;
});
3. Save the file in your NetBeans IDE project.
Configuring the Custom Event Adjustment View Model in the
Registry
After creating the required custom view model, create a custom event adjustment view
model entry in the customRegistry.js file. Billing Care uses the custom event
adjustment view model instead of the default event adjustment view model during
adjustments and renders the Event Adjustment dialog box containing your
customization.
To create the custom event adjustment view model entry in the registry:
1. Create a customRegistry.js file in the myproject/web/custom/ directory.
2. Define the custom event adjustment view model in this file. For example:
eventAdjustment: {
viewmodel:
'custom/viewmodels/customEventAdjustmentViewModel.js'
}
3. Save the file in your NetBeans IDE project.
Chapter 36
Configuring the Custom Event Adjustment View Model in the Registry
36-4

37
Enabling Authorization in Test Installations
You can use the SDK to enable authorization in an Oracle Communications Billing Care test
installation.
Topics in this document:
• About Enabling Authorization in Test Installations
• Enabling Authorization in Test Installations
• Modifying Default Authorization Policies
• Adding Custom Authorization Resources and Actions
• Deploying Customizations
About Enabling Authorization in Test Installations
You use authorization to grant users the privileges appropriate for their job functions, while
denying access to other functionality. Billing Care uses Oracle Platform Security Services
(OPSS) to handle all authorization tasks.
By default, Billing Care test installations are installed without OPSS. The authorization feature
is also disabled in the test installations. This enables the testing Billing Care instances to
connect directly to your BRM system using the native WebLogic server user management.
For more information, see the discussion about installing Billing Care for testing in Oracle
Communications Billing Care Installation Guide.
However, if you want to test authorization in your Billing Care test installation without
installing OPSS, you can enable authorization in Billing Care by using the Billing Care SDK.
See "Enabling Authorization in Test Installations".
Note:
Use the Billing Care SDK to enable authorization only in your test or development
installation. Do not use this customization in production installations.
To enable authorization in a production installation, see the discussion about
production installations in Oracle Communications Billing Care Installation Guide.
Enabling Authorization in Test Installations
This section provides a high level overview of the process on how to enable authorization in a
Billing Care test installation by using the Billing Care SDK.
The Billing Care SDK includes a sample OPSS manager (CustomOPSSManager) in the
SDK_home/samples directory, where SDK_home is the directory where you installed the
37-1

SDK. This sample contains the necessary configuration to enable authorization. Use
this sample to enable authorization in the Billing Care test installation.
To enable authorization in the Billing Care test installation:
1. Using the SDK_home/samples/CustomOPSSManager directory, create a
NetBeans IDE project with the same folder structure of the
CustomOPSSManager directory. See "Creating the Billing Care NetBeans IDE
Project" for more information.
2. (Optional) Modify the default authorization policies in your
CustomConfigurations.xml file. See "Modifying Default Authorization Policies"
for more information.
3. (Optional) Add custom authorization resources or actions in your
CustomConfigurations.xml file. See "Adding Custom Authorization Resources
and Actions" for more information.
4. Deploy your customizations to your Billing Care domain. See "Deploying
Customizations" for more information.
Modifying Default Authorization Policies
To modify default authorization policies:
1. In a text editor, open the myproject/src/java/custom/configurations/
CustomConfigurations.xml file, where myproject is the NetBeans IDE project
that you created using the sample OPSS manager.
2. Search for the authorizationJSON key in the file:
<keyvals>
<key>authorizationJSON</key>
<value>[{"extension":null,"resourceName":"SuperUserResource","grante
dActions":[],"deniedActions":["ANY"]},...
</value> <desc>...</desc>
</keyvals>
3. Change the default actions for the authorization resources in the
authorizationJSON key value as required. For example:
To authorize the logged in user to perform adjustments, change the actions for the
adjustment resource as shown in the following example:
{"extension":null,"resourceName":"AdjustmentResource","grantedActions":
["Allocate","Make"],"deniedActions":[]}
To deny the logged in user to perform adjustments, change the actions for the
adjustment resource as shown in the following example:
{"extension":null,"resourceName":"AdjustmentResource","grantedActions":
[],"deniedActions":["Allocate","Make"]}
See the discussion about Billing Care authorization resources in Oracle
Communications Billing Care Security Guide for more information on the default
authorization resources and actions supported in Billing Care.
4. Change or add transaction limits (obligations) for authorization by doing the
following:
a. Search for the transaction limit mapping in the file. For example:
Chapter 37
Modifying Default Authorization Policies
37-2
<mapping>
<key>weblogic</key>
<map>
<id>Maximum Currency Adjustment Amount</id>
<key>4</key>
</map>
...
<desc>Obligation mapping for user. If there are multiple users for
which obligation has to be mapped replicate the mapping section change the key
to the username to which obligation is required.
Also edit the obligation values as per requirement. Note that the
obligation field that is the id should be as per BillingCare documentation.
</desc>
</mapping>
b. Change transaction limit values for authorizing users as required. For example, to
authorize the weblogic user to make payment only up to $50, change the maximum
payment amount value under the weblogic key to 50 in the mapping:
<key>weblogic</key>
<map>
<id>Maximum Payment Amount</id>
<key>50</key>
</map>
Note:
Do not change the mapping ID for the transaction limit; for example,
Maximum Currency Adjustment Amount.
c. (Optional) Add new transaction limits for authorizing users as required. See the
discussion about policies on transaction limits in Oracle Communications Billing Care
Security Guide for the list of transaction limits supported in Billing Care.
5. Save and close the file.
Adding Custom Authorization Resources and Actions
To add custom authorization resources and actions:
1. In a text editor, open the myproject/src/java/custom/configurations/
CustomConfigurations.xml file, where myproject is the NetBeans IDE project that you
created using the sample OPSS manager.
2. Search for the authorizationJSON key in the file:
<keyvals>
<key>authorizationJSON</key>
<value>[{"extension":null,"resourceName":"SuperUserResource","grantedActio
ns":[],"deniedActions":["ANY"]},...
</value> <desc>...</desc>
</keyvals>
3. Add custom authorization resources and actions in the authorizationJSON key value as
required. For example, to authorize the logged in user to view invoices, add the authorize
resource and action as shown in the following example:
{"extension":null,"resourceName":"InvoiceImageResource","grantedActions":
["View"],"deniedActions":[]}
Chapter 37
Adding Custom Authorization Resources and Actions
37-3

Note:
Ensure that the key value structure is the same.
When you migrate from the Billing Care test installation to the production
installation, make sure that the custom resources are added in OPSS.
4. Save and close the file.
See "About Custom Resource Authorization" for more information.
Deploying Customizations
Package and deploy your customizations using one of the methods described in
"Using an Exploded Archive during Customization" or "Packaging and Deploying
Customizations".
Chapter 37
Deploying Customizations
37-4

38
Restricting Bundle Validity Based on Roles
In Oracle Communications Billing Care, you can restrict the validity or end date set by CSRs
while purchasing additional products or services.
Topics in this document:
• About Restricting Bundle Validity
• Restricting Bundle Validity
• Creating CustomAccountResource.java Class
• Creating a Custom Purchase View Model
• Configuring the Custom Purchase View Model in the Registry
About Restricting Bundle Validity
Typically, CSRs set the validity or end date of a product or service in a bundle (/deal object)
during purchase. For additional purchases, you can customize Billing Care to restrict the
validity or end date set by the CSR based on the CSR's role by using the OPSS policies and
the Billing Care SDK.
For example, for an additional discount purchased from a bundle, you can allow a CSR with
the super user role to set an end date up to a maximum of 12 months, and allow a CSR with
a basic role to set an end date only up to a maximum of 6 months.
Restricting Bundle Validity
You can customize the Purchase Catalogue screen using OPSS policies to restrict the end
date set by CSRs for additional purchases.
To restrict bundle validity:
1. Define a new ResourceType and Resource in the OPSS Server for restricting bundle
validity, such as DealResourceType and DealResource.
2. Define purchase as the corresponding action for the ResourceType in the OPSS Server.
3. Associate the new resource that you created to a CSR who has permission to purchase
products or services.
4. Add the new ResourceType to the CustomConfigurations.xml file. For example:
<keyvals>
<key>authorizationResourceTypes</key>
<value>DealResourceType</value>
<desc>Add comma separated OPSS Resource Types(values) for authorization.
Also these resource types should be defined in OPSS.
Please note that the key should not be changed here.
</desc>
</keyvals>
38-1

5. To set the validity allowed for a CSR, add an obligation with a string (for example,
maximum validity end month) for a policy using OPSS and set a numeric value to
the string (for example, 6).
6. Create a custom REST resource for validating the end date entered in the
Purchase Catalogue screen. See "Creating CustomAccountResource.java Class"
for more information.
7. Create a custom view model to override the default additional purchase logic with
your customization. See "Creating a Custom Purchase View Model" for more
information.
8. Create a customRegistry.js file to configure Billing Care to use the custom view
model that you created. See "Configuring the Custom Purchase View Model in the
Registry" for more information.
9. Deploy your customizations using one of the methods described in "Using an
Exploded Archive during Customization" or "Packaging and Deploying
Customizations".
10. Verify your changes in Billing Care by doing the following:
a. Log in to Billing Care as a CSR who has the permission to purchase products
or services and obligation to validate end date during purchase.
b. Purchase an additional charge or discount offer. For more information, see the
Billing Care Online Help.
c. In the Configure screen, enter a end date for the purchased offer.
If the end date exceeds the end date specified in the obligation associated with the
CSR, an error is displayed. If it matches or less than the end date in the obligation,
CSR is allowed to configure the offer.
Creating CustomAccountResource.java Class
Create a custom resource Java class to get the list of all customized charge offers and
discount offers in Billing Care and validate their end dates.
To create the customAccountResource.java class:
1. Create the CustomAccountResource.java file in myproject/projectname//src/
java/com/oracle/communications/brm/cc/ws/account, where myproject is your
NetBeans IDE Billing Care customizations project and projectname is the name of
your custom project.
2. Add the following code in the CustomAccountResource.java file using a text
editor:
//This custom REST validates the deal end month with the obligation and then
calls the OOTB REST resource.
@Path("customaccounts")
public class CustomAccountResource {
@Context
HttpServletRequest servletRequest;
@Path("{id}/custombundle")
@POST
@Consumes({MediaType.APPLICATION_JSON, MediaType.APPLICATION_XML})
public void purchaseCustomizedBundle(@PathParam("id") String id,
Chapter 38
Creating CustomAccountResource.java Class
38-2

CustomizedBundleForPurchase custbundle) throws JSONException, IOException {
/*
* Get the list of all CustomizedChargeOffers using
getCustomizedChargeOffers() method of CustomizedBundleForPurchase class.
*/
List <CustomizedChargeOffers> custoffer =
custbundle.getCustomizedChargeOffers();
List <CustomizedDiscountOffers> custDistOffer =
custbundle.getCustomizedDiscountOffers();
/*
* Iterate through each charge offer and get the purchaseEnd months and
validate the same against OPSS obligation
*/
for (CustomizedChargeOffers i : custoffer)
{
purchaseEnd=i.getPurchaseEnd();
months=purchaseEnd.getUnitSettings().getOffset();
UIRequestValue maxValidityEndMonthLimit = new UIRequestValue("Maximum
validity end month",
new BigDecimal(months), ConstraintOperator.GREATER_THAN,
new EnforcementError(40002,"Maximum validity end month exceeded"));
//Checks if user is not super csr and UI value is greater than OPSS
obligation value and throws error "Maximum validity end month exceeded"
if (!EnforcementUtil.isResourceGranted(servletRequest, subject,
"BillingCare", EnforcementConstants.SUPERUSER_RESOURCE)) {
EnforcementUtil.checkAccess(subject, "BillingCare", "Purchase",
"DealResourceType","DealResource",
error, maxValidityEndMonthLimit);
}
}
Repeat the above validations for all the discount offers as well by
iterating through custDistOffer.
/*
*After validating maximum validity end month criteria invoke out of the
box code to perform purchase.In below steps
*we have used jersey clients to achieve the same.
*/
1. Create a new Jersey Client
2. Create a webresource passing the baseURI (
host:port/bc/webresources/v1.0/accounts/id/bundle ).
3. Convert custbundle java object to json object.
String scheme = servletRequest.getScheme(); // http or https
String serverName = servletRequest.getServerName(); // hostname.com
int serverPort = servletRequest.getServerPort(); // port
String BASE_URI = scheme + " + serverName + ":" + serverPort + "/bc/webresources/
v1.0/accounts/";
Client client = Client.create();
ObjectMapper mapper = new ObjectMapper();
String jsonInString = mapper.writeValueAsString(custbundle);
JSONObject object = new JSONObject(jsonInString);
Chapter 38
Creating CustomAccountResource.java Class
38-3

javax.servlet.http.Cookie[] cookies=servletRequest.getCookies();
WebResource webResource2 =
client.resource(BASE_URI).path(id).path("bundle");
WebResource.Builder webresourceBuilder =
webResource2.accept(MediaType.APPLICATION_JSON);
Cookie cookieObject =null;
for(javax.servlet.http.Cookie cookie: cookies)
{
if(cookie.getName().contains("JSESSIONID"))
{
cookieObject = new
Cookie(cookie.getName(),cookie.getValue());
webresourceBuilder.cookie(cookieObject);
}
}
webresourceBuilder.post(ClientResponse.class, object);
}
}
3. Save the file in your NetBeans IDE project.
Creating a Custom Purchase View Model
Billing Care uses view model to define the display of the screens in Billing Care. You
must create or update the custom view model, CustomPurcahseViewModel, and add
the details containing the logic to validate the end date for offers and allow purchase.
See "About View Models" for more information about Billing Care view models.
To create a custom purchase view model:
1. Create or update the customPurchaseViewModel.js file in myproject/web/
custom/viewmodels directory.
2. Add the following code in the customPurchaseViewModel.js file using a text
editor:
define(['knockout',
'jquery',
'underscore',
Registry.accountCreation.wizardBase,
'viewmodels/purchase/PurchaseViewModel',
Registry.purchase.wizardView,
'viewmodels/purchase/PurchaseCatalogue'
],
function (ko, $, _, WizardBaseViewModel, PurchaseViewModel,
wizardTempl, PurchaseCatalogue) {
CustomPurchaseViewModel.prototype = new WizardBaseViewModel();
function CustomPurchaseViewModel(title, content, messages) {
WizardBaseViewModel.apply(this, arguments);
PurchaseViewModel.apply(this, arguments);
var self = this;
self.sharedData = {};
self.purchaseCatalogue = new PurchaseCatalogue();
Chapter 38
Creating a Custom Purchase View Model
38-4

self.purchaseBundle = function (stepObj) {
var id = self.sharedData.selectedServiceId ||
globalAppContext.currentAccountViewModel().account().id();
var urlToFetch = baseURL + "/customaccounts/" + id +
"/custombundle";
var data =
ko.toJSON(self.purchaseCatalogue.bundlePurchaseData);
util.showBusyCursor();
var ajaxDef = $.ajax({
type: "POST",
url: urlToFetch,
data: data,
contentType: "application/json; charset=utf-8",
dataType: "json",
processData: false
});
ajaxDef.done(function (completeResponse) {
self.updateStatus(stepObj, 'confirmation');
EventNotifier.assetsUpdated.dispatch("all");
EventNotifier.billUnitsUpdated.dispatch();
self.isInProgress(false);
util.resetCursor();
self.close();
});
ajaxDef.fail(function (errorThrown) {
alert(util.getLocalizedValue(purchasePackage,
"UNABLE_TO_PURCHASE_BUNDLE"));
self.updateStatus(stepObj, 'error');
self.isInProgress(false);
util.resetCursor();
});
return ajaxDef;
};
}
return CustomPurchaseViewModel;
});
3. Save the file in your NetBeans IDE project.
Configuring the Custom Purchase View Model in the Registry
After creating the required custom view model, create a custom purchase view model entry in
the customRegistry.js file. Billing Care uses the custom purchase view model instead of the
default view model during additional product purchase and renders the Purchase Add on
Deal Confirmation screen containing your customization.
To create the custom purchase view model entry in the registry:
1. Create a customRegistry.js file in myproject/web/custom/ directory.
2. Define the custom purchase view model in this file. For example:
purchaseConfiguration: {
viewModel: 'custom/viewModels/purchase/customPurchaseViewModel.js'
}
3. Save the file in your NetBeans IDE project.
Chapter 38
Configuring the Custom Purchase View Model in the Registry
38-5

39
Restricting Additional Bundles Purchase
Based on Roles
You can customize Oracle Communications Billing Care to restrict the purchase of additional
bundles based on user roles or permissions.
Topics in this document:
• About Restricting Bundles
• Restricting Bundles Based on Roles
• Creating the Custom Bundle Selection View Model
• Configuring the Custom Bundle Selection View Model in the Registry
About Restricting Bundles
By default, the Billing Care Purchase Catalogue screen displays all bundles (/deal objects)
retrieved from the BRM database. Customer service representatives (CSRs) can select these
bundles for purchase. You can customize Billing Care to display any additional bundles that
can be purchased based on a CSR's role or permission.
Restricting Bundles Based on Roles
You can use the Billing Care SDK and OPSS policies to customize the Purchase Catalogue
screen to display bundles for additional purchase based on CSR roles or permissions.
To restrict the bundles displayed for additional purchase:
1. Define a new ResourceType and Resource for bundles in the OPSS Server, such as
DealNameResourceType and DealNameResource.
2. Add the new ResourceType to the CustomConfigurations.xml file. For example:
<keyvals>
<key>authorizationResourceTypes</key>
<value>DealnameResourceType</value>
<desc>Add comma separated OPSS Resource Types(values) for authorization.
Also these resource types should be defined in OPSS.
Please note that the key should not be changed here.
</desc>
</keyvals>
For more information about updating the CustomConfigurations.xml file, see "Editing
the Billing Care Configuration File".
3. Create a custom view model to define the display of bundles in the Purchase Catalogue
screen. See "Creating the Custom Bundle Selection View Model".
4. Configure Billing Care to use the custom view model that you created. See "Configuring
the Custom Bundle Selection View Model in the Registry".
39-1

5. Deploy your customizations using one of the methods described in "Using an
Exploded Archive during Customization" or "Packaging and Deploying
Customizations".
Creating the Custom Bundle Selection View Model
Billing Care uses view models to define the display of screens in Billing Care. You
must create the custom view model, customBundleSectionViewModel, containing
the details to customize the display of bundles in the Purchase Catalogue screen for
additional purchase.
See "About View Models" for more information about Billing Care view models.
To create the custom bundle selection view model:
1. Create the customBundleSectionViewModel.js file in myproject/web/custom/
viewmodels/purchase directory, where myproject is the folder containing your
NetBeans IDE project.
2. Add the following code in the customBundleSectionViewModel.js file using a
text editor:
define(['knockout',
'jquery',
'underscore',
Registry.accountCreation.wizardBase,
'viewmodels/purchase/BundleSelectionViewModel'
],
function(ko, $, _, WizardBaseViewModel, BundleSelectionViewModel) {
customBundleSelectionViewModel.prototype = new
WizardBaseViewModel();
function customBundleSelectionViewModel(params) {
BundleSelectionViewModel.apply(this, arguments);
var self = this;
self.filterDealsList = function(loadedData) {
1. call the function
util.getGrantedActionsByResource("DealNameResource") and store its return
value in an array (eg. arr).
2. make a set and store array in set.
3. run a loop from var i =0 to i = loadedData.bundle.length
and check the value of loadedData.bundle[i].name in set.
4. if value is not present in set then remove it from
loadedData.bundle also.
5. return the modified loadedData .
};
}
return customBundleSelectionViewModel;
);
3. Save the file in your NetBeans IDE project.
Configuring the Custom Bundle Selection View Model in the
Registry
After creating the required custom view model, create a custom bundle selection view
model entry in the customRegistry.js file. Billing Care uses the custom bundle
Chapter 39
Creating the Custom Bundle Selection View Model
39-2

selection module instead of the default view model during additional purchase and renders
the Purchase Catalogue screen containing your customization.
To create the custom bundle selection view model entry in the registry:
1. Create a customRegistry.js file in your myproject/web/custom/ directory.
2. Define the custom event adjustment module in this file. For example:
var CustomRegistry = {
purchaseSelection: {
bundleviewmodel: 'custom/viewmodels/purchase/
customBundleSectionViewModel.js'
}
};
3. Save the file in your NetBeans IDE project.
Chapter 39
Configuring the Custom Bundle Selection View Model in the Registry
39-3

40
Making Notes Field Mandatory
In Oracle Communications Billing Care, you can make the Notes field mandatory for
additional product purchase and event adjustments.
Topics in this document:
• Making Notes Mandatory for Additional Product Purchase
• Making Notes Mandatory for Event Adjustments
Making Notes Mandatory for Additional Product Purchase
You can use the Billing Care SDK to make the Notes field mandatory on the Purchase Add
on Deal Confirmation screen.
To make the Notes field mandatory:
1. Create a custom view model to override the default view of the Purchase Add on Deal
Confirmation screen. See "Creating a Custom Purchase Deal View Model" for more
information.
2. Create a customRegistry.js file to configure Billing Care to use the custom view model
that you created. See "Configuring the Custom Purchase View Model in the Registry" for
more information.
3. Deploy your customizations using one of the methods described in "Using an Exploded
Archive during Customization" or "Packaging and Deploying Customizations".
Creating a Custom Purchase Deal View Model
Billing Care uses view model to define the display of the screens in Billing Care. You must
create or update the custom view model, CustomPurchaseViewModel, and add the details
containing the logic to make the Notes field mandatory.
See "About View Models" for more information about Billing Care view models.
To create a custom purchase deal view model:
1. Create or update the CustomPurchaseViewModel.js file in myproject/web/custom/
viewmodels directory, where myproject is the folder containing your NetBeans IDE
project.
2. Add the following code in the CustomPurchaseViewModel.js file using a text editor:
define(['jquery', 'knockout',
'viewmodels/purchase/PurchaseConfigurationViewModel'],
function ($, ko, PurchaseConfigurationViewModel) {
function customPurchaseViewModel() {
PurchaseConfigurationViewModel.apply(this, arguments);
self = this;
self.isValid = function () {
40-1

$("#enterNotesTextArea").attr('name',
'enterNotesWithoutReason');
if (self.note.isValid() && self.note.validator &&
self.note.validator.form() && self.note.comments.comment() ) {
return true;
}
return false;
};
}
customPurchaseViewModel.prototype = new
PurchaseConfigurationViewModel();
return customPurchaseViewModel;
});
3. Save the file in your NetBeans IDE project.
Configuring the Custom Purchase View Model in the Registry
After creating the required custom view model, create a custom purchase view model
entry in the customRegistry.js file. Billing Care uses the custom purchase view model
instead of the default view model during additional product purchase and renders the
Purchase Add on Deal Confirmation screen containing your customization.
To create the custom purchase view model entry in the registry:
1. Create a customRegistry.js file in myproject/web/custom/ directory.
2. Define the custom purchase module in this file. For example:
purchaseConfiguration: {
viewmodel: 'custom/viewmodels/customPurchaseViewModel.js'
}
3. Save the file in your NetBeans IDE project.
Making Notes Mandatory for Event Adjustments
You can use the Billing Care SDK to make the Notes field mandatory in the Event
Adjustment dialog box.
To make the Notes field mandatory:
1. Create a custom view model to override the default view of the Event Adjustment
dialog box. See "Creating a Custom Event Adjustment View Model" for more
information.
2. Create a customRegistry.js file to configure Billing Care to use the custom view
model that you created. See "Configuring the Custom Event Adjustment View
Model in the Registry" for more information.
3. Deploy your customizations using one of the methods described in "Using an
Exploded Archive during Customization" or "Packaging and Deploying
Customizations".
Chapter 40
Making Notes Mandatory for Event Adjustments
40-2

Creating a Custom Event Adjustment View Model
Billing Care uses view models to define the display of its screens. You must create or update
the custom view model, CustomEventAdjustmentViewModel, and add the details
containing the logic to make the Notes field mandatory.
See "About View Models" for more information about Billing Care view models.
To create a custom purchase deal view model:
1. Create or update the customEventAdjustmentViewModel.js file in the myproject/web/
custom/viewmodels directory, where myproject is the folder containing your NetBeans
IDE project.
2. Add the following code in the customEventAdjustmentViewModel.js file using a text
editor:
define(['jquery', 'knockout',
'viewmodels/ARActions/adjustments/EventAdjustmentViewModel'
],
function($, ko, EventAdjustmentViewModel) {
function customEventAdjustmentViewModel() {
EventAdjustmentViewModel.apply(this, arguments);
self = this;
self.isValid = function() {
/**
* Here "if(isGranted)" condition is added for authorization.
* create customAction in resource and use it in below function
* util.isGrantedResourceAction("customAction", "NoteResource");
*
* Use below line directly without "if(isGranted)" condition if OPSS
enforcement is not needed
* $("#enterNotesTextArea").attr('name', 'enterNotesWithoutReason');
*
*/
var isGranted = util.isGrantedResourceAction("customAction",
"NoteResource");
if (isGranted) {
$("#enterNotesTextArea").attr('name',
'enterNotesWithoutReason');
}
if (self.note.isValid() && self.validator &&
self.validator.form()) {
return true;
}
return false;
};
}
customEventAdjustmentViewModel.prototype = new
EventAdjustmentViewModel();
return customEventAdjustmentViewModel;
});
3. Save the file in your NetBeans IDE project.
Chapter 40
Making Notes Mandatory for Event Adjustments
40-3

Configuring the Custom Event Adjustment View Model in the Registry
After creating the required custom view model, create a custom event adjustment
model entry in the customRegistry.js file. Billing Care uses the custom event
adjustment view model instead of the default event adjustment view model during
adjustments and renders the Event Adjustment dialog box containing your
customization.
To create the custom event adjustment view model entry in the registry:
1. Create a customRegistry.js file in myproject/web/custom/ directory.
2. Define the custom event adjustment module in this file. For example:
eventAdjustment: {
viewmodel: 'custom/viewmodels/customEventAdjustmentViewModel.js'
}
3. Save the file in your NetBeans IDE project.
Chapter 40
Making Notes Mandatory for Event Adjustments
40-4

41
Customizing Suspended Payment Allocations
You can customize how Oracle Communications Billing Care allocates partial suspended
payments.
Topics in this document:
• About Suspended Payment Allocation
• Forbidding Partial Allocation of Suspended Payments
• Creating a CustomPCMPaymentModule.java Class
• Creating a Custom Payment Suspense View Model
• Creating a customModule.properties File
• Configuring a Custom Module in the Registry
• Deploying Customizations
About Suspended Payment Allocation
Oracle Communications Billing and Revenue Management (BRM) automatically suspends
subscriber payments that do not meet certain criteria when the optional Suspense Manager is
installed. For example, BRM suspends payments made to unidentifiable bill numbers.
Payments administrators use Billing Care to correct payments for either automatic or manual
allocation to the intended bill or account. By default, Billing Care enables either partial or
complete allocation of a suspended payment to a subscriber's bill or account. See "Working
with Suspended Payments" in Billing Care Online Help for more information on using Billing
Care to manage suspended payments.
Forbidding Partial Allocation of Suspended Payments
You can forbid partial allocation of suspended payments using the Billing Care SDK if your
business policies require only complete allocation of suspended payments. Billing Care will
reject attempted allocations of any suspended payment amount that does not match the
amount of the entire suspended payment.
The SDK includes a sample for configuring Billing Care to reject partial suspended payment
allocation in SDK_home/samples/partialSuspenseAllocation. Use this sample as an
example on how to configure Billing Care to enable only complete allocation of suspended
payments.
To forbid the partial allocation of suspended payments in Billing Care:
1. Create a java class that prevents partial allocation of suspended payments in Billing
Care. See "Creating a CustomPCMPaymentModule.java Class" for more information.
2. Create a custom payment suspense view model to override the default Billing Care
allocation behavior. See "Creating a Custom Payment Suspense View Model" for more
information.
41-1

3. Create a customModule.properties file configuring Billing Care to override the
default payment module logic with the custom payment module created in step 1.
See "Creating a customModule.properties File" for more information.
4. Create a customRegistry.js file configuring Billing Care to use the custom
payment suspense view model created in step 4. See "Configuring a Custom
Module in the Registry" for more information.
5. Deploy your customizations to your application server. See "Deploying
Customizations" for more information.
Creating a CustomPCMPaymentModule.java Class
Configure Billing Care to forbid partial allocation of suspended payments by creating a
custom payment module class containing logic to reject partial allocations.
A sample CustomPCMPaymentModule.java file is provided in the SDK_home/
samples/partialSuspenseAllocation/src/java/custom/com/rest/sdk directory where
SDK_home is the Billing Care SDK installation directory. This sample contains logic
forbidding partial suspended payment allocation.
To create a custom payment module class:
1. Create a CustomPCMPaymentModule.java file in myproject/src/com/rest/sdk
where myproject is the folder containing your NetBeans IDE project.
2. Save the file in your NetBeans IDE project.
Creating a Custom Payment Suspense View Model
Billing Care uses a payment suspense view model to define suspended payment
allocation behavior. You must create a custom payment suspense view model
containing overrides for the openAllocationOverlayForSuspense and autoAllocate
functions.
See "About View Models" for more information about Billing Care view models.
A sample CustomPaymentSuspenseAllocationViewModel.js file is provided in the
SDK_home/samples/partialSuspenseAllocation/web/custom/js/viewmodel
directory. This sample contains the necessary override functions to forbid partial
suspended payment allocation. Use this sample to create a custom payment suspense
view model.
To create a custom payment suspense view model with partial suspended payment
override functions:
1. Create a CustomPaymentSuspenseAllocationViewModel.js file in
myproject/web/custom/js/viewmodels/area/configure where myproject is the
folder containing your NetBeans IDE project and area is the customization type.
2. Save the file in your NetBeans IDE project.
Creating a customModule.properties File
After creating the required custom payment suspense model, create a custom module
entry in the customRegistry.js file to use when allocating suspended payments.
Chapter 41
Creating a CustomPCMPaymentModule.java Class
41-2

Billing Care uses the custom payment suspense module instead of the default entry during
suspended payment allocation.
A sample customModule.properties file is provided in the SDK_home/samples/
partialSuspenseAllocation/src/java/custom directory. This sample contains an override
entry for using the previously created custom payment module. See "About the
customModule.properties File" for more information about this file.
To create a custom payment suspense override in the customModule.properties file:
1. Create a customModule.properties file in myproject/web/WEB-INF/classes/custom
where myproject is the folder containing your NetBeans IDE project.
2. Specify the custom payment module override in the file. Example 41-1 shows an example
of an override where the custom class is located in the ./custom/com/rest/sdk/
CustomPCMPaymentModule directory relative to the location of the
customModule.properties file.
3. Save the file in your NetBeans IDE project.
Example 41-1 Sample Custom Payment Suspense customModule.properties Entry
billingcare.rest.payment.module=custom.com.rest.sdk.CustomPCMPaymentModule
Configuring a Custom Module in the Registry
After creating the required custom payment suspense view model, create a custom module
entry in the customRegistry.js file to use when allocating suspended payments. Billing Care
uses the custom payment suspense module instead of the default entry during suspended
payment allocation and prevents partial allocations.
A sample customRegistry.js file is provided in the SDK_home/samples/
partialSuspenseAllocation/web/custom directory. This sample defines the custom payment
suspense module containing the previously created custom payment suspense view model.
To create a custom payment suspense module entry in the customRegistry.js file:
1. Create a customRegistry.js file in myproject/web/custom/ where myproject is the folder
containing your NetBeans IDE project.
2. Define the custom payment suspense module in this file. Example 41-2 shows a
definition of the custom account creation module in the registry using the SDK samples.
3. Save the file in your NetBeans IDE project.
Example 41-2 Sample Custom Payment Suspense Module Registry Entry
var CustomRegistry = {
paymentSuspenseAllocation: {
viewmodel: '../custom/js/viewmodel/CustomPaymentSuspenseAllocationViewModel'
}
};
Deploying Customizations
Package and deploy your customizations using one of the methods described in "Using an
Exploded Archive during Customization" or "Packaging and Deploying Customizations".
Chapter 41
Configuring a Custom Module in the Registry
41-3

42
Disabling Event Adjustment Options Based on
Roles
You can customize Oracle Communications Billing Care to support the disabling of event
adjustment options based on customer service representatives (CSRs) roles.
Topics in this document:
• About Event Adjustment Options
• Disabling Event Adjustment Options Based on User Roles
• Creating a Custom View Model for Disabling Adjustment Options
• Configuring the Custom View Model for Disabling Event Adjustment Options
About Event Adjustment Options
By default, the following options in the Event Adjustment dialog box are enabled and CSRs
can select these options to adjust events:
• Adjust amount and tax
• Adjust amount only
• Adjust tax only
CSRs can also backdate an adjustment if required. You can customize Billing Care using the
SDK to disable these options based on the user roles.
Disabling Event Adjustment Options Based on User Roles
You can customize the Event Adjustment dialog box using the SDK and Oracle Platform
Security Services Entitlements Server (OPSS) policies to disable or enable the event
adjustment options.
To disable the event adjustment or backdate options in the Event Adjustments dialog box:
1. Define a new ResourceType and Resource for event adjustment options in the OPSS
Server. For example, EventAdjustmentResourceType, EventAdjustmentResource .
2. Define the following as corresponding actions for the ResourceType in the OPSS Server
as required:
• AmountAndTax
• AmountOnly
• TaxOnly
• backDateEventAdjustment
3. Associate the new Resource to the new ResourceType.
4. Add the new ResourceType to the CustomConfigurations.xml file. For example:
42-1

<keyvals>
<key>authorizationResourceTypes</key>
<value>EventAdjustmentResourceType</value>
<desc>Add comma separated OPSS Resource Types(values) for authorization.
Also these resource types should be defined in OPSS.
Please note that the key should not be changed here.
</desc>
</keyvals>
5. Create a custom view model to disable the options in the Event Adjustment dialog
box. See "Creating a Custom View Model for Disabling Adjustment Options" for
more information.
6. Create a customRegistry.js file to configure Billing Care to use the custom view
model that you created. See "Configuring the Custom View Model for Disabling
Event Adjustment Options".
7. Deploy your customizations using one of the methods described in "Using an
Exploded Archive during Customization" or "Packaging and Deploying
Customizations".
Creating a Custom View Model for Disabling Adjustment
Options
Billing Care uses view model to define the display of the screens in Billing Care. You
must create or update the custom view model, CustomEventAdjustmentViewModel,
and add the details to customize the display of event adjustment or backdate options
in the Event Adjustment dialog box.
See "About View Models" for more information about Billing Care view models.
To create a custom model for disabling event adjustment or backdate options:
1. Create or update the customEventAdjustmentViewModel.js file in
myproject/web/custom/viewmodels directory, where myproject is the folder
containing your NetBeans IDE project.
2. To disable the amount and tax adjustment options based on the user role, add the
following code in the customEventAdjustmentViewModel.js file using a text
editor:
define(['jquery',
'underscore',
'knockout',
'knockout-mapping',
'viewmodels/ARActions/adjustments/EventAdjustmentViewModel'
],
function ($, _, ko, komapping, EventAdjustmentViewModel) {
function customEventAdjustmentViewModel() {
EventAdjustmentViewModel.apply(this, arguments);
$(function() {
var myVar= setInterval(function() {
if($('#lblAdjustAmountAndTax').length>0)
{
Chapter 42
Creating a Custom View Model for Disabling Adjustment Options
42-2

if(!util.isGrantedResourceAction('AmountAndTax','EventAdjustmentResource'))
{
$('#lblAdjustAmountAndTax').parent().hide();
}
if(!util.isGrantedResourceAction('AmountOnly','EventAdjustmentResource'))
{
$('#lblAdjustAmountOnly').parent().hide();
}
if(!util.isGrantedResourceAction('TaxOnly','EventAdjustmentResource'))
{
$('#lblAdjustTaxOnly').parent().hide();
}
clearInterval(myVar);
}
}, 20);
});
}
customEventAdjustmentViewModel.prototype = new
EventAdjustmentViewModel();
return customEventAdjustmentViewModel;
});
3. To disable the backdate option based on the user role, add the following code in the
customEventAdjustmentViewModel.js file using a text editor:
define(['jquery', 'knockout',
'viewmodels/ARActions/adjustments/EventAdjustmentViewModel'
],
function($, ko, EventAdjustmentViewModel) {
function CustomEventAdjustmentViewModel() {
EventAdjustmentViewModel.apply(this, arguments);
$(function() {
var myVar1 = setInterval(function() {
if ($('#eventAdjustmentEffectiveDate').length > 0)
{
if
(!util.isGrantedResourceAction("backDateEventAdjustment", "customResource"))
{
$('#eventAdjustmentEffectiveDate').attr('disabled', true);
$("#eventAdjustmentEffectiveDate").next("img").off("click")
}
clearInterval(myVar1);
}
}, 40);
});
}
CustomEventAdjustmentViewModel.prototype = new
EventAdjustmentViewModel();
return CustomEventAdjustmentViewModel;
});
4. Save the file in your NetBeans IDE project.
Chapter 42
Creating a Custom View Model for Disabling Adjustment Options
42-3

Configuring the Custom View Model for Disabling Event
Adjustment Options
After creating or updating the required custom view model, ensure that the custom
event adjustment view model entry is created in the customRegistry.js file. Billing
Care uses the custom event adjustment view model instead of the default event
adjustment view model during adjustments and renders the Event Adjustment dialog
box containing your customization.
To create the custom event adjustment view model entry in the registry:
1. Create a customRegistry.js file in myproject/web/custom/ directory.
2. Define the custom event adjustment view model entry in this file. For example:
eventAdjustment: {
viewmodel: 'custom/viewmodels/customEventAdjustmentViewModel.js'
}
3. Save the file in your NetBeans IDE project.
Chapter 42
Configuring the Custom View Model for Disabling Event Adjustment Options
42-4

Part VI
Customizing the Billing Care REST API
This part describes how to customize the Oracle Communications Billing Care REST API. It
contains the following chapters:
• Using Custom OAuth Providers with Billing Care REST API
• Extending and Creating Billing Care REST Resources
• Extending REST API Response Objects
• Recording Billing Care REST API Request Failures

43
Using Custom OAuth Providers with Billing
Care REST API
You can customize the Billing Care REST API to authenticate your client applications with an
OAuth token management tool other than Oracle Access Manager.
Topics in this document:
• About OAuth Token Management Tools
• Creating a Custom Token Module
• Adding a Custom OAuth Token Module to the customModule.properties File
About OAuth Token Management Tools
The Billing Care REST API authenticates requests from your client applications by using
OAuth 2.0. By default, it uses Oracle Access Manager to generate, manage, and validate
OAuth tokens. However, you can customize the Billing Care REST API to use a different
OAuth token management tool by using the Billing Care SDK.
For more information about the Billing Care REST API, see REST API Reference for Billing
Care.
The Billing Care SDK includes samples that you can use for developing your own
customizations in the SDK_home/samples/OAuthTokenCustomization directory, where
SDK_home is the Billing Care SDK installation directory.
To use a different OAuth token management tool with the Billing Care REST API:
1. Create a custom OAuth token module that defines the logic for generating and validating
OAuth access tokens. See "Creating a Custom Token Module".
2. Create wrapper Java classes. These classes reflect the JSON or XML response
specification for your OAuth token management tool, which are required to convert the
response into a Java Object for further actions. The variables in the wrapper classes will
vary according to the different fields that the response contains.
You can use the sample wrapper files in the SDK_home/samples/
OAuthTokenCustomization/src/java/com/oracle/communications/brm/sdk/model
directory for guidance.
3. Configure the Billing Care REST API to use your custom OAuth token module. See
"Adding a Custom OAuth Token Module to the customModule.properties File".
4. Deploy your customizations as a shared library to the Billing Care REST API. See
"Packaging and Deploying Customizations".
43-1
Note:
Ensure that any third-party libraries or JARs required by the OAuth token
management tool are packaged in the SDK .war file.
Creating a Custom Token Module
Create a new CustomTokenModule.java class that extends the default
PCMOAuthTokenModule.java class. The new class should override the token
management logic used in the default class's queryAccessToken() and
validateToken() methods.
To create a custom token module:
1. Create a CustomTokenModule.java file in your myproject/src/com/oracle/
communications/brm/sdk/modules/ directory, where myproject is your IDE
project folder containing your Billing Care REST API customizations.
2. Open the CustomTokenModule.java file in an editor.
3. Override the queryAccessToken() method to implement the logic for sending a
request to create an OAuth 2.0 token with your OAuth token management tool.
This method needs to return a response with the token.
For example:
@Override
public Response queryAccessToken(HttpServletRequest servletRequest) throws
ApplicationException, JsonProcessingException {
logger.entering("queryAccessToken");
loadOAUTHAttributes();
String BASE_64_CREDENTIALS =
servletRequest.getHeader(HttpHeaders.AUTHORIZATION);
Feature feature = new LoggingFeature(logger.getLogger(), Level.FINE,
LoggingFeature.Verbosity.PAYLOAD_ANY, null);
Client client = ClientBuilder.newBuilder().register(feature).build();
System.setProperty("sun.net.http.allowRestrictedHeaders", "true");
Response response = client.target(OAM_OAUTH_URL + "/token")
.queryParam("grant_type", "CLIENT_CREDENTIALS")
.queryParam("scope", OAM_OAUTH_BC_RESOURCE_SCOPE)
.request()
.header(HttpHeaders.AUTHORIZATION, BASE_64_CREDENTIALS)
.header(HttpHeaders.CONTENT_TYPE,
MediaType.APPLICATION_FORM_URLENCODED)
.header("X-OAUTH-IDENTITY-DOMAIN-NAME", OAM_OAUTH_ID_DOMAIN)
.post(Entity.entity("", MediaType.APPLICATION_FORM_URLENCODED),
Response.class);
String responseString = response.readEntity(String.class);
ObjectMapper mapper = new ObjectMapper();
Response.ResponseBuilder builder;
if (response.getStatus() == Response.Status.OK.getStatusCode()) {
OAuthTokenWrapper tokenWrapper = mapper.readValue(responseString,
OAuthTokenWrapper.class);
builder = Response.status(response.getStatus()).entity(tokenWrapper);
} else {
OAuthTokenErrorMsgWrapper tokenErrorMsgWrapper =
Chapter 43
Creating a Custom Token Module
43-2

mapper.readValue(responseString, OAuthTokenErrorMsgWrapper.class);
builder =
Response.status(response.getStatus()).entity(tokenErrorMsgWrapper);
}
logger.exiting("queryAccessToken");
return builder.build();
}
4. Override the validateToken() method to use the OAuth token returned in step 2 for
validation. If validation is successful, this method needs to return the CLIENT_ID.
The CLIENT_ID must then be added to the Oracle Unified Directory and assigned to
groups according to their expected permissions.
This example shows remote validation using Oracle Access Manager to validate the
token, but your implementation can validate the token locally without a REST API call.
@Override
public String validateToken(HttpServletRequest servletRequest) throws
InvalidTokenException, JsonProcessingException {
logger.entering("validateToken");
loadOAUTHAttributes();
String clientId = "";
String token = getTokenFromRequest(servletRequest);
Feature feature = new LoggingFeature(logger.getLogger(), Level.INFO,
LoggingFeature.Verbosity.PAYLOAD_ANY, null);
Client client = ClientBuilder.newBuilder().register(feature).build();
System.setProperty("sun.net.http.allowRestrictedHeaders", "true");
Response response = client.target(OAM_OAUTH_URL + "/token/info")
.queryParam("access_token", token)
.request()
.header("X-OAUTH-IDENTITY-DOMAIN-NAME", OAM_OAUTH_ID_DOMAIN)
.header(HttpHeaders.CONTENT_TYPE, MediaType.APPLICATION_JSON)
.get(Response.class);
ObjectMapper objectMapper = new ObjectMapper();
if (response.getStatus() == Response.Status.OK.getStatusCode()) {
String responseString = response.readEntity(String.class);
objectMapper.configure(DeserializationFeature.FAIL_ON_UNKNOWN_PROPERTIES,
false);
objectMapper.configure(JsonParser.Feature.ALLOW_BACKSLASH_ESCAPING_ANY_CHA
RACTER, true);
objectMapper.configure(JsonParser.Feature.ALLOW_UNQUOTED_CONTROL_CHARS,
true);
OAuthTokenValidationWrapper validationResponse =
objectMapper.readValue(
responseString, OAuthTokenValidationWrapper.class);
clientId = validationResponse.client;
} else {
logger.exiting("validateToken");
throw new
InvalidTokenException(response.readEntity(String.class));
Chapter 43
Creating a Custom Token Module
43-3

}
logger.exiting("validateToken");
return clientId;
}
5. Save the file in your NetBeans IDE project.
Adding a Custom OAuth Token Module to the
customModule.properties File
Configure the Billing Care REST API to use your custom OAuth token module by
editing the customModule.properties file. See "About the customModule.properties
File" for more information.
To add a custom OAuth token module:
1. Open the myproject/src/java/custom/customModule.properties file in a text
editor.
2. Add the following entry:
billingcare.rest.oauthtoken.module=com.oracle.communications.brm.sdk.modules.
CustomTokenModule
3. Save the file in your NetBeans IDE project.
Chapter 43
Adding a Custom OAuth Token Module to the customModule.properties File
43-4

44
Extending and Creating Billing Care REST
Resources
Learn how to extend the Oracle Communications Billing Care REST framework and create
new REST resources for use with Billing Care.
Topics in this document:
• About Extending and Creating Billing Care REST Resources
• About Billing Care Sample SDK REST Customizations
• Extending REST Services to Filter Custom Headers
• Extending REST Services
About Extending and Creating Billing Care REST Resources
Billing Care supports extending the REST framework and creating new REST resources as
required by your business needs. The following customizations are supported:
• Manipulating Workflow
For example, customizing Billing Care to invoke different Oracle Communications Billing
and Revenue Management (BRM) opcodes, either for data retrieval or persistence. A
typical scenario is a customer who has created a custom opcode similar to one provided
by Oracle but with alternate business logic that cannot not otherwise be provided through
the associated policy opcode. An alternate scenario might involve invocation of an API
from an application other than BRM.
• Payload Manipulation
For example, manipulating or inspecting the payload before invocation of an opcode. An
example scenario involves a web service that returns an error condition after validating
the payload, before invoking the opcode. Another scenario might involve custom logic
applied to the data before submission of a payload to BRM.
• Filtering Custom HTTP Headers
For example, adding a filter that intercepts HTTP requests and makes decisions based
on the custom HTTP header value. An example scenario involves a filter that checks
whether an order ID passed in the HTTP header is a duplicate and, if so, rejects the
request.
• Creating New REST Resources
For example, a new REST resource used by a customized module to retrieve additional
data for display.
44-1

About Billing Care Sample SDK REST Customizations
The Billing Care SDK contains the following example REST customizations located in
the SDK_home/samples/REST_Scenarios/src/java/com/rest/sdk, where
SDK_home is the directory where you installed the SDK:
• To call a new opcode in a customized module, refer to
CustomNewOpCodeBillUnitModule.java and CustomBillUnitWorker.java.
• To modify data sent to BRM, refer to CustomPaymentModule.java.
• To alter the application logic or support subclassing ready to use module classes,
refer to CustomExtendAdjustmentModule.java.
For more information on invoking BRM opcodes through the Java API, see "About the
PCM API" in BRM Developer's Guide and Billing Care Java API Reference.
Extending REST Services to Filter Custom Headers
You can extend the Billing Care REST framework to process custom headers sent in
HTTP requests and responses and then perform additional functionality such as order
tracking. You do this by adding filters to the Billing Care SDK that do the following:
• Intercept HTTP requests before they are sent to the resource, and then make
decisions based on the header value. For example, a filter could check whether
the request is a duplicate and, if so, reject the request.
• Intercept HTTP responses before they are sent to the client, and then make
decisions based on the header value. For example, a filter could construct tracking
objects and persist them in the BRM database.
To customize the Billing Care REST framework to support custom headers, perform
these tasks:
1. Creating a Custom Storable Class in the BRM Data Dictionary
2. Processing Billing Care REST API Requests and Responses
3. Configuring WebLogic Server to Use an Exploded Archive
4. Sending a Test HTTP Request with the Custom Header
Note:
The samples that are referenced in this document use predefined Order ID
patterns to simulate duplicate request identification and depend on BRM
base opcodes for simple order management.
Creating a Custom Storable Class in the BRM Data Dictionary
If you want to persist the custom header data in the BRM database, create a custom
storable class.
To create a custom storable class:
Chapter 44
About Billing Care Sample SDK REST Customizations
44-2

1. In the Oracle DM configuration file (BRM_home/sys/dm_oracle/pin.conf), do this:
• Set the dd_write_enable_objects entry to 1. This allows you to create, edit, and
delete custom storable classes in the data dictionary.
• Set the sm_oracle_ddl entry to 1. This configures the Oracle DM to run Data
Definition Languages (DDLs) when updating object types in data dictionary tables.
- dm dd_write_enable_objects 1
- dm sm_oracle_ddl 1
2. Create a PODL storable class definition file for your custom storable class. For example,
create a file named order_tracker.podl.
You can refer to the sample PODL file (SDK_home/samples/
FiltersAndCustomHeaders/order_tracker.podl) when creating your storable class
definition. In the sample PODL file, ensure that you replace all instances of
__TABLESPACE__ with the name of the tablespace in which to store the header data.
3. Run pin_deploy in verify mode to see the changes that will be caused by importing new
storable class definitions and to verify that there are no conflicts.
pin_deploy verify fileName
where fileName is the file name of the storable class definition, such as
order_tracker.podl.
4. Import the definition for your custom storable class into the BRM data dictionary:
pin_deploy create fileName
See "pin_deploy" and "Creating Custom Fields and Storable Classes" in BRM Developer's
Guide for more information about using the utility.
Processing Billing Care REST API Requests and Responses
Create a filter and wrapper object for retrieving and processing your custom headers.
1. Create a custom filter object that reads the request headers, resource paths, and
attributes as well as the response status codes. Add functionality for making decisions
based on the header value.
You can refer to the sample filter object (SDK_home/samples/
FiltersAndCustomHeaders/src/java/com/oracle/communications/brm/cc/util/
CustomHeaderSampleFilter.java) when creating your filter object.
2. Create a wrapper object that intercepts Billing Care REST API responses before they are
submitted to the client.
You can refer to the sample wrapper Java class (SDK_home/samples/
FiltersAndCustomHeaders/src/java/com/oracle/communications/brm/cc/util/
MultiReadResponseWrapper.java) when creating your wrapper Java class.
Configuring WebLogic Server to Use an Exploded Archive
To configure WebLogic server to use an exploded archive:
1. Create a manifest file by following the instructions in "Creating a Manifest for your Shared
Library".
You can use the SDK_home/samples/FiltersAndCustomHeaders/src/conf/
MANIFEST.MF file as a sample.
Chapter 44
Extending REST Services to Filter Custom Headers
44-3

2. Create a deployment plan by following the instructions in "Creating a New
Deployment Plan for Billing Care with your Shared Library".
The following shows a sample deployment plan:
<?xml version='1.0' encoding='UTF-8'?>
<deployment-plan xmlns="http://xmlns.oracle.com/weblogic/deployment-
plan"
xmlns:xsi="http://www.w3.org/2001/XMLSchema-
instance"
xsi:schemaLocation="http://xmlns.oracle.com/
weblogic/deployment-plan http://xmlns.oracle.com/weblogic/
deployment-plan/1.0/deployment-plan.xsd"
global-variables="false">
<application-name>BillingCareREST.war</application-name>
<variable-definition>
<variable>
<name>SDKLibraryName</name>
<value>BillingCareCustomizations</value>
</variable>
<variable>
<name>CUSTOM_HEADER_FILTER_NAME</name>
<value>CustomHeaderSampleFilter</value>
</variable>
<variable>
<name>CUSTOM_HEADER_FILTER_CLASS_NAME</name>
<value>com.oracle.communications.brm.cc.util.CustomHeaderSampleFilte
r</value>
</variable>
<variable>
<name>CUSTOM_HEADER_FILTER_URL_PATTERN</name>
<value>/webresources/v1.0/*</value>
</variable>
</variable-definition>
<module-override>
<module-name>BillingCareREST.war</module-name>
<module-type>war</module-type>
<module-descriptor external="true">
<root-element>weblogic-web-app</root-element>
<uri>WEB-INF/weblogic.xml</uri>
<variable-assignment>
<name>SDKLibraryName</name>
<xpath>/weblogic-web-app/library-ref/library-name</
xpath>
<operation>add</operation>
</variable-assignment>
</module-descriptor>
<module-descriptor external="true">
<root-element>web-app</root-element>
<uri>WEB-INF/web.xml</uri>
<variable-assignment>
<name>CUSTOM_HEADER_FILTER_NAME</name>
<xpath>/web-app/filter/filter-name</xpath>
<operation>add</operation>
Chapter 44
Extending REST Services to Filter Custom Headers
44-4

</variable-assignment>
<variable-assignment>
<name>CUSTOM_HEADER_FILTER_CLASS_NAME</name>
<xpath>/web-app/filter/[filter-
name="CustomHeaderSampleFilter"]/filter-class</xpath>
<operation>add</operation>
</variable-assignment>
<variable-assignment>
<name>CUSTOM_HEADER_FILTER_NAME</name>
<xpath>/web-app/filter-mapping/filter-name</xpath>
<operation>add</operation>
</variable-assignment>
<variable-assignment>
<name>CUSTOM_HEADER_FILTER_URL_PATTERN</name>
<xpath>/web-app/filter-mapping/[filter-
name="CustomHeaderSampleFilter"]/url-pattern</xpath>
<operation>add</operation>
</variable-assignment>
</module-descriptor>
</module-override>
</deployment-plan>
3. Deploy the exploded archive shared library to your Billing Care domain by following the
instructions in "Deploying your Shared Library on your Billing Care Domain".
4. Redeploy Billing Care using the deployment plan you created in step 2. To do so, follow
the instructions in "Redeploying Billing Care to Use Your Shared Library".
Sending a Test HTTP Request with the Custom Header
Verify that your filter processes the custom header correctly by sending a test HTTP request
to the Billing Care REST API. For more information, see REST API Reference for Billing
Care.
For example, you could submit this POST request to the /accounts resource using cURL:
curl -X POST \
'https://hostname:port/bcws/webresources/v1.0/accounts' \
-H 'content-type: application/json' \
-H 'Accept: application/json' \
-H 'customHeader: value' \
-d
'{"locale":"en_US","customerTypeCode":"","organizationHierarchyTypeCode":"-1"
,"securityCode1":"","securityCode2":"","contacts":
[{"firstName":"a","lastName":"a","middleName":"a","salutation":"","address":"
a","city":"a","company":"a","emailAddress":"","state":"a","zip":"a","deleted"
:false,"newlyCreated":true,"elem":1,"contactType":"Primary","country":"IN","p
honenumbers":[]}],"billUnits":[{"name":"Bill
Unit(1)","billingFrequencyInMonths":1,"accountingType":2,"accountingCycleDom"
:1,"currency":"840","balanceGroups":
[],"paymentType":"10001","walletPaymentInstrumentIndex":0}],"paymentMethod":
[{"invoice":{"details":{"invoiceId":"inv-
a-4","deliveryPrefer":"1","emailAddr":"","name":"a
Chapter 44
Extending REST Services to Filter Custom Headers
44-5

a","address":"a","city":"a","state":"a","zip":"a","country":"IN"}},"pay
mentType":"10001"}]}'
where:
• hostname:port is the host and port number on which the Billing Care REST API
instance is deployed and running.
• customHeader is the name of your custom header.
• value is a sample value to send with the custom header.
Extending REST Services
To extend REST services:
1. Create the Java classes and necessary resources (views, view models, CSS,
validations) in the appropriate myproject/src/package directory for your
implementation (for example, myproject/src/com/company/billingcare where
company is the name of your company).
You can implement new functionality, override existing functionality, or add
functionality by extending the Billing Care classes (from the JAR files added to
CLASSPATH).
Note:
Any REST resources you create for Billing Care must be placed within
the com.oracle.communications.brm.cc.ws package
(myproject/src/com/oracle/communications/brm/cc/ws). This ensures
that your REST resource can be deployed within the customizations
shared library.
2. Compile the new Java classes.
3. Create a customModule.properties file in your myproject/web/WEB-INF/
classes/custom/ directory, where myproject is your NetBeans IDE project
containing your Billing Care customizations. This file will contain a reference to the
location of the custom Java classes you create. See "About the
customModule.properties File" for more information about specifying module
overrides with customModule.properties.
4. Copy the default registry.js file from SDK_home/BillingCare_SDK/references to
a custom registry file named customRegistry.js in your myproject/web/custom
directory, where myproject is your NetBeans IDE project containing your Billing
Care customizations. This file contains the module definitions for your custom view
models (JavaScript). See "About the Registry File" for more information on using a
custom registry file.
5. Add your customization files to your NetBeans IDE project (myproject):
• Add any JavaScript to support your custom view models in the
myproject/web/js directory.
6. Right-click your NetBeans IDE project and select Clean and Build.
7. Package and deploy your customizations to your Billing Care domain.
Chapter 44
Extending REST Services
44-6


45
Extending REST API Response Objects
You can extend the Oracle Communications Billing Care REST API to return data from BRM
storable objects in its response objects.
Topics in this document:
• About Enriching REST API Response Objects
• Enriching Response Objects
• Example: Enriching the Response Object for the Account Module
About Enriching REST API Response Objects
You can extend the Billing Care REST API to return complex data, such as all data stored in
a BRM storable class, in a JAXB-annotated class. For example, it could return all fields in an /
account object or the /profile object linked with an account.
When you extend the BRM REST API to enrich response data, it returns object information in
the extension field of response objects in JSON or XML format.
The Billing Care SDK includes a sample response object customization, including a
README.txt file explaining the sample, in the SDK_home/samples/ExtensionFields
directory where SDK_home is the directory in which you installed the Billing Care SDK. Use
this sample when developing your own customizations.
For more information about the Billing Care REST API, see REST API Reference for Billing
Care.
Enriching Response Objects
To customize the Billing Care REST API to enrich response objects:
1. Create an extended Java class to hold your fields in a single object. For example, create
a Java class named classNameExtension.java.
2. Add JAXB annotations that indicate how to translate the fields in your extended Java
class.
3. Create an ObjectFactory Java class that provides the factory method for creating an
object of your extended class.
4. Create a package-info Java class that provides name space information to JAXB.
5. Create a custom module that extends the default BRM module and overrides its default
method.
The custom module should do the following:
• Invoke default methods
• Fetch additional data from the BRM database
• Wrap the additional data in the extended Java class object
45-1

• Set the additional data in the extension field
6. Create a customModule.properties file that specifies the resource group your
custom module will override.
For more information, see "About the customModule.properties File".
7. (Optional) To serialize the data added through your extended Java class in XML
format, create JAXBContext with the default package
"com.oracle.communications.brm.cc.model" and include the custom package
that holds the extended field Java objects. You can do this by using a provider of
Jersey that implements the ContextResolver<T> interface.
8. Package and deploy your SDK as a shared library to SDK_home/libs/
BillingCareREST.war using one of the methods described in "Using an Exploded
Archive during Customization" or "Packaging and Deploying Customizations".
To support responses in XML format, register your ContextResolver provider with
Jersey.
Example: Enriching the Response Object for the Account
Module
In the Billing Care REST API, the Get Details for an Account endpoint returns
account details such as contact information, billing profiles, registered payment
methods, and so on. The following example shows how to enrich the REST API
response for the account module so that it returns other fields from the /account
database object, such as PIN_FLD_AAC_ACCESS, PIN_FLD_AAC_PACKAGE, and
PIN_FLD_AAC_PROMO_CODE.
To extend the response object for the account module so that it retrieves additional
fields:
1. Open the myproject/web/WEB-INF/classes/custom/customModule.properties
file in a text editor.
2. Add the following entry, where company is the company name used in your
myproject/src directory.
billingcare.rest.account.module=com.company.modules.CustomAccountModule
3. Create a CustomAccountModule.java file in your myproject/src/modules
directory, where myproject is your NetBeans IDE project folder containing your
Billing Care REST API customizations.
This Java class extends PCMAccountModule and appends all fields from the
specified /account object to the extension key in the response object.
For a sample of the override code, see the SDK_home/samples/
ExtensionFields/src/java/com/oracle/communications/brm/sdk/modules/
CustomAccountModule.java sample class.
4. Create an AccountExtension.java file that defines the fields to return in the
extension object.
For a sample of the code, see the SDK_home/samples/ExtensionFields/src/
java/com/oracle/communications/brm/sdk/model/AccountExtension.java
sample class.
Chapter 45
Example: Enriching the Response Object for the Account Module
45-2

5. Create an ObjectFactory Java class that programmatically constructs new instances of
the Java representation for XML content. The Java representation of XML content can
consist of schema-derived interfaces and classes representing the binding of schema
type definitions, element declarations, and model groups.
For a sample of the code, see the SDK_home/samples/ExtensionFields/src/java/com/
oracle/communications/brm/sdk/model/ObjectFactory.java sample class.
6. Create a package-info Java class that provides name space information to the JAXB
model class defined in the com.oracle.communications.brm.sdk.model package.
For a sample of the code, see the SDK_home/samples/ExtensionFields/src/java/com/
oracle/communications/brm/sdk/model/package-info.java sample class.
7. If you want the Billing Care REST API to be able to send the response in XML format,
create a custom JAXBContextProvider Java class that understands Billing Care-defined
default and custom response objects and converts them into XML format.
For a sample of the override code, see the SDK_home/samples/ExtensionFields/src/
java/com/oracle/communications/brm/sdk/util/CustomJAXBContextProvider.java
sample class.
8. Package and deploy your customizations using one of the methods described in "Using
an Exploded Archive during Customization" or "Packaging and Deploying
Customizations".
The following shows a sample deployment plan that links the SDK .war as a shared
library to the Billing Care REST API. It also adds a Jersey Provider package to the
existing list of packages for identifying resource classes, which is required to support
serialization in XML format.
<deployment-plan xmlns="http://xmlns.example.com/weblogic/deployment-plan"
xmlns:xsi="http://www.w3.org/2001/XMLSchema-instance"
xsi:schemaLocation="http://xmlns.example.com/weblogic/
deployment-plan http://xmlns.example.com/weblogic/deployment-plan/1.0/
deployment-plan.xsd"
global-variables="false">
<application-name>BillingCareREST.war</application-name>
<variable-definition>
<variable>
<name>SDKLibraryName</name>
<value>BillingCareCustomizations</value>
</variable>
<variable>
<name>PROVIDER_PACKAGE</name>
<value>com.oracle.communications.brm.cc.ws,com.oracle.communications.brm.c
c.authentication,com.oracle.communications.brm.sdk.util</value>
</variable>
</variable-definition>
<module-override>
<module-name>BillingCareREST.war</module-name>
<module-type>war</module-type>
<module-descriptor external="true">
<root-element>weblogic-web-app</root-element>
<uri>WEB-INF/weblogic.xml</uri>
<variable-assignment>
<name>SDKLibraryName</name>
Chapter 45
Example: Enriching the Response Object for the Account Module
45-3

<xpath>/weblogic-web-app/library-ref/library-name</
xpath>
<operation>add</operation>
</variable-assignment>
</module-descriptor>
<module-descriptor external="true">
<root-element>web-app</root-element>
<uri>WEB-INF/web.xml</uri>
<variable-assignment>
<name>PROVIDER_PACKAGE</name>
<xpath>/web-app/servlet[servlet-name='jersey']/init-
param[param-name='jersey.config.server.provider.packages']/param-
value</xpath>
<operation>replace</operation>
</variable-assignment>
</module-descriptor>
</module-override>
</deployment-plan>
Chapter 45
Example: Enriching the Response Object for the Account Module
45-4

46
Recording Billing Care REST API Request
Failures
You can customize the Oracle Communications Billing Care REST API to record information
about request failures in the Oracle Communications Billing and Revenue Management
(BRM) database.
Topics in this document:
• About Recording Billing Care REST API Request Failures
• Enabling the Recording of REST Request Failures
• Customizing REST Request Failure Details
About Recording Billing Care REST API Request Failures
Billing Care REST API requests may occasionally fail to process completely. For example, a
payment request could fail due to an incorrect account address or because a network
connection dropped. You can configure the Billing Care REST API to store information about
failed REST requests in the BRM database, so you can view them for analysis and reporting,
or reprocess them at a later time.
When a Billing Care REST API request fails, BRM stores the following details about the
failure in /request/failed/rest objects:
• The request's basic header information, such as Content-Type, Accept, and Content-
Length
• The request payload, removing any sensitive information such as card numbers and
expiration dates
In multischema systems, the object is stored in the schema in which the failed request
occurred. For more information about the /request/failed/rest object, see Storable Class
Reference.
To enable the Billing Care REST API to record request failures, see "Enabling the Recording
of REST Request Failures".
To customize the details recorded for a REST request failure, see "Customizing REST
Request Failure Details".
Enabling the Recording of REST Request Failures
To enable the Billing Care REST API to record details about REST request failures:
1. If your system does not have a CustomConfigurations.xml file, create the file. See
"Creating a Custom Configuration File".
2. Open the CustomConfigurations.xml file in an editor.
46-1

Note:
By default, the CustomConfigurations.xml file is in the myproject/src/
java/custom/configurations directory, where myproject is your
NetBeans IDE Billing Care customizations project.
3. In the file, set the request.record.failure key to true:
<flags>
<key>request.record.failure</key>
<value>true</value>
</flags>
4. Save and close your CustomConfigurations.xml file.
5. Save the file in your NetBeans IDE project.
Customizing REST Request Failure Details
You can customize the Billing Care REST API to perform additional tasks when
recording request failures, such as:
• Storing additional headers from the failed request
• Removing additional sensitive data from the request payload
• Changing how the request payload is serialized for storage in the /request/failed/
rest object
• Overriding fields in the /request/failed/rest object
• Specifying to record request failures for only specified Billing Care REST API
endpoints
To customize the details recorded for a REST request failure:
1. Customize the logic for recording request failures. See "Customizing the Request
Record Logic".
2. Customize which headers to record and the information to remove from request
payloads. See "Customizing the Headers and Payload to Record".
3. Configure the Billing Care REST API to use your custom logic for recording
request failures. See "Overriding the Default Request Record Logic".
The Billing Care SDK includes sample Record Request customizations, including a
README.txt file explaining the samples, in the SDK_home/samples/
RecordRequestsCustomization directory, where SDK_home is the directory in which
you installed the Billing Care SDK. Use these samples when developing your own
Record Request customizations.
Customizing the Request Record Logic
To customize the logic for recording request failures:
1. Create a CustomPCMRequestInfoModule.java file in your myproject/src/
java/com/oracle/communications/brm/sdk directory, where myproject is the
folder containing your NetBeans IDE project.
Chapter 46
Customizing REST Request Failure Details
46-2

Note:
A sample CustomPCMRequestInfoModule.java file is provided in the
SDK_home/samples/RecordRequestsCustomization/src/java/com/oracle/
communications/brm/sdk directory.
2. In the file, implement your custom logic by overriding the recordFailure( ) method.
The sample logic below calls the custom method from customRecordFailureWorker to
do the following:
• Record additional headers
• Remove additional information from the request payload
• Create an input flist for the PCM_OP_ACT_REQUEST_OPCODE opcode
• Call the PCM_OP_ACT_REQUEST_OPCODE opcode to record the failed request in
a /request/failed/rest object
@override
public void recordFailure(String id, String descr, String correlationId, String
errorCode, Exception ex, Object payload) throws EBufException {
if(!BRMUtility.getRecordFailureFlag()){
return;
}
PortalContext ctx = null;
BaseOps baseops = getBaseOps();
try {
if (baseOps instanceof PCMBaseOps) {
logger.fine("Setting BRM Connection Object to
BaseOps");
ctx = BRMUtility.getConnection();
((PCMBaseOps) baseOps).setContext(ctx);
}
HttpServletRequest request = getUserContext().getRequest();
CustomRequestInfoWorker customRecordFailureWorker = new
CustomRequestInfoWorker();
customRecordFailureWorker.setBaseOps(baseops);
customRecordFailureWorker.setUserContext(getUserContext());
Map<String, String> headerInfoMap = new HashMap<>();
customRecordFailureWorker.addHeaders(request, headerInfoMap);
int partial =
customRecordFailureWorker.truncateSensitiveInfo(payload);
String payloadStr = customRecordFailureWorker.preparePayload(payload,
request);
FList inputFList =
customRecordFailureWorker.convertToInputFListForRecordFailure(id, correlationId,
partial, errorCode, ex, headerInfoMap, payloadStr, request, descr);
customRecordFailureWorker.invokeRequestCreate(inputFList);
} catch (EBufException excp) {
throw excp;
} finally {
if (ctx != null) {
BRMUtility.releaseConnection(ctx);
}
}
}
3. Save the file in your NetBeans IDE project.
Chapter 46
Customizing REST Request Failure Details
46-3

Customizing the Headers and Payload to Record
You can customize the Billing Care REST API to record additional headers or to
remove additional information from the request payload. To do so, perform the
following:
1. Copy the sample CustomRequestInfoWorker.java file from the SDK_home/
samples/RecordRequestsCustomization/src/java/com/oracle/
communications/brm/sdk directory to your myproject/src/java/com/oracle/
communications/brm/sdk directory.
2. To add custom headers to the operation failure record, override the addHeaders( )
method. For example:
@Override
public void addHeaders(HttpServletRequest request, Map<String,
String> headerInfoMap) {
super.addHeaders(request, headerInfoMap);
//Your custom logic here
logger.fine("Adding custom headers");
}
3. To modify what information is removed from the request payload, override the
truncateSensitiveInfo( ) method. This method must return isPayloadPartial
when sensitive information is removed from the payload. For example:
@Override
public int truncateSensitiveInfo(Object payloadObj) {
int isPayloadPartial =
super.truncateSensitiveInfo(payloadObj);
logger.fine("Truncating sensitive information from
payload");
//Your Custom Logic here
return isPayloadPartial;
}
4. Save the file in your NetBeans IDE project.
Overriding the Default Request Record Logic
You configure the Billing Care REST API to use the logic from your custom request
module rather than the default request module by editing the
customModule.properties file.
To override the default Billing Care REST API request record logic:
1. Open the customModule.properties file from the myproject/src/java/custom
directory.
2. Add the following entry to the file:
billingcare.rest.requestinfo.module=com.oracle.communications.brm.sdk.CustomP
CMRequestInfoModule
3. Save and close the customModule.properties file.
Chapter 46
Customizing REST Request Failure Details
46-4

