
Setting up MLA formatting on Google Docs
1. Font and letter size
● Remember, in MLA formatting, all fonts should be Times New Roman,
12 point font. Your instructor can tell the difference!
● The default font is Arial, size 11.
● Click on the font and change it to Times New Roman.
● Click on the size and change it to 12.
2. Spacing
● Click on the line spacing button located across the top of the page. It
looks like a series of lines with a double ended arrow next to it.
● Choose the option that says “Double” to make your font double spaced.
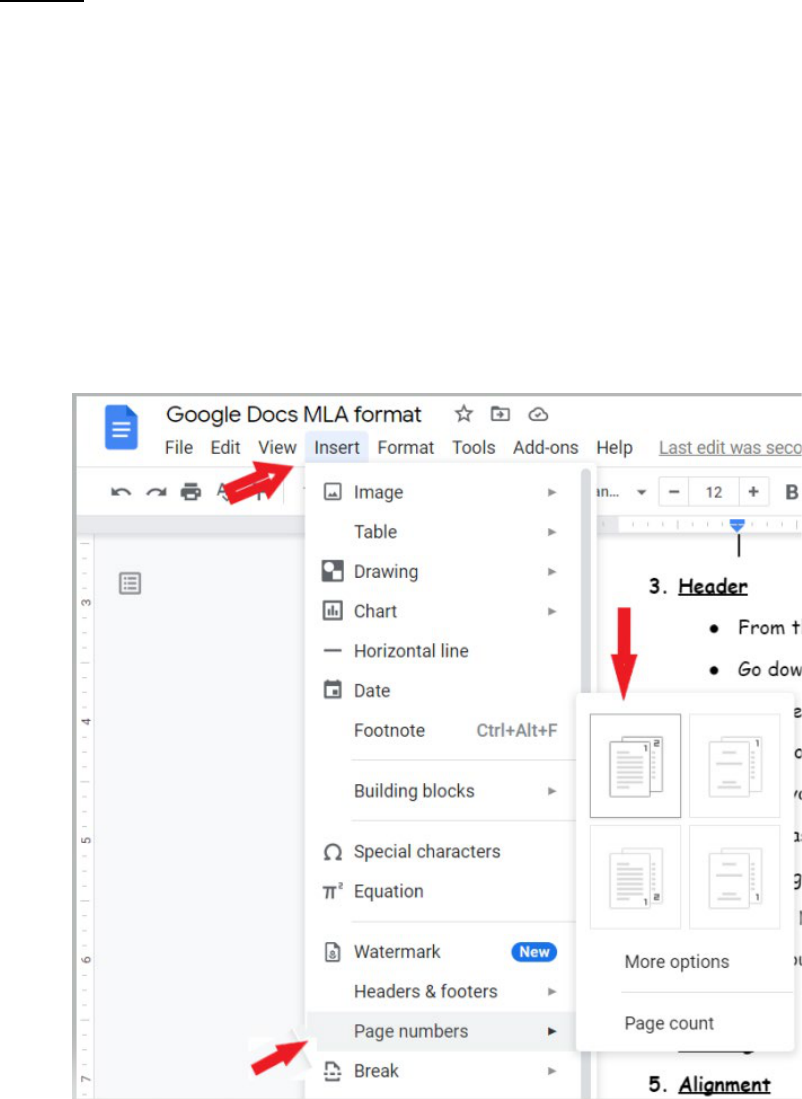
3. Header
● From the top left of the screen, choose “Insert.”
● Go down to “Page Numbers.”
● Choose the option in the top left-hand corner, depicting a number 1
and 2 on two pages.
● Click your cursor to the left-hand side of the page number and type in
your last name.
● Highlight the section with your cursor, and then change the font to
Times New Roman and 12 point.
● Click out of the header box to resume working on the rest of the
paper.

4. Heading
● Type your first and last name and press enter.
● Type your instructor’s name and press enter.
● Type your course title (for example, ENGL 1301 C003) and press
enter.
● Type your paper’s DUE DATE and press enter.
5. Alignment
● From the options across the top of the page, choose the align left
button for your heading.
● After your heading is complete, press enter and then choose the align
center option (located to the right of the align left option) for the
title of your paper. After typing your title, press enter.
● Choose the align left option again to begin writing your paper.
Remember to start the beginning of each new paragraph by pressing
the “tab” button once to create an indentation.
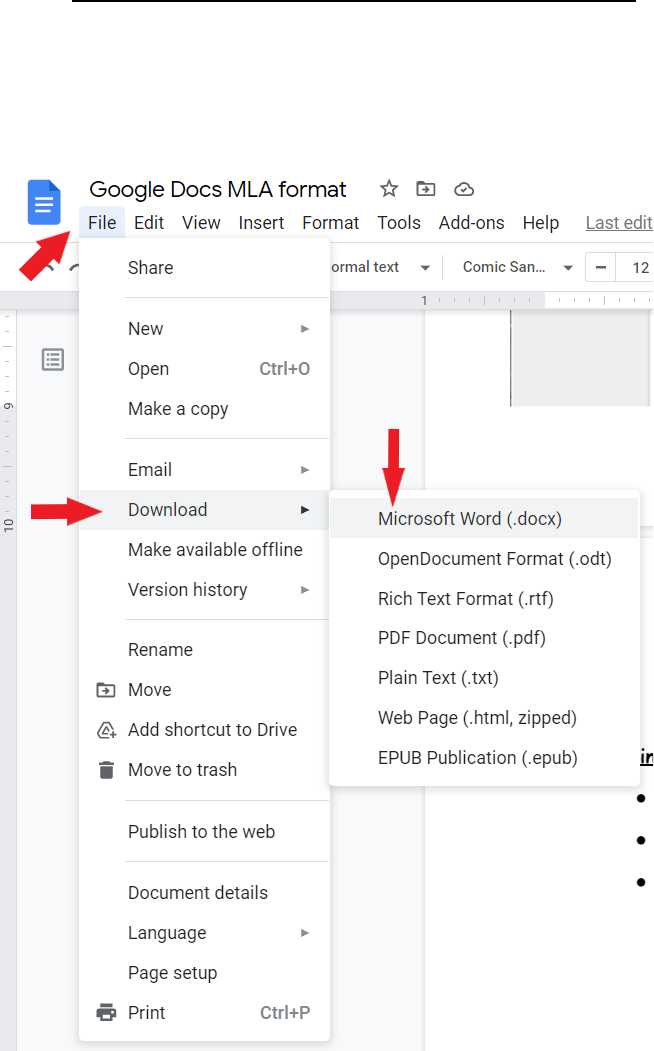
6. Saving Your File as a Microsoft Word Document
● Go to “File” at the top left-hand side of the page.
● Choose “Download”
● Choose “Microsoft Word”
