
California Courts of Appeal
11/01/2017
Guide to Creating
Electronic
Documents/Filings
I. Briefs/
Original Proceedings
II. Record on Appeal/
Exhibits
III. Hyperlinking
Page | 2
Introduction
This guide was created to help filers provide working electronic documents to the
Courts of Appeal and the Supreme Court in California. While there are other
products that can produce the same result, this guide focuses on Word (2007, 2010
and 2013) and Adobe Acrobat Pro XI. Some of these steps may be similar in other
programs.
Be sure to check all rules with the court you are filing with to make sure you have
met all their requirements and local rules for electronic documents.

Page | 3
I. Creating Electronic Appellate
Briefs, Original Proceedings,
etc.
A. Format
Check with the court’s website that you are filing your document(s) with to ensure
that you meet their requirements or guidelines for formatting.
B. Tools
Word processor
The primary tool for creating an electronic brief or original proceeding is your word
processor. Microsoft Word provides some helpful features that make creating an
electronic document easier. In particular, Word’s Styles feature (see Generating
Bookmarks below) allows you to create headings in your brief that will automatically
create bookmarks when you convert the document as a PDF.
Adobe Acrobat Pro
Adobe Acrobat sets the standard for creating, combining, editing, redacting and
making PDFs searchable. Eventually you will need to do all of these things if you are
working with electronic documents. There are other less expensive PDF software
programs, but you will find a variety of resources to assist you with Adobe Acrobat.
For example, Adobe hosts a free Acrobat for Legal Professionals Blog that provides
tips and techniques for working with electronic legal documents.
C. Basic Steps
1. Save or convert your document from the original word
processing document, such as Word, directly to PDF (do not
scan the document to create a PDF).
2. Create bookmarks
1
from the Table of Contents.
3. Redact any information that must be redacted under the rules.
(See Redacting.)
4. Make text-searchable.
You can skip step 3 above if your document does not contain any information that
must be redacted.
1
Bookmarks are a fast and easy way to quickly navigate to different parts of a document and are
required by the California Supreme Court and all Courts of Appeal.

Page | 4
D. Pagination
Before saving/converting the document as a PDF, make sure to number the pages
consecutively beginning with the cover page of the document, using only the Arabic
numbering system, as in 1, 2, 3, with a number on every page. Do not use a separate
pagination system for tables within the document and the page number does not need
to appear on the cover page and can be suppressed.
1. Saving/Converting directly to PDF
Word 2007 (without Adobe Acrobat Pro installed)
Click the Microsoft Office Button in the top left hand corner of Word.
Choose Save As and PDF or XPS (see below).

Page | 5
In the dialog box that appears, click the button in the lower right hand
corner that says Publish.
Word 2007 (with Adobe Acrobat Pro installed)
Choose Save As and Adobe PDF (see below).
When the box below appears, choose Yes.

Page | 6
Word 2010 and 2013
Click on the File tab.
Choose Save As.
Click Browse
In the dialog box that appears, choose the Save as type = PDF.
Click Save.

Page | 7
Adobe Acrobat Ribbon in Word
When you install Adobe Acrobat, the installer may add Acrobat buttons or menu
commands to Microsoft Office applications (e.g., Word, Excel, PowerPoint).
The advantage of using the Acrobat Ribbon to create PDF from Word is that it will
automatically create bookmarks for your document if you have used Word’s Styles
feature.
Choose Acrobat at the top of the screen (to the right of View).
Click Create PDF in the menu.
In the dialog box that appears, click Save.

Page | 8
When printing a hard-copy of a document, be sure to use the PDF file
to insure that the print exactly replicates the e-file version. Pagination
and sentence structure may change when converting a document to a
PDF.
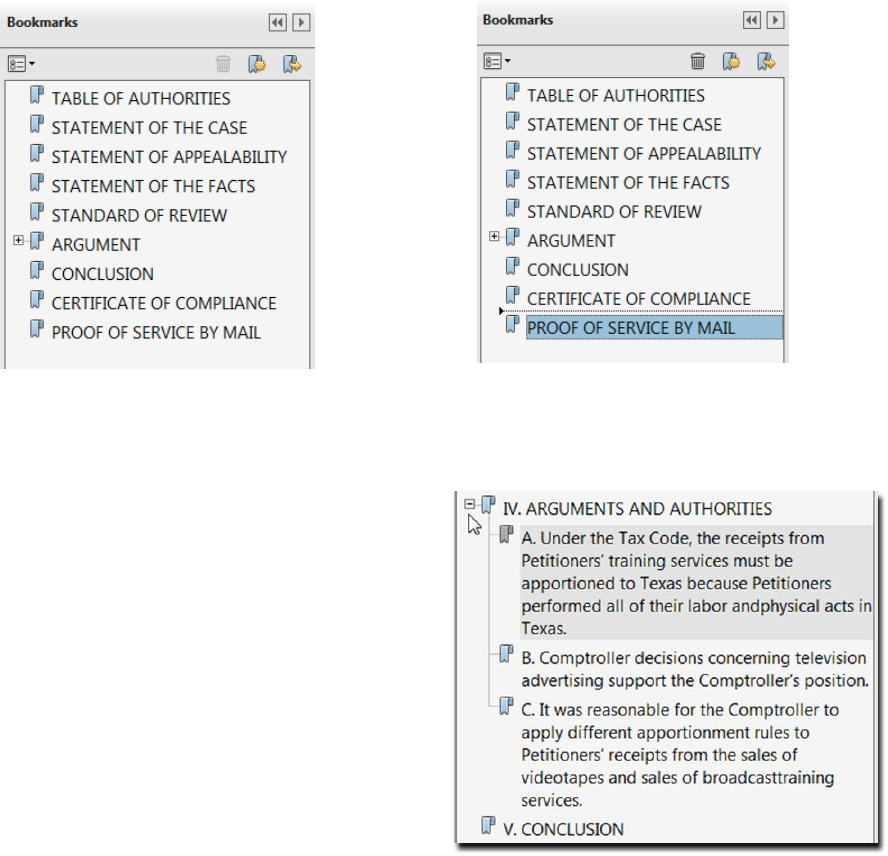
2. Create bookmarks
A bookmark is a text link that appears in the Bookmarks Panel of Adobe Reader
and Adobe Acrobat. Readers can use the bookmarks to quickly navigate to different
sections of a document. Make sure to include bookmarks in all electronic documents
and be sure to use descriptive labels for your bookmarks (e.g. Trial Court Judgment,
Court of Appeals Opinion) as illustrated below.
Clicking on the Bookmarks Icon (left
side of screen) opens the Bookmarks
Panel revealing the list of bookmarks,
as in this illustration.
Bookmark settings
To maximize the impact of your document, set the bookmarks to open automatically.
While the document is open, click File > Properties > Initial View tab
Click the Navigation tab dropdown and select Bookmarks Panel and Page
Click OK
Also, make sure to set the zoom settings in the bookmarks to make sure the
bookmark view is always the same. See Adobe PDF Bookmark Zoom Settings.
Generating bookmarks
If you use the paragraph styles available in Word to label the headings in your
document, when you use the built-in Acrobat ribbon to generate your PDF, your
document will already include bookmarks to the headings in your document.

Page | 9
A tutorial on Word’s Styles feature is beyond the scope of these instructions, but
Microsoft provides a tutorial on the web. Word’s Styles feature is a tremendous time
saver for generating bookmarks, the table of contents, and formatting your document.
Manually adding bookmarks
To manually add a bookmark, in Adobe Acrobat, follow these steps:
1. Click on the page where you want to create a bookmark
2. Click the New Bookmark Icon in the Bookmarks Panel or select CTRL and B
keys on your keyboard at the same time.
3. In the text of the new bookmark, type the name or label that you want to give
the bookmark.
OR
Highlight the text on the page you want to bookmark, then press the CTRL
and B keys on your keyboard at the same time (or right click and select add
bookmark). The bookmark will appear in the panel and the name will be the
same as the text you highlighted.
Editing bookmarks
To delete a bookmark, select the bookmark and press the delete key.
To edit the name of a bookmark,
double click on the bookmark.
Once the bookmark text is
highlighted, you can edit the text of
the bookmark. Press enter when you
are satisfied with the results.
Avoid using names like Header A,
Header B, etc. Instead, try something
like Statement of the Case,
Conclusion.
Page | 10
Moving bookmarks
To move bookmarks up and down in the Bookmarks Panel, left click and hold the
text and drag the bookmark to the desired location in the Bookmarks panel. Once the
arrow and dotted line are in the new location, release the left mouse button to drop the
bookmark in its new location.
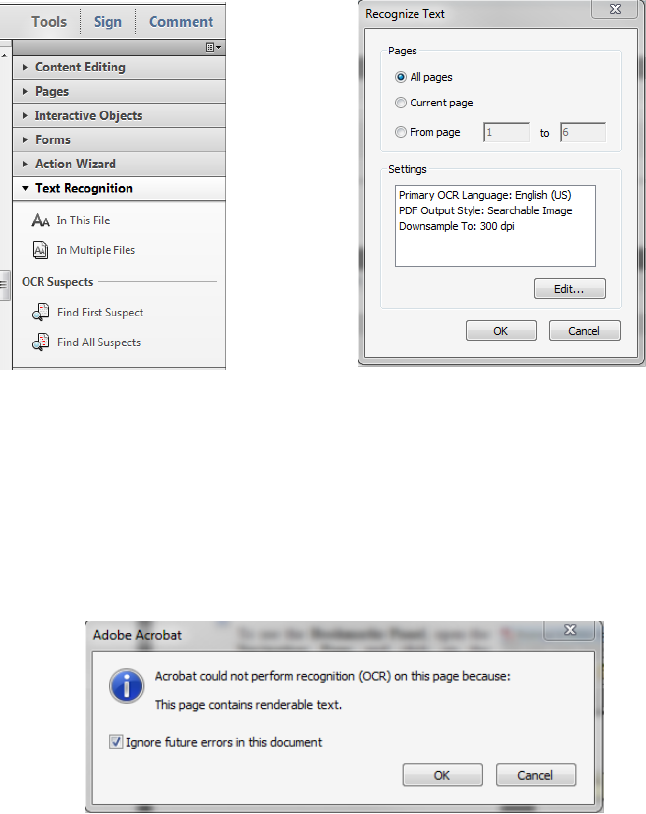
Nesting bookmarks
Bookmarks can also be nested
underneath other bookmarks to create
a tiered structure of bookmarks, as in
the illustration. Clicking on the minus
sign next to the Argument and
Authorities bookmarks collapses
these bookmarks so that they are not
visible. A plus sign then appears next
to the Arguments and Authorities
bookmark, which will expand the
nested bookmarks and make them
visible again when selected.
To nest a bookmark underneath another bookmark, move the bookmark as described
above. But this time, move the bookmark up and over underneath the bookmark
where you want it nested. In other words, select the bookmark by left clicking and
holding the mouse button down. Then move it up and to the right without releasing
the mouse button. Release the mouse button once the bookmark appears to be

Page | 11
indented. Once you have the bookmarks the way you want them, be sure to save your
document in order to save your changes!
3. Redacting
Redaction should be done before creating bookmarks and making the appendices text
searchable. The steps below will remove bookmarks and text recognition.
Pursuant to Cal. Rules of Court, rule 1.20, you must redact the following information
from an appendix submitted to the court:
Social security numbers
Birth date
Home address
Name of any person who was a minor when the underlying suit was filed
Driver’s license number
Passport number
Tax identification number
Any similar government-issued personal identification number
Bank account numbers
Credit card numbers
Any other financial account number.
Page | 12
The most important thing to remember about redacting documents is to
permanently remove the information from the document. Do not use a black
highlighter in Adobe Acrobat to cover up the information! Highlighter marks
can be removed by anyone with Adobe Acrobat and anyone can search the text of the
document to find the text that is beneath the highlighter mark.
If you have Adobe Acrobat Pro, you can use the redaction features of the program to
redact documents electronically (see Redacting Using Adobe Acrobat Pro below).
Please note that Adobe Acrobat Standard does not have redaction features.
Redacting using Word
If you do not have Adobe Acrobat Pro, then you should edit the text of any
document that you have in the original file (e.g., a Word document) to remove the
information. Replace any characters that you remove with the letter x and then
save the edited document as a new document. Here is an example:
Original text document:
Mike Brown’s social security number is 357-57-7372. His home
address is 1510 Maple Avenue, New York, 201292. His credit
card number is 2138 2912 2938 2919.
Edited Text:
Mike Brown’s social security number is xxxxxxxxxx. His home address is
xxxx xxxxx xxxxxxx xxx xxxxx xxxxxxx. His credit card number is xxxx
xxxx xxxx xxxx.
As you can see, depending on the font you are using, editing the document in this way
may slightly alter the layout of your document. Be sure to check the page layout to see
if your page numbering has been altered. If you do not have Adobe Acrobat Pro and you
only have the documents in paper format, you will need to copy the documents, redact
them manually, and then scan the redacted documents.

Page | 13
Redacting Using Adobe Acrobat Pro
Click the Tools panel > Protection > Mark for Redaction.
Select the text you want to redact. To select text, click the left button on the
mouse and drag it across the text using the redaction tool. You can also double
click a word to mark it for redaction.
1. Place the cursor over the word marked for redaction to preview what
the text will look like when redacted.
2. Once you are satisfied with the appearance, choose Apply Redactions.
This window will appear
Click OK
When this window appears
Click Yes

Page | 14
Adobe will open the panel below and find hidden information
Click Remove
When this window appears
Click OK
Save the document.
Page | 15
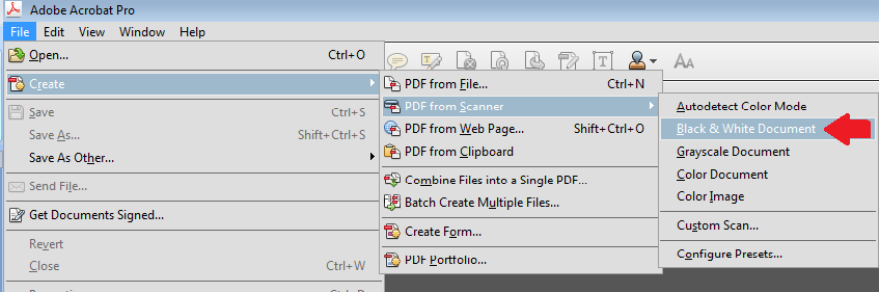
4. Text-searchable
All electronic documents must be text-searchable, in PDF (portable document format)
while maintaining the original document formatting. If you find your PDF is not text-
searchable, follow the instructions below.
Open the document in Adobe Acrobat Pro.
Click Tools > Text Recognition > In This File > OK
If some text has already been rendered searchable, check the box Ignore future errors
in document and click on OK. When the Text Recognition process is complete,
remember to save the document.
NOTE: If a header, e-filing stamp or bates no. has been added to a non-searchable
document, Acrobat will not OCR that page and you will receive the message below.
Page | 16
E. Fixing Mistakes in Adobe Acrobat Pro
It is not unusual to get to the end of the process of creating an electronic brief and
discover that you have made a typographical error. You may be able to fix some simple
typographical errors using Adobe Acrobat. The Edit Text tool allows you to erase and
type in a PDF as though it were a word processing document. Adobe Acrobat
automatically recognizes the font type and size, and you can backspace to remove text
and then retype.
Select Tools > Content Editing > Edit Text & Images. Then place your
cursor where you want to edit and type as you would with a word processor.
The tool has some limitations and not all fonts are available in Adobe Acrobat. If you
used an unusual font you may get the following message.
Also, the Edit Text tool cannot reflow all of the text in your document like a word
processor, so this tool cannot be used to retype sizeable portions of your brief.
F. Replacing Pages
If the mistake cannot be fixed with the Edit Text tool, you may be able to fix the
error by deleting the offending page and replacing it with a corrected page. To replace
a page, first fix the mistake in your word processing program. Then convert the
corrected word processing document to PDF. Now Extract the corrected page from
your corrected PDF and save it as a separate PDF document. Then Delete the page
with the error from your original PDF and Insert the corrected page into the proper
place in the original PDF.
Click Tools > Pages > Extract or click the Page Thumbnail icon on the left,
right click on the page(s), select extract Pages

Page | 17
Depending on the mistake, it may just be easier to start over and recombine all your
files after fixing the error in your brief. But if you have done a lot of manual
bookmarking and hyperlinking, replacing the page using Adobe Acrobat may be easier
than starting all over again.
G. Combine individual files into one PDF file
To combine individual files into a single PDF document, follow these steps:
Within a document in Adobe Acrobat
Choose Create > Combine Files in to a Single PDF
Or

Page | 18
From the Main Menu in Adobe Acrobat
Choose Combine Files into PDF
In the dialog box, add the individual files or folders that you want to combine into a
single PDF. The files can be of any format supported by Adobe Acrobat (Word, PDF,
Excel, etc.).
Arrange the files in the order that you want to combine them.
Select Combine Files.
Save and name the combined document.
Page | 19
H. File Size
A single PDF file may not exceed a total of 25 megabytes in size. If a filing exceeds this
file size limitation, the TrueFiling system will not accept the document and the user
must either (a) submit the filing in multiple parts or (b) provide the court with the
filing in electronic format on a CD (compact disc), DVD or flash drive. Please note that
audio files must be submitted in .wav or mp3 format and any video files must be
submitted in .avi or mp4 format.
Be sure to check all rules with the court you are filing with to make sure you have met
all their requirements and local rules for electronic documents

Page | 20
II. Creating Electronic Appellate
Record on Appeal/Exhibits
Appendices must comply with California Rules of Court, rule 8.124, including
chronological and alphabetical indices. For Exhibits, see rule 8.486(b). When possible,
use PDF files that are converted from native formats, rather than scanned documents.
(See Saving/Converting directly to PDF.) Counsel or parties should cooperate in
providing electronic copies of documents when requested and should check the local
rules of the court where they will be filing to make sure all requirements for electronic
documents have been met.
A. Chronological Index
The chronological and alphabetical index should be converted from the word
processing program used to create them.
B. Pagination
Make sure to number the pages consecutively beginning with the cover page of the
document, using only the Arabic numbering system, as in 1, 2, 3. Every page must
have a number. Do not use a separate pagination system for chronological or
alphabetical index within the document. The page number does not need to appear on
the cover page.
C. Scanning Documents
Although you are prohibited from scanning your documents that are available in
electronic format (e.g. cases, statutes, etc.), there are occasions where you will need
to scan a document in order to include it in your appendix. For example, a trial court
may not have electronic filing so you may have to scan a trial court order. Or maybe
you really want to include a contract in your appendix and it is only available in
paper form. In those situations the only solution is to scan the document.
Page | 21
You can create a PDF file directly from your scanner using Adobe Acrobat or other
software. When scanning, make sure that the scanner settings are:
300 dots per inch (dpi)
Black and white (not gray scale or color, unless scanning an image)
OCR (optical character recognition)
A one hundred page scanned document (that does not include images) with these
settings should be about 3.5 megabytes in size. (NOTE: File size may vary with
certain documents.) If scanning is creating files that are too large, check the settings
on your scanner. Most office copiers, have a menu that allows the scanner settings to
be adjusted.
If you have already adjusted the scanner settings, and the file size is still too large,
some computer programs have the capability to reduce the file size. Adobe Acrobat
Pro can do that (see instructions below). Make sure to do this before bookmarking
the appendix. There are also a number of online resources that explain how to
reduce the file size of scanned documents.
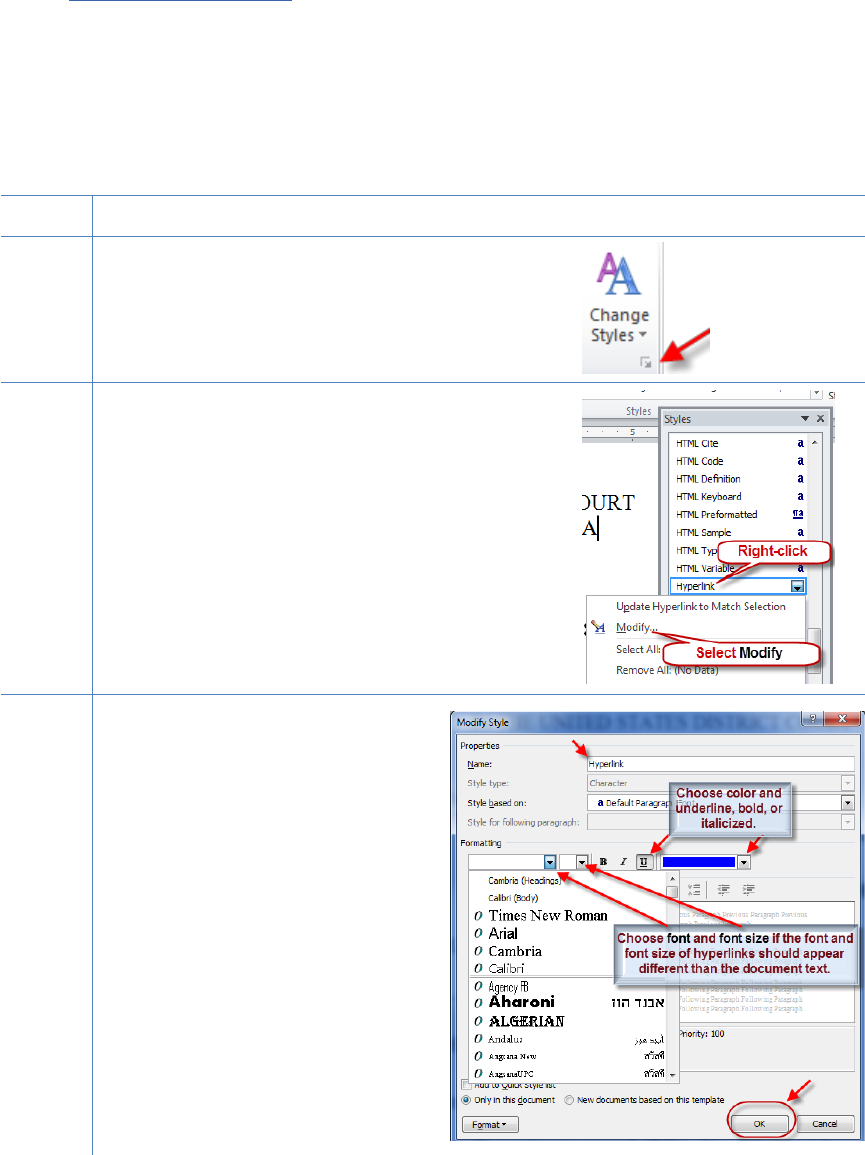
Scanning with Adobe Acrobat
If you have a scanner connected to your computer that Adobe Acrobat recognizes, you
can scan documents using Adobe Acrobat. Follow these steps:
1. Insert the document into your scanner
2. Open Adobe Acrobat
3. In Acrobat, choose Create> PDF From Scanner
4. Choose Black and White

Page | 22
Preset scanning settings for Adobe Acrobat
Adobe allows you to preset settings for scanning a document.
Select Create> PDF from Scanner> Configure Presets
Configure your presets to scan at 300 dpi. Be sure to check Make Searchable (Run
OCR). For standard black and white documents you do not need to move the slider to
create a high quality scan—smaller file size is preferred. Save your settings before
scanning. The default settings are now set and each time you choose to use the Black &
White Document preset the document will be scanned using these settings.

Page | 23
D. Combine individual files into one PDF file
See Combine individual files into one PDF file above.
E. Create bookmarks for all documents contained in the
appendix
A bookmark is a text link that appears in the Bookmarks Panel of Adobe Acrobat.
Some courts require bookmarks for each document that is listed in the index. Be sure
to check the local rules of the court you are filing with to make sure you have met all
requirements for electronic appendices.
For documents without titles, be sure to use descriptive labels for your bookmarks.
See Create Bookmarks in Section I. above.
F. Redacting
See Redacting in Section I. above
G. Make a document searchable from any scanned or otherwise
non-searchable material searchable by using Text
Recognition
Open the document in Adobe Acrobat Pro.
Click Tools >Recognize Text> In This File > OK

Page | 24
If some text has already been rendered searchable, check the box Ignore future errors
in document and click on OK. When the OCR process is complete, remember to save
the text searchable version of the document.
NOTE: If a header, e-filing stamp or bates no. has been added to a non-searchable
document, Acrobat will not OCR that page and you will receive the message below.
H. Optimize PDFs to reduce file size
Large documents or documents containing forms, photos or graphics should be saved
as an optimized PDF to reduce file storage size.
Select File and click Save As.
From the Save as type dropdown menu, select PDF.
From the Optimize for radio buttons, select Minimum size (publishing
online).
Click Save.

Page | 25
III. Hyperlinking
Overview of Hyperlinking
In the internet research world, hyperlinks are a standard way of “drilling down” for
more detail or specific information. Just as all web pages contain links to other
pages, cases downloaded from legal research services such as Westlaw or Lexis
contain links to the cases, statutes, articles, or other sources cited within the opinion.
The links allow immediate access by the reader to these referenced materials.
Attorneys can include links to cited law and their Appendix or Clerk’s Transcript and
Reporter’s transcript, adding another level of persuasion to their writing. Hyperlinks
in briefs and other court filings provide quick, easy, and pinpoint access to particular
sections of a case, or to specific filings in the court’s record. The attorney can thereby
highlight the precise issue presented, and the specific evidence and controlling or
persuasive law the court should consider.
Though it is not required, rather preferred, hyperlinks in court filings are very
beneficial for court chambers. Court submissions which include links to relevant
case law and case filings are easy for chambers staff to review. The attorneys’
arguments can be immediately verified in the context of the relevant law. The
justice or judicial clerk is able to read the text of the cited case law on one screen
while reading the attorney’s brief on the other. And if a brief contains links to
referenced exhibits, and even to specific pages within those exhibits, the judge or
judicial clerk can access the relevant evidence without having to navigate through
the paper record. Particularly when dealing with large and complex cases, links save
chambers considerable time and effort. Links make it easy for the court to verify –
and adopt – the positions taken by an advocate.

Page | 26
Types of Permissible Hyperlinks
Subject to the court’s local rules, the following types of hyperlinks are typically allowed
in court documents.
Internal Links
For example, the Table of Contents located at
the beginning of this Guide.
Links to attachments
and exhibits being
filed with your brief
Note: Evidence must be filed of record. A hyperlink
to a public website where evidence can be found is
not a substitute for filing evidence in support of a
motion.
Links to case and
statute citations
Note: Unless a cited case
cannot reasonably be
found from a public
source, it is not necessary
to attach copies of cases
or statutes to your brief.
For example:
Westlaw,
Lexis,
or court websites.

Page | 27
Creating a Hyperlinked Table of Contents
A table of contents in a Word document can include internal hyperlinks for
navigating the document. When the document is converted to PDF format, these
links will become bookmarks in the PDF document. Note that the Table of Contents
is different from the Bookmarks that are required in the PDF version.
Although there are several methods for creating a table of contents in
Word, the one most useful to attorneys (and discussed below), is to create the
document, include any headings as you write, and then:
•
Mark and format the headings to be included in the table of contents;
•
Generate and insert the table of contents; and
•
Edit as needed.
Marking and Formatting Table of Contents Entries
To mark and format entries to be included in the table of contents using Microsoft
Word:
STEP ACTION
1
Create your document, inserting all headings with the format of
your choice.
2
Using your cursor, scroll over and
select the heading you want to
include in the table of contents.
3
From the
Styles section
on your Home
tab,
Click the down arrow in the right
lower corner.
A drop down list will appear.
Note: There are pre-formatted Heading Styles
available in MS Word, but only 2 may be visible in
your styles drop-down menu. Additional heading
options will appear, as you make your selections.

Page | 28
If…
Then…
You want the
text of the
table of
contents
entries to
match the
headings
already
created
within your
document:
Use your cursor to select the heading to be included
in the table of contents.
From the Styles list, Right-click the heading level
you wish to apply. In the box that appears, select:
Update Heading [x] to Match Selection.
Continue until a heading style has been applied to
all heading levels within your brief.
You want to:
Set a
standard
format (e.g.
font, font color,
bold, etc.), for
all headings
and table of
contents
entries created
with your
Word program
Or
Change
the
heading
format in
the brief
already
created:
From the Styles list:
Right-Click the
heading level you wish
to modify.
In the box that appears,
select Modify to open
the Modify Style box.
Choose text:
•
font
•
font size
•
appearance
•
color
•
justification
•
line spacing
Save settings for:
•
only in this document, or
•
all documents created using your standard
template
•
Add to Quick Style List.
Click OK.
Scroll through your document. For each heading, select the heading text with the
cursor, then click the heading style to be applied.

Page | 29
Generating and Inserting the Table of Contents
To add the Table of Contents to your document:
STEP ACTION
Place your cursor in
the document at the
location you want to
insert the table of
contents.
Add a title for the
Table of
Contents.
Enter a few hard
returns.
Control + Enter to
insert a page break.
Place your cursor
where the table of
contents entries
should begin.
From the
References tab of
your Word ribbon,
Select
Table of Contents,
and from the menu
that appears,
Select:
Insert Table of
Contents.

Page | 30
Make selections for the
appearance of the table of
contents.
Click OK.
Note: If your table has
more than three levels,
you must set Show levels
to the correct number.
Note: The “Use
hyperlinks instead of page
numbers” must be checked
or the table of contents
will not have active links
upon conversion to PDF.
The Table of Contents,
with active section links,
will be inserted into your
document.
Note: You can manually
modify the page numbers
to appear as other links in
your document,
blue and underlined).

Page | 31
Editing the Table of Contents (if needed)
Inserting the Table of Contents may result in page break changes. For example,
hard page breaks or extra lines that were added during drafting to adjust the
overall look of the document may no longer be needed, or some may now need to be
added.
If the brief was modified after the table of contents was inserted:
STEP
ACTION
From the reference tab on
the Word ribbon, select
Update Table.
Select
Update page numbers
only. Click OK.
Note: If you have added or
changed a heading, choose
Update entire table.
When the entire document is complete, using MS Word, Save the document as a
PDF or Create PDF.
Note: Do not Print to PDF. All active links in your Word document
become inactive in PDFs created using Print to PDF.
Page | 32
Formatting the Appearance of the Links Inserted
Before inserting links into a document, you may choose how those links will
appear in the final document. For example, do you want them to appear:
blue and underlined,
bold and black,
black and italicized,
or
some other appearance?
To select the appearance of the links in your document:
STEP ACTION
1 On the Home tab,
click on the tiny arrow under
Changes Styles.
2 A drop down menu will appear.
Scroll down until you see Hyperlink.
Right-click on Hyperlink, and from
the choices that appear, select Modify.
3 A Modify Style box
will appear.
Change the color, font, and
underlining, etc. for
hyperlinks.
Note: Choose a specific font
and font size for the linked
text only if the linked text font
and font size should appear
different from that of the
document text. Otherwise,
leave the font and font size
selections blank.
Click OK.

Page | 33
Adding Links to Attachments
STEP
ACTION
1
Save all the attachment documents you will cite in your brief into a
single folder in your computer. The documents must be in PDF
format. Be sure the names of the files do not contain special
characters, such as apostrophes or ampersands, as these will break
the hyperlinking process.
2
While drafting your brief, include the citations to the documents
saved in your computer.
3
Using your cursor, select the text to which a link will be added.
4
On the Insert
ribbon, select
Hyperlink.
5
In the Insert Hyperlink dialog box:
•
Navigate to cited
file saved on
your computer;
•
Select the file; and
•
Click OK.

Page | 34
6
A link to the file will be added to the text. If you hover over the
link with your cursor, you will see the link address.
Add links to all the citations in your brief accordingly.
Note: Specific page links can be added by following the
directions in the previous section. Use the PDF page number,
not a Bates number or footer page number, for the citation.
Automated Links to Legal Citations
Links to legal citations can be added manually or, assuming the software is
compatible with your computer and word processing software, by using automated
linking software available through Westlaw or Lexis.
Access to Linking Software
Tool
Cost
URL
Westlaw InsertLinks
Must purchase a West
BriefTools
subscription.
Estimated cost:
$100/month for small
firms;
$300 to 500/month for
larger firms (10 licenses)
http://legalsolutions.thomson
re uters.com/law-
products/solutions/brief-
tools?searchterms=brief+tool
Lexis for
Microsoft Office
This Lexis software product
will add links for research
and drafting purposes, but
those links are lost upon
conversion to PDF. Lexis is
investigating the issue.
http://www.lexisnexis.com/en
- us/products/lexis-for-
microsoft- office.page

Page | 35
Linking Software—Compatibility Information
The following graph outlines the compatibility of Shepard’s Links 2008,
West InsertLinks, and Lexis Links for Microsoft Office for inserting links into
MS Word and WordPerfect documents with a Windows XP (SP3) 2GB
Memory, Windows Vista (SP2) 4GB Memory, or Windows 7 – 4GB Memory
computer.*
Shepard’s
Links
2008
Lexis for
Microsoft
Office
West
InsertLin
ks
MS Word 2010 X** X***
MS Word 2007 X** X***
MS Word 2003 X X***
MS Word 2000 X
WordPerfect X6****
WordPerfect X4 – X5 X
WordPerfect X3 X X
WordPerfect 10 – 12 X
* The West and Lexis linking software programs cannot be used on Apple
computers. Moreover, although Shepard’s Links was not designed to operate on
Windows Vista and Windows 7 (as reflected in the Lexis literature), it is working
on these computer systems.
** Lexis for Microsoft Office is being developed and tested. However, in its current
stage of development, any links added by Lexis for Microsoft Office are being
stripped out upon conversion to PDF. Lexis is investigating this issue.
*** Westlaw product information states InsertLinks is compatible with both 32- and
64-bit Microsoft Word. However, while it works well with 32-bit Word, InsertLinks
is not fully compatible or useful with 64-bit Word.
**** West currently has no linking software compatible with WordPerfect X6.
West indicates it may develop and release this product during the summer of 2013.

Page | 36
Westlaw InsertLinks
InsertLinks is a Westlaw computer software program which scans Microsoft
Word or Corel WordPerfect
1
documents to locate legal citations, and then
automatically inserts hyperlinks to the Westlaw internet address (url) for those
citations into the word processing document.
Installing West InsertLinks
InsertLinks is part of the West BriefTools suite, and a
BriefTools subscription is required in order to use this
software.
•
The current West BriefTools product is Version 2.7.2039,
which was updated on December 10, 2012.
Using West InsertLinks
Once InsertLinks software is installed, Westlaw links can be
installed automatically in Microsoft Word documents using the
following steps:
STEP
ACTION
1
With the Microsoft Word document to which you are
adding links open on your screen:
Select the Westlaw Solutions tab on the Word ribbon.
2
The West BriefTools options will open.
Select InsertLinks.
1
Currently, InsertLinks is not compatible with, and cannot be used for, automatically
inserting links into
WordPerfect X6 documents. It does, however, work with prior versions
of WordPerfect.
Page | 37
STEP ACTION
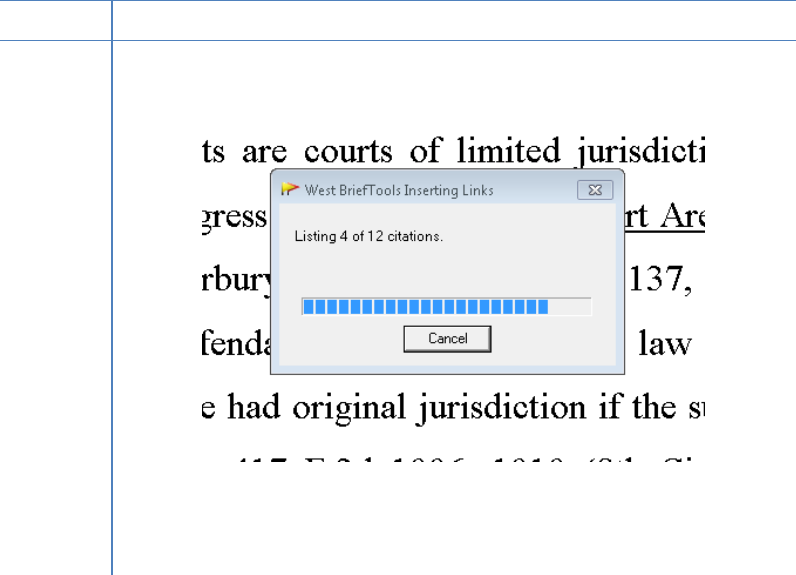
3 The InsertLinks software will begin searching the
document for citations and inserting the appropriate links.
The box depicted above will disappear when the process is
complete and all links are installed.
Manually Inserting Hyperlinks
As previously described, hyperlinks to documents filed can be manually
added to a document about to be filed. It is also possible to manually create links
to documents available through commercial legal websites (e.g., Lexis or
Westlaw), and those posted on the court’s website (Local Rules).
Manually adding links can be labor intensive if the document is long, but
the process is not difficult. And even if you are primarily using software to add
links to a document, understanding the underlying mechanics of hyperlinking
within WordPerfect and Word documents is helpful and may be necessary if, for
example, you need to make corrections to the automatically created links.

Page | 38
Manually Creating Links to Online Research Resources
The process for manually adding links to Westlaw, Lexis, Google Scholar, or any
other online research resource (LoisLaw, FastCase, etc.,) is the same.
STEP ACTION
1 In the brief, use your cursor to select the citation to which
you are adding a link.
2
Sign into the legal research website and open the cited
document. Select the url address for the document.
Note: When using this method, if the link on the website
changes, the link in the document may not work.
Right-click, and Copy the address. See below:
OR
When using Lexis Advance, select Actions > Link to this page.
This will use a static link, which should always work.
Note: Check your local rules for any authority or limitations on
the legal research websites to which links are permitted.
Note: Some attorneys have reported difficulty using this method to
insert links to Lexis research.

Page | 39
STEP
ACTION
3
a
Select the Insert ribbon, then select Hyperlink. An
Insert Hyperlink dialog box will appear.
Note: The text you selected will automatically appear in the
“Text to display” line.
b
Place your cursor in the Address box of the Insert
Hyperlink dialog box. Right-click. From the drop-down
that appears, select Paste.
Click OK.
c
The link to the citation will be added in your brief.
Page | 40
Special thanks is given to Blake A. Hawthorne, Clerk of the Texas
Supreme Court and the Texas Supreme Court for sharing their Guide to
Creating Electronic Appellate Briefs.
