

App Layering
Contents
What’s new 5
Deprecation 27
Known issues 28
System requirements 38
Plan your deployment 41
XenServer 52
Citrix Provisioning 52
Docker 54
Google Cloud 55
Machine Creation for Azure or Azure Government 57
Machine Creation for XenServer 57
Machine Creation for Google Cloud 58
Machine Creation for Hyper‑V 59
Machine Creation for Nutanix AHV 60
Machine Creation for vSphere 62
MS Azure or Azure Government 64
MS Hyper‑V 65
Nutanix AHV 66
VMware vSphere 67
Network File Share (other platforms) 69
Install appliance 70
XenServer 70
Google Cloud 73
© 1999–2024 Cloud Soware Group, Inc. All rights reserved. 1

App Layering
MS Azure or Azure Government 81
MS Hyper‑V 84
Nutanix AHV 87
VMware vSphere 90
Install the App Layering agent 95
Configure 99
Access management console 99
Change administrator passwords 100
Set up file share 101
Connect to a directory service 102
Assign roles 104
Upgrade 106
Connector configurations 112
Azure Deployments 118
Authoring ARM templates 124
Starter templates 133
Template parameters 161
XenServer 169
Citrix Provisioning (XenServer, VMware, Hyper‑V, Nutanix) 173
Google Cloud 177
Machine creation for Azure 180
Machine Creation for Azure Government 182
Machine creation for XenServer 183
Machine Creation for Hyper‑V 188
© 1999–2024 Cloud Soware Group, Inc. All rights reserved. 2

App Layering
Machine Creation for Google Cloud 191
Machine Creation for Nutanix AHV (Acropolis) 194
Machine Creation for vSphere 197
MS Azure 202
MS Azure Government 210
MS Hyper‑V 217
Nutanix AHV (Acropolis) 221
VMware vSphere 225
Network File Share 232
Windows File Share 233
Layer 234
Prepare the OS for layering 239
Prepare your OS image for layering in XenServer, Hyper‑V, or vSphere 241
Prepare your OS image for layering on Google Cloud 247
Prepare your OS image for layering in Azure 250
Prepare your OS image for layering in Nutanix 254
Create the OS layer 260
Create Platform layer 262
Create or clone an app layer 273
Layer antivirus apps 283
App Layering Recipes 284
Deploy App layers as elastic layers 285
Deploy user layers 295
Update layer 316
© 1999–2024 Cloud Soware Group, Inc. All rights reserved. 3

App Layering
Export and import layers 321
Exclude files from layers (Advanced feature) 326
Publish 329
Create or clone an image template 329
Publish layered images from template 332
Manage image template 334
Manage 335
System settings 335
Storage 339
Appliance settings 342
App Layering services 345
Directory service 347
Users 349
Users and groups 350
Firewall ports 350
© 1999–2024 Cloud Soware Group, Inc. All rights reserved. 4

App Layering
What’s new
May 9, 2024
Citrix delivers new features and improvements to Citrix App Layering users when they are available.
New releases provide more value, so there’s no reason to delay updates.
This article covers new and enhanced features, along with the fixed issues in this release.
For the latest App Layering requirements and supported platforms, see System requirements.
App Layering 2403 (This release)
This release contains the following new features:
• Citrix Hypervisor rebranded to XenServer
In line with our latest rebranding strategy, we’ve updated all instances of Citrix Hypervisor to
XenServer.
• OS Machine tools update
The OS Machine tools are now updated to include automatic cleanups of empty INF folders that can
cause performance counter rebuild failures. You must create a new revision of your OS layer and apply
the OS Machine Tools to the layer.
Note: Don’t run setup_x64.exe on an OS revision. The application is only needed before import‑
ing an OS into the elm, and running it on an OS revision might cause unknown issues.
• Layer creation tasks display more information about the packaging machine
The action required state of layer creation tasks now include more information about the packaging
machine than just the VM name when using oload compositing. For most connector types, the addi‑
tional information is the machine’s IP address.
• For Nutanix AHV connector types, a link to the packaging machine in the Nutanix Prism UI is
displayed.
• Azure Deployment connector types allow custom information to be provided through the ARM
templates. For more information, see Machine Output.
• New Connector ‑ Windows File Share
The Connectors UI now includes Windows File Share. This connector allows the user to publish a
disk to a file share, leveraging an existing oload‑enabled connector configuration.
For more information, see Windows File Share.
© 1999–2024 Cloud Soware Group, Inc. All rights reserved. 5

App Layering
• User Personalization Layer ‑ User Layer/UPL space reclamation
Previously, Windows used the unused blocks on a disk first, requiring a large amount of space on the
backend file server. By using the new VHDX space reclamation process, the user layer VHDX files are
automatically optimized every time the user logs o.
For more information, see User Layer/UPL space reclamation.
Fixes
• The Builtin AppV apps are not working with the PVS EL‑enabled images. [ALHELP‑1717]
• The PVS Connector publish fails if the share path has a trailing backslash. [UNI‑89881]
• When creating an OS layer from a XenServer gold VM with custom BIOS strings, the
ImportOsLayer.ps1 script fails to determine the hypervisor type and fails with the
following error:
Offload Compositing is not supported on this hypervisor yet
The hypervisor type can now be explicitly specified through the -HypervisorType
parameter to avoid this issue.[UNI‑90521]
App Layering 2312
This release contains the following new features:
• New and improved Nutanix AHV connector. When you create and manage the Nutanix AHV
connector in App Layering, you can now experience the new UI with the modernized Hypervi‑
sor support. For more information, see Nutanix AHV connector. This release also introduces
Oload Compositing support for layers and image templates in Nutanix AHV. Modern virtual‑
ization technologies such as UEFI, vTPM, and Secure Boot are now available with Oload Com‑
positing. For more information, see About Oload Compositing.
• New approach to override file exclusion. You can now override file exclusions by updating the
Gold Image tool to introduce and accumulate default exclusions for the App Layer file system.
For more information, see Default exclusions.
Fixes
• The HKLM\Software\Wow6432Node\Citrix\PortICA\Policy\Session\
PolicyInputValues and HKLM\SOFTWARE\Citrix\VirtualDesktopAgent\
Policy\Session\PolicyInputValues keys do not have their values or subkeys
persisted between logins. [UNI‑89899]
© 1999–2024 Cloud Soware Group, Inc. All rights reserved. 6

App Layering
• Whenyou publish animage with App Layeringversion 2306, you are unable to see the new image
tools, like AppRulesCompare, on the image. [UNI‑89936]
• A login or logout failure might occur when FSLogix uses Cloud Cache locations for profile
or ODFC containers along with App Layering Elastic Layers. A pop‑up screen displays login
failures and a frozen logout screen displays logout failures. FSLogix log files located at c:/
ProgramData/FSLogix/Logs/Profile/Profile-YYYYMMDD.log also display the
following error message for login failures: "ERROR:00000005 Access is denied"
errors at various points during the login attempt.
App Layering 2309
This release contains the following new features:
• Option to keep the MCS deployment machine up and running. If you want to customize your
deployed images from the ELM when the booted machine is being prepared for deployment to
MCS, you must update your machine tools in the OS revision to revision 2309 or beyond. For
more information, see Create Platform Layer.
• Support for VHDX format for user layers.
User layers are now created using the VHDX format
instead of the VHD format, as in the previous releases. You do not need to convert existing user
layers with the VHD format to VHDX.
However, if you want to convert the user layers manually, the VHDX format of the layer is used if
they both still happen to be in the same folder. If you want to create new user layers using VHD
format, you can turn o the feature. For more information, see Enable User layer.
• OS layer switching option for elastic layers is now enabled by default in the App Layer‑
ing UI. You no longer have to manually enable the new OS layer switching option. For more
information, see OS layer switching for elastic layers.
• New image template option ‑ Defragment disk when publishing the image template. You
can now use the new image template option which optimizes the published image created from
the App Layering appliance. This option is only available when you select an Oload Composit‑
ing connector. For more information, see Create an image template from scratch.
• New and improved Citrix Hypervisor. When you create and manage the Citrix Hypervisor con‑
nector in App Layering, you can now experience the new UI with the modernized Hypervisor
support. For more information, see Citrix Hypervisor.
This release also introduces Oload Compositing support for layers and image templates in the
Citrix Hypervisor. Modern virtualization technologies such as UEFI, vTPM, and Secure Boot are
now available with Oload Compositing. For more information, see About Oload Composit‑
ing.
© 1999–2024 Cloud Soware Group, Inc. All rights reserved. 7

App Layering
Fixes
• There is a memory leak on images that have elastic layering enabled and Sentinel One installed.
[ALHELP‑1708]
• Publishing images with many layers can fail due to database size constraints.
• The LSASS process is hung on some files and causes the boot process to fail. [ALHELP‑1710]
• VMware vSphere fails with invalid object types.
• Purge Failure Mode waits are causing performance problems. [UNI‑89518]
• Session hosts are getting locked on the first login. [ALHELP‑1722]
• AppV packages, when preinstalled in an application layer, might either fail to launch or launch
but fail to operate correctly. [ALHELP‑1717]
App Layering 2306
This release contains the following new features:
• Role‑based access control is now available in the new App Layering UI. You can now assign
roles to App Layering users, defining which features they can access. Any user assigned a role
can log in to the management console. For more information, see Assign roles.
• Removed support for Windows 7 and 32 bit from the ELM. All Windows 7 bit and 32‑bit OS
layers have been discontinued and unsupported for several versions of the ELM. If you are still
using a Windows 7 bit or 32 bit unsupported OS, do not upgrade to this new version without
first backing up your ELM and then contacting Support for options.
• New App Layering tool ‑ ScanWritableFiles. ScanWritableFiles is an application where users
can identify files and folders that exist only on the writable layer (such as the User‑Layer). These
file‑system objects are therefore not located on any other layer/volume, such as the base image
or any elastically assigned layer. Identifying file‑system objects of this type can be helpful when:
– Determining what objects can be safely deleted without aecting elastically‑assigned ap‑
plications
– Identifying application components directly installed by the user, versus being provided
by the image or any elastic layer
– Identifying application components installed on a packaging machine
For more details, see C:\Program Files\Unidesk\Tools\ScanWritableFiles\
ReadMe.txt.
• New App Layering tool ‑ AppRuleCompare. AppRuleCompare analyzes potential file system
and registry conflicts between App layers, including the Platform layer if present. When
© 1999–2024 Cloud Soware Group, Inc. All rights reserved. 8

App Layering
run directly on an app‑layered machine, AppRuleCompare “processes”the AppRule files
associated with layers built into the base image, as well as those that have been elastically
attached to the machine. For more details, see C:\Program Files\Unidesk\Tools\
AppRuleCompare\ReadMe.txt.
Fixes
• On some Provisioning servers, the command to mount a file share with an App Layering agent
greater than 2003 hangs indefinitely. [ALHELP‑1593]
• When a file or directory is created or renamed, CFS also changes the short‑name of the object,
which causes unexpected directory notifications. [ALHELP‑1682]
• An error in the generatePerfGenRecompileScript routine is causing the BIC to fail. [UNI‑89255]
• The rename operation is failing due to a bug in our rename logic. [UNI‑89256]
• A driver digital signature error is occurring on 2012R2 aer switching to a new Citrix certification.
[UNI‑89258]
• The new vSphere connecter UI is not listing all hosts. [UNI‑89314]
• A newly attached virtual disk is not being detected by VDS. [ALHELP‑1694]
App Layering 2304
This release contains the following new features:
• Registration credential support for Azure Deployments. You can now use registration cre‑
dentials to configure the Azure Deployments connector, similar to what was available for the
Legacy Azure connector. For more information, see Azure Deployments.
• You can now define directory paths that are not redirected to the user layer with the user
exclusions policy in Citrix Studio. Some things to note:
– User exclusions do not override AlwaysOnBoot.
– User exclusions apply to the full user layer and the user personalization layer (UPL), but
not to the session host. The session host ignores user exclusions and adds the message to
the user layer.
– Logo.txt now contains all active user exclusions.
• Custom Active Directory (AD) attributes support. You can now use custom AD attributes in
a user layer path for user layers and user personalization layers (UPL). AD attributes must be
enclosed in hashes (for example, #sAMAccountName#). For more information, see Deploy
user layers and User personalization layer.
© 1999–2024 Cloud Soware Group, Inc. All rights reserved. 9

App Layering
• New UI for the VMware vSphere connector. The VMware vSphere connector now has a new
UI. For more information, see VMware vSphere.
• Performance counters now work from any layer, including app layers and full user layers.
The gold image tools must be updated in the OS revision to ensure that the performance coun‑
ters are correctly rebuilt when booting an image. The OS revision needs at least one rebuild
of the performance counters. Open an administrator command window in the same OS revi‑
sion where you’re updating the gold image and run the commands c:\windows\system32
\lodctr /r and c:\windows\syswow64\lodctr \r.
• MSMQ can now be used from any layer included in the image. The gold image tools must be
updated in the OS revision to ensure that MSMQ is properly reset and started, when present. A
new log file named GenRandomQMID.log is present toindicate the actions of C:\Windows\
setup\scripts\kmsdir\GenRandomQMID.ps1. This allows MSMQ to start up properly
regardless of where it was installed.
Fixes
• Missing Profile key causes a failed mounting of the user layer. [UNI‑88890]
• Directory‑notification code causing CPU usage spikes when disconnecting an elastic layer from
a running machine. [ALHELP‑1614]
• The generate.pl tool set the key HKLM\System\WPA from Never Virtualize to Virtualize
Always, causing the Windows activation key to be lost. [ALHELP‑1673]
• FSLogix running with a full user layer failed login on the third and subsequent logins, causing
duplicate profiles and other issues. [ALHELP‑1672]
• Deleting and recreating volatile keys causes the query handlers to block the caller from seeing
the image. [ALHELP‑1648]
• SessionHost file probes missing some files, causing conflicts and leading to non‑working layers.
[ALHELP‑1653]
• Improved the performance of reverse‑direction enumeration times. [ALHELP‑1642]
• The performance counter scanning logic opens files in Read/Share Only Read mode and cannot
be turned o, causing some conflicts with files that must be continually updated by the user en‑
vironment. The performance counter scanning logic now opens files in Read/Share Deny None
mode and can be turned o if needed. [ALHELP‑1679]
• FSLogix search roaming sometimes does not work correctly on Elastic Layer‑only images be‑
cause of a new function, which is called before user login time before the layer hives are virtu‑
alized. [ALHELP‑1669]
• The Microso MSMQ feature is not working when finalizing the image. [ALHELP‑1641]
© 1999–2024 Cloud Soware Group, Inc. All rights reserved. 10

App Layering
App Layering 2211
This release contains the following new features:
• New Azure Deployments connectors. Two new Azure connectors have been created and im‑
plemented into App Layering: Azure DeploymentsandMachineCreation for Azure Deployments.
Both connectors also support Government environments (Azure Government and Machine Cre‑
ation for Azure Government, respectively). The old Azure connector and Machine Creation for
Azure connector (as well as their Government counterparts) are now deprecated, but still avail‑
able for use for a limited time. For more information, see Azure deployments.
• Block platform layer finalize if WEM RSA key detected. If the WEM RSA key exists on the
platform layer, issues are caused with Workspace Environment Management (WEM). If the RSA
key is detected, you now receive a message before finalizing the platform layer to remove the
key. See Create platform layer for details.
• Miss‑cache mechanism improved. The default value for entries in the miss‑cache mechanism
has been increased from 256 entries to 1024 entries. If you have increased the default size using
a registry setting, you must remove your custom setting for this enhancement to work correctly.
• OEM drivers persist in the user layer. OEM drivers (such as printer drivers) can now be stored
in the user layer and don’t require re‑installation aer every user logon. Possible naming con‑
flicts among OEM drivers between the OS image and user layer are resolved automatically. Aer
upgrading, existing user layers are scanned for any unexpected OEM traces.
• Windows 10 and 11 22H2 support. You can now use Windows 10 and 11 22H2 as an operating
system for layered images. For more information, see System Requirements.
Fixes
• Fixed an issue caused by adding the GAC_MSIL file to the registry AOB list. The GAC_MSIL file
was removed. [ALHELP‑1612]
• A new ulayer setting (HKLM\Soware\Unidesk\ULayer\BasicAADScrubEnabled [dword]) was
added which allows you to disable Azure’s removal of Windows 10 registry and file locations.
By default, this setting is set to true. [UNI‑87854]
• Fixed an issue where Purge Mode delays included files opened for read‑only access, which
caused the system to run slowly. [ALHELP‑1621]
• Fixed an issue where the keys in C:\ProgramData\Microsoft\Crypto\RSA\
MachineKeys were being removed when finalizing. The BIC now includes this folder.
[ALHELP‑1623]
© 1999–2024 Cloud Soware Group, Inc. All rights reserved. 11

App Layering
• Fixed an issue where some local policies were being removed aer an OS Machine Tools up‑
grade. The gposetup.cmd was doing additional initialization and overwriting the gpt.ini file
with the defaultgpt.ini file. [ALHELP‑1627]
• Fixed an issue causing Access Control Lists to be ordered incorrectly in newly created folders.
The issue caused some entries in these folders to be ineective. [ALHELP‑1632]
App Layering 2208
This release contains the following new features:
• Wildcard characters are now allowed to exclude a directory from a composited layer. Only
one directory can be wildcarded and only one * might be used in a single path. See Exclude files
from layers for more details.
Fixes
• Selecting layers for export no longer fails to save aer upgrading to 2206. [ALHELP‑1605]
• Fixed issues with certain apps that occurred aer upgrading to 2206. The C:\Windows\
Microsoft.NET\assembly\GAC_MSIL directory is no longer excluded from app layers,
and the c:\windows\system32\wbem\repository directory is only allowed on the
platform layer. [UNI‑87356]
App Layering 2206
This release contains the following new features:
• Microso Silverlight removed. App Layering no longer requires or supports MS Silverlight.
See System requirements for details.
• A few menu items have been moved from the User tab to the System tab in the new UI:
– Managing role access for Active Directory users and groups
– Creating, deleting, and editing directory junctions in the Directory Service
• More management features have been converted to the new user interface. The following
features are now available in the new interface:
– Importing and exporting layers
– System ‑ User Layer storage locations
© 1999–2024 Cloud Soware Group, Inc. All rights reserved. 12

App Layering
• Fully implemented new user interface! With the completion of the above, the new UI is fully
implemented, and all documentation now reflects this. Many procedures and sections through‑
out the documentation have been updated with the new blade workflows, replacing the wizard
dialogs from the old UI.
• Custom firewall settings on user layer.
Administrators can now create a script to auto‑
matically run at logon in a user layer to set up firewall options and rules for a user. The
script is PrivilegedLogon.cmd and can be found at C:\Program Files\Unidesk\
Uniservice\UserScripts.
Fixes
• NVivo no longer crashes when elastically assigned with Full User Layer enabled. [ALHELP‑1564]
• Folders can now be deleted in a published image aer upgrading. [ALHELP‑1582]
App Layering 2204
This release contains the following new features:
• Support for Microso Oice 2021. Oice 2021 can now be used with Citrix App Layering.
• More management features have been converted to the new user interface. You can access
the new interface by way of a unique URL in your web browser. Using the IP address for the
appliance, enter the following URL: https://<ip_address_of_new_vm>. The following
features are now available in the new interface:
– System Tab ‑ Manage Appliance
– System Tab ‑ Settings and Configuration
Fixes
• Setting attributes of a directory no longer fails when located on a read‑only volume (elastic app
layer). (ALHELP‑1500)
App Layering 2202
This release contains the following new features:
• You can now force the deletion of master key files for app layers. If you get an Elastic Fit
warning for an app layer due to master key file changes, you can force the deletion of master key
files by editing the registry setting DeleteMasterKeys. See Deploy App layers as elastic layers for
details.
© 1999–2024 Cloud Soware Group, Inc. All rights reserved. 13

App Layering
• The VMware Horizon View connector has been deprecated. If you enable or use this connec‑
tor, be aware that it has been deprecated and will be removed in a future release.
• More management features have been converted to the new user interface. You can access
the new interface by way of a unique URL in your web browser. Using the IP address for the
appliance, enter the following URL: https://<ip_address_of_new_vm>.
– The following features are now available in the new interface:
*
System Tab ‑ Connectors
*
System Tab ‑ Settings and Configuration
*
User Menu ‑ Upgrade appliance
Fixes
• The default setting of the ‘ManageOpenForBackup’flag has been changed from false to true as
a workaround for ACLs being corrupted on C:\windows\syswow64 and C:\windows\system32
when installing an application. (ALHELP‑1327)
• Searchlocations that areremoved using the Indexing Options appletare now removed correctly.
(ALHELP‑1493)
• Setting the attributes of a directory no longer fails when located on a read‑only volume (elastic
app layer). (ALHELP‑1500)
• Connections from VDAs in the process user layer are now evenly distributed across domain con‑
trollers. (ALHELP‑1535)
• The user personalization layer now installs correctly in XenDesktop. (ALHELP‑1545)
• Upgrading the Enterprise Layer Manager (ELM) from 21.06 to 21.12 no longer fails. (ALHELP‑
1559)
• The user’s session now times out appropriately in the new UI. (UNI‑85868)
App Layering 2112
This release introduces a new App Layering management experience and support for additional ver‑
sions of Windows.
• Support for additional versions of Windows: You can use the following versions of Windows
as an OS Layer in App Layering 2112 and later.
– Windows Server 2022
– Windows 10 version 21H2
– Windows 11, with the following caveat
© 1999–2024 Cloud Soware Group, Inc. All rights reserved. 14

App Layering
Caveat:
To support Windows 11 as an OS Layer, you must upgrade the App Layering appliance to
version 2112. That version provides you with the requisite updates to the Optimizer Script
builder, the Unattend Script builder, the SetKMS, and the guest installer to set the OS type.
The gold image tools used to set up the gold image must be at version 2112 or later.
• New App Layering management experience. This version of App Layering introduces Phase 1
of a new, enhanced management experience. Phase 1 of the new user interface will temporarily
coexist alongside the existing user interface on the App Layering appliance. You can access each
by way of a unique, distinct URL in your web browser. Note that we have not yet ported some
administrative activities outside of image templates and layers to the new user interface. For
those, you need to continue to use the original interface. When accessing the appliance from a
modern web browser such as Chrome, Edge, or Firefox, the new management console appears.
If you use Internet Explorer to access the appliance, the legacy management console appears.
– Using the IP address for the appliance, enter the following URL in a compatible web
browser:
https://<ip_address_of new_vm>
– Features available in the new user interface:
*
Template management
*
App, Platform, OS Layer management
*
Task management
*
Login
*
Elastic Layer user assignment
– Browser support:
*
Microso Edge
*
Google Chrome
*
Mozilla Firefox
Fixes
• Oice 365: Excel can become unresponsive on images created in version 2110 of the App Layer‑
ing appliance. (ALHELP‑1537)
• When using Zscaler, a driver error is reported when any elastic layer is attached to the VM.
(ALHELP‑1528)
• Oice 365: User layers are not being attached to the session host. The issue occurs due to a file
lock on PEUPTemplate.hive (ALHELP‑1525)
© 1999–2024 Cloud Soware Group, Inc. All rights reserved. 15

App Layering
• App Layering 2107: VDAs can experience a fatal exception, displaying a blue screen at random.
(ALHELP‑1436)
App Layering 2110
This release supports:
• VMware Cloud on:
– Azure
– Amazon Web Services (AWS)
• The Citrix Provisioning connector now lets you specify a hypervisor connector configuration to
use for Oload Compositing. Selecting Oload Compositing in a Citrix Provisioning connec‑
tor configuration enables support for VHDX disk format, UEFI firmware, and Secure boot.
• If Oload Compositing is enabled in a Citrix Provisioning connector configuration, you can add
a custom description to the vDisk in the Publish Image wizard. For example, if you publish an
image template using a Citrix Provisioning connector that has Oload Compositing enabled,
you can add a comment in the Publish Layered Image wizard and the comment appears as the
resulting vDisk’s description. If Oload Compositing is not enabled or you leave the Comment
field blank, the description defaults to “Layered Image”. The maximum length for a vDisk de‑
scription is 250 characters. If longer, it is truncated.
• (Advanced feature) You can now exclude specific files and folders from a composited layer to
prevent files from persisting on a user’s desktop. For example, you can exclude antivirus so‑
ware files and folders that must not persist for a desktop from one login to the next.
Fixes
• An issue where images that include a NetApp layer become stuck at 100% CPU utilization has
been fixed in cooperation with NetApp developers. (ALHELP‑1508)
• When User layers are enabled and Windows is updated, the Windows Start Menu and Search
features work properly. (ALHELP‑1482)
• When you create an OS layer and a platform layer and install the Citrix Virtual Delivery Agent
(VDA), the published image no longer results in a blue screen. (ALHELP‑1485, ALHELP‑1486)
• The issue with MediTech Expanse aer upgrading the App Layering appliance has been fixed.
(ALHELP‑1494)
• The issue that prevented the successful setup and use of Dropbox on a user layer has been fixed.
(ALHELP‑1416)
© 1999–2024 Cloud Soware Group, Inc. All rights reserved. 16

App Layering
• The issue where the Windows search index was corrupted when creating an OS layer or adding
a version to it is fixed. (ALHELP‑1433, ALHELP‑1453)
Labs feature
Labs features are previews of potential functionality. While a feature is in Labs, do not use it in pro‑
duction. There is no guarantee that this feature will be included in the product, nor that it works the
same way if it is.
• You can assign app layers as elastic layers on images that use a dierent OS layer: Elastic
layer assignments normally require the App layer assigned uses the same OS layer that was
used to create the App layer. You can try assigning an App layer as an Elastic layer on a layered
image that uses a dierent OS layer.
Important:
Issues can result from running an elastic layer on a dierent OS layer than the one used to
create it.
To use a Labs feature, enable it in System settings.
Upgrade path
For the latest fixes and features, including compatibility with other soware packages that you use,
we encourage you to stay current with the App Layering upgrades.
You can upgrade from any App Layering release from 19.x to present.
App Layering 2107
This release includes the following improvements.
Fixes
• Aer upgrading from vSphere 6.7 to vSphere 7.0 Update 2 or later, you can now create layers
and publish images with VSAN storage. (ALHELP‑1410)
• Aer upgrading to Windows 10 1909 or 20H2, ClickOnce apps now work with existing user layer
disks. (ALHELP‑1425)
• An app layer that is assigned to a subset of users on a machine and contains certain Windows
system files unique to the app no longer causes problems for users that are not assigned to the
layer. (ALHEALP‑1427)
© 1999–2024 Cloud Soware Group, Inc. All rights reserved. 17

App Layering
• On an image with EL running, you can select the remote admin share where OneDrive saves files
without the machine failing with a blue screen. (ALHELP‑1431)
• When Elastic Layering is enabled on an image, a script that installs an application on the image
now completes as expected. (ALHELP‑1432)
App Layering 2106
This release includes the following new feature:
• An updated version of the OS Machine Tools. We recommend that you update your OS layers
with the new tools now, so that you can use any new features that require them in the future.
Fixes
• Aer you finalize a platform layer, the machine no longer fails with a blue screen. (ALHELP‑1177)
• When Oload compositing is enabled and you set the default size of the elastic layering volume,
the writable partition size is updated for all published images. (UNI‑76795)
• When logging in aer adding elastic layers to an image, users no longer receive errors like the
following (ALHELP‑1445):
“Critical Error: Your Start menu isn’t working. We’ll try to fix it the next time you sign in.”
“Citrix App Layering ‑ System Error: An unexpected system error occurred. Retry the operation
or contact technical support.”
• Files on an elastic layer no longer disappear and reappear under certain conditions. (ALHELP‑
1405)
• When using FSLogix and OneDrive with elastic layers enabled, the VM can now access the user
profile folder through the admin share (\\PCName\C$\Users). (ALHELP‑1386, ALHELP‑1405,
ALHELP‑1431)
• FSLogix Profiles now work correctly when the app is installed on an app layer. (UNI‑83092)
App Layering 2104
This release includes the following improvements.
Fixes
• Synchronization of Layer version repair data now runs faster. (UNI‑82197, ALHELP‑1385)
© 1999–2024 Cloud Soware Group, Inc. All rights reserved. 18

App Layering
• The OiceNoReReg.cmd script now updates existing values. (UNI‑82088)
• When accessing a published image running Windows 10 1909, you no longer receive the mes‑
sage, “The User Profile Service failed the sign‑in. User profile cannot be loaded”. (ALHELP‑1307)
• Aer you install Crowdstrike, Edge launches on the first attempt. (ALHELP‑1404)
• When an image is running both elastic layering and Crowdstrike, Chrome and Microso Teams
now launch on the first attempt. (ALHELP‑1392)
• If you install apps that have files with boot‑level components and Crowdstrike tags them, the
apps no longer fail aer you add a version to the layer. (ALHELP‑1397)
App Layering 2102
This release includes support for the following enhancements:
• App Layering now runs on Google Cloud! You can:
– Install an App Layering appliance on Google Cloud.
– Create connector configurations for Google Cloud and Machine creation for Google Cloud.
– Create layers on Google Cloud.
– Move layers from a dierent platform to Google Cloud, using the Export and Import fea‑
ture.
– Publish layered images on Google Cloud, or to Machine creation running on Google Cloud.
Fixes
• Apps published from an image template with elastic layering enabled now launch as expected.
(ALHELP‑1306, ALHELP‑1315, UNI‑81247)
• When booting a session host with UEFI and Citrix Provisioning, the session no longer fails with
a blue screen on the target device. (UNI‑80889)
• Compositing no longer fails because the CE runs out of available drive letters (ALHELP‑1286,
UNI‑80179)
• When an app is installed on a packaging machine, MSIEXEC.EXE no longer removes permissions
on syswow64 content. (ALHELP‑1327, UNI‑81548)
• WebEx no longer fails with Error 1407 when trying to uninstall it from a user layer. (ALHELP‑1339,
UNI‑81434)
• Apps in the Windows Start menu are listed in the correct section rather than in a section with
name ms‑resource:AppName when user layers are enabled. (ALHELP‑1323, UNI‑81402)
© 1999–2024 Cloud Soware Group, Inc. All rights reserved. 19

App Layering
• Logging into the App Layering management console no longer results in a system error.
(ALHELP‑1332, UNI‑81391)
• VDAs no longer fail with a bluescreen on App Layering 20.11. (ALHELP‑1337, UNI‑82008)
• The VDA is no longer unresponsive when users log in on to the VDA with elastic Layering enabled.
(ALHELP‑1369, UNI‑81777)
• Machine creation for vSphere connector no longer deletes files under UnideskCacheddisks on
VMware. (ALHELP‑1345, UNI‑81662)
• When assigned a user layer, you no longer get an error when accessing the Policy tab in Studio.
(ALHELP‑1355, UNI‑81749)
App Layering 2011
This release includes support for the following enhancements:
• We now support Nutanix version 5.18.
• You can use Windows 10, version 20H2 as an OS Layer in App Layering version 2011 and later.
However, the following caveat applies.
Caveat:
If you upgrade the OS layer to Windows 10 20H2 from an earlier release, upgrade directly
to Build 19042.630, or above. Upgrading to builds of Windows 10 20H2 released before
11/16/2020 can result in inconsistent image deployments. For example, if you publish im‑
ages using a template with Generalize Oline selected, the published images might not
work correctly.
Fixes
• Windows 10, 2004 login times. An issue where Windows 10 2004 sometimes took 2–4 minutes
to start, and occasionally included black‑screens for 30‑45 seconds has been fixed. (UNI‑80656)
• kmssetup script not added to the startup scripts folder. An issue that prevented the kms‑
setup.cmd script from being added to the startup scripts folder when unzipped has been fixed.
(ALHELP‑1279, UNI‑80410)
• HP UPD driver not available as a printer driver. When you include an HP UPD driver in an app
layer that becomes part of a published image, the driver is now available as a printer driver. The
issue that prevented the driver from being listed has been fixed. (ALHELP‑1278, UNI‑80426)
• Sessions hangs for minutes. An issue that caused sessions to hang for minutes has been fixed.
This issue appeared aer upgrading to App Layering 2005. (ALHELP‑1263, UNI‑80262)
© 1999–2024 Cloud Soware Group, Inc. All rights reserved. 20

App Layering
• User cannot reconnect to their desktop in App Layering 2009. An issue that caused ran‑
dom occasional blue screens when users tried to reconnect to their desktops has been fixed.
(ALHELP‑1317, UNI‑81156)
• When using the console on a 4K display, dialogue boxes open in top le corner. The issue
that caused dialogue boxes to be displayed o center has been fixed. (ALHELP‑1309,UNI‑78951,
UNI‑78952)
App Layering 2009
This release includes support for the following enhancements:
• You can now override the default repository path and layer size for user layers by configuring
Citrix Studio Policies.
• The user interface for the App Layering management console has been updated with new Citrix
branding images.
App Layering 2008
This release includes support for the following features and enhancements:
• Windows 10, 2004 support: Windows 10, 2004 is now supported as the OS for layered images.
Using Windows 10, 2004 requires App Layering version 2008 or later. The required changes for
this version of Windows 10 are not in previous App Layering releases.
• Citrix Hypervisor 8.2 support We now support Citrix Hypervisor version 8.2.
Important:
App Layering 20.8.3 includes an important update to the included drivers. If you are using a
secure boot, you must upgrade to 20.8.3!
The 20.8.3 installation and upgrade packages are available for download. For new installations, down‑
load the Appliance Installation Package. For upgrades, download the Appliance Upgrade Package.
Fixes
• VM in vSphere with elastic layers enabled no longer fails aer being deployed to a Citrix
Provisioning server. An issue that had caused a VM in vSphere with elastic layers enabled to
fail aer being deployed to a Citrix Provisioning server was fixed. (ALHELP‑1202, UNI‑76300)
• An issue that had caused the AutoDesk 2020 installer to fail in an app layer has been fixed.
(ALHELP‑476)
© 1999–2024 Cloud Soware Group, Inc. All rights reserved. 21

App Layering
• Users can now synchronize their OneDrive files without issues when On Demand syncing and
Elastic layers are enabled (ALHELP‑468)
• Chrome extensions no longercause the errormessage, “FAILED_TO_COPY_EXTENSION_FILE_TO_TEMP_DIRECTORY,”
when elastic layers are enabled and an app layer is assigned. (ALHELP‑419)
App Layering 2005
The App Layering 2005 release includes support for the following features and enhancements:
• Security enhancements: Security enhancements include cipher suite updates, third‑party
component upgrades, and runtime environment upgrades.
• Secure boot support: Guest drivers are certified via Microso’s WHQL program. You can use
certified guest drivers in secure boot configurations. (UNI‑74917)
• Customer user layer path: User layer files can now be stored in network shares whose loca‑
tions are specified using custom paths. The custom paths can include environment variables.
(UNI‑78291)
• Applications with services in user layer: When an application installed in a user layer contains
Windows services, such as Google Chrome, those services are started as expected when the user
logs in. (UNI‑77660)
• 2005 upgrade package: The App Layering 2005 upgrade package is large enough that older ap‑
pliances cannot download it automatically. If you are running version 1911 or older, download
the package manually from the downloads site. Also, we recommend running the upgrade from
a management console in Secure HTTP (HTTPS). If you upgrade while in HTTP, messages do not
display in the browser. If that happens, refresh the browser aer 20 minutes. (Refreshing won’t
cause issues in spite of the message that says not to refresh.) If the upgrade is still running, you
get a “service unavailable error.”You can ignore that message and keep refreshing the browser
every few minutes until the login page appears.
Fixes
• When using oload compositing with VMware vSphere, you can use layer names that start with
brackets [], as long as you follow the closing bracket with a space. For example, the name
[OS] Windows 10 works, but the name [OS]Windows 10 hangs in vSphere studio and times
out aer about 40 minutes. (UNI‑78452)
App Layering 2003
This release includes the following:
© 1999–2024 Cloud Soware Group, Inc. All rights reserved. 22

App Layering
• We now support the following hypervisor, provisioning, and connection broker soware ver‑
sions:
– Citrix Hypervisor 8.1
– Nutanix AOS 5.16
• When administrators configure a larger default user layer size, the disk will be automatically
expanded the next time the user logs in.
• When creating your OS layer in MS Hyper‑V or VMware vSphere, you can now import the OS
image, by using a script in the OS Machine Tools. The script imports the OS image right from
the virtual machine, instead of using the management console and connector configuration.
The script uses the Oload Compositing feature, which speeds up the import, and allows you
to use a wider variety of virtual machines, including UEFI‑based machines.
Fixes
• The Guest Layering service (ULayer) has been modified to not depend upon the Server service
running on the end users’virtual machines. (UNI‑77242)
• When delivered as an elastic layer, the Artiva application no longer fails when users attempt to
log in. (UNI‑76487)
• An issue that had caused the StartCCMEXEC.cmd script to continually grow the log file,
StartCCMExec.txt, even when CCMExec was not installed, has been fixed. To apply the
fix, download the new OS Machine Tools folder for 20.3, and replace the StartCCMEXEC.cmd
file with the new version. (UNI‑77471)
• When users install fonts on a user layer or elastic layer, the fonts persist the next time they log
in. (UNI‑63839)
• When using a connector with Oload compositing enabled to publish an image, 8.3 file names
are no longer incorrectly modified. (UNI‑76961)
• When adding a version to an app layer, you no longer receive the error “The Operation Failed
due to a missing File. VMDK was not found.”(UNI‑77702)
• The issue with expiring JSON Web Tokens (JWT) when using the Oload Compositing feature in
the connector configuration has been fixed. (UNI‑76859)
• The Hyper‑V connector now reports the disk file size rather than its logical size, which was
quickly filling up the cache. (UNI‑76692)
• Compatibility with Citrix Studio GPO policies when using images with user layers has been im‑
proved. (UNI‑76918)
App Layering 2001
This release includes the following:
© 1999–2024 Cloud Soware Group, Inc. All rights reserved. 23

App Layering
• We now support the following hypervisor, provisioning, and connection broker soware ver‑
sions:
– Citrix Provisioning version 1912
– Citrix Virtual Apps and Desktops version 7 1912
• The following Windows 10 versions are now supported as an OS Layer:
– Windows 10, version 1909
– Windows 10, Enterprise Virtual Desktop edition (available from Microso in Azure only)
• Our VMware vSphere connector now supports the VMware Paravirtual SCSI Controller. (UNI‑
75620)
Fixes
• In our App Layering appliance (ELM) deployment script for Azure, we have extended the expi‑
ration dates of signed Azure URLs pointing to standard repository disks. Make sure that you
update your Azure deployment scripts from this release accordingly.
• VDA installations no longer fail on a packaging machine. (UNI‑76299)
• When restarted, a layered image with a user layer no longer drops scheduler tasks. (UNI‑77084)
App Layering 1911
This release includes the following:
• We now support the following hypervisor, provisioning, and connection broker soware ver‑
sions:
– XenApp and XenDesktop 7.15 LTSR CU5
• VMware vSphere:
– Use the new Oload compositing option to significantly reducethe time it takes to package
layers and publish images.
– Select thin provisioned disks and UEFI (no secure boot with elastic layers and user layers)
options.
– Use the vSphere connector to package layers and publish images to VMware Cloud on AWS.
Fixes
• An error when finalizing OS layers with MBR partitions aer a major Windows 10 upgrade has
been fixed. (UNI‑76210)
© 1999–2024 Cloud Soware Group, Inc. All rights reserved. 24

App Layering
• Compatibility with the Microso System Center Configuration Manager (SCCM) has been im‑
proved. (UNI‑76198, UNI‑76126, UNI‑76129)
• Users no longer lose their connection to a session host where FSLogix is running and elastic
layering is enabled. (UNI‑73793)
• Rapid Reader 8.3 now starts as expected aer being installed on a packaging machine. (UNI‑
76316)
• IntelliJ IDEA Ultimate no longer freezes the desktop when the app is started. (UNI‑76075)
• Users no longer get a blue screen when they open SQL Management Studio and attempt to save
a Query to OneDrive or a SharePoint folder. (UNI‑76427)
App Layering 1910
This release includes the following:
• We support the following new versions of hypervisor, provisioning, and connection broker so‑
ware:
– Citrix Virtual Apps and Desktops version 7 1909
– Citrix Provisioning version 1909
– Nutanix Acropolis Hypervisor (AHV) version 5.11
– VMware Horizon View 7.9
• On the Hyper‑V platform, you can package layers and publish images using Oload Composit‑
ing to dramatically improve performance and compatibility. Gen2 VMs and VHDX disk formats
are now supported.
• The App Layering Agent has been updated to support the new Oload Compositing feature. If
you use the agent in your deployment, we strongly recommendthat you install the agent update
on any servers where it is installed.
• Windows Search index performance is improved when using full User Layers.
• For administrators publishing layered images, this version adds validation and warnings to give
guidance on what disk size to use based on selected app layers.
Fixes
• A PVS Support article that called for removal of the CDF Driver Registry entry has been updated
to fix issues troubleshooting Profile Management. (UNI‑75720)
• The issue where Defender didn’t update correctly has been fixed. (UNI‑74918)
• Windows Search Service starts as expected on a packaging machine when using a caching con‑
nector. (UNI‑75915)
© 1999–2024 Cloud Soware Group, Inc. All rights reserved. 25

App Layering
• Windows Defender now starts successfully on an app layer created from a Windows 1809 OS
layer. (UNI‑74997)
• Users can now sync their OneDrive files when On Demand syncing and elastic layers are enabled.
(UNI‑74618)
• OneDrive’s on‑demand feature now streams files correctly when elastic layering is enabled.
(UNI‑73121)
• User layer repairs now complete successfully when the minimum recommended permissions
are set on the Users\ path. (UNI‑75552)
• When installing a Chrome extension with user layers enabled and an app layer assigned
as an elastic layer, you no longer receive the error Can not install package:
FAILED_TO_COPY_EXTENSION_FILE_TO_TEMP_DIRECTORY (UNI‑75568)
• Windows Search index performance has been improved when using full user layers. (UNI‑73049)
• This release adds validation and warnings about what disk size that you can use. The guidance
is based on your configuration and the app layers selected. (UNI‑54390)
App Layering 1908
This release includes support for these new features and improvements.
• Windows versions: Windows 10 version 1903 is now supported as an OS Layer.
• Connection brokers: We now support the following connection broker soware version:
– VMware Horizon View 7.9
• User layer repair: You can now manually repair user layers so that all files and registry settings
coming from a specific set of app layers can be made visible again.
Fixes
• Hyper‑V connector PowerShell sessions no longer expire when a file copy takes longer than 30
minutes. (UNI‑74283, UNI‑74292)
• The issue where System and Display properties did not open correctly when user layers were
enabled has been fixed. (UNI‑74547)
• Removing store apps from a Windows 10 OS layer no longer causes features, like Settings and
Display Properties
, to malfunction. (UNI‑74852)
• The Windows Defender update KB4052623, now successfully installs and works for user layer‑
enabled users. (UNI‑74942)
© 1999–2024 Cloud Soware Group, Inc. All rights reserved. 26

App Layering
Contact Citrix
We welcome your feedback about this release.
• Use our online Forum to speak directly with Citrix employees and other organizations deploying
Citrix App Layering.
• For product issues and questions, open a Support Case.
We look forward to hearing what you think about App Layering.
Related information
• Support Knowledge Center
• Enterprise Architect TechTalks: Citrix App Layering FAQ
• Citrix App Layering Discussions
• App Layering Recipes
Deprecation
December 5, 2023
The announcements in this article are advanced notice of the Citrix App Layering features that are be‑
ing phased out, so that you can make timely business decisions. Announcements can change in sub‑
sequent releases and might not include every deprecated feature or functionality. For details about
product lifecycle support, see the Product Lifecycle Support Policy article.
Deprecations and removals
The following list shows the Citrix App Layering features that are deprecated or removed.
Deprecated items are not removed immediately. Citrix continues to support a deprecated item until
removing it in a future release.
Removed items are either removed, or are no longer supported, in Citrix App Layering.
© 1999–2024 Cloud Soware Group, Inc. All rights reserved. 27

App Layering
Item Description
Deprecation
announced Removed Alternative
Oice 365/Oice
365 Session User
Layer
Deprecated
support for Oice
365 as a selection
for the user layer
type.
August 2023 Target: Q1 2024 Use Citrix Profile
Management for
advanced Oice
365 use cases.
Support for
VMware vSphere
6.7
Removed support
for VMware
vSphere 6.7.
June 2023 Use higher
versions of
VMware vSphere.
Azure connector Deprecated
support for the
legacy Azure
connector.
November 2022 Target: Q4 2023 Use the Azure
Deployments
connector,
released with App
Layering 2211.
VMware Horizon
View connector
Deprecated
support for the
VMware Horizon
View connector
March 2022 Q3 2022 December 2023
Known issues
May 28, 2024
App Layering upgrade
App Layering 2312
Upgrading to App Layering 2312 might fail, returning the error “A failure occurred while upgrading
the appliance. Try the upgrade again aer reverting from a clean snapshot.”We are aware of an issue
with some appliances that were upgraded from previous versions. In this scenario, the upgrade might
fail due to the presence of legacy upgrader components. We are working on a patched build for App
Layering 2306 that contains a permanent fix for this issue.
To work around this issue, it is necessary to remove the legacy module by making the following
changes in the Layering appliance:
© 1999–2024 Cloud Soware Group, Inc. All rights reserved. 28

App Layering
1. Log in to the appliance console using the root login and password.
2. Run the command “yum remove mod_http2”. It might take several minutes for the command
to run.
3. Aer the command completes, log back into the appliance using a web browser and rerun the
upgrade.
4. It might take 30 minutes or more for the upgrade to complete, but it must now succeed.
App Layering 2005
• The App Layering 2005 upgrade package is large enough that older appliances cannot download
it automatically. If you are running version 2001 or older, download the package manually from
the downloads site.
• We recommend running the upgrade from a management console in Secure HTTP (HTTPS). If
you upgrade while in HTTP, messages do not display in the browser. If that happens, refresh the
browser aer 20 minutes. (Refreshing won’t cause issues despite the message that says not to
refresh.) If the upgrade is still running, you get a “service unavailable error.”It is safe to ignore
the message and keep refreshing the browser every few minutes until the login page appears.
• If you have two upgrade packages with the same name in dierent folders in Network File Share,
selecting one of those packages causes both packages to be selected. If both packages have the
same version, the upgrade succeeds. If they have dierent versions, the system chooses the
lower version number. This occurs with Enterprise Layer Manager (ELM) version 22.2.
App Layering appliance and management console
• In the new UI, platform types cannot be edited. Edit Platform Types still functions correctly in
the old UI. (UNI‑86856)
• When installing the App Layering appliance, you must use the default CPU setting of 4 CPUs.
• If you use roles in a complex Active Directory environment and logins are slow, assign all roles
to explicit users rather than to groups.
App Layering documentation links
The documentation links in the management console open as a blank page in Internet Explorer 11. To
get around this issue, paste the link into another browser. The documentation displays correctly.
© 1999–2024 Cloud Soware Group, Inc. All rights reserved. 29

App Layering
App Layering agent
By default, the Citrix App Layering Agent runs under the Local System account on the Hyper‑V server.
If you change the account to anything other than Local System, the agent cannot transfer disks to
and from the appliance.
App Layering OS Machine Tools
• (Release 19.5 only) Aer upgrading to release 19.5 (or later) from 19.3 (or earlier), be sure to
update KMS Oice Activation to use Oice 2019. When preparing your OS image for layering,
download and run the new App Layering OS Machine Tools.
• (Release 19.1 only) When preparing your OS image for layering, ensure that your KMS Oice Acti‑
vation is triggered at desktop startup. For this release only, download and run the App Layering
OS Machine Tools from Release 18.12.
Microso Teams 2.x
Microso Teams 2.x has changed its installation method and now installs under C:\Program
Files\WindowsApps. To support this change, you must be running App Layering version 2403.2
or later. You can download an upgrade disk in the App Layering downloads page that includes this
fix.
Keep in mind:
• You must still follow MSFT recommendations for the exclusion of certain folders/files from per‑
sisting.
• Elastic‑fit indicates these app layers are not suitable for elastic assignment (include the UW‑
P/Appx app layers in the published image).
• Existing user‑layer users go through a “first‑time”login experience if changes are made to the
mix or versions of these two applications are changed in the image.
• When updating Microso Teams in an app layer revision, remove the previous version before
installing the newer version.
• If Microso Teams 2.1 was previously installed into the OS layer, it must be removed from the
OS layer, before creating App Layer(s).
If you are running an earlier version of App Layering, a workaround is required to install Microso
Teams 2.1 in the OS Layer, use the following workaround.
Workaround:
1. Create an OS layer version.
© 1999–2024 Cloud Soware Group, Inc. All rights reserved. 30

App Layering
2. Download the .exe installer for Windows 10 or 11.
3. Download MSIX.
Note:
For more information on the .exe installer and MSIX, see the Microso documentation.
4. Open an admin command prompt.
5. Disable Microso Teams auto update using the following command: reg add hklm\
software\microsoft\teams /v disableAutoUpdate /t REG_DWORD /d 1 /
f
6. Based on where your .MSIX is located, do the following steps:
a) For Windows 10 or 11, use the following command: .\teamsbootstrapper.exe -p
-o "c:\path\to\teams.msix"
b) For Windows Server 2016, 2019, or 2022, use the following command: Dism /Online
/Add-ProvisionedAppxPackage /PackagePath:<MSIX package path>
/SkipLicense
7. To complete the installation, launch Microso Teams.
8. Create a UserExclusion file to include the following MSFT‑recommended exclusions:
• c:\Users\*\AppData\Local\Publishers\8wekyb3d8bbwe\TeamsSharedConfig
\Meeting-Addin\
• c:\Users\*\AppData\Local\Packages\MSTeams_8wekyb3d8bbwe\
LocalCache\Microsoft\MSTeams\Logs\
• c:\Users\*\AppData\Local\Packages\MSTeams_8wekyb3d8bbwe\
LocalCache\Microsoft\MSTeams\PerfLogs\
• c:\Users\*\AppData\Local\Packages\MSTeams_8wekyb3d8bbwe\
LocalCache\Microsoft\MSTeams\EBWebView\WV2Profile_tfw\WebStorage
\
9. Finalize the OS layer version.
10. (Optional) Ensure no application layers containing a previous Microso Teams version is as‑
signed elastically or statistically.
Note:
• Don’t run the .MSIX file itself. This installs Microso Teams and would be available in the
Start menu but when clicked, the process doesn’t start.
• Don’t log in to any Microso Teams accounts while creating an OS layer and don’t change
any Microso Teams settings.
© 1999–2024 Cloud Soware Group, Inc. All rights reserved. 31

App Layering
Personal accounts are not supported with the new Microso Teams.
For more information, see Microso documentation.
[UNI‑90395]
Elastic Layering
• Microso Oice cannot be elastically layered due to the way its licenses are integrated with the
Windows Store. The Oice app layer must be included in the Layered image.
• When you enable an image with elastic layering, users might be able to view files and directories
from other sessions in Windows Explorer. Directories explored in the other session might create
folders visible to all sessions that have permission to browse that directory.
• If you use elastic layer assignments with Windows Server 2008 or Windows 7, create your file
share with a sectorsize of 512. For details about this issue and related operating system updates,
see the following:
– Microso support policy for 4K sector hard drives in Windows
– Update that improves the compatibility of Win 7 and Win Server 2008 R2 with Advanced
Format Disks (UNI‑48984)
User layers
• Signing on aer upgrade starts the Windows First Sign‑in screens: When you sign in aer
upgrading to 4.10 or later, the usual Windows First Sign‑in brings the user layer up‑to‑date with
the OS version. The process preserves user layer files.
Windows 10 support
• Windows 10, version 20H2 upgrades. If you upgrade the OS layer to Windows 10 20H2 from an
earlier release, upgrade directly to Build 19042.630, or later. Upgrading from builds of Windows
10 20H2 released before 11/16/2020 can result in inconsistent image deployments. For example,
if you publish images using a template with Generalize Oline selected, the published images
might not work correctly.
• Upgrading requires extra steps when going to a new Windows 10 major release: During the
upgrade, Windows 10 can create a recovery volume on the same disk as the OS layer version.
Always delete this volume before you finalize the OS layer version. Otherwise, the recovery
volume can cause desktops to fail to start correctly. For more information, see Issue 9 under
Windows 10 v2004, 20H2, 21H1 & 21H2 ‑ Citrix Known Issues.
• If you have generated and applied the App Layering Optimizations.cmd script to a
Windows 10 1909 OS layer, the Search option on the Start menu might not work as expected.
© 1999–2024 Cloud Soware Group, Inc. All rights reserved. 32

App Layering
To avoid this issue, add a version to the OS layer and run the program c:\windows\setup
\scripts\Optimize.hta. To build a new Optimizations.cmd script to apply to the
new layer version, deselect Disable tablet input service (Section 6, Option M) and select
Save File. Before finalizing the OS layer, run the command Powershell Set-Service
TabletInputService -startuptype manual to undo the eect of any previous
Optimizations.cmd that might have disabled the service.
Connectors
• When using the Azure Deployments connector, if you delete all templates and edit the connec‑
tor to choose a new template, a deleted template version appears. Then when you click Save,
an error appears. As a workaround, reselect a valid template version before clicking Save. (UNI‑
88412)
• When using the Windows mini‑boot disk option, you can specify up to four Prerequisite layers
for any given App layer. If an app requires more than four other applications to be present during
installation, install multiple apps in one layer. (UNI‑69524)
• When creating a layer (app, OS, or platform) on Windows 7 64‑bit, if you select Oload Com‑
positing in the connector configuration, you can have issues adding a version to the layer. An
error occurs and the packaging machine is not created. When Oload Compositing is not se‑
lected in the connector configuration, the packaging machine is created. (UNI‑82545)
• Receiving 503 error, “Server Busy issues”from Azure. If you consistently receive this error, follow
the steps in CTX310868. This issue happens sporadically, and a solution for it is being tested.
(ALHELP‑1383)
• If you attempt to enter a name for a connector, and that name already exists, you receive a
generic error message from the system, rather than the correct error message. The issue occurs
for the Azure Deployments, Machine Creation for Azure Deployments, VMware vSphere,
and Machine Creation for vSphere connectors. (UNI‑89218)
Citrix Provisioning
• When you create an image template, the target device hardware settings must match the Win‑
dows operating system and platform layer settings. Ensure that the hardware settings on the
target device match the operating system and platform layer hardware settings, especially the
number of CPUs. If the settings don’t match, you can get a “restart required”message when you
start the published image. (UNI‑50799)
• If you use Provisioning Services, you must disable IPv6 in the OS layer and not in the Platform
layer. (UNI‑53600)
• When importing VHDX files published from App Layering to the PVS disk store, you sometimes
receive an invalid disk message. Eliminate the error by changing the period (.) characters in the
© 1999–2024 Cloud Soware Group, Inc. All rights reserved. 33

App Layering
published file name’s date and time. A valid file name contains only one period for the VHDX
file name extension. (UNI‑75902)
• When Oload Compositing is selected in the connector configuration:
– The path for the Citrix Provisioning Store fails to validate if it contains spaces. Replace the
spaces with %20 to make the name valid. (UNI‑84868)
– Publish jobs fail if the File Share Path ends with a backslash (\). (UNI‑85045)
– Publish jobs fail with a ComponentActivator error message if the Domain User does not
have Read and Write permission to the File Share Path. (UNI‑85020)
• When you select a Hyper‑V connector for the oload compositing configuration, and the OS
Layer is Gen 2, you must create another version of the OS layer, and then create the platform
layer from that OS version. Otherwise, the target does not boot. (UNI‑85044)
• When setting the Compositing File Share Path for the connector configuration, connectivity be‑
tween the compositing engine and the Citrix Provisioning Store is not verified. If the store path
doesn’t map to the File Share Path, you receive an error similar to:
– Error: “An unexpected system error occurred. Retry the operation or contact technical
support. Exception Message: Response status code does not indicate success: 404 (Not
Found). [Exception Details]
(UNI‑85045), (UNI‑85020)
XenServer
• When you prepare your operating system image for use in your XenServer, you must open port
5900 to allow console access. (UNI‑50846)
• Always set the Citrix App Layering connector configuration to point to the master node. (UNI‑
52454)
• Prerequisite layers:
– If a machine hangs at boot and a prerequisite layer is selected, one of the layer disks is
probably not attached. Ensure that the Citrix Guest Tools are included in either the OS or
platform layers.
– If you are using Prerequisite layers to create either the OS or platform layer, Citrix Tools
must be present. Without the tools, the packaging machine fails and you receive a blue
screen. XenServer isn’t able to see any devices attached aer the DVD drive. The DVD
drive is always in the third slot.
(UNI‑67741)
© 1999–2024 Cloud Soware Group, Inc. All rights reserved. 34

App Layering
Citrix Virtual Apps and Desktops (CVAD)
• When updating Citrix Virtual Apps and Desktops to version 7.15 CU4, you must first install .NET
Framework 4.7.1 on a new version of your OS layer, rather than on the platform layer. Installing
.NET Framework 4.7.1 on the OS layer ensures that all app layers, platform layers, and images
work correctly. The latest Windows updates already include .NET Framework 4.7.1 as part of the
updates. (ALHELP‑588, UNI‑75108)
Google Cloud
• When importing layers from another platform, you must add a version to the OS layer, and
switch to using the new layer version from then on. Otherwise, packaging machines and pub‑
lished images are likely to fail with a blue screen.
• Google Cloud Connector Configuration. “Check Credentials”verifies the Service Account User
role. If the service account specified in the Google Cloud connector configuration Service Ac‑
count JSON key file is dierent than the service account associated with your selected In‑
stance Template, your service account in the configuration must have the Service Account
User role. If it does not, then you receive an error when deploying a machine using that con‑
nector configuration. (UNI‑82082)
Nutanix Acropolis
• The following message during app layer creation indicates that the app layer settings specify a
platform layer. Do not use platform layers with the app layer’s performance‑enhancing caching
feature. (UNI‑67742)
VMware vSphere
• When creating the OS layer using the Create OS Layer Wizard, Unified Extensible Firmware In‑
terface (UEFI) virtual machines are listed. You cannot, however, create UEFI machines using the
wizard. Instead, use the new ImportOsLayer.ps1 script to import the OS onto the new OS
layer machine.
© 1999–2024 Cloud Soware Group, Inc. All rights reserved. 35

App Layering
• When using a vSphere connector configuration with VMware Cloud and a vSAN 7.0 Update 2 (or
later) datastore, Oload Compositing must be selected. (UNI‑85216)
• When using the new VMware vSphere connector in AL 23.4, if you select an opaque network
when creating or editing the connector, the connector fails. As a workaround, select a non‑
opaque network. Existing connector configurations using an opaque network created before
AL 23.4 continue to function normally. (UNI‑89439)
Microso Azure
• App Layering does not support Azure File storage. For storage in Azure, create an SMB file share
or a network file share. (UNI‑42272)
• Managed disks are only supported for OS imports. Packaging app layers and publishing images
only produce unmanaged disks. When creating a virtual machine in Azure, select No managed
disks.
Microso Hyper‑V
• When selecting a Hyper‑V connector configuration for Oload compositing and your OS layer
is Gen 2, the layer must have at least one version besides the original. Also, the platform layer
where the Citrix Provisioning target device soware is installed must be created using the new
OS layer version. (UNI‑85044)
• When a Hyper‑V connector configuration is set for Oload Compositing with Gen 2 (UEFI) and
VHDX, choosing VHD as the Disk Format in the Citrix Provisioning connector configuration is
allowed, but this configuration is not supported.
• When you configure Elastic Layering in Hyper‑V, you must use unmanaged RDS pools (UNI‑
53545)
• When creating an app layer, if a platform layer is specified in the app layer settings, you re‑
ceive an error. Do not use platform layers with App Layering’s caching feature. (UNI‑71868,
UNI‑67743)
• Creating an OS layer on Hyper‑V Server 2019 can result in this error:
© 1999–2024 Cloud Soware Group, Inc. All rights reserved. 36

App Layering
‘Failed to create VHD. Make sure that there is enough space on the share specified in the
connector configuration.’
This error is due to an issue with the Microso PowerShell New‑VHD cmdlet. We are keeping our
eye out for a fix from Microso. In the meantime, use the following workaround for this error:
1. Make sure that the Gold VM has no checkpoints.
2. Make sure the Gold VMs disk is in the same directory path that is configured in the connec‑
tor config. Example:
Local path is D:\Brock
Gold VM disk is stored in D:\Brock\WIn10Gold\Win10GoldDisk.vhdx
• App Layering fails to create an app/platform layer if the path to storage in the Hyper‑V connector
configuration contains a backtick (‘). For example:
1 mystoragename`
2 <!--NeedCopy-->
Printing
With App Layering images configured for Full User Layer, you can install your own printer devices di‑
rectly. However, when you log out and log in,
Printers & Scanners
no longer show the self‑installed
printer devices.
As a workaround, you can access or select the printers from within the applications.
Network
Applications that include network components may not operate correctly when installed in an App
Layer and then included in a published image. Applications of this type need to be installed into
either the OS Layer or the Platform Layer to ensure a proper merge of the network‑related registry
information in the image.
Related information
• Support Knowledge Center
• Enterprise Architect TechTalks: Citrix App Layering FAQ
• Citrix App Layering Discussions
• Application Layering Recipes
© 1999–2024 Cloud Soware Group, Inc. All rights reserved. 37

App Layering
System requirements
March 22, 2024
The App Layering virtual appliance runs on the supported hypervisors listed in this article. The appli‑
ance is where you deploy the Enterprise Layer Manager (ELM) during installation.
You can create layers to use on virtually any hypervisor or provisioning soware. For the best user
experience, publish images to the supported platforms.
Hypervisors for the appliance
The Enterprise Layer Manager (ELM) runs on a virtual appliance deployed to a supported hypervisor.
• XenServer, versions 6.5, 7.0–7.6, 8.0, 8.1, 8.2
• Azure Resource Manager
• Google Cloud
• Microso Hyper‑V running on Windows Server 2012 R2, Windows Server 2016, Windows Server
2019, or Windows Server 2022
– Generation 2 Virtual machines are supported when you use the Oload compositing fea‑
ture.
• Nutanix Acropolis Hypervisor (AHV), versions 5.0–5.5 (Prism Element only), 5.8, 5.9, 5.10, 5.11,
5.15 (long‑term support release), 5.16, 5.17, 5.18, 5.19, 6.5 (long‑term support release)
• vSphere vCenter, version 7.0 or 8.0 (including subsequent updates)
– Generation 2 Virtual machines are supported on vSphere vCenter version 7.0 or 8.0 (and
subsequent updates) when you use the Oload compositing feature
Network file share protocol
• Server Message Block (SMB)
Network Connection
• Citrix recommends a 10 Gbps connection between the appliance and the file share.
Directory service
• Microso Active Directory
© 1999–2024 Cloud Soware Group, Inc. All rights reserved. 38

App Layering
Internet browser for management console
The management console supports the following web browsers:
• Edge version 94 or later (version 102 oicially tested)
• Chrome (version 90 and 102 oicially tested)
• Firefox (version 45 ‑ 52.9 oicially tested)
Operating system for layered images
You can layer the following versions of the Windows operating system. Windows Store apps work on
all supported Windows versions.
• Windows Server operating systems ‑ The following session host versions are supported:
– Windows Server 2022, 64‑bit (Standard and Datacenter Editions)
– Windows Server 2019, 64‑bit (Standard and Datacenter Editions)
– Windows Server 2016, 64‑bit (Standard and Datacenter Editions)
– Windows Server 2012 R2, 64‑bit (Standard and Datacenter Editions)
• Desktop operating systems ‑ The following desktop versions are supported:
– Windows 11, version 22H2, supported in App Layering version 2211 and later.
– Windows 10, version 22H2, supported in App Layering version 2211 and later.
– Windows 11, version 21H2. Supported in App Layering version 2112 and later.
– Windows 10, version 21H2. Supported in App Layering version 2110 and later.
– Windows 10, version 21H1. Supported in App Layering version 2107 and later.
– Windows 10, version 20H2. Supported in App Layering version 2011 and later.
Caveat:
If you upgrade the OS layer to Windows 10 20H2 from an earlier release, upgrade di‑
rectly to Build 19042.630, or later. Upgrading to builds of Windows 10 20H2 released
before 11/16/2020 can result in inconsistent image deployments.
– Windows 10, 64‑bit, versions2004, 1909, 1903, 1809, 1803, 1709, 1703, and 1607 (Education
and Enterprise Editions)
– Windows 10, 64‑bit, versions 2004, 1909, 1903, 1809, 1803 (Professional edition)
App Layering supports single‑byte language packs for the base US English Windows operating system.
It supports multi‑byte language packs when the OS layer is deployed on supported versions of:
© 1999–2024 Cloud Soware Group, Inc. All rights reserved. 39

App Layering
• XenServer
• VMware vSphere
• Microso Hyper‑V
User layers
Full User layers are supported on the following platforms:
• Operating systems:
– Windows 10, 64‑bit
– Windows 11, 64‑bit (only if deployed to a platform enabled for oload compositing)
• Publishing platforms:
– Citrix Virtual Desktops
Layered images
Layered Images are bootable images composited from Layers. Each Layered Image contains an OS
Layer, a Platform Layer, and any number of App Layers. You can publish layered images to these plat‑
forms:
• Machine Creation for XenServer (formerly Citrix MCS for XenServer)
• Machine Creation for Azure and Azure Government
• Machine Creation for vSphere
• Machine Creation for Nutanix AHV
• Citrix Provisioning, versions 2203, 2106, 2012, 2009, 2006, 2003, 1912, 1909, 7.15 CU6, 1912 CU3,
and Provisioning Service (PVS), versions 7.15 LTSR (any version)
Notes:
– Citrix recommends network speeds of 10 Gbps to the Provisioning store.
– Provisioning Service (PVS) versions 7.1, 7.6–7.9, 7.11–7.18, and 1808 are no longer sup‑
ported.
The appliance and connectors run in the following environments:
• Citrix Virtual Apps and Desktops, versions 7: 1808, 1811, 1903, 1906, 1909, 1912 (LTSR, CU1‑ CU5),
2003, 2006, 2009, 2012, 2103, 2106, 2112, 2203 (LTSR), 2206, 2209, 2212
• Citrix XenApp and XenDesktop, versions 6.5, 7.0–7.18, and 7.15 (LTSR, CU3 ‑ CU7)
• Citrix Virtual Apps and Desktops Essentials for Azure
© 1999–2024 Cloud Soware Group, Inc. All rights reserved. 40

App Layering
• XenServer
• Google Cloud
• Microso Azure
• Microso Hyper‑V
• Nutanix Acropolis
• VMware vSphere
Desktop provisioning and application delivery
You can use layered images for Persistent desktops, as long as you do not enable Elastic layering or
User layers (Full or Oice 365).
To enable User layers or Elastic layers, you must use Non‑persistent machines.
Note:
Elastic layering does not support View Persona Management.
App Layering features by edition
Per the Citrix DaaS and Citrix Virtual Apps and Desktops (CVAD) Feature Matrix, Citrix App Layering is
available in all editions. This means that you can do the following across any number of Citrix DaaS
and CVAD sites in your environment:
• Create an unlimited number of OS, platform, and application layers
• Create an unlimited number of layered images
• Create an unlimited number of elastic layers
Plan your deployment
March 6, 2024
This section outlines things to consider when planning your Citrix App Layering deployment.
App Layering appliance
You can install an App Layering appliance on one hypervisor, and use it to publish images to the same
hypervisor or to a dierent one.
© 1999–2024 Cloud Soware Group, Inc. All rights reserved. 41

App Layering
The appliance is designed to notify you when an upgrade is available. The appliance hosts a web‑
based management console where you can manage the system, including your layers and image tem‑
plates.
• Management console: The appliance hosts a management console that you can use to create
layers for your operating system, platform soware, and applications. The console also lets you
create image templates that specify what layers to include in the images you publish.
• Backups: We recommend backing up each appliance so you don’t lose the layers you spend
time creating. You need a full backup of each appliance to guarantee that you can recover all
information from it. Although you can export and import layers, this feature is not designed for
failure recovery. For more detailed information on availability, backup, and recovery, see this
article in the Citrix Tech Zone.
Layers
The App Layering architecture lets you manage just one copyof your Windows OS and apps, regardless
of your hypervisor. You can maintain one set of apps for two environments. For example, you can
deploy an OS and its app layers in an on‑premises hypervisor and in a cloud‑based hypervisor. The
same layers run on each.
You can create layers for your operating system, platform tools, and applications. To preserve users’
settings and data, enable user layers on your image templates.
OS layer
The OS layer includes your operating system and hypervisor soware and settings. It is an essential
building block for all other layers that you create. You only need one OS layer for a specific Windows
OS. For example, if you support both a Windows desktop OS and a Windows Server OS, create one OS
layer for each. The platform and app layers you build require the OS layer you use for it.
When you add an update to one of the OS layers, the platform and app layers built with that OS con‑
tinue to run on it.
Platform layer
The platform layer includes the provisioning soware and connection broker tools. Also, if you are
publishing to a dierent hypervisor than the one in the OS layer, add the new hypervisor tools to the
platform layer.
© 1999–2024 Cloud Soware Group, Inc. All rights reserved. 42

App Layering
The platform layer ensures that your OS and app layers run flawlessly in a specific on‑premises or
cloud environment. You can reuse your OS and App layers, and select a dierent platform layer for
each hypervisor or Provisioning Service.
App layers
App layers include the soware for each of your applications. If you maintain more than one OS, you
need a set of App layers for each one.
You can deploy applications as part of layered images, or as elastic layers. Layered images are used
to provision users’systems, while Elastic layers are delivered when the user logs in.
Elastic layers
To use elastic layers you need a layered image on which you have enabled elastic layering. A typical
strategy is to:
• Deploy layered images: Include the OS and Platform layers, and applications that are for all
users. MS Oice and Visual Studio must be included in the layered image and cannot be de‑
ployed as an elastic layer.
• Elastic layers: Enable elastic layers in the image template, and then assign App layers to groups
of users and groups of machines. When elastic layering is enabled, users receive app layers
assigned to them (the user), a group they belong to, or the machine they are logging into.
© 1999–2024 Cloud Soware Group, Inc. All rights reserved. 43

App Layering
User layers
You can choose to save users’data and settings by enabling User layers in your image templates. Once
enabled, a User layer is created for each user who has access to one or more machines published using
the template. We do not use the user layers for the session host.
There are two types of User layers that you can enable on an image template: Full User layers and
Oice 365 User layers.
• Full User layers: Enable Full User layers to preserve the settings and data for all layers assigned
to the machine, for each user who accesses the machine.
• Oice 365 User layers: Oice 365 User layers are optimized for MS Outlook. Enable Oice 365
User layers to preserve the settings and data for Oice 365, including Outlook.
Connectors
Connectors are the means for the appliance to communicate with individual hypervisors or provision‑
ing soware. Typically, you need two types of connector configurations:
• Connector configuration for creating layers: Allows the appliance to access the location in
your hypervisor where you install the soware for each of your layers.
• Connector configurations for publishing layered images: Gives the appliancethe credentials
required to publish layered images to your Provisioning Service or hypervisor.
What to create in your environment
This section lays out the connector configurations that you need, and the soware to install on the OS
and Platform layers based on your target platform.
• XenServer
• MS Azure
• MS Hyper‑V
• Nutanix
• VMware vSphere
XenServer
If the appliance is installed in XenServer, use connector configurations to automate the layering and
publishing processes. If you are using an appliance running on a dierent hypervisor, use the Network
File Share to transfer the files.
© 1999–2024 Cloud Soware Group, Inc. All rights reserved. 44

App Layering
If the appliance is installed in XenServer If your appliance is installed in a dierent hypervisor
and you are creating layers or publishing in XenServer, use the connector configurations and layers
outlined in the following table.
OS Layer in XenServer: Include XenServer tools in the OS layer.
Task
Use connector
configuration
For appliance to
access location of
Include in Platform
layer
Import OS XenServer OS image ‑—
Package layers XenServer Packaging machine ‑—
Publish layered
images
Machine Creation for
XenServer, Citrix
Provisioning, or
XenServer
System provisioning If using Machine
Creation for XenServer
or Citrix Provisioning,
include the respective
tools, and connection
broker tools
If the appliance is installed on another hypervisor If your appliance is running on a hypervisor
other than Citrix, and you are creating layers or publishing in XenServer, use the appliance’s Network
File Share and the layers outlined in the following table.
OS Layer: Dierent hypervisor tools are installed on the OS layer, but if you set the Hypervisor Type
in the Platform layer to XenServer, the tools in the OS layer are removed and the tools you add to the
Platform layer are included in the layered images you publish.
Task
Connector
configuration
For appliance to
access location of Platform layer
Import OS Network File Share OS image XenServer tools
Package layers Network File Share Packaging machine XenServer tools
Publish layered
images
Network File Share System provisioning XenServer tools, either
machine creation or
Citrix Provisioning
tools, if applicable,
and connection broker
tools
Related links
• Connectors:
© 1999–2024 Cloud Soware Group, Inc. All rights reserved. 45

App Layering
– Machine Creation for XenServer
– Citrix Provisioning
– XenServer
• Platform layer details:
– Create Platform layer
– Machine Creation for XenServer tools
– Citrix Provisioning tools
– XenServer tools
MS Azure
If the App Layering appliance is installed in Azure, you can use connector configurations to automate
the layering and publishing processes. Otherwise, you use the appliance’s Network File Share for
transferring images to and from your target platform.
If the appliance is installed in Azure When your applianceis installed in Azure, and you are creating
layers in Azure, or publishing layered images to that hypervisor or a Provisioning Service running on
it, use the connector configurations and layers outlined in the following table.
OS Layer: No hypervisor tools are required for Azure
Task
Use connector
configuration
For appliance to
access location of
Include in Platform
layer
Import OS MS Azure OS image ‑—
Package layers MS Azure Packaging machine ‑—
Publish layered
images
Machine Creation for
Azure, MS Azure
Near systems to
provision
If Machine Creation for
Azure, include
machine creation tools
If the appliance is installed on another hypervisor If your appliance is installed in a hypervisor
other than Azure and you are creating layers in Azure, or publishing layered images to Azure or to a
machine creation running in Azure, use the appliance’s Network File Share and the layers outlined in
the following table.
OS Layer: Even though tools for the wrong hypervisor are installed in the OS layer, you can override
the tools by setting the Hypervisor Type in the platform layer to Azure.
© 1999–2024 Cloud Soware Group, Inc. All rights reserved. 46

App Layering
Task
Connector
configuration
For appliance to
access location of Platform layer
Import OS Network File Share OS image Not required
Package layers Network File Share Packaging machine Not required
Publish layered
images
Network File Share System provisioning machine creation
tools, if applicable
Related links
• Connectors:
– Machine Creation for Azure
– Machine Creation for Azure Government
– MS Azure
• Platform layer soware details:
– MS Azure tools
– Machine Creation for Azure or Azure Government tools
MS Hyper‑V
If the App Layering appliance is installed in Hyper‑V, you can use connector configurations to automate
the layering and publishing processes. Otherwise, you use the appliance’s Fileshare for transferring
images to and from your target platform.
If the appliance is installed in Hyper‑V When your appliance is installed in Hyper‑V and you are cre‑
ating layers in Hyper‑V, or publishing layered images to Hyper‑V or to a Provisioning Service running
on it, use the connector configurations and layers outlined in the following table.
OS Layer:
Include Hyper‑V settings, if the OS did not originate in Hyper‑V.
Task
Use connector
configuration
For appliance to
access location of
Include in Platform
layer
Import OS —‑ OS image —‑
Package layers MS Hyper‑V Packaging machine —‑
© 1999–2024 Cloud Soware Group, Inc. All rights reserved. 47

App Layering
Task
Use connector
configuration
For appliance to
access location of
Include in Platform
layer
Publish layered
images
Machine creation,
Citrix Provisioning, or
MS Hyper‑V
System provisioning If Citrix Provisioning,
include Provisioning
tools and connection
broker tools
If the appliance is installed in another hypervisor If your appliance is installed in a hypervisor
other than Hyper‑V, and you are creating layers or publishing in Hyper‑V, use the appliance’s Network
File Share and the layers outlined in the following table.
OS Layer: Tools for a dierent hypervisor are installed on the OS layer. Delete the files by setting
the Hypervisor Type to Hyper‑V in the platform layer. The settings on the platform layer override the
original hypervisor.
Task
Connector
configuration
For appliance to
access location of Platform layer
Import OS Network File Share OS image MS Hyper‑V settings
Package layers Network File Share Packaging machine MS Hyper‑V settings
Publish layered
images
Network File Share System provisioning Hyper‑V settings,
connection broker
tools, and Provisioning
tools, if applicable
Related links
• Connectors:
– Citrix Provisioning
– MS Hyper‑V
• Platform layer soware details:
– Create Platform layer
– Citrix Provisioning tools
– MS Hyper‑V tools
© 1999–2024 Cloud Soware Group, Inc. All rights reserved. 48

App Layering
Nutanix AHV
If the App Layering applianceis installed in Nutanix, you can use connector configurationsto automate
the layering and publishing processes. Otherwise, you use the appliance’s File Share for transferring
images to and from your target platform.
If the appliance is installed in Nutanix When your appliance is installed in Nutanix and you are
creating layers or publishing images in Nutanix, use the connector configurations and layers outlined
in the following table.
OS layer: Include Nutanix tools
Task
Use connector
configuration
For appliance to
access location of
Include in Platform
layer
Import OS Nutanix AHV OS image ‑—
Package layers Nutanix AHV Packaging machine ‑—
Publish layered
images
Machine Creation for
Nutanix, Machine
creation, or Nutanix
AHV
System provisioning If using Machine
Creation for Nutanix,
include machine
creation tools
If the appliance is installed in another hypervisor If your appliance is installed in a hypervisor
other than Nutanix and you are creating layers or publishing in Nutanix, use the Network File Share
and layers outlined in the following table.
OS Layer:
Even though tools for a dierent hypervisor are installed in the OS layer, you can override
and delete them. In the platform layer, set the Hypervisor Type to Nutanix. The Nutanix tools are then
included in your layered images.
Task
Connector
configuration…
For appliance to
access location of: Platform layer
Import OS Network File Share OS image Nutanix tools
Package layers Nutanix File Share Packaging machine Nutanix tools
Publish layered
images
Nutanix File Share System provisioning Nutanix tools,
connection broker
tools, and machine
creation tools, if
applicable
© 1999–2024 Cloud Soware Group, Inc. All rights reserved. 49

App Layering
Related links
• Connectors:
– Machine Creation for Nutanix AHV
– Nutanix AHV
• Platform layer soware details:
– Create Platform layer
– Machine Creation for Nutanix AHV tools
– Nutanix AHV tools
VMware vSphere
If the App Layering appliance is installed in vSphere, you can use connector configurations to auto‑
mate the layering and publishing processes. Otherwise, you use the appliance’s Network Fileshare
for transferring images to and from your target platform.
If the appliance is installed in vSphere When your appliance is installed in vSphere, and you are
creating layers or publishing in vSphere, use the following connector configurations and layers.
OS layer: Include VMware tools
Task
Use connector
configuration
For appliance to
access location of
Include in Platform
layer
Import OS VMware vSphere OS image —‑
Package layers VMware vSphere Packaging machine —‑
Publish layered
images
Machine Creation for
vSphere, Citrix
Provisioning, or
VMware vSphere
System provisioning If Machine Creation for
vSphere or Citrix
Provisioning, include
the respective tools
and your connection
broker tools.
If the appliance is installed on another hypervisor If your appliance is installed on a dierent
hypervisor than vSphere, use the Network File Share and the layers outlined in the following table.
OS Layer: Tools for the first hypervisor you installed live in the OS layer. Override and remove them
by setting the Hypervisor Type in the platform layer to vSphere.
© 1999–2024 Cloud Soware Group, Inc. All rights reserved. 50

App Layering
Task
Connector
configuration
For appliance to
access location of Platform layer
Import OS Network File Share OS image VMware tools
Package layers Network File Share Packaging machine VMware tools
Publish layered
images
Network File Share System provisioning VMware tools,
connection broker
tools, and machine
creation, Citrix
Provisioning, if
applicable
Related links
• Connectors:
– Machine Creation for vSphere
– Citrix Provisioning
– VMware vSphere
• Platform layer soware details:
– Create Platform layer
– Machine Creation for vSphere tools
– Citrix Provisioning tools
– VMware vSphere tools
Advanced options for deploying the appliance
You need just one App Layering appliance, but you can install more than one, and use each a stand‑
alone appliance.
Consider the following points when deciding how many appliances to use in your environment.
• Maintaining a single appliance results in less management complexity and overhead. Consider
a second appliance only if irreparably slow network speeds or other major issue impedes usage.
• You can use multiple appliances to maintain a test environment and a production environment.
• If you have multiple OS layers and they originated on dierent appliances, you can have dier‑
ent administrators for the layers built using each one.
© 1999–2024 Cloud Soware Group, Inc. All rights reserved. 51

App Layering
• If you create more than one appliance, each is standalone. They do not act as backups for each
other.
• Back up each appliance, or design it for high availability so you don’t lose layers. You need a full
backup of each appliance to guarantee that you can recover all information from it. Although
you can export and import layers, this feature is not designed for failure recovery.
XenServer
March 22, 2024
To use App Layering with XenServer, you need the following accounts, tools, and resource informa‑
tion.
Account and privileges
App Layering requires a new or existing XenServer account for layering. The account needs privileges
to:
• Create and remove virtual disks.
• Copy and delete layers on virtual disks, using XenServer file API calls.
Soware and settings
Access to the XenServer Tools to install on the layer.
Resource information
For details about the XenServer info you need, see the fields detailed in the XenServer connector con‑
figuration.
Citrix Provisioning
March 22, 2024
You can publish layered images to Citrix Provisioning running on MS Hyper‑V, VMware vSphere, Nu‑
tanix AHV Acropolis, or XenServer.
© 1999–2024 Cloud Soware Group, Inc. All rights reserved. 52

App Layering
Soware requirements
When creating a platform layer for Citrix Provisioning, the following soware must be in a location
accessible to the packaging machine:
• Citrix Provisioning installer.
• Connection broker installer, if using a broker.
Only install hypervisor tools on the platform layer to override your primary hypervisor. (The primary
hypervisor is deployed on the OS layer.)
To update the platform layer with a new version, you only need the soware updates.
Citrix Provisioning prerequisites
• Disable IPv6 on the OS layer
If IPv6 is enabled on your OS Layer, add a version to the OS layer and disable IPv6 on it. A new
platform layer must be created based on the new OS layer version.
Important:
If you disable IPv6 on the platform layer instead of on the OS layer, the resulting Citrix
Provisioning machines lose the network connection and hang when booted.
• Install the App Layering agent on Citrix Provisioning servers
Install the agent on Citrix Provisioning servers, and wherever your connector is configured to
run scripts. Register each of the agents with the App Layering appliance.
• Install the Citrix Provisioning console where the agent is installed
The Citrix Provisioning console must be installed on all Citrix Provisioning servers where the
agent is installed.
• Make sure Citrix Provisioning Target Device Imaging soware is available to install
The Target Device Imaging soware must be available to install on the platform layer. Use the
version that is deployed on the server where you are publishing images.
• Citrix Provisioning resource information
The Citrix Provisioning info listed in this Citrix Provisioning Connector Configuration topic.
• Install PowerShell Snap‑in
Install the appropriate PowerShell Snap‑in.
© 1999–2024 Cloud Soware Group, Inc. All rights reserved. 53

App Layering
• Unique CMID for each target device (if using KMS)
When using KMS licensing, Citrix Provisioning requires that each target device has a unique
CMID. For the full story, check out this Citrix article, Demystifying KMS and Provisioning Ser‑
vices. Rearming KMS is covered in the steps to Create a Platform layer.
• More Citrix Provisioning settings to use in your environment
Configure Citrix Provisioning on your platform layer. Make sure that the settings match the en‑
vironment where the layered image is to be used.
• Citrix Provisioning for Hyper‑V
Requires a Legacy Network Adapter to Pre‑Boot Execution Environment boot.
Hypervisor prerequisites
• Soware and settings ‑ Access to the soware to install on the layer.
• Hypervisor resource information ‑ The hypervisor info listed in the connector configuration
you are using.
Connection broker prerequisites
You need any installers, tools, and settings required to run your connection broker on the hypervisor
you are using.
Required Tools and Settings
• KMS settings, if using KMS licensing
Once you have the requirements, you are ready to create the Platform layer.
Docker
March 22, 2022
App Layering supports the Docker platform. To deploy Docker in an App Layering environment, con‑
sider the following:
• Docker must be installed in the OS layer since it configures various Windows components.
• You can create an OS revision to install and enable Docker.
© 1999–2024 Cloud Soware Group, Inc. All rights reserved. 54

App Layering
• Docker stays dormant until you issue Docker commands. Having Docker installed on the revi‑
sion causes no issues on later revisions of the OS, packaging machines, or desktops deployed
using the OS.
• Do not place any Docker images in the OS layer or any of the app layers. The vhd(x) files
written to the disk when the image is downloaded must be moved to the user’s writeable layer
for the image to run. Docker must open the files for read and write access, which can only be
done on the user’s volume.
Note:
In a full user layer implementation, the user only needs to download the Docker image
once. The image persists through logo and logon sessions.
• Docker requires a hypervisor that can support nested hypervisors. The target hypervisor host‑
ing the deployed VDI desktops must support nested hypervisors so when a user logs on the
machine, they can download and run Docker images.
Important:
The storage location of the user’s layer does not matter for this constraint. It’s only the
deployed VDI machine mounting the user’s layer which is required to run on a hypervisor
that allows nested hypervisors.
• Docker images can be large. The size of the user layers must be set to a larger size to accommo‑
date the images when they
’
re downloaded. We recommend user layers set to 100 GB following
our testing.
Note:
User layers are dynamic disks, so the actual size of the disk won’t be full size. Once disk
space is used, it won’t return to being sparse, so the storage location of the user’s volumes
needs suicient disk space to accommodate the full size of the user’s layers over time.
Google Cloud
May 3, 2021
This article describes the resources you need to create layers and publish images on Google Cloud.
To create layers for the Google Cloud, you need a Google Cloud connector configuration. Depending
on your environment, you may also need a platform layer.
If you plan to publish images to Machine Creation on Google Cloud, use the Machine creation for
Google Cloud connector configuration.
© 1999–2024 Cloud Soware Group, Inc. All rights reserved. 55

App Layering
Google Cloud connector configuration
To create layers and publish images on Google Cloud you need the resources required to:
• Install the App Layering appliance
• Create connector configurations
Google Cloud project
To deploy the appliance, you need the administrator credentials for your project.
Google Cloud storage
The Google Cloud connector configuration requires one or more storage locations for:
• The virtual machine disks you use to create layers and publish layered images.
• The template file that you use to deploy your Google Cloud VMs, and the boot diagnostics files
for those VMs.
OS layer
If you plan to use an OS image created on another platform, be sure to prepare to:
• Export the OS layer from the App Layering appliance running on another platform.
• Import the OS layer using the App Layering appliance running on the Google Cloud.
• Add a version to the imported OS layer, to prepare it to run on the Google Cloud.
Platform layer
To create layers or publish layered images on Google Cloud, you only need a platform layer when you
are publishing images to a provisioning service, such as Citrix machine creation.
When you create a platform layer, there is no need to install Google Cloud tools on it. When Google
Cloud tools aren’t present, Google Cloud installsthem onto the packagingmachine when the machine
is started.
When you do create a platform layer, any soware installers you need (for example, Provisioning Ser‑
vice soware) must be accessible from the packaging machine.
© 1999–2024 Cloud Soware Group, Inc. All rights reserved. 56

App Layering
Machine Creation for Azure or Azure Government
May 8, 2020
The soware installers must be available in a location that’s accessible to the packaging machine
where you are creating a layer.
Machine creation prerequisites
When creating a Platform layer for publishing images, you need:
• Citrix Virtual Delivery Agent (VDA) installer for Windows
• Citrix Desktop Delivery Controller (DDC)
Install the Citrix DDC soware on the server where the layered images are published. If you
include a script to run on the layered images, you need the following:
– Agent ‑ Deploy the agent on the DDC, which allows the appliance to run the script there.
– PowerShell Snap‑in ‑ Appropriate PowerShell Snap‑in must be installed on the DDC.
• Citrix resource information
The Citrix info listed in Machine Creation for Azure connector configuration.
Machine Creation for XenServer
March 22, 2024
To publish images to machine creation running on XenServer you need a platform layer for that pur‑
pose. To create the required platform layer, you need:
• An OS layer
• Network access to App Layering tools
Access from the platform layer packaging machine virtual machine to the OS machine tools (in
the installation download package).
• Citrix Virtual Delivery Agent (VDA) installed on the platform layer
Install the Citrix VDA installer for the Windows operating system that you are using on the plat‑
form layer.
© 1999–2024 Cloud Soware Group, Inc. All rights reserved. 57

App Layering
• Citrix Delivery Controller
Install the Citrix Delivery Controller soware on the server where you publish the layered image.
As part of the Connector Configuration, if you include a script to run on the newly published
layered image, you need the following:
– Agent ‑ Installed and running on the Delivery Controller, which allows the appliance to run
the script on the Delivery Controller.
– PowerShell Snap‑in ‑ Install the appropriate PowerShell Snap‑in on the Delivery Con‑
troller.
• Citrix resource information
The Citrix information listed in the topic Machine Creation for XenServer connector configura‑
tion.
Machine Creation for Google Cloud
May 3, 2021
This article describes the resources you need to publish images on Machine creation for Google
Cloud.
To publish images in this environment, you need a Machine Creation for Google Cloud connector con‑
figuration](/en‑us/citrix‑app‑layering/4/connect/machine‑creation‑for‑google‑cloud.html). Depend‑
ing on your environment, you might also need a platform layer.
Machine Creation for Google Cloud connector configuration
To publish images on Machine Creation for Google Cloud, you need the resources required to:
• Install the App Layering appliance
• Create connector configurations
Google Cloud project
The Machine creation for Google Cloud connector configuration requires one or more storage loca‑
tions for:
• The virtual machine disks you use to create layers and publish layered images.
• The template file used to deploy Azure virtual machines, and the boot diagnostics files for those
virtual machines.
© 1999–2024 Cloud Soware Group, Inc. All rights reserved. 58

App Layering
Google Cloud storage
The Azure connector configuration requires one or more storage locations to use for:
• The virtual machine disks you use to create layers and publish layered images.
• The template file used to deploy Azure virtual machines, and the boot diagnostics files for those
virtual machines.
OS layer
If you plan to use an OS image created on another platform, be prepared to:
• Export the OS layer from the App Layering appliance running on another platform.
• Import the OS layer using the App Layering appliance on Google Cloud.
• Add a version to the imported OS layer, to prepare it to run on Google Cloud.
Platform layer
You need a platform layer when publishing on a provisioning platform like Citrix machine creation, or
on a dierent hypervisor.
When you create a platform layer, the machine creation soware installers must be accessible from
the packaging machine so you can install them on the layer.
Machine Creation for Hyper‑V
May 8, 2020
To publish images to machine creation in Hyper‑V, you need a platform layer. The platform layer en‑
sures that applications install and run flawlessly in your publishing environment.
To create your platform layer, you need:
• An OS layer
• Network access to App Layering tools: Access from the platform layer packaging machine to
the OS machine tools. The tools are included in the installation download.
• Hyper‑V resource information: The information listed in the topic Machine Creation for hyper‑
v connector configuration.
© 1999–2024 Cloud Soware Group, Inc. All rights reserved. 59

App Layering
Machine Creation for Nutanix AHV
May 8, 2020
Make the soware installers for the following soware accessible to the packaging machine where
you are creating the layer.
• Nutanix AHV
• Machine Creation
• Your connection broker (if applicable)
Machine creation prerequisites
When creating a platform Layer for publishing images to Machine Creation, you need:
• An OS layer
• Citrix Virtual Delivery Agent (VDA) installer for your Windows OS
The Citrix VDA installer for the Windows OS you are using must be installed on the Platform
Layer.
• Citrix Desktop Delivery Controller (DDC)
The Citrix DDC soware must be installed on the server where layered images are published.
• Citrix resource information
The Citrix info listed in this Machine Creation Connector Configuration topic.
Nutanix AHV prerequisites
Makethe soware installers for your hypervisor accessible to the packagingmachine where you create
layers.
If you are publishing to CitriProvisioning Service or using a connection broker, the tools for those ser‑
vices must also be accessible to the packaging machine.
Nutanix Prism account and privileges
• A Nutanix Prism account (new or existing) to use for App Layering.
• The account must have privileges to perform the following operations:
– VM operations:
© 1999–2024 Cloud Soware Group, Inc. All rights reserved. 60

App Layering
*
clone
*
delete
*
power on/o
*
attach virtual disks
– Image operations:
*
create
*
update (aka upload)
*
delete
– Virtual disks
*
create
*
attach to VMs
Nutanix AHV soware and settings
• Access to the VM Mobility Tools to install on the layer.
Nutanix AHV resource information
• The Acropolis Server info listed in Nutanix AHV Connector Configuration or Machine Creation for
Nutanix AHV Connector Configuration.
Nutanix AHV Connector
• When creating layers for the Nutanix environment, you must use a Nutanix AHV Connector Con‑
figuration. The Machine Creation for Nutanix AHV Connector does not support Layer creation.
Connection Broker prerequisites
You need any installers, tools, and settings required to run your connection broker on the hypervisor
you are using.
Required Tools and Settings
• KMS settings, if using KMS licensing
© 1999–2024 Cloud Soware Group, Inc. All rights reserved. 61

App Layering
Machine Creation for vSphere
May 8, 2020
This article explains considerations and requirements when publishing layered images to machine
creation, and building your layers in vSphere.
Platform layer
You need a platform layer for publishing images in machine creation running in vSphere.
• If you have been using BIOS machines and you want to start using UEFI machines, a new version
of the platform layer is required.
• If you want to publish images to a new location in vSphere, it is recommended that you create
a specific platform layer for the new location.
Platform layer requirements
When publishing images to a Horizon View environment, you need the following resources to create
the platform layer:
• An OS Layer
• Machine Creation soware and resource information: Prepare the Machine Creation info
listed in this Machine Creation for the vSphere connector topic.
• vSphere resource information: The vSphere info listed in vSphere connector configuration.
• Your connection broker soware
When to install VMware vSphere tools on the platform layer
If the OS was created on a hypervisor other than vSphere, install the VMware vSphere soware on the
platform layer. Also, install the App Layering agent and OS Machine Tools. You need:
• Access to the VMware hypervisor soware installer
• App Layering Agent and PowerShell Snap‑in, if using a Script as part of the connector con‑
figuration: If you include a script to run on layered images, make sure the App Layering agent
and PowerShell Snap‑in are running.
© 1999–2024 Cloud Soware Group, Inc. All rights reserved. 62

App Layering
Connectors
You need these connector configurations to create layers and publish layered images to machine cre‑
ation:
• Machine Creation for vSphere connector configuration: Supplies the appliance with the cre‑
dentials it requires to publish to a machine creation location.
• VMware vSphere connector configuration: Gives the appliance the credentials to create lay‑
ers and publish images in a specific vSphere location.
UEFI machines
This section explains how to switch from using BIOS machines to UEFI machines.
To configure UEFI, select a UEFI‑configured virtual machine template from your vCenter server. EFI
machines and VMware Cloud both require the template. Otherwise, it is optional. Select the template
to use for the platform layer.
To start using UEFI if your existing machines are BIOS
To start using UEFI machines in Machine Creation when your existing machines are BIOS:
1. Create a Machine Creation in vSphere connector configuration with the Oload compositing
feature enabled.
2. Select a virtual machine template with UEFI configured.
3. Create a platform layer, or add a version to an existing one. Select the connector configuration
that has UEFI enabled.
4. Publish UEFI images using this platform layer, and select a connector configuration that has
UEFI enabled.
You can publish images using the new UEFI‑enabled platform layer and connector configuration with
your existing OS and app layers.
You can keep revising your OS and app layers using a BIOS connector configuration.
To start using UEFI in a fresh deployment
The Create OS layer feature supports UEFI machines. You can also add support for UEFI to an existing
OS layer. Use a connector configuration with Oload Compositing and UEFI enabled.
1. Create a VMware vSphere connector configuration with UEFI and Oload compositing
enabled.
© 1999–2024 Cloud Soware Group, Inc. All rights reserved. 63

App Layering
2. In the connector configuration, select a virtual machine template with UEFI configured.
3. Create UEFI‑enabled app layers using the same VMware vSphere connector configuration.
4. Create and publish images using an image template with the following things selected:
• Your UEFI‑enabled OS layer.
• A platform layer with Machine Creation installed.
• A UEFI‑enabled Machine creation for vSphere connector configuration.
• Your app layers.
MS Azure or Azure Government
February 20, 2019
When creating layers for an Azure environment, you must use an MS Azure connector configuration.
For an Azure Government environment, use the Azure Government connector configuration. In some
cases, you may also need a Platform layer.
This article describes the requirements, including the resources you need for creating one of these
connector configuration.
Azure or Azure Government connector configuration
The following resources are required for the connector configuration.
Azure account and subscription
To deploy the appliance, you need the administrator credentials for your Azure subscription. For more
information, see the Microso Azure Sign in page.
Azure Resource Manager
App Layering supports Azure’s Resource Management (ARM) model. You cannot use Azure’s Classic
deployment model. All resources for App Layering must be created using Azure Resource Manager.
For more information, see the Azure Resource Manager overview page.
Azure storage
The Azure connector configuration requires one or more storage accounts to use for:
© 1999–2024 Cloud Soware Group, Inc. All rights reserved. 64

App Layering
• The virtual machine disks you use to create layers and publish layered images.
• The template file used to deploy Azure virtual machines, and the boot diagnostics files for those
virtual machines.
For details about the storage required, see MS Azure connector configuration.
Platform layer
As long as the image you use for your OS layer is from Azure, you do not need a Platform layer to
create layers or publish layered images in Azure. You only need a Platform layer when publishing to a
dierent environment, for example, to a provisioning service or another hypervisor.
When publishing to Azure using an OS image that originated in a dierent hypervisor, you need a Plat‑
form layer to make sure layered images work correctly in Azure.
When you create a Platform layer, there is no need to install Azure tools on it. When Azure tools aren’
t present, Azure installs them onto the packaging machine when the machine is started.
When you do create a Platform layer, any soware installers you need (for example, provisioning ser‑
vice soware) must be accessible from the packaging machine.
MS Hyper‑V
March 24, 2021
This section describes considerations and requirements when creating layers or publishing images in
Hyper‑V.
Platform layer
Configure the Hyper‑V settings on the platform layer so that your other layered applications run seam‑
lessly in Hyper‑V.
You need a platform layer if the OS image used to create your OS layer originated in a dierent hyper‑
visor. If the OS image originated in Hyper‑V, you do not need a platform layer. The Hyper‑V settings
are already configured on your OS layer.
You also need a platform layer if you start using Generation 2 machines, as explained in the following
section.
© 1999–2024 Cloud Soware Group, Inc. All rights reserved. 65

App Layering
Generation 2 machines
To start using Generation 2 machines in Hyper‑V when your existing machines are Generation 1:
• Create a Hyper‑V connector configuration with the Oload compositing feature enabled and
Generation 2 selected.
• Create a Generation 2 platform layer.
• Publish Generation 2 images using this platform layer and your existing Generation 1 app layers.
If you are starting with a fresh deployment in Hyper‑V, you can create a Generation 2 OS layer using
either of the following approaches:
• Create the OS layer from a Generation 1 OS image. Then:
– Create a Hyper‑V connector configuration with the Oload compositing feature enabled
and Generation 2 selected.
– Add a Generation 2 version to the OS layer.
– Create Generation 2 app layers.
– Create an image template with the new connector selected, and publish the images.
• Create the OS layer from a Generation 2 OS image, by bypassing the management console and
using the OS import script:
– Locate the ImportOSLayer.ps1 script included in the OS Machine Tools download.
– Import the OS using the script. The script supports the import of UEFI machines and com‑
pletes the import faster than the management console.
Nutanix AHV
March 5, 2019
When creating a Platform layer, the soware installers for your hypervisor must be available in a loca‑
tion that’s accessible to the packaging machine where you are creating the layer. If you are publishing
to a provisioning service or using a connection broker, the tools for those services must also be acces‑
sible from the packaging machine.
Nutanix AHV (Acropolis) prerequisites
• Nutanix Prism account and privileges
– A Nutanix Prism account (new or existing) to use for App Layering.
– The account must have privileges to perform the following operations:
© 1999–2024 Cloud Soware Group, Inc. All rights reserved. 66

App Layering
*
VM operations:
· clone
· delete
· power on/o
· attach virtual disks
*
Image operations:
· create
· update (aka upload)
· delete
*
Virtual disks
· create
· attach to VMs
• Nutanix AHV soware and settings
Access to the VM Mobility Tools to install on the layer.
• Nutanix AHV resource information
The Acropolis Server info listed in Nutanix AHV connector configuration or Machine Creation for
Nutanix AHV connector configuration.
• Nutanix AHV Connector
When creating layers for the Nutanix environment, you must use a Nutanix AHV Connector Con‑
figuration. The Machine Creation for Nutanix AHV Connector does not support Layer creation.
Connection Broker prerequisites
You need any installers, tools, and settings required to run your connection broker on the hypervisor
you are using.
VMware vSphere
November 19, 2019
This section describes considerations and requirements when creating layers or publishing images in
vSphere.
© 1999–2024 Cloud Soware Group, Inc. All rights reserved. 67

App Layering
Platform layer
A platform layer is required for creating layers or publishing images in vSphere ONLY in the following
cases:
• The operating system for your OS layer originated on a dierent hypervisor. If the OS originated
in vSphere, you do not need a platform layer, because the vSphere settings are already config‑
ured on your OS layer.
• If you have been using BIOS machines and you want to start using UEFI machines, a new version
of the platform layer is required.
• If you want to publish images to a new location in vSphere, we recommend that you create a
specific platform layer for each location.
Platform layer requirements
When publishing images to Machine creation in vSphere, you need the following resources to create
the platform layer:
• An OS Layer
• Machine creation for vSphere resource information: The Machine Creation info listed in this
Machine creation for vSphere connector configuration topic.
• vSphere resource information: The vSphere info listed in vSphere connector configuration.
• Access to the Machine Creation soware to install on the layer.
When to install VMware vSphere tools on the platform layer
If the OS was created on a dierent hypervisor than vSphere, install the VMware vSphere soware on
the platform layer, along with App Layering tools and App Layering Agent (if the agent is required).
You need:
• Access to the VMware vSphere soware installer
• App Layering Agent and PowerShell Snap‑in, if using a Script as part of the connector con‑
figuration: As part of the connector configuration, if you include a script to run on the newly
published layered image, you need the App Layering agent and PowerShell Snap‑in installed
and running.
UEFI machines
To start using UEFI machines in vSphere when your existing machines are BIOS:
© 1999–2024 Cloud Soware Group, Inc. All rights reserved. 68

App Layering
• Create a new VMware vSphere connector configuration with the Oload compositing feature
enabled and UEFI selected.
• Create a UEFI platform layer.
• Publish UEFI images using this platform layer and your existing BIOS app layers.
If you are starting with a fresh deployment in vSphere:
• Create your OS layer from a BIOS OS image.
Note:
The Create OS layer feature does not yet support UEFI machines. However, you can add a
version to the OS layer with Oload Compositing and UEFI selected, as described in the
next step.
• Create a VMware vSphere connector configuration with the Oload compositing feature en‑
abled and UEFI selected.
• Add a UEFI version to the OS layer.
• Create UEFI app layers.
• Create an image template with the new connector selected, and publish the images.
Network File Share (other platforms)
March 5, 2024
When creating a Platform layer, you start by selecting the Network File Share (NFS) or the Windows File
Share instead of a connector configuration. Then, you copy the OS disk for the layer to the hypervisor
where you want to create your layers or publish your layered images. You attach the OS disk to a
packaging machine and deploy it, then install the soware, shut down the packaging machine, and
copy the disk back to your appliance’s Network File Share for importing into the new Platform layer.
Prerequisites
• When creating a Platform layer for packaging layers, you need the soware and settings for the
hypervisor where you are creating your layers.
• When creating a Platform layer for publishing layered images, you need the hypervisor prereq‑
uisites, plus the prerequisites for any Provisioning Service and connection broker that you plan
to run in the environment.
© 1999–2024 Cloud Soware Group, Inc. All rights reserved. 69

App Layering
Install appliance
March 6, 2024
The articles in this section explain how to deploy the App Layering service.
First, you install and deploy the App layering appliance, which is powered by the Enterprise Layer
Manager (ELM) technology.
Once installed, you can configure the time zone, NTP servers, and network settings.
Finally, if you need the App Layering agent, install it on the servers where it is required.
For installation details, select your hypervisor:
• XenServer
• Google Cloud
• MS Azure
• MS Hyper‑V
• Nutanix AHV
• VMware vSphere
Once you have installed the appliance, you can finish configuring App Layering using the steps pro‑
vided, and install the App Layering agent.
• Install the App Layering agent
With the soware installed, you can create your OS layer, a prerequisite for layering your applica‑
tions.
XenServer
March 6, 2024
To install the App Layering service, you deploy the appliance to a virtual machine in XenServer. If the
appliance requires a static IP address, you configure one using the appliance configuration utility. The
last section describes the next steps.
Requirements
To start installing App Layering, you need the following:
• A supported version of XenServer
© 1999–2024 Cloud Soware Group, Inc. All rights reserved. 70

App Layering
• Storage
• XenServer account and privileges
A XenServer account to use for App Layering service.
The account must have XenServer privileges to:
– Create and remove virtual disks.
– Copy and delete layers on virtual disks by using XenServer file APIs.
• XenServer soware and settings
Access to the XenServer Tools to install on the layer.
• XenServer resource information
The XenServer info listed in XenServer Connector Configuration.
Download the installation package
Download the installation package, citrix_app_layering_citrix‑hypervisor_4.x.x, from the Citrix down‑
load site. The zip file includes:
File Description
XenServer_x.x.x.ova OVA file for the appliance virtual machine
citrix_app_layering_agent_installer.exe App Layering Agent installer
citrix_app_layering_os_machine_tools.exe OS machine tools
Deploy the App Layering appliance
To deploy the appliance:
1. Download the installation zip file citrix_app_layering_XenServer_4.x.zip
2. Extract the XenServer_elm_4.x.x.x.ova file to a folder on your local drive.
3. In your XenCenter client, select File > Import.
4. In the wizard that opens, select the following values:
• Import Source ‑ Browse to the source on your local drive.
• Location ‑ Choose the XenServer where you want to deploy the appliance.
• Storage ‑ Use the default value to put storage disks on the Local XenServer Storage.
• Networking ‑ Select the correct network for your XenServer configuration.
• Security ‑ This tab is not available. Click Next.
• OS Fixup Settings ‑ Select Don’t use Operating System Fixup.
© 1999–2024 Cloud Soware Group, Inc. All rights reserved. 71

App Layering
• Transfer VM Settings ‑ Choose the correct network and choose DHCP.
• Finish ‑ Review your settings and then click Finish.
5. Switch to Notification view and wait for the deployment to complete. The process can take
20–35 minutes.
6. Switch to Infrastructure view.
7. Select your new appliance, which has the name:
Citrix Enterprise Layer Manager.
8. Click Properties, and enter a new name and description for your new appliance. The new vir‑
tual machine has 8 GB of memory and 4 CPUs. Take note of the IP address assigned in the Net‑
working tab.
9. Start Internet Explorer, type the IP address for the new appliance into the address bar and log
in as “administrator”with the password “Unidesk1”.
The first time you log on to the appliance that you are required to change the App Layering adminis‑
trator passwords, For details, see Change administrative passwords.
Be sure to install the App Layering Agent, if your environment requires it. See the next section for
details.
If you want the appliance to use a Static IP address
You can change the appliance’s IP address and/or its DNS servers. When the appliance is first de‑
ployed, the DNS settings are retrieved through DHCP. If DHCP is not available and you are using sta‑
tic IP addresses, once you select Static, you are prompted to enter the IP addresses for your DNS
servers.
1. Log in to the Appliance Configuration utility. Using either your hypervisor console or SSH, log
in to the appliance as an administrator.
The first time you log in, use the default password, Unidesk1.
2. At the Action prompt, enter C (for Configure Networking), and press Return.
3. At the next prompt, type D for Dynamic (DHCP) or S for Static.
If you choose Static, you are prompted for the IP address and Subnet mask, along with the
default addresses for the Gateway and DNS addresses.
4. When prompted, enter Y to save settings.
5. At the Action prompt, enter Q to quit.
6. Restart the appliance.
© 1999–2024 Cloud Soware Group, Inc. All rights reserved. 72

App Layering
Next steps
Once the appliance is installed and the IP address is correctly configured, you need to:
• Install the App Layering agent
• Configure the App Layering service
Google Cloud
May 3, 2021
To install the App Layering service on Google Cloud, you deploy the appliance to a virtual machine on
Google Cloud. You can configure a static IP address, if you need one, using the appliance configuration
utility.
Google Cloud project configuration
Configure a Google Cloud project.
Enable APIs
Enable the following Citrix Cloud APIs:
• Compute Engine API
• Cloud Storage API
• Cloud Resource Manager API
• Identity and Access Management (IAM) API
• Cloud Build API
See the Citrix Virtual Apps and Desktops instructions for enabling the Google Cloud APIs.
Create a Service Account
The service account needs the following three roles:
• Service Account User
• Compute Admin
• Storage Admin
See Create a Service Account for details.
© 1999–2024 Cloud Soware Group, Inc. All rights reserved. 73

App Layering
Note:
The account for App Layering does not need all of the roles & permissions described in the article
above.
Open required firewall ports
Open the firewall ports for Google Cloud so the appliance can communicate with the Google Cloud.
Virtual machine requirements and settings
Ensure that the virtual machine where you install the appliance on Google Cloud is connected to a
Google Cloud virtual network.
The virtual machine that you use for the appliance must be configured as follows:
Name Value
Virtual Machine Name App Layering Appliance (Enterprise Layer
Manager)
Virtual Machine Generation Generation 1
Memory 8192 MB
CPUs 4
Boot Disk unidesk_gcp‑system
Additional Disk unidesk_gcp‑repository
Download the installation package
Download the installation package, citrix_app_layering_gcp_x.x, from the Citrix download site. The
zip file includes:
File Description
unidesk_gcp‑system.tar.gz Tarball containing system disk for the appliance
VM
citrix_app_layering_agent_installer.exe App Layering agent installer
citrix_app_layering_os_machine_tools.exe OS Machine Tools
© 1999–2024 Cloud Soware Group, Inc. All rights reserved. 74

App Layering
Upload the system disk to Google Cloud
1. Extract the download package, citrix_app_layering_gcp_x.x.zip.
2. Using the Navigation menu on the top le of the Google Cloud UI, go to the STORAGE section
and select Storage > Browser. You can either create a new bucket or add a personal folder to
an existing bucket.
3. Select the upload‑disks bucket link to upload the disk.
4. Select the UPLOAD FILES link, and navigate to the directory where you extracted the
unidesk_gcp‑system.tar.gz file.
5. Select unidesk_gcp‑system.tar.gz and click the Open button. See the status message on the
lower right side of the window to track the progress of the upload.
Create an image for the system disk
1. Select the
Navigation
menu on the top le of the Google Cloud window, go to the
STORAGE
section, and select Compute Engine > Images.
2. Select [+] CREATE IMAGE.
© 1999–2024 Cloud Soware Group, Inc. All rights reserved. 75

App Layering
3. In the Name field, enter a permanent name for the image. Google Cloud warns that the name
is permanent.
4. Under Source, select Cloud Storage file.
5. Under Cloud Storage file, use the Browse button to select the unidesk_gcp‑system.tar.gz file.
6. Under Location, select Multi‑regional or Regional, and the Location.
7. Select Create. The Images page tracks the image creation as it progresses. A green checkmark
appears when the image is created. If creation fails, the image name no longer appears on the
Images screen.
Create a VM instance
Next, create a VM instance, attach the system disk, and create repository disks:
1. Select the Navigation menu on the top le of the Google Cloud window, go to the COMPUTE
section, and select Compute Engine > VM instances.
2. Select [+] CREATE INSTANCE.
3. Enter data, choosing the desired Region and Machine configuration.
4. Expand the CPU platform and GPU section, and check Turn on display device.
5. In the Boot disk section, select the Change button. The Boot disk window opens.
6. Select the Custom images tab and the system image previously created. Your data populates
the project’s Show images from and Boot disk type and Size (GB) dropdowns.
© 1999–2024 Cloud Soware Group, Inc. All rights reserved. 76

App Layering
7. Click Select. The Create an instance page appears with the boot disk image set to the image
you just selected.
8. Select Allow HTTPS traic.
9. Expandthe Management, security, disks, networking, sole tenancy section. Selectthe Disks
tab.
© 1999–2024 Cloud Soware Group, Inc. All rights reserved. 77

App Layering
© 1999–2024 Cloud Soware Group, Inc. All rights reserved. 78

App Layering
10. In the Additional disks section, select + Add new disk button.
11. Enter a descriptive name.
12. For Source type, select the Blank disk tab and enter the Size (in GB) for the repository disk.
13. Select Done to finish adding an additional disk.
14. Still in the Management, security, disks, networking, sole tenancy section, select the Network‑
ing tab.
15. In the Network interface section, select a Network. Verify that a value appears in the Subnet‑
© 1999–2024 Cloud Soware Group, Inc. All rights reserved. 79

App Layering
work field, and select a value for it.
Important:
We recommend that you do not create an external (public) IP address.
16. (Recommended) From the External IP dropdown, select None.
17. Select Done to finish editing the network interface.
18. Select Create to create the VM instance. The VM is created and the appliance powers on. Once
the appliance is created, you no longer need the system disk download.
19. To clean up aer installation, remove:
• The .zip file that you downloaded.
• The folder containing the uncompressed files.
• The unidesk_gcp‑system.tar.gz file from the folder where you uploaded it.
If you want the appliance to use a Static IP address
You can change the appliance’s IP address and its DNS servers. When the appliance is first deployed,
the DNS settings are retrieved through DHCP. If DHCP is not available and you are using static IP ad‑
dresses, once you select Static, you are prompted to enter the IP addresses for your DNS servers.
1. Log in to the Appliance Configuration utility, using the steps and default password described in
Appliance settings.
2. At the Action prompt, enter C (for Configure Networking), and press Return.
3. At the next prompt, type D for Dynamic (DHCP) or S for Static.
If you choose Static, you are prompted for the IP address and Subnet mask, along with the de‑
fault addresses for the Gateway and DNS addresses.
4. When prompted, enter Y to save settings.
5. At the Action prompt, enter Q to quit.
6. Restart the appliance.
Next steps
Once the appliance is installed and the IP address is correctly configured, you need to:
• Install the App Layering agent
• Configure the App Layering service
• Access the App Layering management console
© 1999–2024 Cloud Soware Group, Inc. All rights reserved. 80

App Layering
MS Azure or Azure Government
April 17, 2023
To install the App Layering service, you deploy the appliance to a virtual machine using the Azure (or
Azure Government) resource manager.
• Requirements. ‑ Make sure you have the Azure (or Azure Government) resources you must in‑
stall the appliance.
• Install the App Layering appliancein Azure (or Azure Government). ‑ To install the appliance,
you download the installation package and deploy the appliance.
• Next steps ‑ Links to steps for installing the App Layering agent and configuring the App Layer‑
ing service.
Note: If you have not already set up a connection to an Azure Virtual Network, see Get started with
Azure or Azure Government for more information.
The steps for installing the appliance in Azure and Azure Government are the same, aside from the
installation script that you run. (The scripts are listed in the Installation Package below.)
Requirements
Before installing App Layering in Azure or Azure Government, be sure you have the following.
• An Azure account and subscription
To deploy and configure the App Layering appliance, you need the credentials for an account
that has administrative access to your Azure subscription. For more information, refer to the
Microso Azure Sign‑in page.
• A Virtual Network in Azure (or Azure Government)
Your deployment in Azure (or Azure Government) can operate in a point‑to‑site or site‑to‑site
Virtual Network. The appliance and its network file share must have network connectivity. How‑
ever, the appliance does not require network connectivity to the layered images you publish. A
site‑to‑site connection between your corporate and Azure (or Azure Government) networks is
recommended for accessing the management console on the appliance. For more information,
refer to the Microso Azure Virtual Network page.
Note: If you have not already set up a connection to an Azure Virtual Network, see Get started
with Azure for more information.
• A Network File Share (Azure or Azure Government specifics)
A file share server in Azure (or Azure Government) performs better than an on‑premises file
share. Even though the Azure (or Azure Government) File Share feature is not supported, you
© 1999–2024 Cloud Soware Group, Inc. All rights reserved. 81

App Layering
can use an existing network file share or create a file share in the Azure (or Azure Government)
environment.
Important: Using Premium Storage is recommended.
• Azure (or Azure Government) Resource Manager
App Layering works with Azure’s Resource Management (ARM) model. It does not support
Azure’s Classic deployment model. All resources such as virtual network, file shares and OS
machines that App Layering will work with must be created with Azure Resource Manager. For
more information, refer to the Azure Resource Manager overview page.
• Azure Powershell v7
Azure Powershell v7 must be installed on the Windows system that will be used to install the
appliance in Azure.
• Assigned managed identity
The App Layering appliance must be assigned a managed identity to support deployment on
Azure.
Install the App Layering appliance
To deploy the App Layering appliance to Azure or Azure Government:
1. Check the contents of the installation package.
2. Learn what’s included in the installation script.
3. Deploy the appliance.
Installation package
The installation package, is named citrix_app_layering_azure_yy.m.b, where:
yy is the year
m (or mm) is the month
b is the build
File Description
Azure_yy.m.b.zip VHD file for the appliance VM
AzureELMDeploymentV7.ps1 Installation Script for Azure Government
citrix_app_layering_agent_installer.exe App Layering agent installer
citrix_app_layering_os_machine_tools.exe OS Machine Tools
© 1999–2024 Cloud Soware Group, Inc. All rights reserved. 82

App Layering
File Description
DeployAzureRmVm.template.json App Layering template
Installation script
The installation script included in the installation package does the following.
• Copies the included VHD to the Azure location you specify.
• Creates a virtual machine in Azure using the VHD,
• Attaches the repository disk.
• Boots the Azure appliance.
When you run the script:
• IMPORTANT: Be sure to note the Resource group location you select, as you will need this in‑
formation later. For more information about resource groups, refer to Using the Azure Portal to
manage your Azure resources.
• When selecting a virtual machine size, it is strongly recommended that you select a machine
with 4 CPUs, and at least 14 GB of memory (script default).
• The name you specify for the new virtual machine must comply with Azure naming conventions.
• Select a Virtual Network in which HTTP port: 80 is accessible (Public IP can be disabled).
Deploy the appliance in Azure or Azure Government
The App Layering ZIP download requires 31GB of space when uncompressed.
1. Extract the download package, citrix_app_layering_azure_yy.mm.zip. The files included are
listed above.
2. Extract the ZIP file to a folder on your local drive.
3. Open an Azure Powershell window.
4. Execute the installation script (included in the installation package) and answer the prompts.
Running the script:
• Copies the VHD to the Azure location of your choice, and attaches the repository disk.
• Boots the appliance.
• If the script fails, check the values to make sure that the values are correct for your envi‑
ronment.
The first time you log onto the appliance you are required to change the App Layering administrator
passwords. For details, see Change administrative passwords.
© 1999–2024 Cloud Soware Group, Inc. All rights reserved. 83

App Layering
Be sure to install the App Layering agent, if your environment requires it. See the next section for
details.
Next steps
Once the appliance is installed and the IP address is configured as you want it to be, you can install
the App Layering agent, and configure the App Layering service:
• Install the App Layering agent
• Configure the App Layering service
MS Hyper‑V
July 1, 2020
To install the App Layering service, you deploy the appliance to a virtual machine in Hyper‑V. If the
appliance requires a static IP address, you configure one using the appliance configuration utility, as
described below. The last section describes next steps.
Requirements
Ensure that the Hyper‑V virtual machine from where you are installing the appliance meets the follow‑
ing prerequisites:
• Windows Server 2016, Windows Server 2012 R2
• Virtual network in Hyper‑V
Download the installation package
Download the installation package, citrix_app_layering_hyperv_4.x.x, from the Citrix download site.
The zip file includes:
File Description
hyperv_x.x.x.zip VHDX files for the appliance VM
citrix_app_layering_agent_installer.exe App Layering agent installer
citrix_app_layering_os_machine_tools.exe OS Machine Tools
© 1999–2024 Cloud Soware Group, Inc. All rights reserved. 84

App Layering
Virtual machine settings for the appliance
The virtual machine that you use for the appliance must be configured as follows:
Name Value
Virtual Machine Name App Layering Appliance (Enterprise Layer
Manager)
virtual machine Generation Generation 1
Memory 8192 MB
CPUs 4
Disk 1 unidesk_hyperv‑system.vhdx
Disk 2 unidesk_hyperv‑repository.vhdx
Deploy the appliance in Hyper‑V
To deploy the appliance:
1. Extract the download package, citrix_app_layering_hyperv_4.x.x.zip. Two disk (vhdx) files are
included.
2. Copy the disks to a storage location that the Hyper‑V server can access.
3. Open the Hyper‑V Manager, right‑click the Hyper‑V server where you want to deploy the appli‑
ance, and select New Virtual Machine.
4. On the first wizard tab that opens, click Next to begin configuring the virtual machine.
5. On the Specify Name and Location tab, set the Name and Location of the new VM. Ideally, use
the location where you extracted the disks in step 2.
6. On the Specify Generation tab, ensure that Generation 1 VMs is selected. Generation 1 only is
supported.
7. On the Assign Memory tab, set the VM to use 8 GB of RAM. Make sure the Use Dynamic Memory
for this virtual machine check box is not selected.
8. On the Configure Networking tab, specify the NIC for the network adapter to use to connect to
the network.
9. On the Connect Virtual Hard Disk tab, attach the system disk (unidesk_hyperv‑system.vhdx),
one of the disks that you extracted in step 2.
10. On the Summary tab, verify your choices and click Finish.
© 1999–2024 Cloud Soware Group, Inc. All rights reserved. 85

App Layering
11. Back in the Hyper‑V Manager, select the VM and click Settings from the VM panel.
12. Select Hardware > Processor, and set the Number of Virtual Processors to 4.
13. Select IDE Controller 0 > Hard Drive, click Add.
14. Select the Virtual Disk radiobutton, click Browse, and select the repository disk (unidesk_hyperv‑
repository.vhdx) extracted in step 2.
15. Power on the VM.
16. Type the IP address and logon for an administrator with permission to access the App Layering
management console.
The first time you log on to the appliance you are required to change the App Layering administrator
passwords. For details, see Change administrative passwords.
Configure a Static IP address for the appliance, if necessary
You can change the appliance’s IP address and its DNS servers. When the appliance is first deployed,
the DNS settings are retrieved through DHCP. If DHCP is not available and you are using static IP ad‑
dresses, once you select Static, you are prompted to enter the IP addresses for your DNS servers.
1. Log in to the Appliance Configuration utility, using the steps and default password described in
Appliance settings.
2. At the Action prompt, enter C (for Configure Networking), and press Return.
3. At the next prompt, type D for Dynamic (DHCP) or S for Static.
If you choose Static, you are prompted for the IP address and Subnet mask, along with the de‑
fault addresses for the Gateway and DNS addresses.
4. When prompted, enter Y to save settings.
5. At the Action prompt, enter Q to quit.
6. Restart the appliance.
Next steps
Once the appliance is installed and the IP address is correctly configured, you need to:
• Install the App Layering agent
• Configure the App Layering service
© 1999–2024 Cloud Soware Group, Inc. All rights reserved. 86

App Layering
Nutanix AHV
October 26, 2020
To install the App Layering service, you deploy the appliance to a virtual machine on your hypervi‑
sor.
• Requirements. Make sure you have the required Nutanix accounts, settings, and resources.
• Install the App Layering appliance in Nutanix. ‑ To install the appliance, you download the
installation package and deploy the appliance in Nutanix.
• If the appliance needs a Static IP address. ‑ You can set a Static IP address by accessing the
appliance configuration utility.
• Next steps. ‑ Links to steps for installing the App Layering agent and configuring the App Layer‑
ing service.
Requirements
If you are installing the appliance and building your Layers on Nutanix VMs, or you are publishing
Layered Images that will be used in a Nutanix environment, you need the following settings and re‑
sources.
• Nutanix account and privileges
– An existing or new Nutanix AHV account to use for App Layering.
– The account must have Nutanix AHV privileges to:
*
Create and remove virtual disks.
*
Copy and delete layers on virtual disks using Nutanix file APIs.
• Nutanix soware and settings ‑ Access to the Nutanix Tools to install on the layer.
• Nutanix resource information ‑ The info listed in the Nutanix AHV Connector Configuration.
Install the App Layering appliance in Nutanix AHV
To deploy the App Layering appliance to Nutanix:
• Verify the contents of the installation package.
• Deploy the appliance.
© 1999–2024 Cloud Soware Group, Inc. All rights reserved. 87

App Layering
Installation package
The installation package, citrix_app_layering_nutanix_4.x.x, includes:
File Description
Nutanix_x.x.x.zip IMG files for the appliance VM
citrix_app_layering_agent_installer.exe App Layering Agent installer
citrix_app_layering_os_machine_tools.exe OS Machine Tools
Deploy the appliance in Nutanix
1. Extract the download package, citrix_app_layering_nutanix_4.x.x.zip. The files included are
listed above.
2. Next, unzip the nutanix_4.x.x zip file, containing two IMG files.
3. In the Nutanix Prism console, select the Tools menu in the top right corner of the UI, and choose
Image Configuration.
4. Click the Upload Image button, and name the disk.
5. Select the Disk Image Type.
6. Select the Upload a File option, browse to your file share, and choose the App Layering Boot
Disk (the “system”IMG). Wait for the upload to complete.
7. Repeat steps 3–6 for the Local Storage Disk (the “repository”IMG).
8. Select Tasks and make sure that for each of the disks, both the Image Create and Image Update
tasks are complete. Once this is done, you can create the virtual machine.
9. Select the VM(Virtual Machine) tab on the top le drop‑down menu, and click the Create VM
button.
10. Complete the Name and Description of the new VM.
11. Set VCPU(S) to 1.
12. Set the Number of Cores per vCPU to 4.
13. Set Memory to 8 GB.
14. To add the Disks to the virtual machine, click Add new disk and choose type Disk.
15. In the Operation drop‑down menu, choose Clone from Image Service.
16. In the Bus Type drop‑down menu select IDE.
© 1999–2024 Cloud Soware Group, Inc. All rights reserved. 88

App Layering
17. In the Image Box select the Boot disk that you uploaded, and click Add.
18. Repeat steps 14–17 for each of the following disks:
Boot Disk: citrix_applayering_nutanix‑system.img
Repository Disk: citrix_applayering_nutanix‑repository.img
Add NIC by clicking on Add new NIC.
19. Click Save to create the VM.
20. Power on the VM.
Add the Citrix App Layering appliance to the Nutanix allow list
Be sure to add the appliance to the Nutanix allow list, so that the appliance is allowed to connect to
Nutanix.
If the appliance needs a Static IP address
You can change the appliance’s IP address and its DNS servers. When the appliance is first deployed,
the DNS settings are retrieved through DHCP. If DHCP is not available and you are using Static IP ad‑
dresses, once you select Static, you are prompted to enter the IP addresses for your DNS servers.
1. Log in to the Appliance Configuration utility, using the steps and default password described in
Appliance settings.
2. At the Action prompt, enter C (for Configure Networking), and press Return.
3. At the next prompt, type D for Dynamic (DHCP) or S for Static.
If you choose Static, you are prompted for the IP address and Subnet mask, along with the de‑
fault addresses for the Gateway and DNS addresses.
4. When prompted, enter Y to save settings.
5. At the Action prompt, enter Q to quit.
6. Restart the appliance.
Next steps
Once the appliance is installed and the IP address is configured as you want it to be, you can install
the App Layering agent, if necessary, and configure the App Layering service. See When the agent is
required.
• Install the App Layering agent
• Configure the App Layering service
© 1999–2024 Cloud Soware Group, Inc. All rights reserved. 89

App Layering
VMware vSphere
June 8, 2021
To install the App Layering service, you deploy the appliance to a virtual machine on your hypervi‑
sor.
Requirements
The App Layering appliance requires the following virtual machine settings, vSphere requirements,
and vCenter permissions.
Virtual machine settings
When you create the appliance’s virtual machine, it requires:
• 4 CPUs
• 8 GB RAM
VMware vSphere requirements
To install the App Layering appliance in a VMware vSphere environment, you need the following:
• A supported version of VMware vSphere.
• A virtual network in vSphere.
• vCenter account and privileges.
You need a vCenter account with permissions on a data center for:
– Creating and removing virtual machines.
– Creating, copying, and removing virtual machine disks.
Also, the account needs this permission at the vCenter level:
– Removing virtual machines from inventory.
For details, see the list of vCenter permissions in the next section.
• The Role for App Layering that would be applied to the data center.
To set up a new role:
1. In the vSphere Client, navigate to Home > Administration > Roles.
© 1999–2024 Cloud Soware Group, Inc. All rights reserved. 90

App Layering
2. Click Add Role.
3. Enter a name. For example: CALAdmin.
4. Set the privileges for the account.
• Privileges defined for the vCenter role that you’re using for the App Layering service. You apply
the new role to the Data Center you plan to use for App Layering. For details, see the list of
vCenter permissions in the next section.
1. Open the Assign Permissions window.
2. In the vSphere Client, navigate to Home > Inventory > Hosts and Clusters.
3. Select your DataCenter and then right‑click, and select Add permission.
4. In the Assign Permissions window, under Assigned Role, expand All Privileges.
5. Select the required vCenter permissions.
6. Select the Propagate to Child Objects check box, and click OK.
• The App Layering role must be assigned to the administrator account, as follows:
1. Add the administrator account and then assign the App Layering role to it.
2. Allow the permissions to propagate to the entire data center.
Note: If you want to restrict this user from accessing specific folders in the data center,
grant the user more restrictive permissions for those folders.
• Because the Virtual Machine > Inventory > Remove permission must be assigned at the vCen‑
ter level, you must create a second role.
1. In the vSphere Client, navigate to Home > Administration > Roles.
2. Click Add Role, and enter a name, for example: CALAdmin‑vmremove.
3. Add Virtual Machine > Inventory > Remove, and leave everything else set to read‑only.
4. In the vSphere Client, navigate to Home > Inventory > Hosts and Clusters.
5. Select the vCenter Permissions tab, right‑click, and select Add permission (or modify
the permissions on an existing account).
Note:
Make sure to use the account that has the data center permissions set.
6. Select the new CALAdmin‑vmremove role you defined. Make sure the Propagate to Child
Objects check box is selected and then click OK.
Note:
If your security policy allows, you can set all permissions at the vCenter level instead.
© 1999–2024 Cloud Soware Group, Inc. All rights reserved. 91

App Layering
vCenter permissions
Expand All Privileges, then each of the following permissions categories, and select the required per‑
missions. Permission names might dier depending on your release of VMware VSphere.
Note:
As of release 19.11, the Host.Configuration.System Management permission is no longer
required.
Datastore
• Allocate space
• Browse datastore
• Low level file operations
Folder
• Create folder
Global
• Cancel task
Network
• Assign network
Resource
• Assign virtual machine to resource pool
vApp
• Export
• Import
Virtual machine > Configuration
• Add existing disk
• Add new disk
• Add or remove device
• Advanced
• Change CPU count
• Change resource
• Memory
• Modify device settings
© 1999–2024 Cloud Soware Group, Inc. All rights reserved. 92

App Layering
• Remove disk
• Rename
• Set annotation
• Settings
• Upgrade virtual machine compatibility
Virtual machine > Interaction
• Configure CD media
• Console interaction
• Connect devices
• Power o
• Power on
• Reset
• VMware Tools Install
Virtual machine > Inventory
• Create from existing
• Create new
• Remove
Virtual machine > Provisioning
• Clone template (optional, but required to use a vSphere template as the source virtual machine)
• Clone virtual machine
Virtual machine > Snapshot management
• Create snapshot
• Revert to snapshot
• Remove snapshot
Install the App Layering appliance in VMware vSphere
To deploy the App Layering appliance to vSphere:
• Make sure that you have the vSphere requirements.
• Familiarize yourself with the contents of the installation package.
• Deploy the appliance.
Installation package
The installation package, citrix_app_layering_vmware_21.4.x.x, includes:
© 1999–2024 Cloud Soware Group, Inc. All rights reserved. 93

App Layering
File Description
vmware_x.x.x.ova OVA file for the appliance VM
citrix_app_layering_agent_installer.exe App Layering Agent installer
citrix_app_layering_os_machine_tools.exe OS Machine Tools
Deploy the appliance
1. Extract the download package, citrix_app_layering_vmware_21.4.x.x.zip. The files included are
listed at the beginning of this topic.
2. Extract the vmware_4.x.xx.ova to a folder on your local drive.
3. In the vSphere Web Client you are using, navigate to the VMs and Templates page.
4. Right‑click the folder in vSphere where you want to deploy the template and select Deploy OVF
Template. The Deploy OVF Template wizard appears.
5. In the Deploy OVF Template wizard, do the following:
a) On the Select sourcepage, selectthe Local file option, and browse to the vmware_x.x.x.ova
file to select it.
b) On the Select name and folder page, designate a name and location for the deployed OVF
template.
c) On the Select a resource page, select a location to run the deployed OVF template.
d) On the Select storage page, select the Thick Provision Lazy Zeroed setting of the Select
virtual disk format option, select a storage policy, and specify a storage location.
e) On the Setup networks page, select your vSphere virtual network in the Destination col‑
umn and select the IPv4 setting of the IP protocol option.
f) On the Ready to complete page, review the template settings and then click Finish when
you are satisfied with the settings.
If the appliance needs a Static IP address
You can change the appliance’s IP address and its DNS servers. When the appliance is first deployed,
the DNS settings are retrieved using the Dynamic Host Configuration Protocol (DHCP}. If DHCP is not
available, you can use static IP addresses. You select Static and enter the IP addresses for your DNS
servers.
1. Log in to the Appliance Configuration utility, using the steps and default password described in
Appliance settings.
2. At the Action prompt, enter C (for Configure Networking), and press Return.
© 1999–2024 Cloud Soware Group, Inc. All rights reserved. 94

App Layering
3. At the next prompt, type D for DHCP, or S for Static. If you choose Static, you are prompted for
the following:
• IP address
• Subnet mask
• Default Gateway address
• Default DNS address
4. At the next prompt, enter Y to save settings.
5. At the Action prompt, enter Q to quit.
6. Restart the appliance.
Next steps
Once the appliance is installed and the IP address is configured, proceed to:
• Install the App Layering agent
• Configure the App Layering service
Install the App Layering agent
July 1, 2021
The App Layering agent enables the appliance or a packaging machine to run PowerShell commands
locally. If you supply the proper credentials, the agent can run PowerShell commands as a specific
user.
When the agent is required
The App Layering agent is required if you plan to:
• Launch scripts using your connector configurations.
• Run the App Layering appliance in Microso Hyper‑V.
• Publish layered images to Citrix Provisioning.
You install the agent in the following locations:
• On all Hyper‑V servers you plan to use for layer creation or image publishing.
• On any Citrix Provisioning servers where you plan to publish layered images.
• In locations where your connector configurations run PowerShell scripts.
© 1999–2024 Cloud Soware Group, Inc. All rights reserved. 95

App Layering
Registering the agent with the appliance
The App Layering agent installer prompts you to register the agent with an App Layering appliance.
If you do not register the agent during installation, you can manually register it later. However, the
PowerShell scripts do not run until the agent is registered with the appliance.
Prerequisites
Before you install the App Layering agent, make sure you that the system where you are installing the
agent meets the following requirements:
• An account with administrator privileges
• .NET 4.5
• PowerShell 3.0 or later
• PowerShell Snap‑in. Before using the App Layering agent on a Citrix Provisioning Services
server, you must ensure that the PowerShell Snap‑in is installed. See the steps to manually
register the agent with the appliance.
If you previously installed the App Layering agent, you can download updated versions from the Citrix
downloads page. The agent installation package is included in the App Layering ZIP download.
To download the App Layering agent
1. Go to the Citrix home page and then click Sign in.
2. Click Downloads and select Citrix App Layering from the list.
3. On the Citrix App Layering page, under Citrix App Layering > Product Soware, click Citrix
App Layering.
4. At the bottom of the page, click Tools.
5. Click the Citrix App Layering agent Download File.
The file citrix_app_layering_agent_installer.exe downloads to your computer.
Install the App Layering agent
The App Layering agent installer prompts you to register the agent with an App Layering appliance. If
you do not register the agent during installation, you can manually register it later. However, keep in
mind that the agent must be registered with the appliance before the PowerShell scripts can run.
1. Using an account with administrator privileges, log into the system where you are installing the
agent.
2. Copy the Citrix_app_layering_agent_installer.exe file to a convenient location on the server.
© 1999–2024 Cloud Soware Group, Inc. All rights reserved. 96

App Layering
3. Run the Citrix_app_layering_agent_installer.exe as an administrator, and when prompted, en‑
ter the path to the directory where you want to install the App Layering agent. The default loca‑
tion is C:\Program Files (x86)\Citrix\Agent.
The agent installer checks to see that all prerequisites are present. If any prerequisites are miss‑
ing, the installer reports this and exits without installing.
4. The installer prompts you for an Agent Port number. You can accept the default port number
(8016) or specify a dierent one if the default port is already in use.
5. The installer prompts you for the credentials (address, user name, and password) for your App
Layering appliance. Register the App Layering agent with the appliance by entering the IP ad‑
dress and logon credentials for a management console user on the appliancewith administrator
privileges, (for example, the credentials you use to log on to the management console).
Note:
If the App Layering appliance is not available or you choose not to register with it now, you
can manually register later using the proceduredescribed in Register with the App Layering
appliance manually.
6. Click Finish to exit the wizard.
Manually register the App Layering agent with the appliance
Register the App Layering agent with the appliance.
If the App Layering Agent is not registered with an App Layering appliance during installation, you can
register it later by using the following procedure.
1. As an administrator, log in to the server where you installed the App Layering agent.
2. Open a command window (cmd.exe) as administrator and navigate to the directory where the
App Layering Agent is installed. The default location is C:\Program Files (x86)\Citrix\Agent.
3. Run the following PowerShell command:
Enable-PSRemoting
4. Verify that port 8016 is open by running this command:
netstat -a
5. Open a command window (cmd.exe) as administrator and navigate to the directory where the
App Layering Agent is installed. The default location is:
C:\Program Files (x86)\Citrix\Agent
6. Run the following command, using the IP address of the appliance where indicated:
© 1999–2024 Cloud Soware Group, Inc. All rights reserved. 97

App Layering
1 Citrix.AppLayering.Agent.Service.exe register /i /e:
IP_address_of_appliance /u:Administrator
2 <!--NeedCopy-->
7. When prompted, enter the password for a user who has administrator privileges in the manage‑
ment console on the appliance.
8. When the registration process finishes, a message appears informing you of the successful out‑
come. The App Layering agent registration appears in the audit log for the management service.
If the process does not succeed, examine the agent log file in the installation directory:
C:\Program Files (x86)\Citrix\agent\Logs\applayering.agent.log
You can also view Help for the App Layering agent command line options by running the follow‑
ing command:
Citrix.AppLayering.Agent.Service.exe /?
9. Run PowerShell command to load the appropriate DLL files on the Citrix Provisioning Server.
For PVS 7.7 and later:
a) Navigate to:
C:\program files\citrix\provisioning services console
b) Run the command:
C:\Windows\Microsoft.NET\Framework64\v4.0.30319\InstallUtil.
exe Citrix.PVS.snapin.dll
For PVS 7.1–7.6:
a) Navigate to:
C:\program files\citrix\provisioning services console
b) Run the command:
C:\Windows\Microsoft.NET\Framework64\v4.0.30319\InstallUtil.
exe McliPSSnapIn.dll
In case some Citrix Provisioning and Broker snap‑ins are unregistered, for instance aer a major
Windows update, find out which ones.
10. Run the following command to list the registered snap‑ins:
get-pssnapin -registered
11. See this article for instructions to reregister all snap‑ins.
© 1999–2024 Cloud Soware Group, Inc. All rights reserved. 98

App Layering
Configure
June 13, 2023
Once you’ve installed the App Layering soware and deployed the appliance, you can access the man‑
agement console that runs on the appliance.
To secure the appliance, you are required to set your own administrator passwords the first time you
log into the console. Then, you can proceed to:
• Set up a file share
• Connect to a directory service
• Assign roles to users
You also have the opportunity to
enable Labs features currently in testing.
Access management console
June 1, 2022
You can access the App Layering appliance by entering the appliance’s IP address in a web browser.
The first time you log into the management console, you:
• Enter the default user name (administrator) and password (Unidesk1).
• Agree to the Citrix License Agreement.
• Change all administrative passwords on the appliance.
Access the management console
To log directly into the management console hosted on the App Layering appliance:
1. In your hypervisor, locate the virtual machine you created for the appliance, and determine its
IP address.
2. Using the IP address for the appliance, enter the following URL in a compatible web browser:
http://<ip_address_of new_vm>
3. Log into the management console. Enter the default user name and password listed in the in‑
troduction.
© 1999–2024 Cloud Soware Group, Inc. All rights reserved. 99

App Layering
The first time anyone logs into the management console on a new appliance, the system forces
a password change for each of the appliance’s administrative accounts.
Important:
Be sure to record the new passwords in a safe place, according to your company’s security
guidelines.
Change administrator passwords
June 14, 2022
The appliance has three accounts that you can use to manage its features and settings.
• Management console “administrator”account ‑ Lets you access the management console
hosted on the appliance. There you can create and manage layers, and publish layered images.
The default password is Unidesk1.
• Appliance “administrator”account ‑ Lets you access the appliance’s configuration utility
where you can change the network settings, date, time, NTP server, and time zone. The default
password is Unidesk1.
• Appliance “root”user account ‑ The appliance’s default Linux superuser account. The pass‑
word for this account is required if you ever reset your other administrative accounts. The root
user has access to all commands and files on the appliance’s Linux OS. The default password is
v9Yx*6uj.
The administrator account for the management console is the most used. You can easily configure
and use the App Layering service without ever accessing the other two accounts.
Important:
Keep the password for the root user in a safe place. If you need it to reset the passwords for the
other two administrator accounts.
To secure your appliance, you must change the passwords for these accounts the first time that you
access the management console aer installation.
The first time you access the appliance aer installation
When the appliance is installed and you log in for the first time, a tab is displayed where you must
change the passwords for the administrator accounts that you use to manage the appliance.
1. For each account, enter the new password and then reenter it in the Confirm Password field.
© 1999–2024 Cloud Soware Group, Inc. All rights reserved. 100

App Layering
2. On the Confirm and Complete tab, click Change Credentials.
3. Safely store these passwords in case you need them.
WARNING:
You must keep the root user password in a safe location. Without it you cannot reset your
other administrator accounts.
To change the password for an administrative account
1. Log into the management console.
2. Go to System > Administrators > Default Administrator.
3. Click the Edit button.
4. Enter and confirm the new password, and click Confirm and Complete.
Set up file share
June 14, 2022
The App Layering appliance must be connected to a file share. If you haven’t yet configured a file
share, use these instructions.
You can add storage locations for users’persistent data and settings. You can also add space to storage
disks already in use. For more about managing storage, see the article about managing storage.
If you are using more than one appliance, each applianceneeds touse a dierentfile share, or a unique
folder on the same share.
Requirements
When setting up the appliance’s file share:
• The file share must be configured using Server Message Block (SMB) technology.
• The Service account that the App Layering appliance uses to connect to the file share must have
full permissions for that file share.
• Users require read‑only access to the file share. If you plan to enable user layers on the im‑
ages you publish, also set the file share permissions detailed in Configure security on user layer
folders.
• Ensure that you have the minimum storage space requirement of 40‑100 GB for your file share.
Note: Storage space is expandable. You can add space to a disk, or add other disks to the appli‑
ance.
© 1999–2024 Cloud Soware Group, Inc. All rights reserved. 101

App Layering
Create the network file share
Configure a file share that uses the SMB protocol.
• Follow the vendor’s instructions for setting up a file share using the SMB protocol.
Configure the App Layering appliance to access the file share
Once you have created a file share, configure the App Layering appliance to attach to it. You can con‑
figure the appliance via the App Layering management console.
1. In the Management Console, select System > Network File Shares and click Edit.
2. Specify an SMB file share path, User name, and Password for the file share.
3. Click Confirm and Complete to see if you can connect to the file share. The File Share is saved
if the connection succeeds, or displays an error if the connection fails.
Connect to a directory service
April 12, 2023
You can configure the Citrix App Layering appliance to connect to Active Directory. When you connect
to your directory service, you create one or more Directory Junctions to access specific domains or
organizational units (OUs).
The appliance does not modify the directory service to which you connect. The soware caches the
attributes for each directory service entry. If the connection to the directory service is lost temporarily,
the soware can use the cached information for management tasks.
When creating a Directory Junction, use the following industry standard acronyms:
• OU ‑ Organizational Unit
• DC ‑ Domain Component
About connecting the appliance to a directory service
What happens when you add Directory Junctions
Each Directory Junction that you create specifies a starting node in the directory tree. A new direc‑
tory junction cannot include users who are already members of another junction. You can’t nest junc‑
tions.
© 1999–2024 Cloud Soware Group, Inc. All rights reserved. 102

App Layering
If you’re creating several Distinguished Names
The system compares the Domain Component first; the portions of the Distinguished Name that start
with “DC=”.
In Distinguished Names, order matters. For example, DC=A,DC=B is dierent from DC=B,DC=A.
The system adds Directory Junctions In the following instances:
• The domain components dier.
• Their domain components match and the remaining components do not overlap.
Directory Junctions merge if their domain components match and their other components are re‑
lated.
User attributes are imported from the directory service
The App Layering soware imports and caches user and group attributes from your directory service
when:
• You assign administrator privileges to a user.
• The values of the attributes change in the directory service.
The attributes that the soware caches are read‑only. All changes to the attributes for directory ser‑
vice users come from the directory server.
Imported attributes are synchronized regularly
The soware synchronizes the information it caches for directory service users with the directory ser‑
vice every 12 hours. If a user is no longer an object in the directory service, the user is considered
abandoned. You can view this information in the Information view for the user.
To create a directory junction
1. Click System > Directory Services.
2. Click Add Directory Junction.
3. Specify the details for the directory server:
• Server address ‑ The name for the server that you use for the directory service (IP Address
or DNS Name).
• Port ‑ Specify the port number for communicating with the directory server.
© 1999–2024 Cloud Soware Group, Inc. All rights reserved. 103

App Layering
• Use SSL ‑ Click to enable Secure Sockets Layer (SSL) communication.
If certificate errors occur, the wizard displays a list of these errors. If you are sure it is safe
to ignore them, click Ignore Certificate Errors.
• Connect ‑ Click to verify so the appliance can connect to the directory service.
• Bind Distinguished Name (DN) ‑ To determine the correct syntax for the Bind DN or user
name, see the documentation for your directory. The following examples show some of
the ways you can specify a user for the directory service:
– domain\username
– username@domain.com.
• Bind Password ‑ Type the password.
• Connect ‑ Click to verify so the appliance can connect to the directory service.
• Base Distinguished Name ‑ Specify where the soware starts searching for users and
groups in the remote directory service.
• Directory Junction Name ‑ The name of the folder that you see in the tree view. You can
use any name, including the name of a domain in your directory service tree.
4. Click Confirm and Complete.
Assign roles
June 28, 2023
App Layering roles define which App Layering modules (features) a user can manage. Any users as‑
signed one or more roles can log into the management console. These users are listed in the System
> Access Control tab.
App Layering users, rights, and roles
The App Layering service supports two types of users:
• App Layering administrator. This account is unique to App Layering. You receive it when you
first install the App Layering appliance and log on to the management console. You can use it
to get started. This “built‑in”administrator account has the rights to perform all App Layering
operations. You can edit this administrator
’
s properties, including the name, password, and
contact info. The first time you log into the appliance, you are required to change the password
for this administrator and agree to the EULA.
• Active Directory (AD) users. Other than the built‑in administrator account, all App Layering
users are AD users imported via one or more directory junctions. Once your directory junctions
© 1999–2024 Cloud Soware Group, Inc. All rights reserved. 104

App Layering
have been created, you can grant other rights to users. For more information, see Connect to a
directory service.
Rights and roles
You can select all the rights and roles for each user by selecting the following check boxes. If you select
Administrator or Reader, all other check boxes are grayed out.
• Reader: Can log into the App Layering management console, but cannot modify anything.
• App Layer Contributor: Can add, edit, and delete application layers and versions.
• OS Layer Contributor: Can add, edit, and delete OS layers and versions.
• Platform Layer Contributor: Can add, edit, and delete platform layers and versions.
• Image Template Contributor: Can add, edit, and delete image templates.
• Image Publisher: Can publish images.
• Elastic Layer Assignment Contributor: Can add, edit, and delete Elastic Layer assignments.
• Administrator: Can do everything.
• Layer Importer: Can import OS layers, application layers, and platform layers from external
sources.
• Layer Exporter: Can export OS layers, application layers, and platform layers to an external
location.
• Platform Connector Contributor: Can add, edit, and delete platform connector configura‑
tions.
• Log Exporter: Can export and download the App Layering log package.
User credentials for logging into the management console
When you assign roles to Directory Service users, they can use their Directory Service credentials to
log into the management console.
Who can assign App Layering roles?
You can change a user’s role if you are logged into the management console as a user assigned the
Administrator role.
Assign App Layering roles to users
1. Log in to the management console.
2. Select System > Access Control.
© 1999–2024 Cloud Soware Group, Inc. All rights reserved. 105

App Layering
3. Select a user and click Edit. The Edit User blade opens.
4. Choose the role(s) for the selected user.
5. Click Confirm and Complete, then click Save.
Upgrade
May 8, 2023
For the latest fixes and features, including compatibility with other soware packages that you use,
we encourage you to stay current with the App Layering upgrades. The upgrade process is partially au‑
tomated, in that the appliance periodically checks for the latest package. It downloads new packages,
verifies, and extracts the files. Users receive a message the next time they log in, and administrators
with proper permissions can start the upgrade.
Besides upgrading the App Layering appliance, also expect to upgrade the:
• App Layering agent, if it is installed on your hypervisor and provisioning servers.
• Published layered images (requires provisioning your servers with the images).
This article explains how to complete each of the associated upgrades.
Before you upgrade
Before you upgrade:
• Verify that a network file share is configured.
• Back up the appliance.
• Check the supported upgrade path (for pre‑19.1 versions only)
Verify that a network file share is configured
You can confirm the share by logging on to the appliance and navigating to System > Network File
Share. Aer ensuring you configured the file share, you can upgrade the appliance.
Back up the appliance
Take a snapshot or checkpoint of the appliance.
© 1999–2024 Cloud Soware Group, Inc. All rights reserved. 106

App Layering
Check the supported upgrade path
If you are upgrading from an older version of the product, use the following upgrade path to bring
your installed version up‑to‑date. Click on the version number to be taken to the Download page for
that version.
Upgrade from Version To Version
4.1 4.15
4.7 4.15
4.15 19.1
19.1 19.7
19.7 20.1
20.1 20.8
20.8 20.11
20.11 21.4
21.4 21.7
21.7 23.4
Upgrade the appliance
App Layering upgrades are partially automated. The appliance periodically checks for upgrades and
downloads the latest one, as long as the correct permissions, and other requirements, are in place.
The Upgrade folder includes the appliance upgrade, the agent upgrade, and a folder of tools to use
on your OS layer.
What happens if an upgrade is found
If an upgrade is found during the automated check, the latest available compressed folder is down‑
loaded to your appliance. The appliance verifies the download, and extracts the files in the back‑
ground.
Meanwhile, every user receives one of the following messages the next time they log in:
• Start Upgrade: Run the App Layering appliance soware upgrade (Administrators only).
• Close: Dismisses the message, so you can manually start the upgrade later using User tab >
Upgrade Appliance.
© 1999–2024 Cloud Soware Group, Inc. All rights reserved. 107

App Layering
For more detail about what the appliance checks for, see How the upgrade checks work, in detail.
Who can start the upgrade
Only an administrator can start the upgrade.
If your firewall prevents automatic downloads of the upgrade package
If firewall requirements prevent automatic downloading, download the upgrade package from the
Citrix download site. Copy the package to the network fileshare where the appliance can access it.
1. Navigate to the .zip file and extract the files.
2. Log on to the management console, select User and then click Upgrade Appliance.
3. Verify the upgrade path, and click Upgrade. The upgrade process starts and opens a Statuspage
in the browser.
4. When the upgrade is complete, the status changes to Upgrade Status: Complete. Refresh the
webpage to return to the management console.
5. Verify that the upgrade was successful by clicking the About link in the management console to
confirm the version number.
If you are upgrading from App Layering 18.12 or earlier (VMware vSphere only)
As of Release 18.12, the TEST and SAVE buttons check the VMware vSphere privileges. A pass means
that the appliance has permissions to create, edit, and delete virtual machines.
If upgrading from release 18.12 or earlier, expect to set a few more permissions that are now required.
Create another role and assign the permissions at the vCenter level.
Create another role Because the Virtual Machine > Inventory > Remove permission must be as‑
signed at the vCenter level, you must create another role.
1. In the vSphere Client, navigate to Home > Administration > Roles.
2. Click Add Role, and enter a name, for example: CALAdmin‑vmremove.
3. Add only Virtual Machine > Inventory > Remove. Everything else can remain read‑only.
4. In the vSphere Client, navigate to Home > Inventory > Hosts and Clusters.
5. Select the vCenter Permissions tab, right‑click, and select Add permission (or modify the per‑
missions on an existing account).
© 1999–2024 Cloud Soware Group, Inc. All rights reserved. 108

App Layering
Note:
Make sure the account is the one that owns the data center permissions set previously.
6. Select the new CALAdmin‑vmremove role you defined. Make sure the Propagate to Child Ob‑
jects check box is selected and then click OK.
Note:
You can set all permissions at the vCenter level, if your security policy allows it.
Enable vCenter permissions Enable the permissions listed in the Install appliance in vSphere arti‑
cle.
Disable the following settings For your reference, be sure to disable the following settings:
• vApp
– Application Configuration
• Virtual Machine
– Configuration
*
Advanced Configuration
*
Change Tracking
*
Managed By
*
Reset Guest Info
*
Swap Placement
– Interact
*
Answer Question
*
Console Interact
*
Suspend
– Inventory
*
Register
*
Unregister
– Provisioning
*
Customize
*
Deploy Template
*
Mark As Template
– State
*
Remove Snapshot
© 1999–2024 Cloud Soware Group, Inc. All rights reserved. 109

App Layering
Upgrade the App Layering agent (if installed)
Next, upgradethe App Layering agent. This componentenables an appliance or packagingmachine to
run PowerShell commands locally. You can expectto find the agent installed in the following locations,
if they exist in your environment:
• Hyper‑V servers that App Layering uses for layer creation or image publishing.
• Citrix Provisioning servers where you publish layered images.
• Servers where a connector configuration runs PowerShell scripts. To view any existing connec‑
tor configurations, open the management console and select System > Connectors.
To upgrade the App Layering agent in those locations:
1. Copy the agent upgrade file to the servers where the agent is installed.
2. Double‑click the agent upgrade file, and follow the instructions for upgrading the agent.
Upgrade your published layered images
App Layering upgrades include driver updates, new features, and the bug fixes documented in the
What’s new. Once you upgrade the appliance, upgrade your published images.
To upgrade your published images, you select each of your image templates, verify the settings, and
use it to publish new versions of the layered images. Use the new images to provision your systems.
To apply the upgrade to your published layered images:
1. Log into the layering management console.
2. Select the Images tab. Your image templates are displayed.
3. If you want to verify or update a template’s settings, select the image template, and click Edit
Template. Edit the settings and click Save Template and Publish.
4. If the image template does not need editing, simply select the template, click Publish Layered
Image.
5. Once published, use the new layered images to provision your systems.
Background: How the upgrade checks work, in detail
When the App Layering appliance checks for an upgrade:
• If an update is not available: Nothing happens. Another check is made at the next scheduled
interval.
• If an update is available, but there is no network file share configured: The user receives
a message that there is an upgrade available. It asks you to finish configuring the network file
share.
© 1999–2024 Cloud Soware Group, Inc. All rights reserved. 110

App Layering
• If an update is available: A job is started to “Download Upgrade Media.”You can check for
progress through the following tasks:
– Downloading the upgrade media to local storage.
– Ensuring the checksum of the successfully downloaded upgrade package is correct.
– Extracting the downloaded upgrade package to the configured Network File Share. The
download is extracted to the appliance’s file share:
Location: NetworkFileShare*AppLayeringVersion*
Example: \MyServer\AppLayeringFileShare\4.0.8
*
If extraction is successful, the next time any user logs in they will be notified that an
upgrade is available.
*
If at any time during this process an error requires Administrator intervention, the job
fails with an error. For example:
· Out of space on local storage.
· Out of space on the network file share.
· Invalid files found.
Note:
If a job fails, it retries at the next check interval, regardless of whether the issue
has been resolved.
• If another update is found before a previously downloaded one is installed ‑ The new up‑
grade is downloaded, and once successfully completed, becomes “Upgrade Available.”
• If one upgrade is downloading when another is made available ‑ The running download is
aborted and a new download is started. All files related to the in‑progress download are deleted.
Optional: How to check for available upgrades manually
Automated upgrade checks always pull the latest version, but you can manually check for updates.
To manually check for an update:
1. Log into the management console.
2. Click the User tab and then the Upgrade Appliance action. The latest version displays in the
Upgrade Disk field.
If you are logged into a desktop as Administrator, and an Upgrade badge is displayed:
1. Click Start Upgrade. The download information is displayed in the Upgrade Disk field.
2. As Administrator, you can select a dierent Upgrade Disk.
Use the detailed steps in the earlier section, Upgrade the appliance.
© 1999–2024 Cloud Soware Group, Inc. All rights reserved. 111

App Layering
Connector configurations
March 12, 2024
The first time you use the App Layering service, plan to create one or more “connector configurations”.
App Layering connector configurations are stored sets of credentials that the appliance uses to access
locations on your hypervisor or provisioning server. A connector configuration can specify where to
build a layer, or where to publish images.
Why use connector configurations
Connector configurations let the App Layering appliance access locations in your environment for cre‑
ating layers or publishing layered images. Using a connector configuration automates the file transfer
process and saves significant amounts of time.
You can use a connector configuration to:
• Create an app layer or platform layer, or add a version to an OS layer, and if you choose, also
run a script.
• Publish layered images to your hypervisor or provisioning server, and if you choose, also run a
script.
Create layers
Layer creation is easier when you use a connector configuration. The connector configuration in‑
cludes the credentials for the location where you plan to install the sowarefor a layer. This connector
configuration includes a Packaging Cache option, which is enabled by default to aord you the best
layering performance.
Publish layered images
You need a connector configuration for each location to which you are publishing layered images.
Once published, you use layered images to provision systems for specific groups of users.
Requirements
To create a connector configuration, you need to meet the following requirements.
© 1999–2024 Cloud Soware Group, Inc. All rights reserved. 112

App Layering
Credentials
Valid account credentials that the appliance can use to access a location in your environment. For
details about the values you need, select the hypervisor or Provisioning Service later in this section.
About oload compositing
When creating a layer or publishing a layered image, you can use the built‑in App Layering compositing
engine to create layers. The compositing engine is enabled by selecting the Oload Compositing
connector configuration option. The ImportOsLayer.ps1 script is used when creating an OS layer
from scratch. Be sure to open the firewall ports required for the compositing engine
Note:
An OS layer is created (initially) by importing the OS from an existing virtual machine. Once cre‑
ated, you update the OS layer just like any other layer.
Oload Compositing:
• Reduces the layering task processing time.
• Enables support for creating UEFI images with vTPM and GPT partitions. These features are
required for modern Windows OS versions such as Windows 11.
• Enables support for creating VHDX disks.
• Can automatically eliminate some file system issues with native Windows tools
To create a layer using Oload Compositing:
• App layer, platform layer: While creating a layer, choose a connector configuration with Of‑
fload Compositing enabled.
• OS layer: Run a script. For details, see Create OS layer.
Disk space for cache
On all supported hypervisors, except for Azure, the default Packaging cache size is set to the recom‑
mended starting level. Allow enough disk space to increase the cache size, if needed.
• Creates the layer or image as a UEFI or Generation 2 machine.
• Uses VHDX disk format for either BIOS and Generation 1 format, or UEFI and Generation 2 im‑
ages.
To create an app or platform layer using Oload Compositing, you select a connector configuration
with Oload Compositing enabled. To create an OS layer, you run a script instead. For details, see
Create OS layer.
© 1999–2024 Cloud Soware Group, Inc. All rights reserved. 113

App Layering
Packaging layers
When using Oload Compositing in the connector configuration, packaging a layer begins when you
shut down the machine for finalization. The packaging is done automatically. You do not have to
manually select Finalize in the management console.
Important:
You must run the script to create an OS layer. You can also build the OS on a BIOS or Generation
1 machine, then add a version to the layer with Oload Compositing selected.
When you select Oload Compositing, choose either UEFI or Generation 2 for the new layer version.
Select VHDX for the disk format. VHDX format is supported on BIOS (Generation 1) and UEFI (Genera‑
tion 2) machines.
Publish images
When you publish an image, the publishing machine builds the image on the hypervisor (Hyper‑V,
VMware vSphere) server.
Connectivity
When you use Oload Compositing, a temporary worker VM is created in your environment, which is
called a compositing engine. The compositing engine requires direct connectivity to the App Layering
appliance over SSL (port 443) and iSCSI (port 3260). Ensure that this traic is permitted within your
App Layering environment. Otherwise, tasks created from the appliance are not completed success‑
fully.
About “Packaging cache size”and “Select rate”
Connector configurations for all hypervisors except Azure let you configure space for a Packaging
cache. The appliance uses this cache on your hypervisor to speed up layer packaging.
Packaging cache size
We recommend using the default packaging cache starting size for your hypervisor:
• vSphere: 250 GB
• XenServer: 480 GB
• Hyper‑V: 200 GB
© 1999–2024 Cloud Soware Group, Inc. All rights reserved. 114

App Layering
• Nutanix: 480 GB
The more app layers you create, the larger the cache you need. Increase the Packaging cache size, if
needed.
The Hit rate
The Hit rate is the percentage of times that the appliance has found a disk in the cache. A low value
in this field indicates that the cache is not providing much value. Increase the cache size to accommo‑
date more unique layers.
You can improve a low rate by increasing the Packaging cache size. Increasing the cache size allows
more disks to be stored in the cache. It also increases the likelihood of finding a disk for packaging in
the cache. The result is a higher hit rate value.
View connector configurations
The Connectors tab lists the connector configurations that you have created.
Sort connector configurations
By default, connector configurations are listed in alphabetical order by name.
View connector configuration details
When caching is enabled for a connector configuration, the Connectors tab displays the cache size
for that configuration.
To see the values for any given connector configuration:
1. Click the View Details button or the info icon on the right side of the screen. Details about the
connector configuration are displayed.
View Cache size and Hit rate
The Packaging Cache Size and Hit rate are displayed when the Packaging Cache Size is set to a value
greater than zero (0).
© 1999–2024 Cloud Soware Group, Inc. All rights reserved. 115

App Layering
Add a connector configuration
This section explains how to add and manage a connector configuration on the Connectors tab.
A connector configuration speeds up the process of creating a layer or image template. If you need
one to access a specific location, you can create one by selecting Add Connector Configuration on
the Connectors tab. From there, use the detailed steps later in this section.
To add a connector configuration, follow these steps:
1. Access the management console, and select Connectors to see your connector configurations,
if you have created any.
2. Click Add Connector Configuration in the Action bar. A dialog box opens where you can select
the type of connector configuration to create.
3. Choose the connector type from the drop‑down menu.
4. Complete the fields on the connector configuration page.
5. Click the Test button to verify that the connector can access the location specified using the
credentials supplied.
6. Click Save. The new connector configuration appears on the Connector tab.
Edit a connector configuration
To edit a connector configuration:
1. Access the management console, and select Connectors.
2. Select the connector and click Edit on the action panel or the right side of the screen. The con‑
nector configuration is displayed.
3. Update the configuration, as needed.
4. Click the Test button to verify that the connector can access the location specified using the
credentials supplied.
5. Click Save. The connector configuration is updated.
© 1999–2024 Cloud Soware Group, Inc. All rights reserved. 116

App Layering
Increase the Cache size and Hit rate
To improve the utility of the cache and therefore increase the hit rate by editing the Packaging Cache
Size:
1. Select the connector and click Edit on the action panel or on the right side of the screen.
2. Scroll to Layer Disk Cache Size in GB and enter the amount of space that the cache can occupy.
3. Click the Test button to verify that the connector can access the location specified by using the
credentials supplied.
4. Click Save. The connector configuration is updated.
Continue adjusting the cache size until you achieve the layering performance you are looking for.
Disable or re‑enable caching
Caching is enabled and set to a recommended starting size by default. We strongly recommend that
you use caching.
If you disable caching for a connector configuration, set the cache size to zero (0). You can re‑enable
it by increasing the Packaging cache size.
Delete a connector configuration
To delete a connector configuration:
1. In the management console, select Connectors.
2. Make sure that the connector configuration is not in use.
3. Click Delete on the Action bar or the right side of the screen.
4. In the pop‑up window that opens, select Delete. The connector configuration is deleted.
The Connectors tab takes a few minutes to update aer another administrator deletes a connector
configuration.
Messages when deleting connector configurations
If a connector configuration is in use when you attempt to delete it, you receive a message similar to
the following example:
“Validation Error: Unable to delete connector configuration ‘Citrix Provisioning ‑ ConnectorEx‑
ample’as it is in use. If you receive this error message, remove the connector configuration from the
layer or image template where it is still in use. Then delete the configuration.”
© 1999–2024 Cloud Soware Group, Inc. All rights reserved. 117

App Layering
Azure Deployments
August 11, 2023
When creating layers or publishing images in an Azure environment, use the Azure Deployments or
Machine Creation for Azure Deployments connector configuration. This article describes the con‑
nector configuration settings. For more information about connector configurations and how to add
new ones, see Connector configurations.
Note:
Azure Deployments also supports Azure Government.
Overview
Azure Deployments in App Layering refer to the creation of Azure deployments using Azure Resource
Manager (ARM) templates. ARM templates are Azure‑specific JSON documents that define infrastruc‑
ture and configuration as code. For more information on ARM templates, refer to the Azure documen‑
tation here.
All Azure resources created by the App Layering Azure Deployments connector are created using the
deployment of a user‑specified ARM template. These templates allow an administrator to extensively
customize what resources are created and how they’re configured.
Azure template specs
Azuretemplate specs are a type of Azure Resource that store and version an ARM Template for later use
in an ARM template deployment. You must specify between two to four template specs for each Azure
Deployments connector configuration. Each deployment type in an Azure Deployments connector
requires a corresponding version of a template spec. The Cache Disk and Machine deployments are
required, but the Boot Image and Layered Image deployments are optional.
© 1999–2024 Cloud Soware Group, Inc. All rights reserved. 118

App Layering
Deployment types
There are four deployment types, each requiring its template spec. The deployment types dier in the
type of resources that they create, the inputs they receive, and the outputs they produce to override
the default behavior. For more information on these concepts, see Authoring ARM templates.
Machine The Machine deployment creates a virtual machine (VM). VMs created by Machine deploy‑
ments can composite layered images and package layers. If the optional Layered Image deployment
isn’t specified, then a VM is the final result of publishing an image. In this case, the VM can be used
as‑is or as a Machine Creation Services (MCS) master image.
© 1999–2024 Cloud Soware Group, Inc. All rights reserved. 119

App Layering
If a Layered Image deployment is specified, then the resources created by the Machine deployment
are deleted aer the Layered Image deployment completes. Otherwise, App Layering does not delete
the resources (unless the deployment fails).
Cache disk The Cache Disk deployment creates an Azure‑managed disk. This disk is used to contain
the Compositing Engine boot image. The App Layering appliance uploads the contents to the disk
aer it’s created.
If a Boot Image deployment is specified, then the resources created by the Cache Disk deployment
are deleted aer the Boot Image deployment completes. Otherwise, App Layering deletes the re‑
sources during cache cleanup.
© 1999–2024 Cloud Soware Group, Inc. All rights reserved. 120

App Layering
Layered image (optional) The Layered Image deployment is an optional deployment type. The
resulting resources are the final result of publishing a layered image. No particular resource type is
required to be created. The Layered Image deployment can be used to produce a compute gallery
image, a managed disk, or any other type of resource.
App Layering doesn’t delete the resources created by the layered image deployment (unless the de‑
ployment fails).
Boot image (optional) The Boot Image deployment is an optional deployment type. The resulting
resources are used to create the OS disks of the VMs created by Machine deployments. It isn’t required
to create any particular type of resource, however it must create a resource that can be used to create
an OS disk for a VM. This deployment can be used to produce a compute gallery image, or any other
type of resource that can be used as the source of a disk.
App Layering deletes the resources created by the boot image deployment during cache cleanup.
App Layering appliance machine identity
There are two ways to connect using Azure Deployments: as a managed identity or as a registered
application (similar to the Legacy Azure connectory). While using a managed identity is a convenient
way to grant rights to the appliance, using app registration credentials enables Azure Deployments to
access resources across tenants and to be configured on appliances that don’t reside in Azure.
Managed identity
With Azure Deployments, you are now able to authenticate to Azure with the managed identity as‑
signed to the App Layering appliance in Azure.
© 1999–2024 Cloud Soware Group, Inc. All rights reserved. 121

App Layering
Since a managed identity must be assigned, this method is only supported on an App Layering appli‑
ance deployed in Azure.
Registration credentials
To authenticate using your registration credentials, the Azure Deployments connector configuration
requires the following information:
• Azure Environment ‑ The environment being used, whether Azure Public Cloud or Azure Gov‑
ernment.
• Tenant ID ‑ An Azure Active Directory instance, this GUID identifies your organization’s dedi‑
cated instance of Azure Active Directory (AD).
• Client ID ‑ An identifier for the App Registration, which your organization has created for App
Layering.
• Client Secret ‑ The password for the Client ID you are using. If you have forgotten the Client
Secret, you can create a new one.
Note:
Client secrets are logically associated with Azure tenants, so each time you use a new tenant ID,
you must use a new Client Secret.
Add a connector configuration
Refer to the following descriptions for information on each field in the connector configuration
screen.
Defaults (optional)
Defaults are optional and can be used to apply Tags and Custom Data to all deployment types in the
connector configuration. The data specified in the defaults are merged with the data specified in the
corresponding fields of each deployment type.
Deployments
Each deployment type contains the following fields.
Template The template spec used for the deployment. The user creates and manages template
specs in Azure. The managed identity or the registration credentials of the appliance must have read
permission on the resource group containing the template spec.
© 1999–2024 Cloud Soware Group, Inc. All rights reserved. 122

App Layering
Version The version of the template spec to use for deployment. The newest version is selected by
default when the Template selection is changed.
Resource Group The Azure resource group to which to deploy. All resources created by the deploy‑
ment are created in this resource group.
The managed identity or registration credentials of the appliance must have permission to:
• Deploy templates to the resource group
• Create each type of resource in the template
• Delete each type of resource in the template
Assigning the general Contributor role to the managed identity or registration credentials on the re‑
source group grants the required permissions. More granular permissions or roles can be specified
instead, but the permissions required depend on the resources specified in the template.
Note:
The managed identity of the appliance must have permission to connect a device to the virtual
network specified for the VM created by the Machine deployment. If the virtual network isn’t
located in any of the resource groups specified for the deployments, then roles assigned to the
managed identity or registration credentials for those resource groups won’t apply to the virtual
network and a role must be assigned directly to the virtual network.
Tags (advanced) The tags to apply to the Azure deployment artifact created by a deployment. You
can include data from the input parameter (see Authoring ARM templates). To do so, put the JSON
path of the field you want to reference between braces. For example, { context.user } evalu‑
ates to the name of the App Layering user who created the task that caused the deployment. This
works for both the tag name and the tag value fields. If you want to use literal braces in your tags, you
can escape them by doubling them. For example, evaluates to {}.
Important:
These tags are only applied to the deployment resource itself. They aren’t applied to the re‑
sources created by the deployment. To apply tags to the created resources, specify those tags in
the ARM template.
Custom Data (advanced) Arbitrary data specified in JSON format. This data can be referenced in
the ARM template associated with the deployment. The data is accessed using the input parameter’s
context.config.custom object. See Authoring ARM templates for more details.
© 1999–2024 Cloud Soware Group, Inc. All rights reserved. 123

App Layering
Considerations
• Network connectivity is required between the App Layering appliance and the VMs created by
the Machine deployment.
– From the VMs created by the Machine deployment, IP traic must be routable to the App
Layering appliance’s IP address on ports 443 (HTTPS) and 3260 (iSCSI). Also, App Layering
appliance traic must be routable to these VM’s (created by the Machine deployment) IP
address on port 443 (HTTPS).
– App Layering appliances deployed on‑premises mustbe connectedto the Azure virtual net‑
work specified for VMs created by the Machine deployment. You can connect on‑premises
virtual networks to Azure through Azure ExpressRoute and Azure VPN Gateway.
• The Legacy Azure connectors are deprecated but are still available for a limited time. There’s no
upgrade nor migration path from any Legacy Azure connectors to the new Azure Deployments
connector types.
For more information, see Citrix App Layering in Azure.
Authoring ARM templates
March 26, 2024
This section is intended for users familiar with ARM templates. It provides detailed information about
authoring templates for the App Layering Azure Deployments connector. For general ARM template
authoring information, see the Microso documentation.
Input
Every deployment type is passed one parameter, an object named al. This object has two properties,
input and context. The input property is an object specific to each deployment type and its
properties change depending on the deployment type. The context property is the same for all
deployment types. It contains data about the App Layering task, item (layer or image template), and
connector configuration associated with the current deployment. For detailed information about the
parameter object, see Azure Deployments Template Parameter.
Each template must declare the al parameter in its parameters section, as follows:
1 {
2
3 ...
4 "parameters": {
© 1999–2024 Cloud Soware Group, Inc. All rights reserved. 124

App Layering
5
6 "al": {
7
8 "type": "object"
9 }
10
11 }
12 ,
13 ...
14 }
15
16 <!--NeedCopy-->
A template can declare more parameters, but the parameters must all have default values. Otherwise,
App Layering doesn’t provide value to them. This can be useful for using functions that can only be
used in the default value section of a parameter, for example utcNow.
Output
All ARM templates can have outputs. With the Azure Deployments connector, template outputs can
be used to pass information to the next deployment. They can also be used to override some default
behaviors.
The outputs of a deployment are passed to the next deployment using the input property of the al
template parameter.
For example, when a Cache Disk deployment has these outputs:
1 {
2
3 ...
4 "outputs": {
5
6 "generation": {
7
8 "type": "string",
9 "value": "[variables('generation')]"
10 }
11 ,
12 "name": {
13
14 "type": "string",
15 "value": "[variables('name')]"
16 }
17 ,
18 }
19
20 ...
21 }
22
© 1999–2024 Cloud Soware Group, Inc. All rights reserved. 125

App Layering
23 <!--NeedCopy-->
The Boot Image deployment receives this input:
1 {
2
3 "input":
4 {
5
6 "type": "BootImage",
7 "source": {
8
9 "generation": "V2",
10 "name": "MyCoolDiskName"
11 }
12
13 }
14 ,
15 "context": {
16
17 ...
18 }
19
20 }
21
22 <!--NeedCopy-->
Notice the source property of the input object has a property for each output specified by the
Cache Disk deployment template. The origins of each output depend on the type of deployment.
Deployment type details
Each deployment type has a dierent set of inputs and outputs that can change the behavior of the
App Layering operation. These deployment‑specific details are described in this section.
For real‑world examples that use all of these concepts, see Starter Templates.
Cache Disk
The Cache Disk deployment must create a managed disk resource. You can optionally create other
resources in addition to the disk. The App Layering appliance must have permission to write to the
disk using a SAS token (generated by the appliance). A boot image containing the App Layering com‑
positing engine is uploaded to the disk aer it’s created.
Cache Disk Requirements
• Must create a managed disk resource
© 1999–2024 Cloud Soware Group, Inc. All rights reserved. 126

App Layering
• The managed disk’s createOption must be set to "Upload"
• The managed disk’s uploadSizeBytes must be set to the uploadSize specified by the
input, such as "[parameters('al').input.uploadSize]"
• The App Layering appliance must be able to write to the managed disk using a SAS token
1 {
2
3 ...
4 "resources": [
5 {
6
7 "type": "Microsoft.Compute/disks",
8 ...
9 "properties": {
10
11 ...
12 "creationData": {
13
14 "createOption": "Upload",
15 "uploadSizeBytes": "[parameters('al').input.
uploadSize]"
16 }
17
18 ...
19 }
20
21 }
22
23 ]
24 ...
25 }
26
27 <!--NeedCopy-->
Cache Disk Input The input object includes the size and uploadSize properties. This object
does not include output from another deployment.
Cache Disk Output The output of the deployment is passed to the Boot Image deployment if one
is specified. Otherwise, it’s passed to the Machine deployment.
An output named diskId can be specified to explicitly tell App Layering which disk to use. If no
diskId output is specified, App Layering automatically adds one and sets it to the resource ID of the
first managed disk resource created by the deployment. The disk specified by diskId has the App
Layering compositing engine boot image uploaded to it.
© 1999–2024 Cloud Soware Group, Inc. All rights reserved. 127

App Layering
Boot Image
This deployment creates a resource from the managed disk created by the Cache Disk deployment.
There are no hard requirements as to what type of resources are created. However, it must create a
resource that can be used as the source of an OS disk when creating a VM, such as a compute gallery
image version.
Boot Image Disk Requirements
• Must create a resource that can be used to create the OS disk of a VM with the same contents as
the disk with the ID passed in as input.
As an example, a compute gallery image version using the input diskId as a source:
1 {
2
3 ...
4 "resources": [
5 {
6
7 "type": "Microsoft.Compute/galleries/images/versions",
8 ...
9 "properties": {
10
11 ...
12 "storageProfile": {
13
14 "osDiskImage": {
15
16 "source": {
17
18 "id": "[parameters('al').input.source.
diskId]"
19 }
20
21 }
22
23 }
24
25 ...
26 }
27
28 }
29
30 ]
31 ...
32 }
33
34 <!--NeedCopy-->
© 1999–2024 Cloud Soware Group, Inc. All rights reserved. 128

App Layering
Boot Image Input The input object includes the source property. The source represents the
outputs of the Cache Disk deployment, with a property for each output specified. Use the diskId
property for the source of the resource being created.
Boot Image Output The output of the Boot Image deployment is passed to the Machine deploy‑
ment. There are no special or required outputs. However, you must include the data required to
create a VM from the created resource, like a resource ID.
Machine
The Machine deployment must create a virtual machine resource. The virtual machine must be at‑
tached a network on which it can reach the App Layering appliance and the other way around, as per
Firewall ports internal connections for Compositing machine.
Important:
Don’t attach the disk created by the Cache Disk deployment to the virtual machine. The Cache
Disk is a shared resource and considered read only. Create a copy of the disk and attach that
instead when not using the Boot Image deployment.
Machine Requirements
• Must create a virtual machine resource
• The virtual machine must be attached to a network that allows communication to and from the
App Layering appliance
• The virtual machine’s OS disk must be created using Boot Image or Cache Disk resource as its
source
• The virtual machine’s OS disk size must be set to "[parameters('al').input.disk.
size]"
• The virtual machine’s userData property must be set to "[parameters('al').input.
vm.userData]"
1 {
2
3 ...
4 "resources": [
5 {
6
7 "type": "Microsoft.Compute/disks",
8 "name": "[variables('diskName')]",
9 ...
10 "properties": {
11
12 ...
© 1999–2024 Cloud Soware Group, Inc. All rights reserved. 129

App Layering
13 "creationData": {
14
15 "createOption": "Copy",
16 "sourceResourceId": "[parameters('al').input.disk.
image.diskId]"
17 }
18 ,
19 "diskSizeGB": "[parameters('al').input.disk.size]",
20 ...
21 }
22
23 }
24 ,
25 {
26
27 "type": "Microsoft.Compute/virtualMachines",
28 ...
29 "dependsOn": [
30 "[resourceId('Microsoft.Compute/disks', variables('
diskName'))]"
31 ],
32 ...
33 "properties": {
34
35 ...
36 "storageProfile": {
37
38 "osDisk": {
39
40 ...
41 "createOption": "Attach",
42 "managedDisk": {
43
44 "id": "[resourceId('Microsoft.Compute/disks
', variables('diskName'))]"
45 }
46
47 }
48 ,
49 "dataDisks": []
50 }
51 ,
52 ...
53 "userData": "[parameters('al').input.vm.userData]"
54 ...
55 }
56
57 }
58
59 ]
60 ...
61 }
62
© 1999–2024 Cloud Soware Group, Inc. All rights reserved. 130

App Layering
63 <!--NeedCopy-->
Machine Input The input object includes the disk and vm properties.
The disk.image property contains the output from the Boot Image deployment if one was spec‑
ified. Otherwise, it contains the output of the Cache Disk deployment. The disk.size property
contains the size of the disk in GB.
The vm.userData property contains the user data that must be assigned to the created virtual ma‑
chine.
Machine Output The output of the Machine deployment is passed to the Layered Image deploy‑
ment if one is specified. If you’re using a Layered Image deployment, then you must include the ID
of the VM or OS disk in the output so it can be referenced by the Layered Image deployment.
An output named machineId can be specified to explicitly tell App Layering which virtual machine
to use. If no machineId output is specified, App Layering automatically adds one and sets it to the
resource ID of the first virtual machine resource created by the deployment.
An output named ipAddress can be specified to explicitly tell App Layering which IP address to
use to communicate with the machine. If no ipAddress output is specified, App Layering uses the
primary private address of the primary network card attached to the virtual machine resource.
An output named message can be specified to provide a message that is appended to the final status
of a publish image task and the action required status of a layer creation task in the App Layering UI.
This message is only used in the final status of the image publish task if a Layered Image deployment
isn’t specified.
• The Machine Starter Template sets the message output parameter to a link to the machine in
the Azure portal.
Layered Image
The Layered Image deployment creates a resource from the virtual machine or other resources cre‑
ated by the Machine deployment. There are no hard requirements as to what type of resources are
created. However, it creates a resource that can be used as an input to a Provisioning Service such as
Machine Creation Services (MCS). A compute gallery image resource is a good example.
Layered Image Disk Requirements
• Creates a resource that can be used by a Provisioning Service to create virtual machines.
© 1999–2024 Cloud Soware Group, Inc. All rights reserved. 131

App Layering
As an example, the following code block creates a compute gallery image version using the input
diskId as a source. This assumes that the Machine deployment included an output named diskId
that is set to the ID of the machine’s OS disk:
1 {
2
3 ...
4 "resources": [
5 {
6
7 "type": "Microsoft.Compute/galleries/images",
8 "name": "[format('{
9 0 }
10 /{
11 1 }
12 ', variables('galleryName'), variables('name'))]",
13 ...
14 "resources": [
15 {
16
17 "type": "versions",
18 ...
19 "dependsOn": [
20 "[resourceId('Microsoft.Compute/galleries/
images', variables('galleryName'), variables
('name'))]"
21 ],
22 ...
23 "properties": {
24
25 ...
26 "storageProfile": {
27
28 "osDiskImage": {
29
30 "source": {
31
32 "id": "[parameters('al').input.
source.diskId]"
33 }
34
35 }
36
37 }
38
39 ...
40 }
41
42 }
43
44 ]
45 }
46
© 1999–2024 Cloud Soware Group, Inc. All rights reserved. 132

App Layering
47 ],
48 ...
49 }
50
51 <!--NeedCopy-->
Layered Image Input The input object includes the source and diskName properties. The
source represents the outputs of the Machine deployment, with a property for each output
specified. The diskName property is the name of the disk specified in the App Layering image
template.
Layered Image Output The output of the deployment isn’t passed to any other deployments. How‑
ever, an output named message can be specified to provide a message that is appended to the final
status of a publish image task in the App Layering UI.
Starter templates
March 28, 2024
This section contains a full set of ARM templates that can be used with the Azure Deployments con‑
nector. These templates can be used as‑is, or they can be modified to meet specific needs.
Each resource created by these templates is tagged with the same set of tags. These tags include
useful information about the context of the deployment, such as the name of the user who started
the task and the comment they entered.
The templates make extensive use of custom data in the connector configuration. Custom data al‑
lows the user to define common parameters such as location, vmSize, generation, and other
parameters without needing to modify the template.
The following table lists all the custom data properties used by these templates. It specifies which
templates apply to each property and whether the property is required.
R = Required, O = Optional, ‑ = Not used
© 1999–2024 Cloud Soware Group, Inc. All rights reserved. 133

App Layering
Name Type Description Default
Cache
Disk
Boot
Image Machine
Layered
Image
location string The
region
where
resources
are
created.
Same
region as
the target
resource
group.
O O O O
gallery string The name
of the
compute
gallery to
create
images in.
The
gallery
must be
in the
target
resource
group.
‑ ‑ R ‑ R
storageSku string The name
of the
SKU to
use for
managed
disks.
“Stan‑
dard‑
SSD_LRS”
O ‑ O ‑
generation string The gen‑
eration of
virtual
machine.
“V2” ‑ O O O
© 1999–2024 Cloud Soware Group, Inc. All rights reserved. 134

App Layering
Name Type Description Default
Cache
Disk
Boot
Image Machine
Layered
Image
trustedLaunchboolean true to
enable
Trusted
Launch,
false
otherwise.
This must
be the
same
value for
all deploy‑
ment
types.
false O O O O
© 1999–2024 Cloud Soware Group, Inc. All rights reserved. 135

App Layering
Name Type Description Default
Cache
Disk
Boot
Image Machine
Layered
Image
diskAccessIdstring The
resource
ID of the
disk
access
used
when up‑
loading
the disk
contents.
If this is
specified,
the disk is
created
with
public
network
access
disabled.
For more
informa‑
tion, see
Azure
documen‑
tation.
null O ‑ ‑ ‑
vmSize string The size
of the VM
to create.
“Stan‑
dard_D2s_v3”
‑ ‑ O ‑
licenseType string The on‑
premises
license
type to
apply to
created
virtual
ma‑
chines.
null ‑ ‑ O ‑
© 1999–2024 Cloud Soware Group, Inc. All rights reserved. 136

App Layering
Name Type Description Default
Cache
Disk
Boot
Image Machine
Layered
Image
subnetId string The
resource
ID of the
subnet to
which to
attach the
VM’s
network
card.
‑ ‑ ‑ R ‑
replicaCountnumber The
default
number
of
replicas
per
region of
the
gallery
image
version
1 ‑ ‑ ‑ O
© 1999–2024 Cloud Soware Group, Inc. All rights reserved. 137

App Layering
Name Type Description Default
Cache
Disk
Boot
Image Machine
Layered
Image
targetRegionsarray The target
regions of
the
gallery
image
version.
This is
specified
as an
array of
region
name
strings
and/or
TargetRe‑
gion
objects.
The array
must
contain
the region
of the
source
disk
(which is
specified
by the
location
custom
data).
The
region
specified
by the
location
custom
data
‑ ‑ ‑ O
© 1999–2024 Cloud Soware Group, Inc. All rights reserved. 138

App Layering
Name Type Description Default
Cache
Disk
Boot
Image Machine
Layered
Image
publishAs string or
array
The type
of re‑
source(s)
to publish
images as.
Specified
as an
array or
string
consisting
of
‘gallery‑
Image’
and/or
‘man‑
agedDisk’
[“gallery‑
Image”]
‑ ‑ ‑ O
Example custom data:
1 {
2
3 "gallery": "MyGallery",
4 "subnetId": "/subscriptions/ab3d1259-f5a9-407f-bbdd-bfd5701e2e94/
resourceGroups/PDGTPB/providers/Microsoft.Network/
virtualNetworks/MyVnet/subnets/mysubnet"
5 }
6
7 <!--NeedCopy-->
Another example of custom data:
1 {
2
3 "location": "eastus",
4 "gallery": "MyGallery",
5 "storageSku": "Premium_LRS",
6 "trustedLaunch": true,
7 "diskAccessId": "/subscriptions/ab3d1259-f5a9-407f-bbdd-
bfd5701e2e94/resourceGroups/MyResourceGroup/providers/Microsoft.
Compute/diskAccesses/MyDiskAccess",
8 "vmSize": "Standard_D4s_v3",
9 "subnetId": "/subscriptions/ab3d1259-f5a9-407f-bbdd-bfd5701e2e94/
resourceGroups/MyResourceGroup/providers/Microsoft.Network/
© 1999–2024 Cloud Soware Group, Inc. All rights reserved. 139

App Layering
virtualNetworks/MyVnet/subnets/mysubnet",
10 "replicaCount": 2,
11 "targetRegions": [
12 "eastus",
13 {
14
15 "name": "eastus2",
16 "regionalReplicaCount": 5,
17 "storageAccountType": "Premium_LRS"
18 }
19 ,
20 "westus"
21 ]
22 }
23
24 <!--NeedCopy-->
Cache Disk
Creates a managed disk.
Cache Disk custom data
Name Type Description Default Required
location string The region in
which resources
are created.
Same region as
the target
resource group
no
storageSku string The name of the
SKU to use.
“Standard‑
SSD_LRS”
no
trustedLaunch boolean
true to enable
Trusted Launch,
false otherwise.
This must be the
same value for all
deployment
types.
false no
© 1999–2024 Cloud Soware Group, Inc. All rights reserved. 140

App Layering
Name Type Description Default Required
diskAccessId string The resource ID of
the disk access to
use when
uploading the
disk contents. If
specified, the
disk is created
with public
network access
disabled.
null no
Cache Disk template
• 1.1.0.0 ‑ Added support for Trusted Launch
• 1.0.0.0 ‑ Initial version
1 {
2
3 "$schema": "https://schema.management.azure.com/schemas/2019-04-01/
deploymentTemplate.json#",
4 "contentVersion": "1.1.0.0",
5 "parameters": {
6
7 "al": {
8
9 "type": "object"
10 }
11
12 }
13 ,
14 "variables": {
15
16 "custom": "[parameters('al').context.config.custom]",
17 "location": "[if(contains(variables('custom'), 'location'),
variables('custom').location, resourceGroup().location)]",
18 "name": "[concat(parameters('al').context.item.name,'-',
parameters('al').context.item.id)]",
19 "tags": {
20
21 "alTaskId": "[parameters('al').context.taskId]",
22 "alUser": "[parameters('al').context.user]",
23 "alComment": "[parameters('al').context.comment]",
24 "alItemType": "[parameters('al').context.item.type]",
25 "alItemId": "[parameters('al').context.item.id]",
26 "alItemName": "[parameters('al').context.item.name]",
© 1999–2024 Cloud Soware Group, Inc. All rights reserved. 141

App Layering
27 "alItemVersion": "[parameters('al').context.item.version.
name]",
28 "alConfigId": "[parameters('al').context.config.id]",
29 "alConfigName": "[parameters('al').context.config.name]"
30 }
31 ,
32 "hasDiskAccess": "[contains(variables('custom'), 'diskAccessId
')]",
33 "storageSku": "[if(contains(variables('custom'), 'storageSku'),
variables('custom').storageSku, 'StandardSSD_LRS')]",
34 "trustedLaunch": "[if(contains(variables('custom'), '
trustedLaunch'), variables('custom').trustedLaunch, false())
]"
35 }
36 ,
37 "resources": [
38 {
39
40 "type": "Microsoft.Compute/disks",
41 "apiVersion": "2021-08-01",
42 "name": "[variables('name')]",
43 "location": "[variables('location')]",
44 "tags": "[variables('tags')]",
45 "sku": {
46
47 "name": "[variables('storageSku')]"
48 }
49 ,
50 "properties": {
51
52 "creationData": {
53
54 "createOption": "Upload",
55 "uploadSizeBytes": "[parameters('al').input.
uploadSize]"
56 }
57 ,
58 "incremental": "false",
59 "diskAccessId": "[if(variables('hasDiskAccess'),
variables('custom').diskAccessId, null())]",
60 "networkAccessPolicy": "[if(variables('hasDiskAccess'),
'AllowPrivate', 'AllowAll')]",
61 "publicNetworkAccess": "[if(variables('hasDiskAccess'),
'Disabled', 'Enabled')]",
62 "securityProfile": "[if(variables('trustedLaunch'),
createObject('securityType', 'TrustedLaunch'), null
())]"
63 }
64
65 }
66
67 ]
68 }
© 1999–2024 Cloud Soware Group, Inc. All rights reserved. 142

App Layering
69
70 <!--NeedCopy-->
Boot Image
The Boot Image deployment creates a gallery image and image version in the gallery specified by the
custom data. It outputs the ID of the created compute gallery image version for use by the Machine
template.
Boot Image custom data
Name Type Description Default Required
location string The region in
which resources
are created.
Same region as
the target
resource group.
no
generation string The generation of
the virtual
machine used in
the disk.
“V2” no
trustedLaunch boolean true to enable
Trusted Launch,
false otherwise.
This must be the
same value for all
deployment
types.
false no
gallery string The name of the
compute gallery
to create the
image in. The
gallery must be in
the target
resource group.
‑ yes
Boot Image template
• 1.1.0.0 ‑ Added support for Trusted Launch
© 1999–2024 Cloud Soware Group, Inc. All rights reserved. 143

App Layering
• 1.0.0.0 ‑ Initial version
1 {
2
3 "$schema": "https://schema.management.azure.com/schemas/2019-04-01/
deploymentTemplate.json#",
4 "contentVersion": "1.1.0.0",
5 "parameters": {
6
7 "al": {
8
9 "type": "object"
10 }
11
12 }
13 ,
14 "variables": {
15
16 "custom": "[parameters('al').context.config.custom]",
17 "location": "[if(contains(variables('custom'), 'location'),
variables('custom').location, resourceGroup().location)]",
18 "tags": {
19
20 "alTaskId": "[parameters('al').context.taskId]",
21 "alUser": "[parameters('al').context.user]",
22 "alComment": "[parameters('al').context.comment]",
23 "alItemType": "[parameters('al').context.item.type]",
24 "alItemId": "[parameters('al').context.item.id]",
25 "alItemName": "[parameters('al').context.item.name]",
26 "alItemVersion": "[parameters('al').context.item.version.
name]",
27 "alConfigId": "[parameters('al').context.config.id]",
28 "alConfigName": "[parameters('al').context.config.name]"
29 }
30 ,
31 "name": "[concat(parameters('al').context.item.name, '.',
replace(parameters('al').context.config.id, '-', ''), '.',
parameters('al').context.item.id)]",
32 "version": "[parameters('al').context.item.version.name]",
33 "galleryName": "[variables('custom').gallery]",
34 "generation": "[if(contains(variables('custom'), 'generation'),
variables('custom').generation, 'V2')]",
35 "trustedLaunch": "[if(contains(variables('custom'), '
trustedLaunch'), variables('custom').trustedLaunch, false())
]"
36 }
37 ,
38 "resources": [
39 {
40
41 "type": "Microsoft.Compute/galleries/images",
42 "name": "[concat(variables('galleryName'), '/', variables('
name'))]",
© 1999–2024 Cloud Soware Group, Inc. All rights reserved. 144

App Layering
43 "apiVersion": "2021-07-01",
44 "location": "[variables('location')]",
45 "tags": "[variables('tags')]",
46 "properties": {
47
48 "description": "[parameters('al').context.item.
description]",
49 "features": "[if(variables('trustedLaunch'),
createArray(createObject('name', 'SecurityType', '
value', 'TrustedLaunch')), null())]",
50 "hyperVGeneration": "[variables('generation')]",
51 "osType": "Windows",
52 "osState": "Specialized",
53 "endOfLifeDate": "2030-01-01T00:00:00Z",
54 "identifier": {
55
56 "publisher": "Citrix",
57 "offer": "[parameters('al').context.config.id]",
58 "sku": "[parameters('al').context.item.id]"
59 }
60
61 }
62 ,
63 "resources": [
64 {
65
66 "type": "versions",
67 "apiVersion": "2021-07-01",
68 "name": "[variables('version')]",
69 "location": "[variables('location')]",
70 "dependsOn": [
71 "[resourceId('Microsoft.Compute/galleries/
images', variables('galleryName'), variables
('name'))]"
72 ],
73 "tags": "[variables('tags')]",
74 "properties": {
75
76 "publishingProfile": {
77
78 "replicaCount": 1,
79 "targetRegions": [
80 {
81
82 "name": "[variables('location')]"
83 }
84
85 ]
86 }
87 ,
88 "storageProfile": {
89
90 "osDiskImage": {
© 1999–2024 Cloud Soware Group, Inc. All rights reserved. 145

App Layering
91
92 "source": {
93
94 "id": "[parameters('al').input.
source.diskId]"
95 }
96
97 }
98
99 }
100
101 }
102
103 }
104
105 ]
106 }
107
108 ],
109 "outputs": {
110
111 "id": {
112
113 "type": "string",
114 "value": "[resourceId('Microsoft.Compute/galleries/images/
versions', variables('galleryName'), variables('name'),
variables('version'))]"
115 }
116
117 }
118
119 }
120
121 <!--NeedCopy-->
Machine
The Machine deployment creates a virtual machine, NIC, and managed disk. This template works with
or without the Boot Image deployment being specified.
Machine custom data
Name Type Description Default Required
location string The region in
which resources
are created.
Same region as
the target
resource group.
no
© 1999–2024 Cloud Soware Group, Inc. All rights reserved. 146

App Layering
Name Type Description Default Required
storageSku string The name of the
SKU for the
created disk.
“Standard‑
SSD_LRS”
no
generation string The generation
for the virtual
machine.
“V2” no
trustedLaunch boolean true to enable
Trusted Launch,
false otherwise.
This must be the
same value for all
deployment
types.
false no
secureBoot boolean true to enable
Secure Boot,
false otherwise.
This is only
applied if
trustedLaunch
is set to true.
true no
vTpm boolean true to enable
the vTPM, false
otherwise. This is
only applied if
trustedLaunch
is set to true.
true no
vmSize string The size of VM to
create.
“Stan‑
dard_D2s_v3”
no
licenseType string The on‑premises
license type to
apply to the
virtual machine.
null no
subnetId string The resource ID of
the subnet to
which to attach
the NIC.
‑ yes
© 1999–2024 Cloud Soware Group, Inc. All rights reserved. 147

App Layering
Machine template
• 1.1.0.0 ‑ Added support for Trusted Launch
• 1.0.0.0 ‑ Initial version
1 {
2
3 "$schema": "https://schema.management.azure.com/schemas/2019-04-01/
deploymentTemplate.json#",
4 "contentVersion": "1.1.0.0",
5 "parameters": {
6
7 "al": {
8
9 "type": "object"
10 }
11
12 }
13 ,
14 "variables": {
15
16 "custom": "[parameters('al').context.config.custom]",
17 "location": "[if(contains(variables('custom'), 'location'),
variables('custom').location, resourceGroup().location)]",
18 "name": "[concat('al-', parameters('al').context.taskId)]",
19 "vmName": "[concat(variables('name'), '-vm')]",
20 "nicName": "[concat(variables('name'), '-nic')]",
21 "diskName": "[concat(variables('name'), '-disk')]",
22 "diskId": "[resourceId('Microsoft.Compute/disks', variables('
diskName'))]",
23 "tags": {
24
25 "alTaskId": "[parameters('al').context.taskId]",
26 "alUser": "[parameters('al').context.user]",
27 "alComment": "[parameters('al').context.comment]",
28 "alItemType": "[parameters('al').context.item.type]",
29 "alItemId": "[parameters('al').context.item.id]",
30 "alItemName": "[parameters('al').context.item.name]",
31 "alItemVersion": "[parameters('al').context.item.version.
name]",
32 "alConfigId": "[parameters('al').context.config.id]",
33 "alConfigName": "[parameters('al').context.config.name]"
34 }
35 ,
36 "source": "[parameters('al').input.disk.image]",
37 "isFromImage": "[not(contains(variables('source'), 'diskId'))]"
,
38 "generation": "[if(contains(variables('custom'), 'generation'),
variables('custom').generation, 'V2')]",
39 "vmSize": "[if(contains(variables('custom'), 'vmSize'),
variables('custom').vmSize, 'Standard_D2s_v3')]",
40 "storageSku": "[if(contains(variables('custom'), 'storageSku'),
variables('custom').storageSku, 'StandardSSD_LRS')]",
© 1999–2024 Cloud Soware Group, Inc. All rights reserved. 148

App Layering
41 "trustedLaunch": "[if(contains(variables('custom'), '
trustedLaunch'), variables('custom').trustedLaunch, false())
]",
42 "secureBoot": "[if(contains(variables('custom'), 'secureBoot'),
variables('custom').secureBoot, variables('trustedLaunch'))
]",
43 "vTpm": "[if(contains(variables('custom'), 'vTpm'), variables('
custom').vTpm, variables('trustedLaunch'))]",
44 "securityProfile": {
45
46 "securityType": "TrustedLaunch",
47 "uefiSettings": {
48
49 "secureBootEnabled": "[variables('secureBoot')]",
50 "vTpmEnabled": "[variables('vTpm')]"
51 }
52
53 }
54
55 }
56 ,
57 "resources": [
58 {
59
60 "type": "Microsoft.Network/networkInterfaces",
61 "apiVersion": "2020-11-01",
62 "name": "[variables('nicName')]",
63 "location": "[variables('location')]",
64 "tags": "[variables('tags')]",
65 "properties": {
66
67 "ipConfigurations": [
68 {
69
70 "name": "ipconfig1",
71 "properties": {
72
73 "privateIPAllocationMethod": "Dynamic",
74 "subnet": {
75
76 "id": "[variables('custom').subnetId]"
77 }
78 ,
79 "primary": true,
80 "privateIPAddressVersion": "IPv4"
81 }
82
83 }
84
85 ],
86 "dnsSettings": {
87
88 "dnsServers": []
© 1999–2024 Cloud Soware Group, Inc. All rights reserved. 149

App Layering
89 }
90 ,
91 "enableAcceleratedNetworking": false,
92 "enableIPForwarding": false
93 }
94
95 }
96 ,
97 {
98
99 "condition": "[not(variables('isFromImage'))]",
100 "type": "Microsoft.Compute/disks",
101 "apiVersion": "2021-08-01",
102 "name": "[variables('diskName')]",
103 "location": "[variables('location')]",
104 "tags": "[variables('tags')]",
105 "sku": {
106
107 "name": "[variables('storageSku')]"
108 }
109 ,
110 "properties": {
111
112 "osType": "Windows",
113 "hyperVGeneration": "[variables('generation')]",
114 "creationData": {
115
116 "createOption": "Copy",
117 "sourceResourceId": "[variables('source').diskId]"
118 }
119 ,
120 "diskSizeGB": "[parameters('al').input.disk.size]",
121 "networkAccessPolicy": "DenyAll",
122 "publicNetworkAccess": "Disabled"
123 }
124
125 }
126 ,
127 {
128
129 "type": "Microsoft.Compute/virtualMachines",
130 "apiVersion": "2021-07-01",
131 "name": "[variables('vmName')]",
132 "location": "[variables('location')]",
133 "dependsOn": [
134 "[resourceId('Microsoft.Network/networkInterfaces',
variables('nicName'))]",
135 "[variables('diskId')]"
136 ],
137 "tags": "[variables('tags')]",
138 "properties": {
139
140 "hardwareProfile": {
© 1999–2024 Cloud Soware Group, Inc. All rights reserved. 150

App Layering
141
142 "vmSize": "[variables('vmSize')]"
143 }
144 ,
145 "securityProfile": "[if(variables('trustedLaunch'),
variables('securityProfile'), null())]",
146 "storageProfile": {
147
148 "imageReference": "[if(variables('isFromImage'),
createObject('id', variables('source').id), null
())]",
149 "osDisk": {
150
151 "osType": "Windows",
152 "createOption": "[if(variables('isFromImage'),
'FromImage', 'Attach')]",
153 "caching": "ReadWrite",
154 "deleteOption": "Delete",
155 "diskSizeGB": "[parameters('al').input.disk.
size]",
156 "managedDisk": "[if(variables('isFromImage'),
createObject('storageAccountType', variables
('storageSku')), createObject('id',
variables('diskId')))]"
157 }
158 ,
159 "dataDisks": []
160 }
161 ,
162 "networkProfile": {
163
164 "networkInterfaces": [
165 {
166
167 "id": "[resourceId('Microsoft.Network/
networkInterfaces', variables('nicName')
)]"
168 }
169
170 ]
171 }
172 ,
173 "diagnosticsProfile": {
174
175 "bootDiagnostics": {
176
177 "enabled": true
178 }
179
180 }
181 ,
182 "licenseType": "[if(contains(variables('custom'), '
licenseType'), variables('custom').licenseType, null
© 1999–2024 Cloud Soware Group, Inc. All rights reserved. 151

App Layering
())]",
183 "userData": "[parameters('al').input.vm.userData]"
184 }
185
186 }
187
188 ],
189 "outputs": {
190
191 "diskId": {
192
193 "type": "string",
194 "value": "[reference(variables('vmName')).storageProfile.
osDisk.managedDisk.id]"
195 }
196 ,
197 "message": {
198
199 "type": "string",
200 "value": "[format('See [link=\"{
201 0 }
202 /#@{
203 1 }
204 /resource/{
205 2 }
206 \"]{
207 2 }
208 [/link].', environment().portal, tenant().tenantId, resourceId('
Microsoft.Compute/virtualMachines', variables('vmName')))]"
209 }
210
211 }
212
213 }
214
215 <!--NeedCopy-->
Layered Image
The Layered Image deployment can create two types of resources, a gallery image version and/or a
managed disk. Both resource types are named using the name of the App Layering image template
being published and its constructed version number. The version number is constructed using major
and minor numbers from App Layering image template disk name. If the disk name is not formatted
as a numeric version (number.number), then 1.0 is applied by default. The patch number is the
version number of the App Layering image template (the number of times that it’s been published).
The gallery image is assigned the name and the gallery image version is assigned the version number.
The managed disk is assigned the name appended with the version number.
The gallery image and version are created in the gallery specified by the custom data. When an image
© 1999–2024 Cloud Soware Group, Inc. All rights reserved. 152

App Layering
is published multiple times, a new version is added to the compute gallery image, and the old version
stays.
Layered Image custom data
R = Required, O = Optional, ‑ = Not used
Name Type Description Default Gallery Image Managed Disk
publishAs string or array The type of
resource(s) to
create.
Specified as
an array or
string
consisting of
‘galleryImage’
and/or ‘man‑
agedDisk’
[“galleryIm‑
age”]
O R
location string The region
where
resources are
created.
Same region
as the target
resource
group
O O
generation string The
generation of
the virtual
machine that
the image will
support.
“V2” O O
© 1999–2024 Cloud Soware Group, Inc. All rights reserved. 153

App Layering
Name Type Description Default Gallery Image Managed Disk
trustedLaunch boolean true to
enable
Trusted
Launch,
false
otherwise.
This must be
the same
value for all
deployment
types.
false O O
gallery string The name of
the compute
gallery to
create the
image in. The
gallery must
be in the
target
resource
group.
‑ R ‑
replicaCount number The default
number of
replicas per
region of the
gallery image
version
1 O ‑
© 1999–2024 Cloud Soware Group, Inc. All rights reserved. 154

App Layering
Name Type Description Default Gallery Image Managed Disk
targetRegions array The target
regions of the
gallery image
version. This
is specified as
an array of
region name
strings and/or
TargetRegion
objects. The
array must
contain the
region of the
source disk
(as specified
by the
location
custom data).
The region
specified by
the
location
custom data
O ‑
storageSku string The name of
the SKU to
use.
“Standard‑
SSD_LRS”
‑ O
diskAccessId string
The resource
ID of the disk
access to use
when
uploading the
disk contents.
If specified,
then the disk
is created
with public
network
access
disabled.
null ‑ O
© 1999–2024 Cloud Soware Group, Inc. All rights reserved. 155

App Layering
Layered Image template
• 1.1.0.0
– Added support for Trusted Launch
– Added replica count and target region support for gallery image versions
– Added support for publishing as a managed disk
• 1.0.0.0 ‑ Initial version
1 {
2
3 "$schema": "https://schema.management.azure.com/schemas/2019-04-01/
deploymentTemplate.json#",
4 "contentVersion": "1.1.0.0",
5 "parameters": {
6
7 "al": {
8
9 "type": "object"
10 }
11
12 }
13 ,
14 "variables": {
15
16 "invalidChars": [ " ", "(", ")", "[[", "]", "{
17 ", " }
18 ", "!", "@", "#", "$", "%", "^", "&", "*", "+", "/", "\\", "'", "\"",
"|", "`", "~", "<", ">", ",", "?", "*" ],
19 "numericChars": [ "0", "1", "2", "3", "4", "5", "6", "7", "8",
"9" ],
20 "custom": "[parameters('al').context.config.custom]",
21 "location": "[if(contains(variables('custom'), 'location'),
variables('custom').location, resourceGroup().location)]",
22 "name": "[join(split(parameters('al').context.item.name,
variables('invalidChars')), '_')]",
23 "tags": {
24
25 "alTaskId": "[parameters('al').context.taskId]",
26 "alUser": "[parameters('al').context.user]",
27 "alComment": "[parameters('al').context.comment]",
28 "alItemType": "[parameters('al').context.item.type]",
29 "alItemId": "[parameters('al').context.item.id]",
30 "alItemName": "[parameters('al').context.item.name]",
31 "alItemVersion": "[parameters('al').context.item.version.
name]",
32 "alConfigId": "[parameters('al').context.config.id]",
33 "alConfigName": "[parameters('al').context.config.name]"
34 }
35 ,
36 "splitVer": "[split(parameters('al').input.diskName, '.')]",
© 1999–2024 Cloud Soware Group, Inc. All rights reserved. 156

App Layering
37 "major": "[if(equals(0, length(join(split(variables('splitVer')
[0], variables('numericChars')), ''))), variables('splitVer
')[0], '1')]",
38 "minor": "[if(greater(length(variables('splitVer')), 1), if(
equals(0, length(join(split(variables('splitVer')[1],
variables('numericChars')), ''))), variables('splitVer')[1],
'0'), '0')]",
39 "version": "[format('{
40 0 }
41 .{
42 1 }
43 .{
44 2 }
45 ', variables('major'), variables('minor'), parameters('al').context.
item.version.number)]",
46 "galleryName": "[variables('custom').gallery]",
47 "generation": "[if(contains(variables('custom'), 'generation'),
variables('custom').generation, 'V2')]",
48 "trustedLaunch": "[if(contains(variables('custom'), '
trustedLaunch'), variables('custom').trustedLaunch, false())
]",
49 "replicaCount": "[if(contains(variables('custom'), '
replicaCount'), variables('custom').replicaCount, 1)]",
50 "targetRegions": "[if(contains(variables('custom'), '
targetRegions'), variables('custom').targetRegions,
createArray(variables('location')))]",
51 "diskName": "[format('{
52 0 }
53 _{
54 1 }
55 -{
56 2 }
57 -{
58 3 }
59 ', variables('name'), variables('major'), variables('minor'),
parameters('al').context.item.version.number)]",
60 "hasDiskAccess": "[contains(variables('custom'), 'diskAccessId
')]",
61 "storageSku": "[if(contains(variables('custom'), 'storageSku'),
variables('custom').storageSku, 'StandardSSD_LRS')]",
62 "publishAs": "[if(contains(variables('custom'), 'publishAs'),
variables('custom').publishAs, createArray('galleryImage'))]
",
63 "galleryLink": "[format('[link=\"{
64 0 }
65 /#@{
66 1 }
67 /resource/{
68 2 }
69 \"]{
70 2 }
71 [/link].', environment().portal, tenant().tenantId, resourceId('
Microsoft.Compute/galleries/images/versions', variables('
© 1999–2024 Cloud Soware Group, Inc. All rights reserved. 157

App Layering
galleryName'), variables('name'), variables('version')))]",
72 "diskLink": "[format('[link=\"{
73 0 }
74 /#@{
75 1 }
76 /resource/{
77 2 }
78 \"]{
79 2 }
80 [/link].', environment().portal, tenant().tenantId, resourceId('
Microsoft.Compute/disks', variables('diskName')))]",
81 "outputLinks": "[filter(createArray(if(contains(variables('
publishAs'), 'galleryImage'), variables('galleryLink'), null
()), if(contains(variables('publishAs'), 'managedDisk'),
variables('diskLink'), null())), lambda('link', not(equals(
lambdaVariables('link'), null()))))]"
82 }
83 ,
84 "resources": [
85 {
86
87 "condition": "[contains(variables('publishAs'), '
galleryImage')]",
88 "type": "Microsoft.Compute/galleries/images",
89 "name": "[format('{
90 0 }
91 /{
92 1 }
93 ', variables('galleryName'), variables('name'))]",
94 "apiVersion": "2021-07-01",
95 "location": "[variables('location')]",
96 "properties": {
97
98 "description": "[parameters('al').context.item.
description]",
99 "features": "[if(variables('trustedLaunch'),
createArray(createObject('name', 'SecurityType', '
value', 'TrustedLaunch')), null())]",
100 "hyperVGeneration": "[variables('generation')]",
101 "osType": "Windows",
102 "osState": "Specialized",
103 "endOfLifeDate": "2030-01-01T00:00:00Z",
104 "identifier": {
105
106 "publisher": "AppLayering",
107 "offer": "[variables('name')]",
108 "sku": "[variables('generation')]"
109 }
110
111 }
112 ,
113 "tags": "[variables('tags')]",
114 "resources": [
© 1999–2024 Cloud Soware Group, Inc. All rights reserved. 158

App Layering
115 {
116
117 "condition": "[contains(variables('publishAs'), '
galleryImage')]",
118 "type": "versions",
119 "apiVersion": "2022-03-03",
120 "name": "[variables('version')]",
121 "location": "[variables('location')]",
122 "dependsOn": [
123 "[resourceId('Microsoft.Compute/galleries/
images', variables('galleryName'), variables
('name'))]"
124 ],
125 "tags": "[variables('tags')]",
126 "properties": {
127
128 "publishingProfile": {
129
130 "replicaCount": "[variables('replicaCount')
]",
131 "targetRegions": "[map(variables('
targetRegions'), lambda('item', if(
contains(lambdaVariables('item'), 'name
'), lambdaVariables('item'),
createObject('name', lambdaVariables('
item')))))]"
132 }
133 ,
134 "storageProfile": {
135
136 "osDiskImage": {
137
138 "source": {
139
140 "id": "[parameters('al').input.
source.diskId]"
141 }
142
143 }
144
145 }
146
147 }
148
149 }
150
151 ]
152 }
153 ,
154 {
155
156 "condition": "[contains(variables('publishAs'), '
managedDisk')]",
© 1999–2024 Cloud Soware Group, Inc. All rights reserved. 159

App Layering
157 "type": "Microsoft.Compute/disks",
158 "apiVersion": "2021-08-01",
159 "name": "[variables('diskName')]",
160 "location": "[variables('location')]",
161 "tags": "[variables('tags')]",
162 "sku": {
163
164 "name": "[variables('storageSku')]"
165 }
166 ,
167 "properties": {
168
169 "osType": "Windows",
170 "hyperVGeneration": "[variables('generation')]",
171 "creationData": {
172
173 "createOption": "Copy",
174 "sourceResourceId": "[parameters('al').input.source
.diskId]"
175 }
176 ,
177 "diskAccessId": "[if(variables('hasDiskAccess'),
variables('custom').diskAccessId, null())]",
178 "networkAccessPolicy": "[if(variables('hasDiskAccess'),
'AllowPrivate', 'AllowAll')]",
179 "publicNetworkAccess": "[if(variables('hasDiskAccess'),
'Disabled', 'Enabled')]"
180 }
181
182 }
183
184 ],
185 "outputs": {
186
187 "message": {
188
189 "type": "string",
190 "value": "[if(empty(variables('outputLinks')), null(),
format('See {
191 0 }
192 .', join(variables('outputLinks'), ' and ')))]"
193 }
194
195 }
196
197 }
198
199 <!--NeedCopy-->
© 1999–2024 Cloud Soware Group, Inc. All rights reserved. 160

App Layering
Template parameters
December 13, 2022
This article describes objects passed to all templates associated with an Azure Deployments connec‑
tor. The object is passed as the al parameter and can be accessed via the ARM template function
parameters, such as [parameters('al').context.user].
1 {
2
3 "input":
4 {
5
6 "type": "BootImage",
7 "source": "any"
8 }
9 ,
10 // OR
11 {
12
13 "type": "CacheDisk",
14 "size": "number",
15 "uploadSize": "number"
16 }
17 ,
18 // OR
19 {
20
21 "type": "LayeredImage",
22 "diskName": "string",
23 "source": "any"
24 }
25 ,
26 // OR
27 {
28
29 "type": "Machine",
30 "disk": {
31
32 "image": "any",
33 "size": "number",
34 "name": "string"
35 }
36 ,
37 "vm": {
38
39 "userData": "string"
40 }
41
42 }
43 ,
© 1999–2024 Cloud Soware Group, Inc. All rights reserved. 161

App Layering
44 "context": {
45
46 "taskId": "number",
47 "type": "string",
48 "user": "string",
49 "comment": "string",
50 "config": {
51
52 "id": "string",
53 "name": "string",
54 "custom": "any"
55 }
56 ,
57 "item": {
58
59 "type": "string",
60 "id": "number",
61 "name": "string",
62 "description": "string",
63 "created": "string",
64 "modified": "string",
65 "version": {
66
67 "number": "number",
68 "name": "string",
69 "description": "string",
70 "created": "string"
71 }
72
73 }
74
75 }
76
77 }
78
79 <!--NeedCopy-->
AlParam
The set of data passed to every deployment as the al parameter. This can be accessed from within the
ARM template by passing al to the
parameters
ARM template function, such as parameters('al').
© 1999–2024 Cloud Soware Group, Inc. All rights reserved. 162

App Layering
Name Description Value
input A set of data that applies only
to a specific deployment type.
The type of this property
depends on the deployment
type specified by
context.type
BootImageInput,
CacheDiskInput,
LayeredImageInput,
MachineInput
context A set of data that applies to
every deployment type.
DeploymentContext
BootImageInput
Input data specific to the BootImage deployment type.
Name Description Value
type The type of deployment to
which this input applies.
‘BootImage’
source The source for the image. This
is an object with a property for
each output specified in the
ARM template associated with
the Cache Disk deployment.
any
CacheDiskInput
Input data specific to the CacheDisk deployment type.
Name Description Value
type The type of deployment to
which this input applies.
‘CacheDisk’
size The size of the managed disk to
be created, in GiB.
number (32‑bit integer)
uploadSize The size of source disk that will
be uploaded to the created
disk, in bytes.
number (64‑bit integer)
© 1999–2024 Cloud Soware Group, Inc. All rights reserved. 163

App Layering
LayeredImageInput
Input data specific to the LayeredImage deployment type.
Name Description Value
type The type of deployment to
which this input applies.
‘LayeredImage’
diskName The name of the disk as
specified in the App Layering
image template of the image
currently being published.
string
source The source for the image. This
is an object with a property for
each output specified in the
ARM template associated with
the Machine deployment.
any
MachineInput
Input data specific to the Machine deployment type.
Name Description Value
type The type of deployment to
which this input applies.
‘Machine’
disk Input data that applies to the
OS disk of the machine.
DiskInput
vm Input data that applies to the
VM itself.
VmInput
DiskInput
Input data that applies to the OS disk of a machine.
© 1999–2024 Cloud Soware Group, Inc. All rights reserved. 164

App Layering
Name Description Value
image The source for the disk. This is
an object with a property for
each output specified in the
ARM template associated with
the
Boot Image
deployment, if
the Boot Image deployment is
specified in the connector
configuration. If the Boot
Image deployment is not
specified, then output of the
ARM template associated with
the Cache Disk deployment is
used.
any
size The size of the disk to be
created, in GiB.
number (64‑bit integer)
name The name of the disk as
specified in the App Layering
image template of the image
currently being published. If
this is not an image publish
operation, then this is
undefined.
string
VmInput
Input data that applies to a VM.
Name Description Value
userData The value that must be applied
to the userData property of
the VirtualMachineProperties
of the virtualMachine
specified in the ARM template
associated with the
deployment.
string
© 1999–2024 Cloud Soware Group, Inc. All rights reserved. 165

App Layering
DeploymentContext
Provides the context of the current deployment operation.
Name Description Value
taskId The ID of the ELM task that
caused the deployment.
number (64‑bit integer)
type
The type of the current
deployment.
‘
CacheDisk
’
,
‘
BootImage
’
,
‘Machine’, ‘LayeredImage’
user The username of the user who
started the ELM task that
caused this deployment.
string
comment The comment the user entered
when starting the ELM task that
caused this deployment.
string
config The platform connector
configuration that is associated
with this deployment.
Config
item The App Layering entity
associated with the ELM task
that caused this deployment.
This will refer to a layer, a
layered image template, or a
boot image.
Item
Config
Contains the properties of the platform connector configuration associated with the current opera‑
tion.
Name Description Value
id The ID of the platform
connector configuration. This
is a guid in the form of xxxxxxxx‑
xxxx‑xxxx‑xxxx‑xxxxxxxxxxxx.
string
name The name of platform
connector configuration.
string
© 1999–2024 Cloud Soware Group, Inc. All rights reserved. 166

App Layering
Name Description Value
custom The custom data specified in
the platform connector
configuration. The type and
properties of this object
depend on the JSON specified
for the current deployment
type by the user.
any
Item
The App Layering entity associated with an ELM task that caused a deployment.
This can be a layer, a layered image template, or a boot image.
Name Description Value
type The item type of App Layering
entity.
‘Image’, ‘AppLayer’, ‘OsLayer’,
‘PlatformLayer’, ‘Connector‑
CachedCeBootImage’
id The ID of the item. number (64‑bit integer)
name The name of the item. string
description The description of the item. string
created The date and time the item was
originally created.
string (ISO 8601 datetime)
modified The date and time the item was
last changed.
string (ISO 8601 datetime)
version Information about this
particular version of the item.
Version
Version
The version of an App Layering entity associated with an ELM task that caused a deployment. This
can be a layer version, a layered image template version, or a boot image version.
© 1999–2024 Cloud Soware Group, Inc. All rights reserved. 167

App Layering
Name Description Value
number An integer that represents the
version. For layers, this is the
number of attempted
packagings. For layered image
templates, this is the number
of successful publishes of the
template. For boot images, this
is the timestamp of the image
file.
number (32‑bit integer)
name The name of the version. For
layers, this is the version name
specified by the user. For
layered image templates, this is
Publish{Number}_. For boot
images, this is the version
(x.y.z) of App Layering creating
the deployment.
string
description The description of the version.
For layers, this is the version
description specified by the
user. For layered image
templates, this is an empty
string. For boot images, this is
a generic description that
includes the appliance version
number.
string
created The date and time the version
was created. For layers, this is
when the version was created.
For layered image templates,
this is when the template was
last edited. For boot images,
this is the timestamp of the
image file.
string (ISO 8601 datetime)
© 1999–2024 Cloud Soware Group, Inc. All rights reserved. 168

App Layering
XenServer
March 27, 2024
XenServer is a highly optimized hypervisor platform for Citrix Virtual Apps and Desktops, enabling
Windows and Linux Virtual Apps and Desktops delivery to any device and hundreds of employees in
just minutes.
Before you start
You can use your XenServer environment to create Layers and publish layered images. Each Connec‑
tor Configuration accesses a specific storage location in your XenServer environment. You might need
more than one XenServer Connector Configuration to access the correct location for each purpose.
Further, you can publish each layered image to a location convenient to the system you provision
with the published image. For more information about Connectors and Connector Configurations,
see Connector configurations.
With the XenServer architecture, you can interact with individual servers or a cluster of servers in‑
stead of a central management server. You can manage XenServer by using command‑line access or
management soware, such as XenCenter. You can install XenCenter on your desktop and connect
individually to each host or a cluster of hosts.
If this is your first time using App Layering
If you want to create App Layers by using a XenServer virtual machine, you need a XenServer Connec‑
tor within App Layering. When you publish layered images to XenServer, you also need a Connector
Configuration for each of your publishing locations.
Creating a layer and publishing a layered image prompts you to select a connector configuration. If
you don’t yet have the right connector configuration for the task, you can create one by clicking Add
Connector Configuration on the Connectors page.
Required information for XenServer Connector Configuration settings
Configuring a connector for XenServer lets you browse for the XenCenter Server, Data Store, and
Host to use for a new configuration.
Important
The fields are case‑sensitive. Any values that you enter manually must match the case of the
object in XenServer, or the validation fails.
• XenServer Configuration Name: A useful name to help identify and keep track of this connec‑
tor configuration.
© 1999–2024 Cloud Soware Group, Inc. All rights reserved. 169

App Layering
• XenServer Address: The name of the XenServer host with which the appliance integrates.
• User Name and Password: The credentials for the account that the appliance uses to connect
to the XenServer.
• Use Secured Communications: SSL encryption for the API connection traic between the App
Layering Connector and XenServer. This field is selected by default.
• Virtual Machine Template: The virtual machine template for cloning. The list of choices con‑
tains custom virtual machine templates only, rather than actual virtual machines or any of the
built‑in templates. The selected template must not have any disks attached and must have at
least one network card attached. If it does not, you see an error when trying to validate or save
the configuration.
• Storage Repository: The storage repository for the disk that uploads. The list is filtered to show
only repositories that can contain virtual hard disks (ISO repositories are filtered out).
• Layer Disk Cache Size in GB (optional): Specifies the size of the cache allowed for the layer.
By default, the allowed cache size is 250 GB.
• Use HTTPS for File Transfers: Encrypts the image file transfers. HTTPS is selected by default
for more secure uploads and downloads but can be cleared for increased performance. This
does not apply when you enable Oload Compositing.
• Oload Compositing (recommended): Enables the layer packaging or image publishing
process to run on the specified Hypervisor server. This feature increases performance and it
allows you to use VMDK disk format and either BIOS or UEFI virtual machines. With UEFI, you
can also use Secure Boot if it’s enabled on the Hypervisor.
• ISO Storage Repository: Repository for the disks that Oload Compositing uploads. The list is
filtered to show only ISO repositories. SMB and NFS are supported.
• ISO Share Path: Automatically populates for selected ISO storage repository by the ISO share
path configured. For display only.
• ISO Share Username: User name for the selected ISO Share. Only valid for SMB ISO Share. NFS
ISO Share does not support a user name or password.
• ISO Share Password: Password for the select ISO share. Only valid for SMB ISO Share. NFS ISO
Share does not support a user name or password.
When Oload Compositing is selected:
• If you provide a template configured for BIOS or UEFI, the resulting virtual machine is the type
that you chose.
• If you provide a template with UEFI‑Secure Boot enabled and selected, the resulting virtual ma‑
chine is the UEFI‑Secure Boot.
When Oload Compositing isn’t selected:
• If you provide a template configured for BIOS, the resulting virtual machine is BIOS.
• If you provide a template configured for UEFI and when you attempt to save the connector con‑
figuration, an error is displayed.
© 1999–2024 Cloud Soware Group, Inc. All rights reserved. 170

App Layering
Virtual Machine folder
Virtual machines created by the XenServer connector, whether packaging machines or layered im‑
ages, can use either folders or tags to organize the virtual machines. XenServer allows you to orga‑
nize virtual machines by folder or by tag. These organizational tools are optional when creating and
managing virtual machines through XenCenter or other tools. Although XenServer connector configu‑
rations do not allow you to specify folders or tags, the virtual machines created by the XenServer con‑
nector, both packaging machines and published layered images, can use both organizational tools.
Caching tags
If the template specified in the XenServer connector configuration has any tags, then those tags are
carried over to any virtual machine cloned from that template. All packaging virtual machines or pub‑
lished layered images are tagged with the same tags that the template has. Also, the XenServer con‑
nector adds three tags.
• App Layering ‑ All virtual machines created by the XenServer connector can be found by this
tag regardless of their purpose or image.
• Purpose Tag ‑ All packaging machines are tagged with App Layering Packaging Machine while
all published layered image virtual machines are tagged with App Layering Published Images.
• Image or Layer Name ‑ All packaging machines are tagged with the layer name for the layer
for which they are generated, while all published layered images are tagged with the template
image name.
If you are using XenCenter, you can view your virtual machines by tag by selecting Organization
Views and then selecting By Tag.
Folder
By default, virtual machines created by the XenServer Connector are not placed in a folder. However,
if the template specified in the XenServer Connector Configuration resides in a folder, then any virtual
machine that the Connector creates from that template also resides in the same folder. All packaging
VMs and published layered images are placed in that same folder. There are no separate subfolders
for packaging VMs or published layered images.
Machine network connectivity
The virtual network settings of the source template specified in the XenServer Connector Configura‑
tion are carried over when creating any VMs through the XenServer Connector. There is no option in
the Connector Configuration UI to override the network settings.
XenServer Clusters
The XenServer Connector does not yet work correctly with XenServer clusters. If the host specified in
the configuration is part of a cluster, then it must be the master host in the cluster for the connector
to work. However, this means that anytime the master XenServer host goes down and a new master
is elected, the XenServer configuration must be updated.
© 1999–2024 Cloud Soware Group, Inc. All rights reserved. 171

App Layering
Create a Connector Configuration
To enter the values:
• Enter the first three Connector fields manually. Aer validating the credentials in those fields,
you can select values for the remaining fields from the drop‑down menus.
• To enter values manually, click to put the cursor in the field and type the value, making sure that
the case matches the value in XenServer.
• To select a value from a drop‑down list, do the following:
– Click once to put the cursor in the field.
– Click a second time to display the list of possible values.
To add a Connector Configuration
1. Click the Connectors page.
2. Click Add Connector Configuration. A dialog box opens.
3. Select the Connector Type for the platform and location where you are creating the layer or
publishing the image.
4. Click New to open the Connector Configuration page.
5. Type the configuration Name, XenServer address, user name, password, and setting for the Use
Secured Communications check box. For more information, see the above field definitions.
6. Click CONNECT below the XenServer Configuration fields. The Virtual Machine Clone Settings
fields are then enabled if the user name and password are correct.
Note:
If there is a certificate error, the following error message is displayed:
One or more problems with the service certificate were found
. You can enable them to be ignored, or you must update the
certificate on the server.
You can click Ignore Certificate Errors and Continue.
7. Select the required Virtual Machine Template.
8. Select the Storage Repository.
9. Ensure Packaging Cache Size in GB is set to the desired value (or use default). Setting the value
to 0 results in no caching.
10. Select the setting for Use HTTPS for File Transfers.
11. Select the setting for Use Oload Compositing.
© 1999–2024 Cloud Soware Group, Inc. All rights reserved. 172

App Layering
12. If Use Oload Compositing is selected, select ISO Storage Repository. The ISO Share Path is
auto‑populated.
13. If an SMB ISO share is selected, enter the SMB ISO share user name and password.
14. Click CONFIRM AND COMPLETE. A configuration summary is displayed.
15. Click Save. If no errors are displayed, the new connector configuration is saved and displayed
on the Connector page.
Citrix Provisioning (XenServer, VMware, Hyper‑V, Nutanix)
March 22, 2024
The Citrix Provisioning connector configuration requires an account that the App Layering appliance
can use to access the virtual machine where you are creating a layer or publishing layered images.
When using vSphere as the hypervisor for Citrix Provisioning, we recommend using the same vSphere
VM template, in the vSphere connector settings, for creating layers as you do for creating the Target
Devices in Citrix Provisioning. This practice ensures that the published image and the target devices
have the same baseline VM specs.
Requirements
If you plan to publish layered images to your Citrix Provisioning environment, add a Citrix Provisioning
connector configuration for that Citrix Provisioning location.
Citrix Provisioning requirements
• Domain accounts have permission to access the Citrix Provisioning store and the local system
account does not. If your Citrix Provisioning server is configured to use the local system account,
which is the default setting, you can change the account by running the Citrix Provisioning con‑
figuration wizard. The wizard gives you the option to run as the local system or use a domain
account. Choose a domain account.
• The domain user account in the connector configuration must be in the local Administrators
group on the Citrix Provisioning server.
• Citrix Provisioning server and account information ‑ For App Layering to access the location in
your Citrix Provisioning environment where you want to publish a layered image, you supply
the credentials and location in a Citrix Provisioning connector configuration.
• The App Layering agent must be installed on each of your Citrix Provisioning servers. For details,
see the agent installation instructions.
© 1999–2024 Cloud Soware Group, Inc. All rights reserved. 173

App Layering
Citrix Provisioning connector configuration
The information you need for the Citrix Provisioning connector configuration includes.
• Config Name: A useful name to identify and keep track of this connector configuration.
Citrix Provisioning Server Configuration
• Console: The name of the Citrix Provisioning server on which the App Layering agent is de‑
ployed. This is the server to which the Personal vDisk is published.
Note:
The host name is required, rather than the FQDN so that the Citrix Provisioning server can
access the App Layering appliance if it is on a dierent domain.
• Domain User: User name of a domain account that has permission to manage Citrix Provision‑
ing. This account is used by the agent to run Provisioning Services PowerShell commands. This
account must have Read/Write access to the Citrix Provisioning store for writing the published
Personal vDisk.
• Password: The password for the domain user account.
vDisk Settings
• Site Name: Name of the Site this Personal vDisk is to be a member of.
• Store Name: Name of the Store that this Personal vDisk is a member of.
• Write Cache: When a new Disk is being created, this value sets the Write Cache type of the new
Disk. Possible values include:
– Cache on Server
– Cache on Server, Persistent
– Cache in Device RAM
– Cache in Device RAM with Overflow on Hard Disk
– Cache on Device Hard Drive
Important:
When choosing a Write Cache option, see Selecting the write cache destination for stan‑
dard Personal vDisk images to ensure that the Citrix Provisioning servers and target de‑
vices that use this Personal vDisk are properly configured for the type you select.
• License Mode: Sets the Windows License Mode to:
© 1999–2024 Cloud Soware Group, Inc. All rights reserved. 174

App Layering
– KMS ‑ Key Management Service
– MAK ‑ Multiple Activation Keys
– None
• Enable Active Directory machine account password management: Enables Active Directory
password management. The default value is Enabled.
• Enable Load Balancing: Enables load balancing. for the streaming of the Personal vDisk.
• Enable Printer Management: When enabled, invalid printers are deleted from the Device.
Compositing Settings Oload Connector Configuration: A hypervisor connector configuration
with Oload compositing enabled. This connector configuration composites layer on behalf of the
Citrix Provisioning connector. The virtual machine settings used by the oload compositing engine
are from this connector configuration. For example, if the Oload Connector Configuration is set up
to create UEFI machines, the resulting vDisk is in UEFI format.
Disk Format: The Disk Format of the Citrix Provisioning vDisk on the Citrix Provisioning Server. The
format specified here overrides the format in the associated Oload Connector Configuration.
File Share Path: The UNC path corresponds to the Citrix Provisioning Store selected in the vDisk Set‑
tings. Requirements include:
• If the Citrix Provisioning Store does not point to a UNC File share, configure the local path as an
SMB share.
• The File Share Path is accessible to the compositing engine and selected Citrix Provisioning
Store.
If you change the Store selection when Oload Compositing is selected, the connector attempts to
resolve the File Share Path. If the File Share Path cannot be resolved automatically, it remains blank.
Script configuration (Optional, advanced feature)
When creating a connector configuration, you can configure an optional PowerShell script on any Win‑
dows machine running an App Layering agent, the same agent used on the Citrix Provisioning server.
Store these scripts on the machine where the App Layering agent is installed. Only run the scripts aer
a successful deployment of a layered image. Some preset variables are available to enable scripts to
be reusable with dierent template images and dierent connector configurations. These variables
also contain information needed to identify the virtual machine created as part of the published lay‑
ered image in Citrix Provisioning.
Running the scripts do not aect the outcome of the publish job, and the progress of commands run
in the script aren’t visible. The Citrix Provisioning connector logs contain the output of the script that
ran.
© 1999–2024 Cloud Soware Group, Inc. All rights reserved. 175

App Layering
Configure a script
Remember that this procedure is optional. If you want a script to run each time a layered image is
published, complete these steps using the values described in the sections that follow.
1. Complete and save the connector configuration.
Note:
Before selecting the Script configuration page, you must save (or discard) any edits to the
connector configuration settings,
2. If the Navigation menu on the le is not open, select it and click Script Configuration to open
the Script Path page.
3. Complete the required fields, and click Save. Field descriptions follow.
Script Configuration fields
• Enable script: Select this check box to enable the remaining fields. This allows you to enter a
script that runs each time a Layered Image is published.
• Script Agent: The agent machine where the scripts are located and run from.
• Username (optional): The user name to impersonate when running the script. This name can
be used to ensure the script runs in the context of a user that has the needed rights/permissions
to perform the operations in the script.
• Password (optional): The password for the specified user name.
• Script Path: A full path and file name on the agent machine where the script file resides.
Other Script Configuration values
PowerShell variables Use any of these Variables in the PowerShell script:
Value
Applies to connector
types
Value determined by
which code Description
connectorCfgName All Common code The name of the
connector
configuration with
which the script
configuration is
associated.
© 1999–2024 Cloud Soware Group, Inc. All rights reserved. 176

App Layering
Value
Applies to connector
types
Value determined by
which code Description
imageName All Common code The name of the
layered image
template that is used
to build/publish the
layered image.
osType All Common code The OS type of the
published layered
image. It can be one of
the following values:
Windows7;
Windows764;
Windows200864;
Windows201264;
Windows10;
Windows1064
diskLocatorId All Provisioning Services The internal ID for the
Personal vDisk.
User Impersonation The App Layering Agent, which runs as a service on a Windows machine, runs
under either the local system account or the network account. Either of these accounts can have some
special privileges, but they are oen restricted when running specific commands or seeing files in
the file system. Therefore, App Layering gives you the option of adding a domain user and password
that can be used to “impersonate”a user. This means that the script can be run as if that user had
logged on to the system so that any commands or data are accessible subject to those user rights and
permissions. If a user name or password is not entered, the script runs using the account under which
the service is configured to run.
Script Execution Policy Script execution policy requirements are up to you. If you intend to run un‑
signed scripts, you must configure the execution policy to one of the more lenient policies. However,
if you sign your own scripts, you can choose to use a more restrictive execution policy.
Google Cloud
April 30, 2021
© 1999–2024 Cloud Soware Group, Inc. All rights reserved. 177

App Layering
A connector configuration contains the credentials that the appliance uses to access a specific project
on Google Cloud. You need a connector configuration for each Google Cloud project that you want to
access with the appliance.
Creating layers on Google Cloud requires a Google Cloud connector configuration. This article de‑
scribes the values required for the connector. See Connector configurations for more about configu‑
rations and how to create them.
Before you create a Google Cloud connector configuration
This section explains:
• The Google Cloud account information required to create this connector configuration.
• The Google Cloud storage you need for App Layering.
Required Google Cloud Service Account and Service Account Key
The Google Cloud connector configuration requires the following information.
• Project ‑ The Project Id of a Google Cloud project.
• Service Account Key File ‑ For making API calls as the service account on behalf of the connec‑
tor configuration.
• Storage Bucket: A storage location in Google Cloud for storing virtual disks uploaded by the
connector.
• Instance Template: A Google Cloud VM template with the desired settings for creating a virtual
machine.
• Disk Type: The type of Google Cloud storage.
• Zone: The Google Cloud Zone where you plan to create layers or publish images using the con‑
nector configuration.
Required Google Cloud storage bucket
Any account you use for App Layering must meet the following requirements:
• Must be separate from the storage bucket used for the appliance.
• Must be in the Google Cloud location where you plan to deploy virtual machines.
Create a Google Service Account and Service Account Key File
Use the following procedures for each Google Cloud project that you want to connect with the App
Layering appliance.
© 1999–2024 Cloud Soware Group, Inc. All rights reserved. 178

App Layering
1. Log into console.cloud.google.com.
2. Select the project, and click Go To Project Settings.
3. On the le pane, click Service Accounts.
4. At the top of the page, click + CREATE SERVICE ACCOUNT.
5. Add the details for your service account
• Name for this service account: Descriptive name. For example, TestEast1
• Service Account Id: filled in with what you put in the name field, use that value.
6. Click the Create button.
Add the roles for your service account
In the Select Role box, select the roles required:
• Storage Admin
• Compute Admin
• Service Account User
1. Click the Continue button.
2. Click the Done button. User access to the role is not necessary.
© 1999–2024 Cloud Soware Group, Inc. All rights reserved. 179

App Layering
Create a Service Account Key File
1. From the project, select the Service Account tab on the le.
2. Click the three vertical dots to the right of the service account you want to create the key file for.
3. Select Create key.
4. On the popup, select the JSON radio button and click the CREATE button.
5. When you are prompted to save the key to a file, enter the name of your choice or keep the
default name. You are returned to the Service Accounts screen.
6. Click your service account to verify that the key is there.
Edit Service Account Roles
To edit the roles:
1. Navigate to the project UI screen as you did when creating the service account.
2. From the hamburger menu on the top le, expand the IAM & ADMIN and select Manage Re‑
sources.
3. Select your project, and on the right side type the Service Account you want to edit into the
Filter Tree. The service account name is displayed.
4. Edit each of the roles to include or to remove from the roles and save the results.
Note:
If you remove all the privilege from the service account, it will no longer show on the IAM
page (because IAM page only lists those account with at least one roles attached). But it
will show up on Service Account screen. You would need to go to IAM page to add privileges
back.
5. Click the ADD button.
6. On the Add members, roles to “current”project panel, in the New members field, type the
name of the member to whom you want to give privileges.
7. Select the roles you want to give the member, and click the SAVE button.
Machine creation for Azure
April 4, 2022
© 1999–2024 Cloud Soware Group, Inc. All rights reserved. 180

App Layering
A connector configuration contains the credentials and location information that the appliance needs
to access a specific location in Machine Creation for Azure. For example, your organization can have
one Machine Creation for Azure account and several storage locations, and you need a connector con‑
figuration so the appliance can access each storage location.
This article describes the settings included in the Machine Creation for Azure connector configuration.
For more about connector configurations and how to add them, see Connect.
Note:
This connector can be used for any template you want to use in a non‑persistent catalog. For
example, if you deploy a template to Azure and want to use that template to create a Citrix Provi‑
sioning Personal vDisk for non‑persistent machines, you must use the MCS connector to publish
the template.
When to add a connector configuration for Azure
When you create your first layers, and later when you publish layered images for the first time, you
will add a connector configuration for each task, as described below.
Required Azure information for Machine Creation for Azure
Your organization may have several Azure subscriptions. For the App Layering service to access your
Azure subscriptions, whether it’s to import an OS Image or to publish a layered image, you must use
the procedure below for each Azure subscription that you want to connect to via the App Layering
service.
• Name ‑ A name you enter for a new connector configuration.
• Subscription ID ‑ In order to deploy Azure virtual machines, your organization must have a sub‑
scription ID.
• Tenant ID ‑ An Azure Active Directory instance, this GUID identifies your organization’s dedi‑
cated instance of Azure Active Directory (AD).
• Client ID ‑ An identifier for the App Registration, which your organization has created for App
Layering.
• Client Secret ‑ The password for the Client ID you are using. If you have forgotten the Client
Secret, you can create a new one. > Note:
Each time you use a new subscription and Tenant ID, you must enter a new Client Secret.
This is because client secrets are logically associated with Azure tenants.
© 1999–2024 Cloud Soware Group, Inc. All rights reserved. 181

App Layering
• Storage Account Name ‑ The Azure storage account you want to use when storing Azure vir‑
tual machine disks. This name must adhere to Azure storage account naming restrictions. For
example, the storage account name cannot contain uppercase characters.
You must either create a storage account through the portal or use an existing storage account that
fits the following criteria. The account:
• Cannot be a classic storage account.
• Be a separate storage account from the one used for the appliance. This new storage account is
used during layer creation and layered image publishing.
• Must be in the Azure location where you will deploy virtual machines.
• Must be one of the following types:
– Standard Locally Redundant storage (LRS)
– Standard Geo‑Redundant storage (GRS)
– Standard Read‑Access Geo‑Redundant storage (RAGRS)
• Can be located in any resource group, as long as the resource group’s location is the same as
the account’s location.
Machine Creation for Azure Government
March 13, 2019
A connector configuration contains the information that the appliance needs to access a specific lo‑
cation for machine creation in Azure Government. If your organization has more than one storage
location, you need a connector configuration for each location.
This article describes the settings included in the Machine Creation for Azure Government connector
configuration. For more about connector configurations and how to add them, see Connect.
When to add a connector configuration for Azure Government
When you create your first Layers, and later when you publish Layered Images for the first time, you
will add a connector configuration for each task, as described below.
Required Azure Government information
Your organization may have several Azure Government subscriptions. For the App Layering service
to access your subscriptions, whether it’s to import an OS Image or to publish a Layered Image, you
© 1999–2024 Cloud Soware Group, Inc. All rights reserved. 182

App Layering
must use the procedure below for each Azure Government subscription that you want to connect to
via the App Layering service.
• Name ‑ A name you enter for a new connector configuration.
• Subscription ID ‑ In order to deploy Azure Government virtual machines, your organization
must have a subscription ID.
• Tenant ID ‑ An Azure Government Active Directory instance, this GUID identifies your organiza‑
tion’s dedicated instance of Azure Government Active Directory (AD).
• Client ID ‑ An identifier for the App Registration, which your organization has created for App
Layering.
• Client Secret ‑ The password for the Client ID you are using. If you have forgotten the Client
Secret, you can create a new one. > Note:
Each time you use a new subscription and Tenant ID, you must enter a new Client Secret.
This is because client secrets are logically associated with Azure Government tenants.
• Storage Account Name ‑ The Azure Government storage account you want to use when storing
Azure Government virtual machine disks. This name must adhere to Azure Government storage
account naming restrictions. For example, the storage account name cannot contain uppercase
characters.
You must either create a storage account through the portal or use an existing storage account that
fits the following criteria. The account:
• Cannot be a classic storage account.
• Be a separate storage account from the one used for the appliance. This new storage account is
used during layer creation and layered image publishing.
• Must be in the Azure Government location where you will deploy virtual machines.
• Must be one of the following types:
– Standard Locally Redundant storage (LRS)
– Standard Geo‑Redundant storage (GRS)
– Standard Read‑Access Geo‑Redundant storage (RAGRS)
• Can be located in any resource group, as long as the resource group’s location is the same as
the account’s location.
Machine creation for XenServer
March 22, 2024
© 1999–2024 Cloud Soware Group, Inc. All rights reserved. 183

App Layering
The Machine Creation for XenServer Connector Configuration contains the information that allows
the Citrix App Layering appliance to publish layered images to Machine Creation in your XenServer
environment. The information includes user credentials and storage location.
To publish layered images, use the machine creation for XenServer Connector Configuration. In the
Connector Configuration, ensure that you configure a virtual machine template. Then, the layered im‑
age you publish is in a ready‑to‑use virtual machine, the image is shut down, and a snapshot is taken.
You can use the virtual machine in your XenServer environment without further modifications.
Each Connector Configuration is set to publish layered images to a specific storage location in your
environment. If you publish to multiple locations, you might need more than one machine creation
Connector Configuration. You can also publish each layered image to a location convenient to the
system you provision with the published image.
Notes:
This Connector Configuration is for publishing layered images. You cannot package layers in the
machine creation environment. For packaging layers, use a XenServer Connector Configuration.
A Personal vDisk is not supported for machine creation. The published desktop images are non‑
persistent. You can only use a Personal vDisk when you publish to Citrix Provisioning.
Before you start
You can use your XenServer environment for creating layers, and for publishing layered images. Each
Connector Configuration accesses a specific storage location in your XenServer environment. You
might need more than one XenServer Connector Configuration to access the correct location for each
purpose. Further, you can publish each layered image to a location convenient to the system where
you provision the published image.
XenServer uses a pod‑like architecture where you interact with individual servers or clusters of servers,
instead of a central management server. You can manage the pods by using command‑line access or
GUI management soware such as XenCenter. Install XenCenter on your desktop and then you can
connect individually to each standalone host or a cluster of hosts.
Using the App Layering Service for the first time
If you want to create layers by using a XenServer virtual machine, you need a XenServer Connector
within App Layering. When publishing layered images to the XenServer, you need a Connector Con‑
figuration for each of your publishing locations as well.
You select a Connector Configuration when creating an app layer and publishing a layered image. If
you need a Connector Configuration for the task, you can create one. To do so, click Add Connector
Configuration on the Connectors page.
© 1999–2024 Cloud Soware Group, Inc. All rights reserved. 184

App Layering
Required information for Machine creation for XenServer connector configuration settings
When configuring a connector for Machine Creation for the XenServer, you can browse for the XenCen‑
ter server, data store, and host to use for a new configuration.
Important:
The fields are case‑sensitive. Any values that you type manually must match the case of the
object in the XenServer, or the validation fails.
• Configuration name: The name for the connector configuration.
• XenServer address: The name of the XenServer host with which the appliance integrates.
• User name and password: The credentials for the account that the appliance uses to connect
to the XenServer.
• Use Secured Protocol: The default setting that allows SSL encryption for the API connection
traic between the Connector and XenServer.
• Virtual Machine Template: The virtual machine template that you can use for cloning. The list
of choices includes custom virtual machine templates only, rather than actual virtual machines
or any of the built‑in templates. The selected template cannot have any disks attached and
must have at least one network card attached. If the template does not have these items, an
error appears when trying to validate or save the configuration.
• Storage Repository: The storage repository for the uploaded disk. The list is filtered to show
repositories that can contain virtual hard disks (VHDs). ISO repositories are filtered out.
• Use HTTPS for File Transfers: Encrypts the image file transfers. HTTPS is selected by default
for uploads and downloads. You can clear the check box for increased performance.
• Oload Compositing (recommended): Enables the layer packaging or image publishing
process to run on the specified Hypervisor server. This feature increases performance and it
allows you to use VMDK disk format and either BIOS or UEFI virtual machines. With UEFI, you
can also use Secure Boot if it’s enabled on the Hypervisor.
• ISO Storage Repository: Repository for the disks that Oload Compositing uploads. The list is
filtered to show only ISO repositories. SMB and NFS are supported.
• ISO Share Path: Automatically populates for selected ISO storage repository by the ISO share
path configured. For display only.
• ISO Share Username: User name for the selected ISO Share. Only valid for SMB ISO Share. NFS
ISO Share does not support a user name or password.
• ISO Share Password: Password for the select ISO share. Only valid for SMB ISO Share. NFS ISO
Share does not support a user name or password.
When Oload Compositing is selected:
• If you provide a template configured for BIOS or UEFI, the resulting virtual machine is the type
that you chose.
© 1999–2024 Cloud Soware Group, Inc. All rights reserved. 185

App Layering
• If you provide a template with UEFI‑Secure Boot enabled and selected, the resulting virtual ma‑
chine is the UEFI‑Secure Boot.
When Oload Compositing isn’t selected:
• If you provide a template configured for BIOS, the resulting virtual machine is BIOS.
• If you provide a template configured for UEFI and when you attempt to save the connector con‑
figuration, an error is displayed.
Virtual Machine Organization
You can organize XenServer virtual machines by folder or by tag. These organizational tools are op‑
tional when creating and managing virtual machines through XenCenter or other tools. XenServer
Connector Configurations do not allow you to specify folders or tags. Virtual machines created by the
XenServer Connector, both Packaging Machines, and published Layered Image can use both organi‑
zational tools.
Tags
If the template specified in the XenServer connector configuration contains tags, the tags carry over
to any virtual machine cloned from that template. Therefore, all packaging virtual machines or pub‑
lished layered images receive the same tags that are in the template. Also, the XenServer Connector
adds three tags.
• Unidesk: Lists all virtual machines created by the XenServer Connector regardless of their pur‑
pose or image.
• Purpose Tag: Tags all packaging machines with App Layering Packaging Machine. Tags all pub‑
lished layered image virtual machines with App Layering Published Images.
• Image/Layer Name: Provides a tag on all packaging machines with the layer name for the layer
from which they generate. Tags all published layered images with the template image name.
If you are using XenCenter, you can view your virtual machines by tag by selecting Organization Views
and then selecting By Tag.
Folder
By default, virtual machines created by the XenServer Connector are not placed in a folder. If the
specified template is in a folder, the virtual machines that the Connector Configuration creates are in
the same folder. All packaging virtual machines and published layered images are placed in that same
folder. There are no separate folders for packaging virtual machines or published layered images.
© 1999–2024 Cloud Soware Group, Inc. All rights reserved. 186

App Layering
Machine Network Connectivity
When you create virtual machines with the XenServer Connector, the virtual network settings in the
source template of the Connector Configuration carry over. An option is not available in the Connector
Configuration UI to override the network settings.
The XenServer connector does not work correctly with XenServer clusters. If the host in the configura‑
tion is part of a cluster, you must specify the primary host for the connector to work. However, if the
primary XenServer host fails and a new primary is elected, you must update the XenServer configura‑
tion.
Create a Connector Configuration
To type values:
• Type the first three Connector fields manually. Aer validating the credentials in those fields,
you can select values for the remaining fields from the drop‑down menus.
• To type values manually, click to put the cursor in the field and type the value, making sure that
the case matches the value in XenServer.
• To select a value from a drop‑down list, click once to put the cursor in the field. Then, click a
second time to display the list of possible values.
To add a Connector Configuration
1. Click the Connectors page.
2. Click Add Connector Configuration. A dialog box opens.
3. Select the Connector Type for the platform and location where you are creating the layer or
publishing the image.
4. Click New to open the Connector Configuration page.
5. Type the configuration Name, XenServer address, user name, password, and setting for the Use
Secured Communications check box. For more information, see the above field definitions.
6. Click CONNECT below the XenServer Configuration fields. The Virtual Machine Clone Settings
fields are then enabled if the user name and password are correct.
Note:
If there is a certificate error, the following error message is displayed:
One or more problems with the service certificate were found
. You can enable them to be ignored, or you must update the
© 1999–2024 Cloud Soware Group, Inc. All rights reserved. 187

App Layering
certificate on the server.
You can click Ignore Certificate Errors and Continue.
7. Select the required Virtual Machine Template.
8. Select the Storage Repository.
9. Select the setting for Use HTTPS for File Transfers.
10. Select the setting for Use Oload Compositing.
11. If Use Oload Compositing is selected, select ISO Storage Repository. The ISO Share Path is
auto‑populated.
12. If an SMB ISO share is selected, enter the SMB ISO share user name and password.
13. Click CONFIRM AND COMPLETE. A configuration summary is displayed.
14. Click Save. If no errors are displayed, the new connector configuration is saved and displayed
on the Connector page.
Machine Creation for Hyper‑V
June 14, 2022
Although there is not a Machine Creation for Hyper‑V connector configuration, you can use the Hyper‑V
connector configuration to configure the credentials and storage location the appliance needs to pub‑
lish layered images to a specific machine creation location within your MS Hyper‑V environment.
Each connector configuration is set up to access a specific storage location in your environment. Since
you need the images in a location convenient to the systems you are provisioning, there is a good
chance that you need more than one connector configuration for publishing to machine creation.
Notes:
• This connector configuration is for publishing layered images only. You cannot package
layers using this configuration. For packaging layers, use an MS Hyper‑V connector config‑
uration.
• When creating an image template for publishing to Machine Creation for Hyper‑V, you must
select the Sysprep type generalized oline.
• A Personal vDisk is not supported for machine creation. The published desktop images are
non‑persistent. You can only use a Personal vDisk when publishing to MS Hyper‑V.
For more about connectors and connector configurations, see Connector configurations.
© 1999–2024 Cloud Soware Group, Inc. All rights reserved. 188

App Layering
Before you start
The first time you create an image template for publishing layered images to machine creation, you
need to add a Hyper‑V connector configuration for that location.
App Layering requirements
The App Layering Agent is required to use a Machine Creation for Hyper‑V connector. The agent must
be:
• Installed on the server where you want to publish layered images. For details, see Install the
App Layering agent in the App Layering installation topic.
• Registered with the App Layering appliance. For details, see Register with the App Layering
appliance manually in the App Layering installation topic.
Machine Creation and MS Hyper‑V requirements
This section lays out the information you need to create a Machine Creation for Hyper‑V connector.
Virtual machine template Before you start, configurea virtual machine templatethatthe connector
configuration can use to clone a virtual machine with the desired hardware settings (memory, CPUs,
and video settings). Using a template ensures the following:
• The published image is in a ready‑to‑use virtual machine.
• The image is shut down.
• A snapshot is taken.
MS Hyper‑V credentials and location The information you need for the Hyper‑V connector config‑
uration includes:
• Hyper‑V Configuration
– Agent ‑ App Layering Agent from the list of agents registered with the appliance.
– User Name ‑ Agent user name.
– Password ‑ Agent Password.
• Virtual Machine Settings
– Template VM (Optional) ‑ A template that can be used to clone a Hyper‑V virtual machine
with the desired hardware settings (memory, CPUs, and video settings). You can spec‑
ify the host, datastore, and network for configuring the resulting virtual machines. The
© 1999–2024 Cloud Soware Group, Inc. All rights reserved. 189

App Layering
template must have at least one network card attached, and it must not have any disks
attached. Otherwise, you receive an error when attempting to validate or save the config‑
uration.
– Number of CPUs ‑ Number of CPUs to use for creating a Packaging Machine or publishing
a layered image. The default value is 4 CPUs.
– Memory (Mb) ‑ Amount of memory allocated for creating the Packaging Machine or the
layered image Machine. The default value is 8192 Mb.
– Network ‑ Network switch. You can select from a list of network switches known by the
agent.
• Storage Settings
– Remote path to storage, for example server virtual machines ‑ UNC path to the File Share
being used for layering and publishing.
– Local path to storage, for example C:\Virtual Machines ‑ Location where the disks and
Packaging Machines are created. This value must be the same as the location specified in
the UNC path.
– Use the Agent Credentials check box ‑ If checked, the agent credentials are used as the
File Share credentials. Otherwise, you must specify the credentials used to connect to the
File Share.
– User Name and Password (if dierent than use the Agent Credentials) ‑ These values are
only required if you’ve chosen not to use the Agent credentials.
– Layer Disk Cache Size in GB (optional) ‑ Amount of File Share space (in gigabytes) to use
for caching layer disks. A value of:
*
0 disables layer caching.
*
1+ enables layer caching and specifies the amount of space to allow for caching layer
disks on the File Share.
keep copies of boot disks and packaging disks and reuses these disks to create pack‑
aging machines. The reuse of these boot disks and packaging disks reduces the time
it takes to package an App layer.
Create a Hyper‑V connector configuration for Machine Creation
To use the Hyper‑V connector for publishing to machine creation in Hyper‑V:
1. Click the Connectors page.
2. Click Add Connector Configuration, which opens a small dialog box.
3. Select the Microso Hyper‑V Connector Type. Then click New to open the connector configu‑
ration page.
4. Complete the fields on the connector configuration page. For guidance, see the field definitions
in the requirements section above.
© 1999–2024 Cloud Soware Group, Inc. All rights reserved. 190

App Layering
5. Click the TEST button to verify that the appliance can access the location specified using the
credentials supplied.
6. Click SAVE, and verify that the new connector configuration is listed on the Connector tab.
Machine Creation for Google Cloud
May 3, 2021
A connector configuration contains the credentials that the appliance uses to access a specific project
on Google Cloud. Your organization can have one or more Google Cloud projects and you need a
connector configuration for the appliance to access each one.
This article describes the values required to set up a Machine Creation for Google Cloud connector
configuration. For more about connector configurations and how to add them, see Connect.
Before you create this connector configuration
This section explains:
• The Google Cloud account information required to create this connector configuration.
• The Google Cloud storage you need for App Layering.
Required Google Cloud Service Account and Service Account Key
The Google Cloud connector configuration requires the following information.
• Project ‑ The Project Id of a Google Cloud project.
• Service Account Key File ‑ For making API calls as the service account on behalf of the connec‑
tor configuration.
• Storage Bucket: A storage location in Google Cloud for storing virtual disks uploaded by the
connector.
• Instance Template: A Google Cloud VM template with the desired settings for creating a virtual
machine.
• Disk Type: The type of Google Cloud storage.
• Zone: The Google Cloud Zone where you plan to create layers or publish images using the con‑
nector configuration.
© 1999–2024 Cloud Soware Group, Inc. All rights reserved. 191
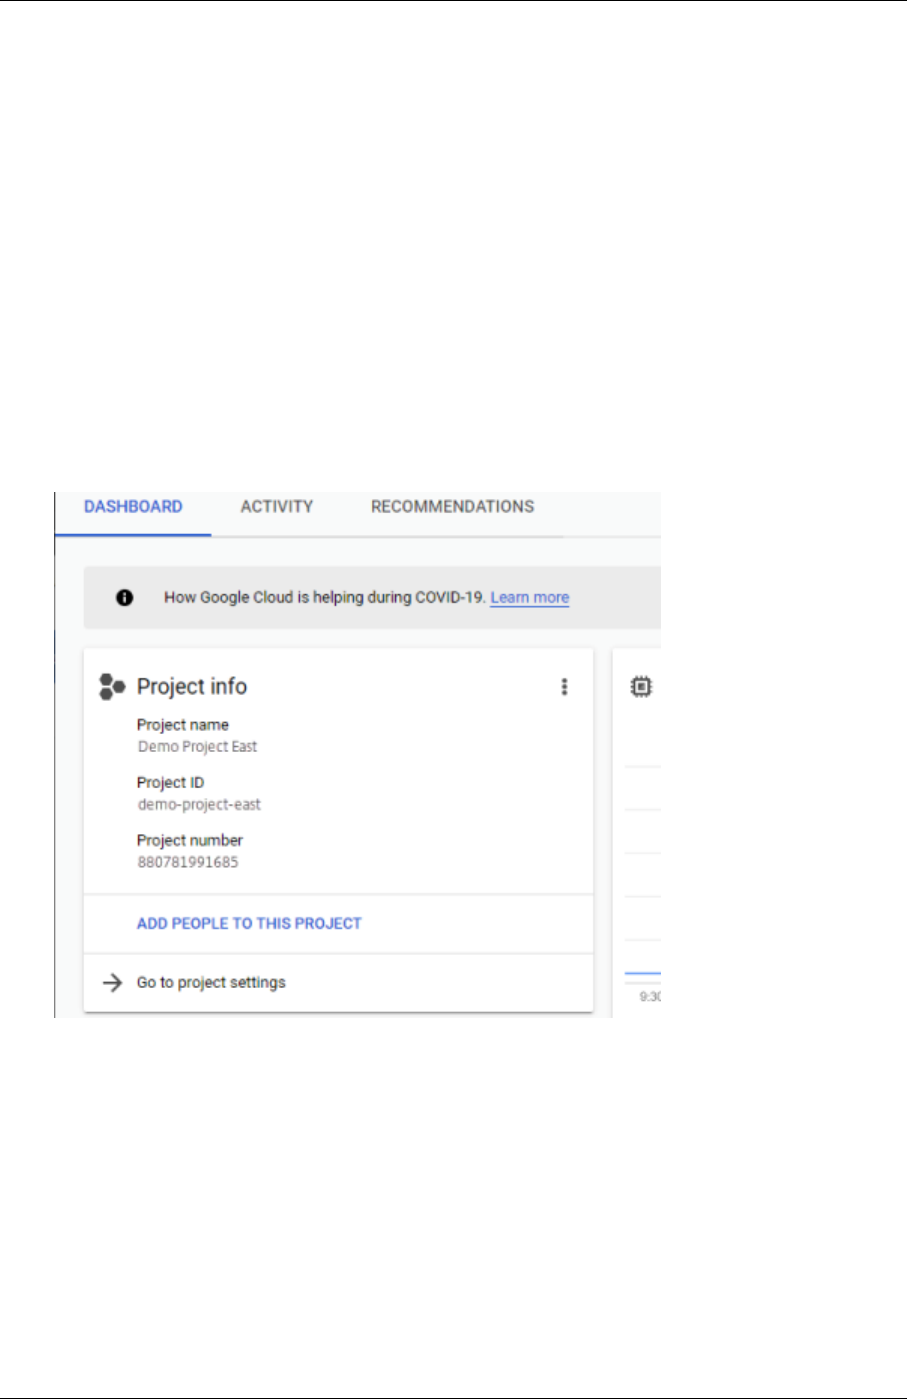
App Layering
Required Google Cloud storage bucket
Any account you use for App Layering must meet the following requirements:
• Must be separate from the storage bucket used for the appliance.
• Must be in the Google Cloud location where you plan to deploy virtual machines.
Create a Google Service Account and Service Account Key File
Use the following procedures for each Google Cloud project that you want to connect with the App
Layering appliance.
1. Log into console.cloud.google.com.
2. Select the project, and click Go To Project Settings.
3. On the le pane, click Service Accounts.
4. At the top of the page, click + CREATE SERVICE ACCOUNT.
5. Add the details for your service account
• Name for this service account: Descriptive name. For example, TestEast1
• Service Account Id: filled in with what you put in the name field, use that value.
6. Click the Create button.
© 1999–2024 Cloud Soware Group, Inc. All rights reserved. 192

App Layering
Add the roles for your service account
In the Select Role box, select the roles required:
• Storage Admin
• Compute Admin
• Service Account User
1. Click the Continue button.
2. Click the Done button. User access to the role is not necessary.
Create a Service Account Key File
1. From the project, select the Service Account tab on the le.
2. Click the three vertical dots to the right of the service account you want to create the key file for.
3. Select Create key.
4. On the popup, select the JSON radio button and click the CREATE button.
5. When you are prompted to save the key to a file, enter the name of your choice or keep the
default name. You are returned to the Service Accounts screen.
6. Click your service account to verify that the key is there.
Edit Service Account Roles
To edit the roles:
1. Navigate to the project UI screen as you did when creating the service account.
2. From the hamburger menu on the top le, expand the IAM & ADMIN and select Manage Re‑
sources.
3. Select your project, and on the right side type the Service Account you want to edit into the
Filter Tree. The service account name is displayed.
4. Edit each of the roles to include or to remove from the roles and save the results.
Note:
If you remove all the privilege from the service account, it will no longer show on the IAM
page (because IAM page only lists those account with at least one roles attached). But it
will show up on Service Account screen. You would need to go to IAM page to add privileges
back.
© 1999–2024 Cloud Soware Group, Inc. All rights reserved. 193

App Layering
5. Click the ADD button.
6. On the Add members, roles to “current”project panel, in the New members field, type the
name of the member to whom you want to give privileges.
7. Select the roles you want to give the member, and click the SAVE button.
Machine Creation for Nutanix AHV (Acropolis)
March 26, 2024
A Machine Creation for Nutanix AHV connector configuration* contains the credentials and storage
location that the App Layering appliance needs to publish layered images to machine creation in your
Nutanix AHV environment. This connector does not support layer creation.
Before you start
You can use Machine Creation for Nutanix AHV to publish layered images. Each connector configura‑
tion accesses a specific storage location in your Nutanix AHV environment to which you can publish
layered images.
You might need more than one Nutanix AHV connector configuration to access the correct location for
each purpose. Further, it is important to publish each layered image to a location convenient to the
systems you plan to provision using the published image. For more about connectors and connector
configurations, see Connector configurations.
If this is your first time using App Layering
When publishing layered images to Nutanix AHV, you need at least one connector configuration for
each storage location you plan to publish to. You can add connector configurations when creating
an Image Template from which you publish layered images. If you don’t yet have the right connector
configuration for the task, you can create one by clicking New on the Connector wizard tab.
Required information for Nutanix AHV connector configuration settings
The Nutanix AHV connector configuration wizard lets you browse the Nutanix AHV server, Data Store,
and Host to use for a new configuration.
© 1999–2024 Cloud Soware Group, Inc. All rights reserved. 194

App Layering
Important
The fields are case‑sensitive. Any values that you enter manually must match the case of the
object in Nutanix AHV. Otherwise, the validation fails.
• Connector Name: A useful name to help identify and keep track of the Nutanix AHV connector
configuration.
• User Name/Password: Credentials that are used when interacting with the Nutanix system.
The specified user must have suicient privileges for the following operations:
– VM operations:
*
clone
*
delete
*
power on/o
*
attach virtual disks
– Image operations:
*
create
*
update (aka upload)
*
delete
– Virtual disks:
*
create
*
attach to VMs
• Allow Certificate Errors: Allows you to use SSL encryption for the API connection traic be‑
tween the App Layering Connector and Nutanix AHV. This field is cleared by default.
• Virtual Machine (VM) Template (required): The template used to clone a VM with the hard‑
ware settings for machine creation, including memory, CPUs, and video settings. Use the VM
template to specify the host, datastore, and network for configuring the resulting VMs. Since
there is no concept of a “template”in Nutanix, these “templates”are actual VMs. The OS version
used by the selected “template”must match the OS version that you are using in your layered
images. The template must not have any disks attached and must have at least one network
card attached. If it does not, you see an error when trying to validate or save the configuration.
• Storage Container: Allows you to select the storage container for the images (virtual disks,
VHDs) that are uploaded and the resulting virtual disks that are created from those images.
When creating App Layers and OS layer versions, we are required to mount the storage container
as an NFS mount point. The selected storage container MUST have the appliance included in
an allow list of clients that are allowed to mount the storage container via NFS. The allow list
configuration must be done through the Nutanix product (either their web console or through
their CLI tools). If the appliance is not properly allow‑listed for the selected storage container,
then the validation phase fails, and the error is indicated with the storage container selection.
© 1999–2024 Cloud Soware Group, Inc. All rights reserved. 195

App Layering
• Oload Compositing: Enables the layer packaging or image publishing process to run on the
specified Nutanix server. This feature increases performance and it allows you to use a native
disk format and either BIOS or UEFI virtual machines. Enabled by default.
How Virtual Machines are Organized
Nutanix does not provide a mechanism for organizing virtual machines. Because of this, it may be
diicult to find the virtual machines created by your App Layering appliance when the total number
of virtual machines is large. To help you find these VMs, the following naming conventions are used:
• Packaging Machines (virtual machines created during the process of creating an App Layer or
OS Version)
– The virtual machine name starts with the layer name that is being created/modified
– The virtual machine names end with the following text: (Packaging Machine)
• Layered Image Virtual Machines (virtual machines created as a result of publishing a layered
image)
– The virtual machine name starts with the image name that was published
– The virtual machine name ends with the following text: (Published Image)
When viewing virtual machines through the Nutanix web console, you can search for virtual machines
by filtering on:
• “Citrix App Layering”to find all virtual machines created by the App Layering soware.
• “Citrix App Layering”to find all virtual machines created for layer management jobs.
• “Citrix App Layering”to find all virtual machines created to publish a layered image.
• Image name or layer name to find virtual machines related to a specific layered image publish‑
ing job or App or OS creation.
Virtual Machine Network Connectivity
The virtual network settings of the source template specified in the Nutanix AHV connector configura‑
tion are carried over when creating any VMs through the Nutanix Acropolis Hypervisor (AHV) Connec‑
tor. There is no option in the connector configuration UI to override the network settings.
Create a connector configuration To enter values:
• The first three Connector fields must be entered manually. Once the credentials in those fields
are validated, you can select values for the remaining fields from the drop‑down menus.
© 1999–2024 Cloud Soware Group, Inc. All rights reserved. 196

App Layering
• To enter values manually, click to put the cursor in the field and type the value, making sure that
the case matches the value in the Nutanix AHV hypervisor.
• To select a value from a drop‑down list, click once to put the cursor in the field, and a second
time to display the list of possible values.
To add a connector configuration:
1. On the wizard for creating a layer or for adding a layer version, click the Connector tab.
2. Below the list of connector configurations, click the New button. This opens a small dialog box.
3. Select the Connector Type for the platform and location where you are creating the layer or
publishing the image. Then click New to open the connector configuration page.
4. Enter the configuration Name, and the Nutanix AHV Address, User Name, and Password. For
guidance, see the above field definitions.
5. Click the Connect button below the Nutanix AHV Configuration fields. The Virtual Machine
Clone Settings field is then enabled if the connection is successful. Any connection problems
are reported on the connector configuration blade. If there were server certificate errors found,
you see an Ignore Certificate Errors and Continue button.
6. Select the Virtual Machine Template.
7. Select the Storage Repository.
8. Click Confirm and Complete. If there are no errors, a summary page is displayed.
9. Click Save. Verify that the new connector configuration is listed on the Connector page.
Machine Creation for vSphere
June 14, 2022
A Machine Creation for vSphere connector configuration contains the credentials and storage location
required to publish layered images to machine creation in your vSphere environment.
You can publish layered images to machine creation running in a vSphere environment by using a
Machine Creation for vSphere Connector Configuration. In the Connector Configuration, be sure to
configure a Virtual Machine Template, so that the layered image you publish is in a ready‑to‑use VM,
the image shutdown and a snapshot taken. You can use the VM in your Horizon environment without
further modifications.
Each Connector Configuration is set to publish layered images to a specific storage location in your
environment, so you may need more than one connector configuration if publishing to multiple loca‑
tions. Further, you may want to publish each layered image to a location convenient to the system
you are provisioning with the published image. For more about connectors, and connector configu‑
rations, see Connect.
© 1999–2024 Cloud Soware Group, Inc. All rights reserved. 197

App Layering
Notes:
This Connector Configuration is for publishing layered images. You cannot package layers in the
environment.
Personal vDisks are not supported for Machine Creation. The published desktop images are non‑
persistent. Currently, vDisks can only be used when publishing to Citrix Provisioning.
Before you start
The first time you create an Image Template for publishing layered images to a location in your envi‑
ronment, you create a Connector Configuration for that location.
Required information for this Connector Configuration
Configuring a connector for Machine Creation for vSphere lets you browse for the vCenter Server, Data
Store, and Host to use for a new configuration.
Important:
The fields are case sensitive, so any values that you enter manually must match the case of the
object your environment, or the validation fails.
• Name: A useful name to help identify this connector configuration.
• vCenter Server: The name of the vSphere server with which the appliance integrates.
• vCenter User Name: The user name of the account that the appliance uses to connect to
vSphere.
• vCenter Password: The password of the account that the appliance uses to connect to vSphere.
• DataCenter Name: The name of the vSphere data center in which the appliance creates and
retrieves virtual machines.
• Virtual Machine Template (recommended, required for UEFI virtual machines): A template
that can be used to clone a VM with the hardware settings for machine creation, including mem‑
ory, CPUs, and video settings. You can specify the host, datastore, and network for configuring
the resulting VMs. The list of choices contains only custom VM templates, rather than actual
VMs or any of the built‑in templates. The OS version used by the selected template must match
the OS version that you are using for publishing layered images. The template must not have
any disks attached, and must have at least one network card attached. If it does not, you see an
error when trying to validate or save the configuration.
• DataStore Name: The name of the vSphere DataStore in which the appliance creates virtual
machines.
• ESX Host Name: The name of the vSphere ESX Host on which the appliance creates virtual
machines.
© 1999–2024 Cloud Soware Group, Inc. All rights reserved. 198

App Layering
• Network Name: The name of the vSphere Network in which the appliance creates virtual ma‑
chines.
• Virtual Machine Folder Name: The name of the vSphere Folder in which the appliance creates
virtual machines.
• Oload Compositing: Enables the layer packaging or image publishing process to run on the
specified server. This feature increases performance, and it allows you to use VMDK disk format
and either BIOS or UEFI virtual machines. When Oload Compositing is selected:
– If you do not provide a virtual machine template, the virtual machine defaults to BIOS.
– If you provide a template configured for BIOS or UEFI, the resulting virtual machine is the
type you chose.
When Oload Compositing is not selected:
– If you do not provide a template, the virtual machine defaults to BIOS.
– If you provide a template configured for BIOS, the resulting virtual machine is BIOS.
– If you provide a template configured for UEFI, the machine fails to boot, and results in a
blue screen.
Create a Connector Configuration
To enter values:
• The first three vCenter fields must be entered manually. Once the credentials in those fields are
validated, you can select values for the remaining fields from the drop‑down menus.
• To enter values manually: Click to put the cursor in the field and type the value.
• To select a value from a drop‑down list: Click once to put the cursor in the field, and a second
time to choose from a list of possible values.
To add a new Connector Configuration
1. Click the Connectors page.
2. Click Add Connector Configuration. This opens a small dialog box.
3. Select the Connector Type for the platform and location where you are creating the layer or
publishing the image. Then click New to open the Connector Configuration page.
4. Enter the configuration Name, and the vCenter Server, vCenter User Name, and vCenter Pass‑
word. For guidance, see the above field definitions.
5. Click the CHECK CREDENTIALS button below the vCenter fields. The data center field is then
enabled with a list of data centers available.
6. Select the data center, and the remaining drop‑down menus are enabled.
7. (Recommended) Select a virtual machine to use as the template. Although a VM Template is
optional, it is recommended.
© 1999–2024 Cloud Soware Group, Inc. All rights reserved. 199

App Layering
8. Complete the remaining fields and click the TEST button to verify that the appliance can access
the location specified using the credentials supplied.
9. Click Save. Verify that the new connector configuration is listed on the Connectors page.
Script Configuration (Optional, Advanced feature)
When creating a Connector Configuration, you can configure an optional PowerShell script on any
Windows machine running an App Layering Agent. These scripts must be stored on the same machine
that the App Layering Agent is installed on, and are run only aer a successful deployment of a layered
image. Some preset variables are available to enable scripts to be reusable with dierent template
images and dierent connector configurations. These variables also contain information needed to
identify the virtual machine created as part of the published layered image in vSphere.
The running of these scripts will not aect the outcome of the publish job, and progress of commands
run in the script are not visible. The vSphere connector logs contain the output of the script that ran.
Configure a script
Remember that this step is optional. If you want a script to run each time a layered image is published,
complete these steps using the values described in the sections that follow.
1. Complete and save the Connector Configuration as described above.
Note:
Before selecting the Script Configuration page, you must save (or discard) any edits to
the Connector Configuration settings,
2. If the Navigation menu on the le is not open, select it and click Script Configuration to open
the Script Path page.
3. Complete the required fields using the values detailed herein, and then click Save.
Script Configuration fields
Enable script ‑ Select this check box to enable the remaining fields. This allows you to enter a script
that runs each time a layered image is published.
Script Agent ‑ The agent machine where the scripts are located.
Username (optional) ‑ The user name to impersonate when running the script. This can be used to
ensure the script runs in the context of a user that has the needed rights/permissions to perform the
operations in the script.
© 1999–2024 Cloud Soware Group, Inc. All rights reserved. 200

App Layering
Password (optional) ‑ The password for the specified user name.
Script Path ‑ A full path and file name on the agent machine where the script file resides.
Other Script Configuration values
PowerShell variables When the script is run, the following variables are set and can be used in the
PowerShell script:
Value
Applies to connector
types
Value determined by
which code Description
connectorCfgName All Common code The name of the
connector
configuration that the
script configuration is
associated with.
imageName All Common code The name of the
layered image
template that was
used to build/publish
the layered image.
osType All Common code The operating system
type of the published
layered image. It can
be one of the following
values: Windows7;
Windows764;
Windows200864;
Windows201264;
Windows10;
Windows1064
virtualInfrastructureServerAll vSphere connector
code
The vCenter server
specified in the
connector
configuration.
vmName All vSphere connector
code
The name of the
virtual machine that
was created.
© 1999–2024 Cloud Soware Group, Inc. All rights reserved. 201

App Layering
Value
Applies to connector
types
Value determined by
which code Description
vmId All vSphere connector
code
The virtual machine ID
taken from the VM
(that is, “vm‑12345”)
vmUuid All vSphere connector
code
The virtual machine
UUID.
User Impersonation
The App Layering Agent, which runs as a service on a Windows machine, runs under either the local
system account or the network account. Either of these accounts may have some special privileges,
but they oen are restricted when running specific commands or seeing files in the file system. There‑
fore, App Layering gives you the option of adding a domain user and password that can be used to
“impersonate”a user. This means that the script runs as if that user had logged on to the system so
that any commands or data are accessible subject to those user rights and permissions. If a user name
or password is not entered, the script runs using the account under which the service is configured to
run.
Script Execution Policy Script execution policy requirements are up to you. If you intend to run un‑
signed scripts, you must configure the execution policy to one of the more lenient policies. However,
if you sign your own scripts, you can choose to use a more restrictive execution policy.
MS Azure
December 13, 2022
Important:
This Azure connector configuration is now deprecated and only available for a limited time. For
Azure connections, use the new Azure Deployments connector configuration.
When creating layers in an Azure environment, use an MS Azure connector configuration. This article
describes the fields included in Azure connector configuration settings. For more about connector
configurations and how to add new ones, see Connector configurations.
A connector configurationcontains the credentials that the appliance uses to accessa specific location
in Azure. Your organization can have one Azure account and several storage locations. You need a
connector configuration for the appliance to access each storage location.
© 1999–2024 Cloud Soware Group, Inc. All rights reserved. 202

App Layering
Note:
This connector is used for publishing layers. Do not use this connector for publishing templates.
Before you create an Azure connector configuration
This section explains:
• The Azure account information required to create this connector configuration.
• The Azure storage you need for App Layering.
• The servers that the appliance communicates with.
Required Azure account information
The Azure connector configuration requires the following information.
© 1999–2024 Cloud Soware Group, Inc. All rights reserved. 203

App Layering
• Name ‑ A name you use for a new connector configuration.
• Subscription ID ‑ To deploy Azure virtual machines, your organization must have a subscription
ID.
• Tenant ID ‑ An Azure Active Directory instance, this GUID identifies your organization’s dedi‑
cated instance of Azure Active Directory (AD).
• Client ID ‑ An identifier for the App Registration, which your organization has created for App
Layering.
• Client Secret ‑ The password for the Client ID you are using. If you have forgotten the Client
Secret, you can create a one. Note: Client secrets are logically associated with Azure tenants,
so each time you use a new subscription and Tenant ID, you must use a new Client Secret.
© 1999–2024 Cloud Soware Group, Inc. All rights reserved. 204

App Layering
• Standard Azure storage (required): A storage account for Azure virtual machines (VHD files),
the template file that you use to deploy Azure virtual machines, and the boot diagnostics files
for the Azure virtual machines. If you specify Premium storage, which is optional, the virtual
machines are stored there, and the template and boot diagnostics files remain in Standard stor‑
age.
The storage account must already have been created in the Azure portal, and the name you
enter must match the name in the portal. For details, see Set up one or more necessary storage
accounts below.
• Premium storage (optional): Optional extra storage for Azure virtual machines (VHD files). Pre‑
mium storage only supports page blobs and cannot be used to store the template file for deploy‑
ing Azure virtual machines or the boot diagnostics files for those virtual machines. When you
specify a premium storage account, the virtual machine sizes available are limited to those that
support premium storage.
The storage account must already have been created in the Azure portal, and the name you
enter must match the name in the portal. For details, see Set up one or more necessary storage
accounts below.
Required Azure storage account
Any account you use for App Layering must meet the following requirements:
• Must not be a classic storage account.
• Must be separate from the storage account used for the appliance.
• Must be in the Azure location where you plan to deploy virtual machines.
• Can be located in any resource group, as long as the resource group’s location is the same as
the account’s location.
Required Standard storage account One of the following types of Standard Azure storage accounts
is required to create a connector configuration.
• Standard Locally Redundant storage (LRS)
• Standard Geo‑Redundant storage (GRS)
• Standard Read‑Access Geo‑Redundant storage (RAGRS)
When creatingthe required Standard Storage, enable Blob Public Access for this account. Otherwise,
attempts to publish images fail with the error:
1 "A failure occurred while creating a storage container in the Azure
storage account: Public access is not permitted on this storage
account."
© 1999–2024 Cloud Soware Group, Inc. All rights reserved. 205

App Layering
Premium storage account In addition to the required Standard account, you can use Premium
storage to store your App Layering virtual machine disks. When creating the optional Premium Stor‑
age, Blob Public Access is not required.
Servers that the appliance communicates with
Using this connector, the appliance communicates with the following servers:
• management.azure.com
• login.windows.net
• management.core.windows.net
• portal.azure.com/#create/Microso.Template/uri
• blob.core.windows.net
The appliance requires network connections with these servers.
Set up your Azure subscriptions
Use the following procedures for each Azure subscription that you want to connect with the App Lay‑
ering appliance.
Set up and retrieve your Azure credentials
To retrieve Azure credentials when adding an Azure connector configuration:
• Identify your Azure Subscription ID.
• Create an App Registration in Azure Active Directory.
• Retrieve the Azure Tenant ID, Client ID, and Client Secret from the App Registration.
• Create a storage account, or use an existing one, inside the subscription.
Identify the correct Azure Subscription ID
1. Go to the Azure portal.
2. Click Subscriptions, and find the subscription you need in the list.
3. Select and copy the Subscription ID, and paste it into the connector configuration Subscription
ID field.
Create an app registration for the Azure subscription You can use one Azure subscription for mul‑
tiple Azure connector configurations. Each Azure subscription that you want to use for your App Lay‑
ering connector configurations requires an app registration.
© 1999–2024 Cloud Soware Group, Inc. All rights reserved. 206

App Layering
To create an app registration:
1. Log into the Azure portal.
2. Click Azure Active Directory.
If Azure Active Directory isn’t listed, click More Services to display more choices.
3. On the le under Manage, select App registrations.
4. At the top of the page, click New registration.
A form appears.
5. In the Name field, type a descriptive name, such as “Citrix App Layering access”.
6. For Supported account types, select Accounts in this organizational directory only (My
Company only ‑ Single tenant).
7. For Redirect URL, type https://myapp.com/auth.
8. Click Register.
9. In the list of App registrations, click the new app registration that you created in the preceding
procedure.
10. In the new window that appears, the Application ID appears near the top. Enter this value into
the Client ID box in the connector configuration you are creating.
11. Scroll right to see the application properties, including the Display name, Application ID, and
other values.
12. Copy the Directory (tenant) ID value and paste it into the Tenant ID field in the connector con‑
figuration.
13. In the le column under Manage click Certificates and Secrets.
14. Add a client secret for the App Layering application, with a description such as “App Layering
Key 1”.
15. Type the value for the new Client Secret into the connector configuration.
Note:
This key does not appear again aer you close this window. This key is sensitive informa‑
tion. Treat the key like a password that allows administrative access to your Azure sub‑
scription. Open the settings of the app registration you created in
Azure Active Directory
> App registrations > [name you just entered] > Settings > Properties.
16. Go back to Azure Home, and click Subscriptions. If Subscriptions isn’t listed, click More Ser‑
vices to locate it.
17. Click the subscription you are using for this connector.
© 1999–2024 Cloud Soware Group, Inc. All rights reserved. 207

App Layering
18. In the le panel click Access Control (IAM).
19. On the top bar of the Access control panel, click Add and select Add role assignment.
20. The Add role assignment form appears on the right. Click the drop‑down menu for Role and
select Contributor.
21. In the
Select
field, type
“
Citrix App Layering access
”
or use the name you entered for the Appli‑
cation registration.
22. Click the Save button at the bottom of the form.
You have now set up an Azure app registration that has read/write access to your Azure subscription.
Set up one or more necessary storage accounts The Azure storage accounts are where the App
Layering soware stores all images imported from and published to Azure(virtual hard disks, or VHDs),
along with the template file that you use to deploy Azure virtual machines, and the boot diagnostics
files for those machines.
You can use an existing storage account, if it meets these requirements:
• It is not a classic storage account.
• It is in the same subscription used in the connector configuration.
In the App Layering Azure connector configuration, enter the storage account name in the Standard
Storage Account field.
If you don’t have a storage account, create a standard storage account. Connector configurations
require a standard account, though you can also specify a second storage account that is premium.
1. On the Azure home page, click Storage accounts.
2. In the Storage accounts window, click Add.
3. In the Subscription field, select the subscription you are using.
4. In the Resource group field, select Create New and enter a name similar to the name of the
Storage account.
5. In the Storage account name field, enter a memorable name.
6. Select the Location.
7. In the Performance field, if the location you chose is the only one for this connector configura‑
tion, select Standard. Otherwise, choose the best type for your needs.
8. In the Account kind field, select general purpose v2 or general purpose v1.
9. In the Replication field, select the type you need.
10. For the Access tier (default), select Hot or Cold.
11. Click Next: Networking, and select the connectivity method.
12. Complete the remaining options under Networking, Advanced, and Tags.
13. Select Review + Create.
14. Finally, enter the new Storage account name in the connector configuration you are creating.
© 1999–2024 Cloud Soware Group, Inc. All rights reserved. 208

App Layering
What to do if your Azure Client Secret is lost You can generate a new Azure Client Secret using the
Certificates and Secrets. For details, see the steps in the Create an app registration for each Azure
subscription section earlier in this article.
Add a Connector Configuration
When the requirements are ready, create an Azure connector configuration:
1. Click the Connectors page.
2. Click Add Connector Configuration.
3. In the dialog box that opens, select the Connector type for the platform and location where you
are creating the layer or publishing the layered image. Then click New to open the Connector
Configuration page.
4. Complete the fields on the Connector Configuration page. For guidance, see the field defini‑
tions.
5. Click the TEST button to verify that the appliance can access the location specified using the
credentials supplied.
6. Click Save. The new Connector Configuration appears on the Connector tab.
Azure data structure (Reference)
The Azure data structure is as follows:
Tenant
• Tenant ID
• App Registration
– Client ID
– Client Secret
• Subscription
• Subscription ID
– Storage Account
*
Storage Account Name
Where:
• Tenant is your Azure Active Directory instance that users and applications can use to access
Azure. The Tenant ID identifies each tenant. A tenant can have access to one or more Azure
Subscriptions.
• The Azure Active Directory Tenant contains two types of accounts.
© 1999–2024 Cloud Soware Group, Inc. All rights reserved. 209

App Layering
– A User Account for logging into the Azure portal (portal.azure.com).
– An App Registration for accessing the subscription has a Client ID.
*
The Client ID has a Client Secret, instead of a password.
*
Users can generate the Client Secret, and delete it.
• An Azure Subscription contains everything that can be created in Azure, except for user
accounts.
• A Subscription contains storage accounts. A storage account is where App Layering VHDs are
stored. The Storage Account Name identifies the location.
MS Azure Government
June 14, 2022
When creating layers in Azure Government, use an MS Azure Government connector configuration.
This article describes the fields included in the connector configuration. For more about App Layering
connectors, see Connector configurations.
A connector configurationcontains the credentials that the appliance uses to accessa specific location
in Azure Government. Yourorganization may have one AzureGovernment accountand several storage
locations. You need a connector configuration for the appliance to access each storage location.
Before you create an Azure Government connector configuration
This section explains:
• The Azure Government account information required to create this connector configuration.
• The Azure Government storage you need for App Layering.
• The servers that the appliance communicates with.
Required Azure account information
The Azure Government connector requires the same information as the Azure connector.
© 1999–2024 Cloud Soware Group, Inc. All rights reserved. 210

App Layering
• Name ‑ A name you use for a new connector configuration.
• Subscription ID ‑ To deploy Azure virtual machines, your organization must have a subscription
ID.
• Tenant ID ‑ An Azure Active Directory instance, this GUID identifies your organization’s dedi‑
cated instance of Azure Active Directory (AD).
• Client ID ‑ An identifier for the App Registration, which your organization has created for App
Layering.
• Client Secret ‑ The password for the Client ID you are using. If you have forgotten the Client Se‑
cret, you can create a new one. Note: Client secrets are logically associated with Azure tenants,
so each time you use a new subscription and Tenant ID, you must use a new Client Secret.
© 1999–2024 Cloud Soware Group, Inc. All rights reserved. 211

App Layering
• Standard Azure storage (required): A storage account for Azure virtual machines (VHD files),
the template file that you use to deploy Azure virtual machines, and the boot diagnostics files
for those machines. When you specify Premium storage, which is optional, the virtual machines
are stored there, and the template and boot diagnostics files remain in Standard storage.
The storage account must already have been created in the Azure government portal, and the
name you enter must matchthe name in the portal. For details, see Set up the necessary storage
accounts below.
• Premium storage (optional): More storage for Azure virtual machines (VHD files). Premium
storage only supports page blobs. You cannot use premium storage to store the template file
for deploying Azure virtual machines, nor the boot diagnostics files for those virtual machines.
When you specify a premium storage account, the virtual machine sizes available are limited to
those that support premium storage.
The storage account must already have been created in the Azure government portal, and the
name you enter must matchthe name in the portal. For details, see Set up the necessary storage
accounts later in this article.
Required Azure government storage account
Any account you use for App Layering must meet the following requirements:
• Must not be a classic storage account.
• Must be separate from the storage account used for the appliance.
• Must be in the Azure government location where you plan to deploy virtual machines.
• Can be located in any resource group, as long as the resource group’s location is the same as
the account’s location.
Required Standard storage account One of the following types of Standard Azure Government)
storage accounts is required to create a connector configuration.
• Standard Locally Redundant storage (LRS)
• Standard Geo‑Redundant storage (GRS)
• Standard Read‑Access Geo‑Redundant storage (RAGRS)
When creatingthe required Standard Storage, enable Blob Public Access for this account. Otherwise,
attempts to publish images fail with the error:
1 "A failure occurred while creating a storage container in the Azure
storage account: Public access is not permitted on this storage
account."
© 1999–2024 Cloud Soware Group, Inc. All rights reserved. 212

App Layering
Premium storage account In addition to the required Standard account, you can use Premium stor‑
age to store your App Layering virtual machine disks.
Servers that the appliance communicates with
Using this connector, the appliance communicates with the following servers:
• login.microsoonline.us
• management.usgovcloudapi.net
• management.core.usgovcloudapi.net
• portal.azure.us/#create/Microso.Template/uri/
• blob.core.usgovcloudapi.net
The appliance requires network connections with these servers.
Set up your Azure Government subscription
Use the following procedures for each Azure Government subscription that you want to connect with
the App Layering appliance.
Set up and retrieve your Azure Government credentials
When adding a new MS Azure Government connector configuration, retrieve your Azure Government
credentials as follows:
• Identify your Azure Government Subscription ID.
• Create an App Registration in Azure Government Active Directory.
• Retrieve the Azure Government Tenant ID, Client ID, and Client Secret from the App Registration.
• Create a new storage account, or use an existing one inside the subscription.
Identify the correct Azure Government Subscription ID
1. Go to the Azure Government portal.
2. Click Subscriptions, and find the subscription you need in the list.
3. Select and copy the Subscription ID, and paste it into the connector configuration Subscription
ID field.
© 1999–2024 Cloud Soware Group, Inc. All rights reserved. 213

App Layering
Create an app registration for each Azure Government subscription
You can use one Azure Government subscription for multiple Azure connector configurations. Each
subscription that you want to use for your App Layering connector configurations requires an app
registration.
To create an app registration:
1. Log into the Azure Government portal.
2. Click Azure Active Directory.
If Azure Active Directory isn’t listed, click More Services and searchfor Azure Government Active
Directory.
3. On the le under Manage, select App registrations.
4. At the top of the page, click New registration.
A form appears.
5. In the Name field, type a descriptive name, such as “Citrix App Layering access”.
6. For Supported account types, select Accounts in this organizational directory only (My
Company only ‑ Single tenant).
7. For Redirect URL, type https://myapp.com/auth.
8. Click Register.
9. In the list of App registrations, click the new app registration that you created in the preceding
procedure.
10. In the new window that appears, the Application ID appears near the top. Enter this value into
the Client ID box in the connector configuration you are creating.
11. Scroll right to see the application properties, including the Display name, Application ID, and
other values.
12. Copy the Directory (tenant) ID value and paste it into the Tenant ID field in the connector con‑
figuration.
13. In the le column under Manage click Certificates and Secrets.
14. Add a new client secret for the App Layering application, with a description such as “App Layer‑
ing Key 1”.
15. Type the value for the new Client Secret into the connector configuration.
Note:
This key does not appear again aer you close this window. This key is sensitive informa‑
tion. Treat the key like a password that allows administrative access to your Azure Gov‑
© 1999–2024 Cloud Soware Group, Inc. All rights reserved. 214

App Layering
ernment subscription. Open the settings of the app registration you just created in Azure
Government Active Directory > App registrations > [name you just entered] > Settings
> Properties.
16. Go back to Azure Home, and click Subscriptions. If Subscriptions isn’t listed, click More Ser‑
vices to locate it.
17. Click the subscription you are using for this connector.
18. In the le panel click Access Control (IAM).
19. On the top bar of the Access control panel, click Add and select Add role assignment.
20. The Add role assignment form appears on the right. Click the drop‑down menu for Role and
select Contributor.
21. In the Select field, type “Citrix App Layering access”or use the name you entered for the Appli‑
cation registration.
22. Click the Save button at the bottom of the form.
You have now set up an Azure Government app registration that has read/write access to your Azure
Government subscription.
Set up the necessary Storage Account(s)
The Azure Government storage account(s) are where the App Layering soware stores all images im‑
ported from and published to Azure Government (virtual hard disks, or VHDs), along with the template
file that you use to deploy Azure Government virtual machines, and the boot diagnostics files for those
machines.
You can use an existing storage account. It must meet these requirements:
• It is not a classic storage account.
• It is in the same subscription used in the connector configuration.
In the App Layering Azure connector configuration, enter the storage account name in the Standard
Storage Account field.
If you don’t have a storage account, create a standard storage account. Connector configurations
require a standard account, though you can also specify a second storage account that is premium.
1. On the Azure home page, click Storage accounts.
2. In the Storage accounts window, click Add.
3. In the Subscription field, select the subscription you are using.
4. In the Resource group field, select Create New and enter a name similar to the name of the
Storage account.
© 1999–2024 Cloud Soware Group, Inc. All rights reserved. 215

App Layering
5. In Storage account name field, enter a name that you’ll remember.
6. Select the Location.
7. In the Performance field, if this is the only storage location for this connector configuration,
select Standard. Otherwise, choose the best type for your needs.
8. In the Account kind field, select general purpose v2 or general purpose v1.
9. In the Replication field, select the type you need.
10. For the Access tier (default), select Hot or Cold.
11. Click Next: Networking, and select the connectivity method.
12. Complete the remaining options under Networking, Advanced, and Tags.
13. Select Review + Create.
14. Finally, enter the new Storage account name in the connector configuration you are creating.
What to do if your Azure Government Client Secret is lost You can generate a new Azure Client
Secret using the Certificates and Secrets. For details, see the steps in the Create an app registration
for each Azure subscription section earlier in this article.
Add a Connector Configuration
When all requirements are ready, create an Azure Government connector configuration:
1. Click the Connectors page.
2. Click Add Connector Configuration to open a dialog box.
3. Select the Connector Type for the platform and location where you are creating the Layer or
publishing the image. Then click New to open the Connector Configuration page.
4. Complete the fields on the Connector Configuration page. For guidance, see the field defini‑
tions.
5. Click the TEST button to verify that the appliance can access the location specified using the
credentials supplied.
6. Click Save. The new Connector Configuration appears on the Connector tab.
Azure Government data structure (Reference)
The Azure Government data structure is as follows:
Tenant
• Tenant ID
• App Registration
– Client ID
– Client Secret
© 1999–2024 Cloud Soware Group, Inc. All rights reserved. 216

App Layering
• Subscription
• Subscription ID
– Storage Account
*
Storage Account Name
where:
• Tenant is your Azure Government Active Directory instance that users and applications can use
to access Azure Government. The Tenant is identified by your Tenant ID. A Tenant can have
access to one or more Azure Government Subscriptions.
• The Azure Government Active Directory Tenant contains two types of accounts.
– A User Account for logging into the Azure Government portal (portal.azure.us).
– An App Registration for accessing the subscription has a Client ID.
*
The Client ID has a Client Secret, instead of a password.
*
Users can generate the Client Secret, and delete it.
• An Azure Government Subscription contains everything that can be created in Azure Govern‑
ment, except for user accounts.
• A Subscription contains Storage Accounts. This is where App Layering VHDs are stored. It is
identified by a Storage Account Name.
MS Hyper‑V
June 14, 2022
An MS‑Hyper‑V connector configuration includes the credentials and storage location the appliance
needs to connect to Hyper‑V, and it identifies the properties to be associated with the vDisk.
You can select a Hyper‑V connector for importing the OS, creating other layers, or publishing layered
images. Each connector configuration is set to access a storage location using a specific account.
The Hyper‑V connector uses Microso’s Background Intelligent Transfer Service (BITS) to copy disks
to and from the appliance. With BITS the appliance reports progress as a percentage complete, and
the connector no longer requires a CIFS share.
The Hyper‑V connector includes an Oload Compositing checkbox that enables layer packaging and
image publishing to be done on the Hyper‑V server, rather than on the App Layering appliance. Oload
Compositing greatly increases the speed of layer packaging and image publishing. It also automates
layer finalization and lets you create layers and publish images as Hyper‑V Generation 2 machines on
VHD or VHDX disks.
For more about connectors and connector configurations in general, see Connector configurations.
© 1999–2024 Cloud Soware Group, Inc. All rights reserved. 217

App Layering
Before you start
The first time you create an image template for publishing layered images to your Microso Hyper‑V
environment, you need to add a new Hyper‑V connector configuration for that location.
Hyper‑V requirements
You can use a Hyper‑V connector configuration makes it easy to connect to a location in your Microso
Hyper‑V environment.
The information you need for the Hyper‑V connector configuration includes:
• Hyper‑V Configuration
– Agent ‑ App Layering agent from the list of agents registered with the appliance. The agent
runs under the machine account for the machine it is running on.
• Virtual Machine Settings
– Template VM (Optional) ‑ A template that can be used to clone a Hyper‑V virtual machine
with the desired hardware settings (memory, CPUs and video settings). You can specify the
host, data store and network for configuring the resulting virtual machines. The template
must have at least one network card attached, and it must not have any disks attached.
Otherwise, you receive an error when attempting to validate or save the configuration.
– Number of CPUs ‑ Number of CPUs to use for creating a Packaging Machine or publishing
a layered image. The default value is 4 CPUs.
– Memory (Mbs) ‑ Amount of memory allocated for creating the Packaging Machine or the
layered image Machine. The default value is 8192 Mb.
– Network ‑ Network switch. You can select from a list of network switches known by the
agent.
– Generation ‑ Generation 1 machines are supported in all cases. Generation 2 machines
are supported only when the Oload Compositing option is selected.
– Disk Format ‑ VHD or VHDX are supported on Generation 1 machines. Only VHDX is sup‑
ported on Generation 2 machines.
Note:
VHDX disk format requires Oload Compositing, even on Generation 1 machines.
– Oload Compositing ‑ Enables the layer packaging or image publishing process to run on
the specified Hyper‑V server. This feature increases performance, and it allows you to use
© 1999–2024 Cloud Soware Group, Inc. All rights reserved. 218

App Layering
VHDX disk format and Generation 2 VMs. With UEFI, you can also use Secure Boot if it is
enabled on the VM.
When Oload Compositing is selected:
– If you do not provide a virtual machine template, the virtual machine defaults to BIOS.
– If you provide a template configured for BIOS or UEFI, the resulting virtual machine is the
type you chose.
– If you provide a template with UEFI‑Secure Boot enabled and selected, the resulting VM is
UEFI‑Secure Boot.
When Oload Compositing is not selected:
– If you do not provide a template, the virtual machine defaults to BIOS.
– If you provide a template configured for BIOS, the resulting virtual machine is BIOS.
– If you provide a template configured for UEFI, the machine fails to boot, and results in a
blue screen. (Oload Compositing is required for UEFI.)
• Storage Settings
– Path to Storage, eg: C:\Virtual Machines ‑ Path for the local or remote location where the
App Layering soware creates layer disks, packaging machines, and layered image disks.
This value:
*
Must be the same as the location specified in the UNC path.
*
Cannot be a mapped drive.
– Layer Disk Cache Size in GB (optional) ‑ Amount of File Share space (in gigabytes) to use
for caching layer disks. A value of:
*
0 disables layer caching.
*
1+ enables layer caching and specifies the amount of space to allow for caching layer
disks on the File Share.
Copies of boot disks and packaging disks are stored and then reused wherever possi‑
ble to reduce the time it takes to package an app layer.
App Layering requirements
The App Layering agent is required to use a Hyper‑V connector. The App Layering agent must be:
• Installed on the Microso Hyper‑V server where you want to create layers or publish layered
images. For details, see Install the App Layering agent in the App Layering installation topic.
• Registered with the App Layering appliance. For details, see Register with the App Layering
appliance manually in the App Layering installation topic.
© 1999–2024 Cloud Soware Group, Inc. All rights reserved. 219

App Layering
Create a Hyper‑V connector configuration
To use the Hyper‑V connector for layering or publishing, you:
1. Click the Connectors page.
2. Click Add Connector Configuration. This opens a small dialog box.
3. Select the Microso Hyper‑V Connector Type. Then click New to open the Connector Configu‑
ration page.
4. Completethe fields on the ConnectorConfiguration page. For guidance, see the field definitions
in the Hyper‑V requirements section above.
5. Click the TEST button to verify that the appliance can access the location specified using the
credentials supplied.
6. Click SAVE. The new connector configuration should now be listed on the Connector tab.
HTTPS and certificate errors
By default, HTTPS is turned o and certificate errors are ignored, because the self‑signed certificate
that comes with the appliance would fail over HTTPS. When you upload your own certificate, you can
configure the connector to use HTTPS and to stop ignoring certificate errors.
If you want to enable HTTPS for Hyper‑V
if you want to enable HTTPS for Hyper‑V, edit the settings for turning on HTTPS and for ignoring cer‑
tificate errors in the config.json file.
1. Open the Hyper‑V connector config.json file:
/usr/local/lib/node_modules/unidesk‑hyperv‑connector/config.json
2. Set useHttpsFileTransfer to true:
“
useHttpsFileTransfer
”
: true
3. Set ignoreCertificateErrors to false:
“ignoreCertificateErrors”: false
4. Restart the Hyper‑V connector.
Certificate errors
Once certificate errors are no longer ignored, you will receive the following error if your certificate
expires:
© 1999–2024 Cloud Soware Group, Inc. All rights reserved. 220

App Layering
1 Failed copying file to D:\path\file.vhdx. The certificate authority is
invalid or incorrect.
2 The error occurred while the remote file was being processed.
Nutanix AHV (Acropolis)
March 18, 2024
A Nutanix AHV connector configuration contains the credentials and storage container that the appli‑
ance needs to connect to Nutanix Acropolis.
You can use this connector configuration to access a specific location in your Nutanix environment
when you:
• Package layers as part of creating a Platform or App layer, or as part of adding a version to a
layer.
• Publish layered images to Nutanix.
Before you start
You can use your Nutanix Acropolis environment for creating layers and publishing layered images.
Each connector configuration accesses a specific storage container in your Nutanix Acropolis environ‑
ment where you can create your layers or publish layered images.
You need more than one Nutanix Acropolis connector configuration to access the correct container for
each purpose. Furthermore, it is important to publish each layered image to a container that is con‑
veniently accessible to the systems you are provisioning with the published image. For more about
connectors and connector configurations, see Connector configurations.
Specify the Nutanix Prism Elements console
App Layering uses the Prism Elements web console and does not support the Prism Central console.
Important:
When using Nutanix connectors, App Layering requires direct NFS access to the hosts to work
correctly. In older versions of Nutanix AHV (5.6 and 5.7), this direct NFS access to hosts was not
allowed if a Prism Element host or cluster was registered with Prism Central. Make sure that
your Nutanix setup allows this access. For details about this issue on various Nutanix versions,
see Adding layer versions with Nutanix fails with error: Failed to execute the script
© 1999–2024 Cloud Soware Group, Inc. All rights reserved. 221

App Layering
When configuring the Nutanix connector be sure to enter the URL for the Prism Elements console.
Error you receive if Prism Central is specified in the connector If Prism Central is used in the
connector configuration, you receive the error, “internal error 500.”
Add the Citrix App Layering appliance to the Nutanix allow list
Ensure that the appliance is added to your Nutanix allow list so that it can access the appropriate stor‑
age containers, as needed. This can be accomplished by configuring the file system and container‑
level allow list settings. For details about adding an allow list with Nutanix, see the Nutanix documen‑
tation.
Required information for Acropolis connector configuration settings
The Nutanix connector configuration lets you define the credentials and container to use for a new
configuration.
Important:
The fields are case‑sensitive. Any values that you enter manually must match the case of the
object at Nutanix, or else the validation fails.
• Connector Configuration Name: A useful name to help identify this connector configuration.
• Web Console (Prism) Address: The host name (resolvable via DNS) or IP address of the Prism
Web Console. This address is the same one that you use to access the Nutanix Prism Web Con‑
sole.
• User Name/Password: Credentials that are used when interacting with the Nutanix system.
The specified user must have suicient privileges for the following operations:
– VM operations:
*
clone
*
delete
*
power on/o
*
attach virtual disks
– Image operations:
*
create
*
update (aka upload)
*
delete
– Virtual disks:
*
create
© 1999–2024 Cloud Soware Group, Inc. All rights reserved. 222

App Layering
*
attach to VMs
• Virtual Machine Template (recommended): Virtual Machine Template that can be used to
clone a VM with the hardware settings for Nutanix, including memory, CPUs, and video settings.
You can specify the host, datastore, and network for configuring the resulting VMs. Since there
is no concept of a “template”at Nutanix, these “templates”are actual VMs. The OS version used
by the selected “template”must match the OS version that you are using for building layers or
publishing layered images. The template must not have any disks attached and must have at
least one network card attached. If it does not, you see an error when trying to validate or save
the configuration.
• Storage Container: Allows you to select the storage container for the images (virtual disks,
VHDs) that are uploaded, and the resulting virtual disks that are created from those images.
When creating app layers and OS layer versions, mount the storage container as an NFS mount
point.
Configure the allow list using the Nutanix web console or Nutanix CLI tools. Set the allow list
to the cluster and every storage container on the cluster, even the ones you are not using.
Note: If the appliance is not allow‑listed for the selected storage container, the validation phase
fails, and the error is indicated with the storage container selection.
• Layer Disk Cache Size in GB (optional): Specifies the size of the cache allowed for each layer.
• Oload Compositing: Enables the layer packaging or image publishing process to run on the
specified Nutanix server. This feature increases performance and it allows you to use a native
disk format and either BIOS or UEFI virtual machines. This is enabled by default.
• Packaging Cache Size in GB (recommended): Amount of cache size space (in GB) to use for
packaging. Accept the recommended value or modify it.
How Virtual Machines are Organized
Nutanix does not provide a mechanism for organizing virtual machines. Because of this, it could be
diicult to find the virtual machines created by your appliance when the total number of virtual ma‑
chines is large. To help you find these VMs, the following naming conventions are used:
• Packaging Machines (virtual machines created during the process of creating an App Layer or
OS Version)
– The virtual machine name starts with the layer name that is being created/modified
– The virtual machine names end with the following text: (Packaging Machine)
• Layered Image Virtual Machines (virtual machines created as a result of publishing a layered
image)
– The virtual machine name starts with the image name that was published
– The virtual machine name ends with the following text: (Published Image)
© 1999–2024 Cloud Soware Group, Inc. All rights reserved. 223

App Layering
When viewing virtual machines through the Nutanix web console, you can search for virtual machines
by filtering on:
• “Citrix App Layering”to find all virtual machines created by the App Layering service.
• “Citrix App Layering Packaging Machine”to find all virtual machines created for layer manage‑
ment jobs.
• “Citrix App Layering Published Image”to find all virtual machines created to publish a layered
image.
• Image name or layer name to find virtual machines related to a specific layered image publish‑
ing job or App or OS creation.
Virtual Machine Network Connectivity
The virtual network settings of the source template specified in the Nutanix AHV connector config‑
uration will be carried over when creating any VMs through the Nutanix Acropolis Hypervisor (AHV)
Connector. There is no option in the Connector Configuration UI to override the network settings.
Create a connector configuration
To enter values:
• You must manually enter the first three Connector fields. Once the credentials in those fields
are validated, you can select values for the remaining fields from the drop‑down menus.
• To enter values manually, click to put the cursor in the field and type the value, making sure that
the case matches the value in Acropolis.
• To select a value from a drop‑down list, click once to put the cursor in the field, and a second
time to display the list of possible values.
To add a connector configuration
1. Log in to the management console as an administrator.
2. Select the Connectors > Add connector configuration.
3. Select Nutanix AHV from the connector Type drop‑down menu and click New. This opens the
connector configuration.
4. Enter the configuration Name, and the Acropolis Address, User Name, and Password. For guid‑
ance, see the above field definitions.
5. Click the Connect button below the Acropolis Configuration field. The Virtual Machine Clone
Settings field is then enabled if the connection is successful. Any connection problems are re‑
ported on the connector configuration blade. If there were server certificate errors found, you
see an Ignore Certificate Errors and Continue button.
© 1999–2024 Cloud Soware Group, Inc. All rights reserved. 224

App Layering
6. Select the Virtual Machine Template.
7. Select the Storage Repository.
8. Click Confirm and Complete. If there are no errors, a summary page is displayed.
9. Click Save. Verify that the new connector configuration is listed on the Connectors page.
VMware vSphere
April 21, 2023
A vSphere connector configuration contains the credentials and storage location that the appliance
needs to connect to vSphere. Use the vSphere connector to package layers and publish images to
VMware vSphere or VMware Cloud on AWS.
Before you start
You can use your vSphere environment to create layers, and to publish layered images. Each connec‑
tor configuration accesses a specific storage location.
For convenient system provisioning, you can publish layered images to more than one location in your
hypervisor. To publish to more than one location, create a connector configuration for each location.
For more about connectors, and connector configurations, see Connect.
The vCenter account that you use for the connector must have the same permissions on a data center
as are listed in the App Layering appliance installation article.
When using vSphere as the hypervisor for Citrix Provisioning, we recommend using the same vSphere
VM template, in the vSphere connector settings, for creating layers as you do for creating the Target
Devices in Citrix Provisioning. This practice ensures that the published image and the target devices
have the same baseline VM specs.
If this is your first time using App Layering
If this is your first time using App Layering and you want to create layers using a vSphere virtual ma‑
chine, you need a vSphere connector. If you’re also publishing layered images to vSphere, you can
create a connector configuration for each of your publishing locations also.
When creating a layer and publishing a layered image, you can select a connector configuration. If
you don’t yet have the right connector configuration for the task, you can create one by clicking Add
Connector Configuration on the Connectors page.
© 1999–2024 Cloud Soware Group, Inc. All rights reserved. 225

App Layering
Virtual controllers
You can use either the default LSI Logic SAS controller, or a VMware paravirtual SCSI controller.
To use the default LSI Logic SAS controller, simply select it for the layer’s virtual machine, and make
sure that all of your layers use the same controller.
To use a VMware paravirtual SCSI controller, you need a pre‑existing Template VM with a VMware Par‑
avirtual SCSI controller and without any disks.
To use an existing LSIOS Layer with a VMware Paravirtual SCSI controller If you have an OS layer
with an LSI Logic SAS controller, and you want to use it with a VMware Paravirtual SCSI controller you
can use either of the following approaches:
• Add a version to the OS layer, using a VMware vSphere connector with an LSI Logic SAS VM tem‑
plate. When the packaging machine is created, follow the steps below to make the OS layer
Paravirtual enabled.
• Add a new platform layer with an LSIOS layer, and a platformconnector with an LSILogic SAS VM
template. When the packaging machine is created, follow the steps below to make the platform
layer Paravirtual enabled.
Note:
The following changes must be performed on the OS layer and the platform layer.
When the packaging machine from your chosen approach is ready:
1. Log in to the virtual machine and shut it down.
2. In the vSphere Web Client open the Edit Settings page for the packaging machine.
3. Add a new SCSI controller, by selecting SCSI Controller from the New Device menu, and click
Add.
4. Expand the New SCSI controller section that was added, and set Change Type to VMware Par‑
avirtual.
5. Add a new hard disk, by selecting New Hard Disk from the New device menu, and clicking Add.
6. Expand the New Hard disk section and set the following parameters:
• Size: 1 GB
• Disk Provisioning: Thin provision
• Virtual Device Node: New SCSI controller default bus
7. Click OK.
8. Install the Paravirtual drivers by powering on the packaging machine, logging in, and then shut‑
ting down.
© 1999–2024 Cloud Soware Group, Inc. All rights reserved. 226

App Layering
9. In the vSphere Web Client, open the Edit Settings page for the packaging machine.
10. Remove both the hard disk and the Paravirtual controller that you added earlier in this proce‑
dure.
11. Power on the packaging machine, log in, and click Shut down For Finalize.
Once you finish creating the layer, you can use it to create an image with a Paravirtual controller.
Required information for vSphere connector configuration settings
Configuring a connector for vSphere lets you browse for the vCenter Server, Data Store, and Host to
use for a new configuration.
Important:
The fields are case sensitive, so any values that you enter manually must match the case of the
object in vSphere, or the validation fails.
• Connector Configuration Name‑ A useful name to help identify and track this connector con‑
figuration.
• vCenter Server‑ The name of the vSphere server with which the appliance integrates.
• vCenter User Name‑ The user name of the account that the appliance uses to connect to
vSphere.
• vCenter Password‑ The password of the account that the appliance uses to connect to vSphere.
• DataCenter Name‑ The name of the vSphere data center in which the App Layering appliance
creates and retrieves virtual machines.
• Packaging Cache Size in GB (Recommended)‑ The size of the Disk Cache that App Layering
uses when creating layers. If you leave the size blank or set it to 0, App Layering does not use a
Disk Cache. If you specify a size, App Layering uses a Disk Cache of up to this size to keep copies
of boot disks and packaging disks, and reuses these disks to create packaging machines. The
reuse of these boot disks and packaging disks reduces the time that it takes to package an App
layer.
• Virtual Machine Template ‑ (Optional) Virtual Machine Template that clones a virtual machine
with the hardware settings for VMware, including memory, CPUs, and video settings. This set‑
ting lets you specify the host, datastore, and network for configuring the resulting virtual ma‑
chines.
Important:
When publishing to VMware Cloud, a VMware Virtual Machine template (not a regular VM
template) is required for the virtual machine’s network to work correctly.
© 1999–2024 Cloud Soware Group, Inc. All rights reserved. 227

App Layering
When selecting a template virtual machine:
– Answer Yes to the prompt asking to update settings, but do not change the network.
– Make sure that the OS version that’s used by the selected template matches the OS version
that you’re using for building layers or publishing layered images.
– The template must not have any disks attached, and must have at least one network card
attached. Otherwise, you receive an error when trying to validate or save the configura‑
tion.
• ESXHost Name‑ The name of the vSphereESX Host on which the appliance creates and retrieves
virtual machines.
• DataStore Name‑ The name of the vSphere DataStore in which the appliance creates and re‑
trieves virtual machines.
• Network Name‑ The name of the vSphere Network in which the appliance creates and retrieves
virtual machines.
• Virtual Machine Folder Name‑ The name of the vSphere Folder in which the appliance creates
and retrieves virtual machines.
• Oload Compositing ‑ Enables the layer packaging or image publishing process to run on the
specified vSphere server. This feature increases performance, and it allows you to use VMDK
disk format and either BIOS or UEFI virtual machines. With UEFI, you can also use Secure Boot
if it’s enabled on the VM.
Important:
When using a vSphere connector configuration with VMware Cloud and a vSAN 7.0 Update
2 (or later) datastore, Oload Compositing must be selected.
When Oload Compositing is selected:
– If you do not provide a virtual machine template, the virtual machine defaults to BIOS.
– If you provide a template configured for BIOS or UEFI, the resulting virtual machine is the
type you chose.
– If you provide a template with UEFI‑Secure Boot enabled and selected, the resulting VM is
UEFI‑Secure Boot.
When Oload Compositing isn’t selected:
– If you do not provide a template, the virtual machine defaults to BIOS.
– If you provide a template configured for BIOS, the resulting virtual machine is BIOS.
– If you provide a template configured for UEFI, the machine fails to boot, and results in a
blue screen. (Oload Compositing is required for UEFI.)
© 1999–2024 Cloud Soware Group, Inc. All rights reserved. 228

App Layering
Required Privileges for the connector’s vSphere Client Administrator Role
Set the VMware privileges required by the vSphere Client Administrator to match the permissions for
the App Layering appliance.
Once you have set the permissions, verify them by clicking Save in the Create Connector configuration
summary blade.
Create a connector configuration
To enter values:
• The first three vCenter fields must be entered manually. Once the credentials in those fields are
validated, you can select values for the remaining fields from the drop‑down menus.
• To enter values manually, click to put the cursor in the field and type the value, making sure that
the case matches the value in vCenter.
• To select a value from a drop‑down list, click once to put the cursor in the field to display the list
of possible values.
To add a new connector configuration
1. Click the Connectors page.
2. Click Add Connector Configuration. A dialog box opens.
3. Select the Connector Type for the platform and location where you’re creating the layer or pub‑
lishing the image. Then click New to open the Connector Configuration page.
4. Enter the configuration Name, and the vCenter Server, vCenter User Name, and vCenter Pass‑
word. For guidance, see the previous field definitions.
5. Click the Connect button below the vCenter fields. The data center field is then enabled with a
list of data centers available.
6. Select the data center, enabling the remaining drop‑down lists.
7. Complete the remaining fields and click the TEST button to verify that App Layering can access
the location specified using the credentials supplied.
8. Click Save. Verify that the new connector configuration is listed on the Connectors page.
Script Configuration (Optional, Advanced feature)
When creating a connector configuration, you can configure an optional PowerShell script on any Win‑
dows machine running an App Layering agent, the same agent used on the Citrix Provisioning server.
The scripts must be stored on the machine where the App Layering agent is installed, and will only run
aer a successful deployment of a layered image.
© 1999–2024 Cloud Soware Group, Inc. All rights reserved. 229

App Layering
Some preset variables are available to enable scripts to be reusable with dierent template images
and dierent connector configurations. These variables also contain information needed to identify
the virtual machine created as part of the published layered image in vSphere.
Running the scripts does aect the outcome of the publish job, and the progress of the script isn’t
visible. The vSphere connector logs contain the output of the script aer it runs.
Configure a Script
Remember that this is an optional procedure. If you want a script to run each time a layered image is
published, complete these steps using the values described in the sections that follow.
1. Complete and save the connector configuration as described previously.
Note:
Before selecting the Script Configuration page, you must save (or discard) any edits to
the connector configuration settings,
2. If the Navigation menu on the le isn’t open, select it and then click Script Configuration to
open the Script Path page.
3. Complete the required fields using the values detailed here, and click Save.
Script Configuration fields
• Enable script‑ Select this check box to enable the remaining fields. This allows you to enter a
script that runs each time a layered image is published.
• Script Agent‑ The agent machine where the scripts are located and run from.
• Username (optional)‑ The user name to impersonate when running the script. This can be used
to ensure the script runs in the context of a user that has the permissions to do the operations
in the script.
• Password (optional)‑ The password for the specified user name.
• Path‑ A full path and file name on the agent machine where the script file stays.
Other Script Configuration values
When the script runs, the following variables are set and can be used in the PowerShell script:
© 1999–2024 Cloud Soware Group, Inc. All rights reserved. 230

App Layering
Value
Applies to connector
types
Value determined by
which code Description
connectorCfgName All Common code This is the name of the
connector
configuration with
which the script
configuration is
associated.
imageName All Common code This is the name of the
layered image
template that was
used to build/publish
the layered image.
osType All Common code The OS type of the
published layered
image. It can be one of
the following values:
Windows7;
Windows764;
Windows8;
Windows864;
Windows200864;
Windows201264;
Windows10;
Windows1064
virtualInfrastructureServerAll vSphere connector
code
The vCenter server
specified in the
connector
configuration.
vmName All vSphere connector
code
The name of the
virtual machine.
vmId All vSphere connector
code
The virtual machine ID
from the VM (that is,
“vm‑12345”).
vmUuid
All
vSphere connector
code
The virtual machine
UUID.
© 1999–2024 Cloud Soware Group, Inc. All rights reserved. 231

App Layering
User Impersonation The App Layering agent, which runs as a service on a Windows machine, runs
under either the local system account or the network account. Either of these accounts may have
some special privileges, but they oen are restricted when running specific commands, or seeing files
in the file system. So, App Layering gives you the option of adding a domain user and password that
can be used to “impersonate”a user. The script can be run as if that user logged on to the system so
that any commands or data are accessible with those user rights and permissions. If no user name or
password is entered, the script runs using the account under which the service is configured to run.
Script Execution Policy Script execution policy requirements are up to you. If you intend to run un‑
signed scripts, you must configure the execution policy to one of the more lenient policies. However,
if you sign your own scripts, you can choose to use a more restrictive execution policy.
Error messages
If you receive ENOTFOUND errors when you deploy a packaging machine or publish an image, use the
IP Address in place of the FQDN for the vCenter server.
Network File Share
March 12, 2024
When the App Layering appliance is installed, you set up a network file share to use as a connector
configuration when creating layers and publishing Layered Images. This Connector Configuration
contains the appliance’s Network File Share credentials and location so you can deploy a Packaging
Machine to the File Share when creating layers or publishing Layered Images.
Each connector configuration is set up to access a storage location by using a specific account. For
more about Connectors and Connector Configurations, see Connect.
Network File Share Location
The name of the Network File Share connector configuration includes its location. Look for the folder
at the top level of the Network File Share. For details, see Set up a file share.
When to select the Network File Share as your Connector Configuration
When you publish Layered Images to a Provisioning Service for which we do not yet have a connector,
you can select the Network File Share Connector Configuration. You can then copy the Layered
© 1999–2024 Cloud Soware Group, Inc. All rights reserved. 232

App Layering
Image from the network file share to the correct location for provisioning servers.
Windows File Share
March 22, 2024
A Windows File Share configuration contains the credentials and storage location that the appliance
needs to connect to a file share. Use Windows File Share Connector Configuration to publish Lay‑
ered Images.
For more about Connectors and Connector Configurations, see Connect.
Before you start
Ensure that you have the following configurations:
• A connector configuration with Oload Compositing enabled that supports packaging layers.
• A network file share that can be accessed over SMB from packaging machines created by the
packaging connector.
If this is your first time using App Layering
If this is your first time using App Layering and you want to publish layered image disks to a network
file share, you can create a connector configuration for each of your publishing locations.
When publishing a layered image, you can select a connector configuration. If you don’t yet have the
right connector configuration for the task, you can create one by clicking Add Connector Configura‑
tion on the Connectors page.
Required information for Windows File Share Connector Configuration settings
In the Management Console, select Connector > Add Connector Configuration > Windows File
Share and click New.
To configure the Windows File Share, specify the following values:
• Config name: A useful name to help identify and track this connector configuration.
• SMB File Share Path: Network share path where layered image disks must be published.
• User Name: Name of a user with read and write permissions to the given share path.
• Password: Password of the given user.
© 1999–2024 Cloud Soware Group, Inc. All rights reserved. 233

App Layering
Compositing Settings
• Oload Connector Configuration: A connector configuration with Oload Compositing en‑
abled. This connector configuration composites the layer on behalf of the Windows File Share
connector. The virtual machine settings used by the Oload Compositing engine are from this
connector configuration. For example, if the Oload Connector Configuration is set up to create
UEFI machines, the resulting image is in UEFI format.
• Disk Format: The virtual disk format to publish images as in the network file share. This can be
either VHD or VHDX.
Layer
March 6, 2024
A layer is a virtual disk that contains the soware for your operating system, platform tools, apps, or
the user’s data and settings.
When you create a layer, the appliance saves the new layer as a virtual disk in your hypervisor envi‑
ronment, and attaches the disk to a packaging machine.
Once created, each layer is stored in a repository as a virtual disk.
Types of layers
You can use the following types of layers:
• Layers you create in your hypervisor and include in the image templates you use to publish
layered images.
• Layers you enable on image templates, and therefore on the layered images you publish.
Layers to include in image templates and layered images
You can create layers for your OS, your platform tools, and the applications that you want to deliver
to users.
• OS layer: The layer where you install the Windows OS from ISO. You can reuse the same OS
layer with all compatible platform and app layers. We recommend creating just one OS layer
for each major Windows version, for example, one for Windows 10 and one for Windows Server
2016. You can add new versions of a layer for each follow‑on release. For example, if you have a
Windows 10, version 1709 layer, you add a version to it for version 1809, and one for 1903. When
© 1999–2024 Cloud Soware Group, Inc. All rights reserved. 234

App Layering
you update the OS layer, it is not necessary to update the app layers, but do update the platform
layer. For more about creating an OS layer, see Create the OS layer.
• Platform layers: A layer where you install and configure the soware for a specific on‑premises
or cloud environment. When you isolate your infrastructure soware in a platform layer, you can
reuse the same OS layer and app layers on multiple hypervisors. You can create a platform layer
for each part of your infrastructure if for example you use more than one hypervisor.
If you use any of the following soware in your infrastructure, you normally install them on a
platform layer:
– Connection broker soware
– Provisioning soware
– System Center Configuration Manager (SCCM)
Though it might not seem intuitive, it is crucial to install the soware for the first hypervisor you
support on the OS layer.
If you support more than one hypervisor, you can then create another platform layer for the
additional hypervisor. The platform layer for an additional hypervisor must include the hyper‑
visor soware, along with the provisioning, connection broker, and SCCM soware. When you
create this additional platform layer, be sure to select the check box for the new hypervisor you
are supporting. This ensures that the App Layering appliance removes the original hypervisor
files and settings from the OS layer so that they do not interfere with performance.
For more about creating an OS layer, see Create platform layer.
• App layers: The layers where you install applications. Typically, we recommend installing one
app on each layer, though you can include more. For easy maintenance, include apps that are
on the same update schedule. If an application requires other apps, create the layer for the
required application first. For more about creating an app layer, see Create or clone an app
layer. For tips about layering a specific application, see App Layering Recipes.
Layers you can enable on layered images
Besides the layers that you include in layered images, you can enable Elastic and User layers on them
through settings in the image template:
• Elastic layers: App layers that are assigned to specific users and delivered when the users log
in. An elastic app layer is not included in the base image, but is delivered on it. Elastic apps
appear on the user’s desktop.
Important:
An app layer can be delivered to a user either as part of the layered image or as an elastic
© 1999–2024 Cloud Soware Group, Inc. All rights reserved. 235

App Layering
layer.
There are a few applications that cannot be used as elastic layers, for example, Microso Oice.
To find out whether an application has this limitation, check the App Layering recipes here and
the App Layering forum for notes about layering an application. If no limitations are specified
for your app, you can assign it as an elastic layer. For more about enabling and assigning elastic
layers on a layered image, see Deploy app layers as elastic layers.
• User layers: Enabling user layers on a layered image allows you to persist a user’s data and
settings, and any applications that they install themselves. When enabled, a user layer is cre‑
ated for each user the first time they log on to an image. To enable this feature, select the User
layers setting in the image template that you use to publish the layered image. For more about
enabling elastic layers on a layered image, see Deploy user layers, and Create or clone an image
template.
Don
’
t assign application layers that have browsers like Chrome or Firefox to users when those
users are logging into an image that is using full user layers. Browsers update frequently, which
can cause revision conflicts between the user’s writeable layer and the revision on the bootable
image. You can, however, assign those layers to users if they are logging in to an image that is a
session host.
Applications that require a local user or administrator
The OS layer preserves any local users or groups that you add, but app layers, platformlayers, and user
layers do not. For example, users and groups that you add or change while installing an application
on an app layer, platform layer, or user layer do not persist. You can either:
• Add the local user or administrator to the OS layer before installing the application.
• Install the application on the OS layer.
Layer integrity overview
When creating an OS, app, or a platflorm layer, you begin layer creation in the App Layering manage‑
ment console, then install the soware in the specified VM in your hypervisor. When the layer is in the
state that you want it to be in when users start their desktops, you shut down the machine and finalize
the layer.
When you shut down a layer to finalize it, Windows Ngen.exe operations display messages about
pending tasks that must be completed before shutting down. You must let these jobs complete, but
you can expedite the Ngen.exe operations, if necessary. Details about Ngen.exe messages and
how to expedite operations are included in each of the related layering articles:
© 1999–2024 Cloud Soware Group, Inc. All rights reserved. 236

App Layering
• Prepare your OS image for layering in XenServer, Hyper‑V, or vSphere
• Prepare your OS image for layering in Azure
• Prepare your OS image for layering in Nutanix
• Create platform layer
• Create or clone an app layer
• Update layer
• Troubleshoot layer integrity issues
Layer priority
Layer priority defines layer order when creating the Windows file system and registry. Layer priority
is important when:
• Compositing layers as part of publishing layered images.
• Searching layers for file and registry settings.
• Delivering elastic layers and user layers to users’desktops.
The App Layering soware assigns a priority to each layer, and applies the layers in order, from the
lowest priority to the highest.
In Windows, the highest priority layer takes precedence. If a file or registry entry exists in two layers,
Windows uses the file or registry entry from the layer with highest priority.
How layer priority is determined
A layer’s priority is based on the layer type and, for App layers, the order in which the layers were
created.
Layers within the base image Layers that are part of the layered image are applied in order, with
the Platform Layer always applied last, as the highest priority layer.
As the following table shows, the priority assigned to app layers is based on the order in which the
layers are created. The newest app layers are given a higher priority than older layers.
Priority Layer type
High Platform layer
App layer created last
Medium App layers in order by creation date
App layer created first
© 1999–2024 Cloud Soware Group, Inc. All rights reserved. 237

App Layering
Priority Layer type
Low OS layer
If the layers have a file or registry entry in common, the file or registry entry from the higher priority
layers are used.
Layers enabled on the base image When a published image boots, more layers can be applied, if
the layers are enabled in the image template for your layered image:
• Elastic layers (app layers assigned to users as elastic layers)
• User Layers
When merging layers onto an image, User layers are always the highest priority. Elastic layers are next,
and the layers in the base image last.
As shown in the following table, the priority of elastic layers is the same as the priority of the original
app layers, but applied to the base image. Elastic layer priority does not depend on the order in which
the layers are attached to the published image.
Priority Layer type
High User layer
Elastic layer ‑ App layer created last
Medium Elastic layers ‑ App layers in creation order
Elastic App ‑ App layer created first
Low Layered image ‑ All layers within base image
Layer priority conflicts
Most app layers work, but in some situations, the order in which you install applications can cause
conflicts on the desktop.
If one app must be installed before another, create the layers in the order required. The App Layering
soware applies the layers in the same order.
If two layers conflict and you suspect that it is due to the order in which they are incorporated into the
image, you have two choices:
• Recreate the layer that you want to install last, so that it is incorporated in the correct order.
• Request assistance from Technical Support.
© 1999–2024 Cloud Soware Group, Inc. All rights reserved. 238

App Layering
Prepare the OS for layering
March 26, 2024
You can prepare your operating system for layering at any time, even if the App Layering soware
has not yet been installed. It is important that you meet all requirements so that the OS layer works
correctly in your environment.
Once you have met the requirements and have familiarized yourself with the guidelines for what to
include in the OS layer, use the instructions for preparing the OS in your hypervisor environment. If
you later expand support to another hypervisor, you can reuse this OS layer by installing the tools for
the second hypervisor on the Platform layer that you create for that second environment.
Requirements and recommendations
When preparing an OS image, meet the following requirements and consider the related recommen‑
dations.
• One OS layer for each Windows version you are managing (recommended): Citrix recom‑
mends that you prepare a single OS image for each Windows version that you are managing,
along with a set of Platform and App layers for each.
• Fresh OS image: Start with a fresh image of a supported Windows OS from your hypervisor.
This ensures that the image is optimized for your environment.
• IP address from DHCP: Make sure that the OS image is not in a domain. Ensure that the image
gets its IP address from DHCP. Otherwise, you cannot install the App Layering OS Machine Tools.
Domain join can be done in the platform layer.
• App Layering OS Machine Tools: Locate the OS Machine Tools in the App Layering installation
package.
• Optimization script for MS Oice: If you are going to run MS Oice, you must use the optimiza‑
tion script included in the installation package.
XenServer, MS Hyper‑V, or VMware vSphere
In the rare case that you need to run Windows Mini Setup, you can edit the unattend.hta file we supply
for your needs.
• Answer file for unattended installation (optional): The answer file is included in the App
Layering download.
© 1999–2024 Cloud Soware Group, Inc. All rights reserved. 239

App Layering
Notes:
Avoid using third‑party scripts, because they can change services and features that the App
Layering service uses, for example, Universal Plug and Play and the 8.3 file names setting.
What to include in the OS layer
Include the following soware and settings in the OS layer:
• Hypervisor tools: You must include your hypervisor tools in the OS layer. You can upgrade the
tools by adding a new version to the layer.
Notes:
– When you upgrade the hypervisor tools on the OS layer, test the existing platform layer
to see if it needs updating. Depending on the platform and what else is installed on it,
you may need to recreate the platform layer.
– If you are using the same OS layer with multiple hypervisors, it makes sense to install
the hypervisor tools in purpose‑built platform layers for those given hypervisors.
• .NET Framework v4.0 or later: Include .NET Framework v4.0 or later so that Windows updates
are only required on the OS layer. For example, .NET 4.8 is required for Citrix Virtual Apps and
Desktops (CVAD) 2303 to add a VDA.
• .NET Framework 3.5 (when creating an MS Oice layer): For ease in updating, install all ver‑
sions of the .NET Framework on the OS layer before creating the Oice layer. If .NET Framework
v3.5 is not present when you install Oice, Oice installs it for you, and it is not recommended
to have .NET Framework versions or updates installed in app layers.
• Disable Windows updates using local GPO: Disable Windows updates on the OS layer, and do
so using Local GPO rather than the Windows Update Service.
• Windows Store app removal: If you remove Windows Store apps, remove them from the OS
layer, not on an App layer.
• Windows activation: Use KMS for Windows Activation. When creating your OS layer, run
SetKMSVersion.exe to configure the startup scripts that activate the correct version of
Windows.
• User accounts and groups:
Any extra user accounts or groups must be created in the OS layer.
Any domain group membership changes must be done through Group Policy.
• Applications that create local users: Include apps that create local users to ensure that
changes to local groups and local users are captured, something that is not done on Platform
and App layers.
© 1999–2024 Cloud Soware Group, Inc. All rights reserved. 240

App Layering
What not to include in the OS layer
Do not include the following soware on the OS layer.
• Provisioning soware: Soware associated with your Provisioning Service must be installed
on your Platform layer, not on the OS layer.
• Connection broker soware: Your connection broker soware must also be installed on your
Platform layer, not on the OS layer.
• MS Oice and other apps: Do not include MS Oice or other applications on the OS layer, ex‑
cept for the few apps that create local users. Generally, applications should be installed on App
layers.
• Domain join: Do not join the OS layer to an Active Directory domain. Instead, join the domain
in the Platform layer. This allows you to use the same OS in dierent domains.
• Debug flag: The Debug flag cannot be enabled in any BCD boot entry in your OS layer if you
are using Secure Boot. Whether the flag is true or false does not matter; the flag itself cannot be
present, as it is known to cause issues.
For detailed steps to prepare the OS, select your hypervisor:
• XenServer, Hyper‑V, vSphere
• Azure
• Nutanix
Prepare your OS image for layering in XenServer, Hyper‑V, or vSphere
March 27, 2024
Before you start, ensure that you meet the requirements. While preparing the image, you can Expedite
a Microso Ngen.exe operation, if necessary, if you think it is taking too long.
If using Windows 10, you can speed up desktop start times as long as you are not running Citrix Pro‑
visioning, machine creation, or VMware View. In this situation, you can remove Windows 10 built‑in
applications. We recommend removing the apps on a new version of the OS layer, rather than in the
OS image itself.
Note:
XenServer supports UEFI‑based machines aer a new XenServer connector was added.
Install the OS on a virtual machine
It is crucial to start with an OS freshly installed from ISO, preferably from your hypervisor.
© 1999–2024 Cloud Soware Group, Inc. All rights reserved. 241

App Layering
In this procedure, be sure to follow steps and notes specific to the Windows version you are
installing.
1. Log in to your hypervisor client.
2. Create a virtual machine with the correct CPU, RAM, hard drive, and network settings for your
operating system type. Guidance:
• XenServer virtual machine: Ensure that only one network is selected.
• vSphere virtual machine:
– Network: (Required) Select the VMXNET 3 network adapter.
Important:
You can have one, and only one, network device, and the E1000 NIC must never have
been used. The default E1000 adapter (or even a ghost NIC leover from an E1000
adapter) can cause customization timeout errors on the virtual machines.
– Thin Provision: Select Thin Provision.
• All hypervisors:
– Hard drive: Ensure that the appliance can access the hard drive that you create.
3. Attach the ISO and install the operating system. This machine must not be joined to the do‑
main. Domain join must be done in the Platform layer, and any domain group membership
changes must be done through Group Policy.
4. Install the hypervisor tools for the platform where you plan to package layers. If you support
multiple hypervisors, put the tools for the hypervisor you plan to use for publishing images in
the Platform layer.
• For Hyper‑V: Use the Microso Windows Integration Services Setup Disk to install Hyper‑V
Integration Services.
If using a Server OS, install the Remote Desktop Session Host feature
When using a Windows Server, you need to install the Remote Desktop Session Host feature. When
the Remote Desktop Session Host role is installed in the OS layer, it is updated as part of Windows.
You can install the role on the platform layer with the VDA instead if you prefer.
If you install RDS in the OS layer, you need to use local GPOs to define the RDS license servers. Other‑
wise, over time, you will lose the ability to log in to packaging machines.
To install the Session Host feature:
© 1999–2024 Cloud Soware Group, Inc. All rights reserved. 242

App Layering
1. In the Server Manager, select Add roles and features.
2. For the Installation Type, select Role‑based or Feature‑based installation.
3. For the Server role, select Remote Desktop Services > Remote Desktop Session Host (In‑
stalled). This installs the C++ library and the RDS role.
4. Complete the process of adding the Server Roles.
Ensure the correct versions of .NET Framework are installed (Windows 10 and
Windows Server 2016)
The .NET Framework is a soware framework provided by Microso, and it is required for many third‑
party applications to run. Any installation of the .NET Framework must be included in the OS layer.
This includes .NET 3.5 and .NET 4.0 or later.
Note:
Citrix Virtual Apps and Desktops (CVAD) 2303 requires .NET version 4.8 to add VDAs.
Be sure to install the .NET Framework and any updates on your OS layer.
Install Windows updates
Be sure to install all Windows updates.
1. Install all important updates.
2. Check for updates again aer the virtual machine is rebooted. Some updates became available
only aer others are installed.
3. Install all required service packs:
• If using Windows 2008 with Citrix Provisioning, install Windows Server 2008 R2 Service
Pack 1 (SP1).
Note:
If KB3125574 is installed, uninstall it before installing this service pack.
4. Clear Windows Automatic Updates and disable Windows System Restore using the local
group policy editor, gpedit.msc. The system handles restore points for you. Layer versions
allow you to specify when updates occur.
5. Windows 10: Clear Hibernation by entering this command:
1 powercfg.exe /hibernate off
2 <!--NeedCopy-->
© 1999–2024 Cloud Soware Group, Inc. All rights reserved. 243

App Layering
6. Enable the built‑in administrator and select Password never expires.
7. If using Key Management Service(KMS) licensing, run a command window as Administrator, and
enter these commands:
1 slmgr /skms <kmsserverhost>
2 slmgr /rearm
3 reboot
4 slmgr /ipk XXXX-YOUR-KMS-KEY-XXXX
5 slmgr /ato
6 <!--NeedCopy-->
8. If using a server OS, run the following commands in PowerShell:
1 Set-ExecutionPolicy Unrestricted
2 Enable-PSRemoting
3 <!--NeedCopy-->
Expedite a Microso Ngen.exe operation, if necessary
Once all soware updates have been installed, you must allow Ngen.exe to essentially recompile
.NET byte code into native images and construct the registry entries to manage them.
Ngen.exe is the Microso Native Image Generator, which is part of the .NET system. Windows deter‑
mines when to run Ngen.exe based on what soware is being installed and what Windows detects
in the configuration.
Important:
When Ngen.exe is running, you must let it complete. An interrupted Ngen.exe operation can
leave you with non‑functioning .NET assemblies or other problems in the .NET system.
Normally, Ngen.exe is a background operation that pauses when there is a foreground activity. If
you want to expedite an Ngen.exe operation, you can bring the task into the foreground to complete
it as quickly as possible.
To bring the task into the foreground:
1. Open a command prompt as Administrator.
2. Go to the Microsoft.NET\Framework directory for the version currently in use:
1 cd C:\Windows\Microsoft.NET\FrameworkNN\vX.X.XXXXX
2 <!--NeedCopy-->
3. Enter the following Ngen.exe command to run all queued items. This command processes
queued component installs before building assemblies.
© 1999–2024 Cloud Soware Group, Inc. All rights reserved. 244

App Layering
1 ngen eqi 3
2 <!--NeedCopy-->
Note:
This variation of the ngen command has been tested and is the variation that works in this
situation in App Layering.
The Ngen.exe task moves to the foreground in the command prompt and lists the assemblies
being compiled. It is OK if you see compilation messages.
You can use the Task Manager to see if an instance of MSCORSVW.EXE is running. If it is, allow
it to complete, or run ngen eqi 3.
Warning:
Do not reboot to stop the task. Allow the task to complete!
4. Ensure that all Ngen.exe processes have run to completion.
Run the App Layering OS Machine Tools on the image
To prepare the OS image to run in a layer, you run the OS Machine Tools file on the image. This ex‑
ecutable runs a GPO setup script (gposetup.cmd), and a script to set the Key Management Service
(KMS) version. The script is called SetKMSVersion.hta.
1. Download the following zip file onto the OS image:
App_Layering_Citrix_App_Layering_OS_Machine_Tools_20.x.zip
2. Extract the files to:
1 c:\windows\setup\scripts
2 <!--NeedCopy-->
Note:
The file must be extracted to the directory. Do not change the directory.
If using KMS, configure license activation
Once the Key Management Service (KMS) scripts are extracted, the SetKMSVersion utility asks you
to choose whether to use KMS licensing.
© 1999–2024 Cloud Soware Group, Inc. All rights reserved. 245

App Layering
Note:
Publishing images into environments where both KMS and Active Directory‑based activation
(ADBA) are being used at the same time causes problems with activation.
1. In the dialog box that appears, select whether to use Key Management Service (KMS) licensing.
To configure scripts for KMS, do the following.
1. Go to:
c:\windows\setup\scripts
2. Run SetKMSVersion.hta as Administrator to create a script in the c:\windows\setup\
scripts\kmsdir folder.
When the operating system starts, the appropriate KMS activation script is run.
Install the App Layering services
1. In the c:\windows\setup\scripts folder, run the setup_x86.exe (32‑bit) or
setup_x64.exe (64‑bit).
You are ready to import the image into a new OS layer.
Note:
Ensure that the image preparation tools installer is run once before the OS has been imported.
Don’t run the image preparation tools installer aer the OS is imported as this might cause un‑
known issues.
© 1999–2024 Cloud Soware Group, Inc. All rights reserved. 246

App Layering
Prepare your OS image for layering on Google Cloud
May 3, 2021
This topic explains how to prepare a clean OS image for import into a new OS layer. Before you start,
make sure that you meet the requirements. While preparing the image, you can Expedite Microso
Ngen.exe operations, if you think it is taking too long.
If using Windows 10 and not running Citrix Provisioning, Citrix machine creation, or View, you can
speed up desktop starttimes by removing Windows 10 built‑in applications. However, we recommend
removing the apps on a new version of the OS layer, not in the OS image itself.
Install the OS on a virtual machine
1. Get familiar with the guidelines for preparing an OS layer, including requirements and recom‑
mendations. Be sure to read the sections on what to include, and what not to include in an OS
layer layer.
2. Navigate to the Google Cloud portal.
3. Select Marketplace in the le column, and deploy a new virtual machine.
Note:
When configuring the new instance network, make sure the VM is on a network that is ac‑
cessible to the appliance.
4. If you are using a Windows Server operating system, scroll to Operating systems, and select a
Windows Server 2019 or Windows Server 2016 operating system.
5. If you are bringing Windows 10 from another platform (it is not available in the Marketplace),
follow the steps in the Bringing your own licenses tutorial.
6. Configure the new instance:
• When selecting a network for the new instance, make sure that the VM is on a network that
is accessible to the appliance.
• When selecting storage, any type of storage is fine.
Run the App Layering OS Machine Tools on the image
1. On the new machine, open a web browser, navigate to the Download Center and download the
OS Machine Tools.
© 1999–2024 Cloud Soware Group, Inc. All rights reserved. 247

App Layering
2. Download the following zip file onto the OS image:
1 Citrix_App_Layering_OS_Machine_Tools_20.x.x.exe
2 <!--NeedCopy-->
3. Run the file, and it copies files to:
1 c:\windows\setup\scripts
2 <!--NeedCopy-->
Note:
The file must be extracted to the above directory. Do not change the directory.
If using Key Management Service, configure license activation
Once the scripts are extracted, the SetKMSVersion utility asks you to choose whether to use Key
Management Service (KMS) licensing.
Note:
Publishing images into environments where both KMS and Active Directory‑based activation
(ADBA) are being used at the same time causes problems with activation.
1. In the following dialog box, select whether to use Key Management Service (KMS) licensing.
To configure scripts for KMS, do the following.
1. Navigate to:
1 c:\windows\setup\scripts
2 <!--NeedCopy-->
© 1999–2024 Cloud Soware Group, Inc. All rights reserved. 248

App Layering
2. Run SetKMSVersion.exe as Administrator to create a script file in the c:\windows\setup\
scripts\kmsdir folder.
When the operating system starts, the appropriate KMS activation script is run.
Install the App Layering services
1. On the new machine, navigate to C:\Windows\Setup\scripts and run setup_x64.exe to
install the App Layering drivers on the OS machine.
2. The installation prompts you for the location of the Unattend.xml file (the default location is
‘C:\windows\panther).
3. Ensure that this machine is not joined to a domain.
4. Perform pending reboots on the OS machine so that you can import this image into a layer.
5. Make sure that the new OS machine is in one of the following states before proceeding.
• Running
• Stopped
• Stopped (deallocated)
Expedite a Microso Ngen.exe operation, if necessary
Once all soware updates have been installed, you must allow Ngen.exe to essentially recompile
.NET byte code into native images and construct the registry entries to manage them.
Ngen.exe is the Microso Native Image Generator, which is part of the .NET system. Windows deter‑
mines when to run Ngen.exe based on what soware is being installed and what Windows detects
in the configuration.
Important:
When Ngen.exe is running, you must let it complete. An interrupted Ngen.exe operation can
leave you with non‑functioning .NET assemblies or other problems in the .NET system.
Normally, Ngen.exe is a background operation that pauses when there is foreground activity. If you
want to expedite an Ngen.exe operation, you can bring the task into the foreground to complete it
as quickly as possible.
To bring the task into the foreground:
1. Open a command prompt as Administrator.
2. Go to the Microsoft.NET\Framework directory for the version currently in use:
1 cd C:\Windows\Microsoft.NET\FrameworkNN\vX.X.XXXXX
2 <!--NeedCopy-->
© 1999–2024 Cloud Soware Group, Inc. All rights reserved. 249

App Layering
3. Enter the following Ngen.exe command to run all queued items. This command processes
queued component installs before building assemblies.
1 ngen eqi 3
2 <!--NeedCopy-->
The Ngen.exe task moves to the foreground in the command prompt, and lists the assemblies
being compiled. It is OK if you see compilation messages.
You can use the Task Manager to see if an instance of MSCORSVW.EXE is running. If it is, allow
it to complete, or run ngen update eqi 3.
Caution:
Do not reboot to stop the task. Allow the task to complete!
4. Ensure that all Ngen.exe processes have run to completion.
Prepare your OS image for layering in Azure
July 25, 2022
This topic explains how to prepare a clean OS image for import into a new OS layer. Before you start,
make sure that you meet the requirements. While preparing the image, you can Expedite Microso
Ngen.exe operations, if you think it is taking too long.
If using Windows 10 and not running Citrix Provisioning, machine creation, or View, you can speed up
desktop start times by removing Windows 10 built‑in applications. However, we recommend remov‑
ing the apps on a new version of the OS layer, not in the OS image itself.
Note:
Do not use an unattend file with a Machine Creation Services (MCS) Azure connector. The App
Layering soware removes the unattend file if it is present, because it is not necessary or recom‑
mended for an MCS Azure connector.
Install the OS on a virtual machine
1. In the Microso Azure portal, create a new virtual machine from the Windows Server Remote
Desktop image by selecting:
New > Compute > Virtual Machine
2. Complete the Create virtual machine wizard:
Basics:
© 1999–2024 Cloud Soware Group, Inc. All rights reserved. 250

App Layering
• Name: The name you specify for the new machine must comply with Azure naming con‑
ventions.
• Username and password: The user name and password of the new server machine you
specify are used for any packaging machines that are created containing this OS layer.
• Resource group location: Be sure that the value for the Resource group location matches
the Storage account location that you configured in the connector configuration.
3. Select required network settings.
4. Review the summary and create the virtual machine.
5. Log into the new virtual machine, and reboot the machine.
6. Install all important updates. Be sure to reboot the system and check for more updates. Some
updates become available only aer others are installed.
7. Run Windows Ngen.exe.
8. Remove or rename the Unattend file in C:\Windows\OEM.
9. Clear Windows Automatic Updates by selecting:
Control Panel > System and Security > Windows Update > Change Settings
10. Ensure that this machine is not joined to a domain.
11. Enable the built‑in administrator and check Password never expires.
12. If this is a server OS, run the following commands in PowerShell:
1 Set-ExecutionPolicy Unrestricted
2 Enable-PSRemoting
3 <!--NeedCopy-->
Run the App Layering OS Machine Tools on the image
1. On the new machine, open a web browser, navigate to the Download Center and download the
OS Machine Tools.
2. Download the following zip file onto the OS image:
1 Citrix_App_Layering_OS_Machine_Tools_20.x.x.exe
2 <!--NeedCopy-->
3. Run the file, and it copies files to:
c:\windows\setup\scripts
Note:
© 1999–2024 Cloud Soware Group, Inc. All rights reserved. 251

App Layering
The file must be extracted to the above directory. Do not change the directory.
If using Key Management Service, configure license activation
Once the scripts are extracted, the SetKMSVersion utility asks you to choose whether to use Key
Management Service (KMS) licensing.
Note:
Publishing images into environments where both KMS and Active Directory‑based activation
(ADBA) are being used at the same time causes problems with activation.
1. In the following dialog box, select whether to use Key Management Service (KMS) licensing.
To configure scripts for KMS, do the following.
1. Navigate to:
c:\windows\setup\scripts
2. Run SetKMSVersion.exe as Administrator to create a script file in the c:\windows\setup\
scripts\kmsdir folder.
When the operating system starts, the appropriate KMS activation script is run.
Install the App Layering services
1. On the new machine, navigate to C:\Windows\Setup\scripts and run setup_x64.exe to
install the App Layering drivers on the OS machine.
© 1999–2024 Cloud Soware Group, Inc. All rights reserved. 252

App Layering
2. The installation prompts you for the location of the Unattend.xml file (the default location is
‘C:\windows\panther).
3. Ensure that this machine is not joined to a domain.
4. Perform pending reboots on the OS machine so that you can import this image into a layer.
5. Make sure that the new OS machine is in one of the following states before proceeding.
• Running
• Stopped
• Stopped (deallocated)
Expedite a Microso Ngen.exe operation, if necessary
Once all soware updates have been installed, you must allow Ngen.exe to essentially recompile
.NET byte code into native images and construct the registry entries to manage them.
Ngen.exe is the Microso Native Image Generator, which is part of the .NET system. Windows deter‑
mines when to run Ngen.exe based on what soware is being installed and what Windows detects
in the configuration.
Important:
When Ngen.exe is running, you must let it complete. An interrupted Ngen.exe operation can
leave you with non‑functioning .NET assemblies or other problems in the .NET system.
Normally, Ngen.exe is a background operation that pauses when there is foreground activity. If you
want to expedite an Ngen.exe operation, you can bring the task into the foreground to complete it
as quickly as possible.
To bring the task into the foreground:
1. Open a command prompt as Administrator.
2. Go to the Microsoft.NET\Framework directory for the version currently in use:
cd C:\Windows\Microsoft.NET\FrameworkNN\vX.X.XXXXX
3. Enter the following Ngen.exe command to run all queued items. This command processes
queued component installs before building assemblies.
ngen eqi 3
The Ngen.exe task moves to the foreground in the command prompt, and lists the assemblies
being compiled. It is OK if you see compilation messages.
You can use the Task Manager to see if an instance of MSCORSVW.EXE is running. If it is, allow
it to complete, or run ngen update eqi 3.
© 1999–2024 Cloud Soware Group, Inc. All rights reserved. 253

App Layering
Caution:
Do not reboot to stop the task. Allow the task to complete!
4. Ensure that all Ngen.exe processes have run to completion.
Prepare your OS image for layering in Nutanix
May 22, 2023
This topic explains how to prepare a clean OS image for import into a new OS layer. Before you start,
make sure that you meet the requirements. While preparing the image, you can Expedite a Microso
Ngen.exe operation, if necessary, if you think it is taking too long.
If using Windows 10 and not running PVS, machine creation, or View, you can speed up desktop start
times by removing Windows 10 built‑in applications. However, we recommend removing the apps on
a new version of the OS layer, not in the OS image itself.
Note:
Do not use an unattend file in Nutanix. The App Layering soware removes the unattend file if it
is present, because it is not necessary or recommended in Nutanix.
Install the OS on a virtual machine
As part of this procedure, you can set up Key Management Service (KMS) activation.
Note:
Publishing images into environments where both KMS and Active Directory‑based activa‑
tion(ADBA) are being used at the same time causes problems with activation.
1. Log into the Prism Console.
2. Select Task > VM, and switch to Table View to see the existing virtual machines.
3. Click +Create VM in the upper right corner, and enter the specifics about the new virtual ma‑
chine:
a) Enter a Name and add a Description.
b) Select the number of VCPUs.
c) Set the Cores per CPU.
d) Set Memory.
© 1999–2024 Cloud Soware Group, Inc. All rights reserved. 254

App Layering
e) Select Disks, and create a virtual machine with three disks. The first CD‑ROM is the ISO
for the OS. The second CD‑ROM is for the Nutanix VIRTIO drivers that allow the Nutanix
virtual machine to access the disk where you install the OS. One CD‑ROM is assigned in the
beginning.
i. Edit the values for the assigned CD‑ROM:
ii. For Operation, select Clone from ADSF file.
iii. For Bus Type, select IDE.
iv. Enter the path to your Windows ISO. The path is the combination of the Storage Con‑
tainer and the ISO Name. For example:
/ISOStore/en_windows_10_enterprise_version_1511_x64_dvd_7224901
.iso
v. Click Update.
f) Add another disk by clicking the +Add New Disk button:
i. Set the Type to CDROM.
ii. Set the Operation to Clone from ADSF file.
iii. Set the Bus Type to IDE
iv. Enter the path to the Windows VIRTIO Drivers. For example:
/ISOStore/virtio-win-0.1.102.iso
v. Click Add.
g) Click the +Add New Disk button.
i. Set the Type to Disk.
ii. Set the Operation to Allocate on Container.
iii. Set the Bus Type to SCSI.
iv. Select the Container you want to use.
v. Enter the Size.
vi. Click Add.
h) Click +Add new Nic, and enter the VLAN Name.
i) Click Save.
4. Power on the virtual machine.
a) Select Tasks > VM.
b) Switch to the Table View to see existing virtual machines.
c) Select the virtual machine in the Table, and click Power On.
5. Launch the console by selecting the VM and clicking Launch Console. When the VM boots it
begins to install the Windows OS from the ISO disk. When the VM boots, it begins to install the
Windows OS from the ISO disk.
a) When asked, “Where do you want to install Windows?”notice that even though you added
a disk in the VM creation wizard, there is no disk.
© 1999–2024 Cloud Soware Group, Inc. All rights reserved. 255

App Layering
b) Select the Load Driver option, and select Browse.
c) Select the CD with the virtio‑win‑0.1.1 drivers.
d) Select the vioscsi folder, and choose the folder for your Windows OS.
6. Aer the OS is installed manually install the VirtIO drivers:
a) Launch Device Manager.
b) Select Other Devices, right‑click Ethernet Controller and choose Update Driver So‑
ware.
c) Browse My Computer, and choose the VirtIO CD. The Ethernet drivers are stored in the
NetKVM folder.
7. Server OS: If you need a session host feature:
a) Select Add roles and features.
b) For the Installation Type select
Feature‑based installation
.
c) For the Server Role, select Remote Desktop Services > Remote Desktop Session Host.
d) Complete the process of adding server roles.
8. Install all important updates. Restart the system and check for more updates. Some updates
only become available aer others are installed.
9. Install all required service packs.
10. Disable Windows System Restore and Windows Automatic Updates.
11. Enable built‑in administrator and check Password never expires.
12. If using Key Management Service(KMS) licensing, run a command window as Administrator, and
enter these commands:
1 slmgr /skms <kmsserverhost>
2 slmgr /rearm
3 reboot
4 slmgr /ipk XXXX-YOUR-KMS-KEY-XXXX
5 slmgr /ato
6 <!--NeedCopy-->
13. Server OS: Add Domain Users to Remote setting for server OS.
14. Check for dead (ghost) NICs and delete if any exist. Enter the commands:
1 set devmgr_show_nonpresent_devices=1
2 devmgmt.msc
3 <!--NeedCopy-->
15. Uninstall any dead (ghost) NICs.
16. If this is a server OS, run the following commands in PowerShell:
© 1999–2024 Cloud Soware Group, Inc. All rights reserved. 256

App Layering
1 Set-ExecutionPolicy Unrestricted
2 Enable-PSRemoting
3 <!--NeedCopy-->
Run the OS Machine Tools on the OS image
To prepare the OS image to run in a layer, you run the OS Machine Tools file on the image. This exe‑
cutable runs a GPO setup script (gposetup.cmd), and a Set KMS Version script (SetKMSVersion.hta).
1. Download the following executable file onto the OS image:
Citrix_App_Layering_OS_Machine_Tools_20.x.x.exe
2. Run the executable. Files are saved to:
c:\windows\setup\scripts
Note:
The file must be extracted to the c:\windows\setup\scripts directory. Do not
change the directory.
If using Key Management Service (KMS), configure license activation
Once the scripts are extracted, the SetKMSVersion utility asks you to choose whether to use KMS li‑
censing.
Note:
Publishing images into environments where both KMS and Active Directory‑based activation
(ADBA) are being used at the same time causes problems with activation.
1. In the following dialog box, select whether to use Key Management Service (KMS) licensing.
© 1999–2024 Cloud Soware Group, Inc. All rights reserved. 257

App Layering
To configure scripts for KMS, do the following.
1. Navigate to:
c:\windows\setup\scripts
2. Run SetKMSVersion.exe as Administrator. This creates a script file in the c:\windows\
setup\scripts\kmsdir folder.
When the operating system starts, the appropriate KMS activation script is run.
Make sure the correct versions of .NET Framework are installed (Windows 10 and
Windows Server 2016)
The .NET Framework is a soware framework provided by Microso, and it is required for many third
party applications to run. Any installations of the .NET Framework must be included in the OS layer.
This includes .NET 3.5 and .NET 4.0 or later.
Note:
.NET 4.8 is required by Citrix Virtual Apps and Desktops (CVAD) 2303 to add VDAs.
Be sure to install the .NET Framework and any updates on your OS layer.
Install the App Layering services
1. In the c:\windows\setup\scripts folder, run the setup_x86.exe (32‑bit) or
setup_x64.exe (64‑bit).
© 1999–2024 Cloud Soware Group, Inc. All rights reserved. 258

App Layering
2. The installation prompts for the location of the unattend file. Do NOT use the unattend file
in Nutanix.
Run the Optimization script, if using MS Oice
The Optimization script included in the App Layering installation package is requiredto layer Microso
Oice. This script allows you to save memory and CPU by disabling services you don’t need, enabling
services you do need, and removing installation‑specific drivers and settings.
You can run the Optimization script on the OS layer, and if needed, supersede it with a new version of
the script in an App layer included in your image template. Since App layers are applied to the image
aer the OS layer, the script in the App layer overrides the original version in the OS layer.
1. In the c:\windows\setup\scripts folder, run the optimizations.cmd file to create a file
to run when the image is created.
2. Follow the instructions to run optimizations.cmd on the OS image.
Expedite a Microso Ngen.exe operation, if necessary
Once all soware updates have been installed, you must allow Ngen.exe to essentially recompile
.NET byte code into native images and construct the registry entries to manage them.
Ngen.exe is the Microso Native Image Generator, which is part of the .NET system. Windows deter‑
mines when to run Ngen.exe based on what soware is being installed and what Windows detects
in the configuration.
Important:
When Ngen.exe is running, you must let it complete. An interrupted Ngen.exe operation can
leave you with non‑functioning .NET assemblies or other problems in the .NET system.
Normally, Ngen.exe is a background operation that pauses when there is foreground activity. If you
want to expedite an Ngen.exe operation, you can bring the task into the foreground to complete it
as quickly as possible.
To bring the task into the foreground:
1. Open a command prompt as Administrator.
2. Go to the Microsoft.NET\Framework directory for the version currently in use:
cd C:\Windows\Microsoft.NET\FrameworkNN\vX.X.XXXXX <!--NeedCopy
-->
© 1999–2024 Cloud Soware Group, Inc. All rights reserved. 259

App Layering
3. Enter the following Ngen.exe command to run all queued items. This command processes
queued component installs before building assemblies.
ngen eqi 3 <!--NeedCopy-->
The Ngen.exe task moves to the foreground in the command prompt, and lists the assemblies
being compiled. It is OK if you see compilation messages.
You can use the Task Manager to see if an instance of MSCORSVW.EXE is running. If it is, allow
it to complete, or run ngen update eqi 3.
Caution:
Do not reboot to stop the task. Allow the task to complete!
4. Ensure that all Ngen.exe processes have run to completion.
Create the OS layer
June 14, 2022
An OS layer includes the soware and settings for the operating system that you deploy in layered
images. The OS layer is necessary for creating:
• Platform layers
• App layers
• Layered images
Important:
In the new UI, the only way to create an OS layer is by importing it with the ImportOSLayer
.ps1 utility. You can no longer create OS layers through the management console. For more
details, contact your Citrix representative.
About importing the operating system for the layer
The only way to import the operating system is to run the OS import script, included in the OS Machine
Tools download:
1 ImportOSLayer.ps1
2 <!--NeedCopy-->
The advantages of using an import script include:
• Better performance: The operating system import runs faster.
© 1999–2024 Cloud Soware Group, Inc. All rights reserved. 260

App Layering
• Unified Extensible Firmware Interface (UEFI) machine and Secure Boot support.
Requirements
Before creating the OS layer, be sure to:
• Prepare the OS image for importing into the layer.
• Install the appliance.
• Configure App Layering.
Considerations for your OS layer
• To deploy Windows patches and updates, you can simply add a version to the layer. You can
easily revert to the previous version of the layer, if necessary.
• You can select any version of the layer to use in an image template, and therefore in the pub‑
lished images.
• You can update the OS using Windows Update, Windows Server Update Services (WSUS), or of‑
fline standalone update packages. Do not use tools like SCCM.
• Platform and app layers are tied to the specific OS layer that you use to create them, though not
to a specific version of the layer. When you add versions to the OS layer, the dependent app and
platform layers continue to work.
• Windows updates must be applied to the OS layer before you update any other layers.
Import the OS using the ImportOSLayer.ps1 script
This procedure explains how to import the OS for your new OS layer using the ImportOsLayer.
ps1 script.
If you have downloaded and expanded the App Layering OS Machine Tools onto your OS image, the
ImportOsLayer.ps1 has been copied to c:\windows\setup\scripts.
Run the script
To import the OS:
1. Run the ImportOsLayer.ps1 PoSH script as administrator:
1 C:\Windows\Setup\scripts\ImportOsLayer.ps1 -ElmAddress <Ip Address
> [-IgnoreCertErrors]
2 C:\Windows\Setup\scripts\ImportOsLayer.ps1 -ElmAddress <FQDN> [-
IgnoreCertErrors]
3 <!--NeedCopy-->
© 1999–2024 Cloud Soware Group, Inc. All rights reserved. 261

App Layering
where
• ElmAddress is the IP Address or FQDN of the App Layering appliance. It specifies where
the new OS layer is created.
• IgnoreCertErrors ignores certification errors when the script communicates with the
App Layering appliance.
2. The ImportOsLayer.ps1 script prompts you for the credentials to connect to the App Layering
appliance (referred to as the ELM in the script). The script uses your credentials to create a
session on the appliance.
3. The script then prompts you for details about the new OS layer:
• LayerName (required)
• VersionName (required)
• LayerSizeGib (required, but defaults to 60 GB)
• LayerDescription (optional)
• VersionDescription (optional)
• Comment (optional)
Once you’ve entered the required information, the script reboots the system into the composit‑
ing engine, imports the OS, and builds the layer. Monitor the progress of the job in the manage‑
ment console.
When the compositing engine is finished (success or failure), it reboots back into the Windows
OS image.
Create Platform layer
March 22, 2024
A platform layer includes the platform soware and settings required for your layers and layered im‑
ages to run flawlessly in your environment.
You can create platform layers for two purposes:
• For creating and packaging layers: When you’ve imported the OS from a dierent hypervisor
than the one where you create your layers, use this type of platform layer to create app layers.
• For publishing layered images: Use this type of Platform layer in your image template so that
the published layered images run flawlessly in your environment.
© 1999–2024 Cloud Soware Group, Inc. All rights reserved. 262

App Layering
Platform layers for packaging layers or publishing layered images
Use the following table to determine whether you need a platform layer. This table also shows what
soware to install on the platform layer, if you need one.
Packaging layers Publishing layered images
Platform layer required? Required if the OS image
originated on a dierent
hypervisor. When an app
requires the agent or SSO
soware, you can create a
platform layer specifically for
creating and updating that
layer.
Required when publishing to a
provisioning server and using a
connection broker.
What to install Hypervisor tools, when the OS
originated on a dierent
hypervisor. The SSO or agent
soware, if necessary to create
an app layer.
Provisioning and connection
broker soware and settings. If
publishing to a dierent
hypervisor than the one where
the OS originated, include the
hypervisor tools.
Values to select Select your hypervisor. Select your hypervisor,
provisioning soware, and
connection broker.
What you need Installer for hypervisor Installers for provisioning
soware and connection
broker.
Other soware and settings to include in the platform layer
Besides the platform soware specified above, you must include the following settings and soware
on the platform layer:
• Domain join
• NVIDIA Drivers, if applicable
• Citrix Receiver, for the single sign‑on component
• Citrix Workspace Environment Management(WEM) agent
© 1999–2024 Cloud Soware Group, Inc. All rights reserved. 263

App Layering
Note:
The RSA key generated by Citrix WEM causes issues when using WEM on the deployed
image. If the RSA key is present when finalizing the layer, a message appears stating you
must delete the RSA key file, which begins with the following path: C:\ProgramData\
Microsoft\Crypto\RSA\S-1-5-18\fb8cc9e38d3e60ab60c17cdfd6dd6d99_
.
• Any soware that impacts the logon stack, for example, Imprivata
• Citrix Provisioning on Hyper‑V: Requires a Legacy Network Adapter to PXE boot
• Microso System Center Configuration Manager (SCCM) soware, if you are using it
Process for creating a platform layer
The steps for creating a platform layer are to:
1. Create a platform layer in the management console.
2. Connect to and log in to the packaging machine.
3. Install your provisioning and connection broker soware.
4. Is the appliance running on a dierent hypervisor than the one where you create layers and
publish images? If yes, we recommend installing the hypervisor tools too.
5. Verify the layer and shut down the packaging machine.
• If the connector configuration selected is set to use Oload Compositing, the layer is au‑
tomatically finalized.
• If the connector configuration is not set to Oload Compositing, finalize the layer manu‑
ally, as described in the detailed steps in this article.
When to update a platform layer
The platform layer is the highest priority layer. It is critical for deploying images, especially for network
devices. Whenever you update the infrastructure soware, add a version to the platform layer.
When you update the OS layer, the image sometimes has startup issues. To fix the problem, add a
version to the platform layer using the new OS layer. Once the packaging machine starts, shut down
the machine for finalization. The platform layer gathers the critical componentsfrom the new OS layer
version and updates them in the platform so that they match the OS version.
© 1999–2024 Cloud Soware Group, Inc. All rights reserved. 264

App Layering
Requirements
When creating a platform layer, the soware installers must be available in a location the packaging
machine can access. For example, your provisioning server and connection broker soware must be
accessible. If the appliance is running on a dierent hypervisor, also include the hypervisor tools.
For detailed requirements, select the environment where you create layers or publish images:
• Machine Creation for Azure
• Machine Creation for Nutanix AHV
• Machine Creation for vSphere
• Machine Creation for XenServer
• Citrix Provisioning
• XenServer
• MS Azure
• MS Hyper‑V
• Nutanix AHV
• VMware vSphere
• Network File Share (other platforms)
A word on optimizations
The platform layer is the highest priority layer. You might think it would be the best place to include
optimizations. However, on Windows 10, optimizations that remove Windows Apps only work on the
OS layer. The Windows Apps are integrated with the Windows Store, which can only be modified in
the OS layer.
Citrix oers an excellent optimization utility called the Citrix Optimizer. We recommend using this
utility, rather than the optimizer shipped with App Layering because the Citrix Optimizer can usually
reverse the optimizations if needed.
To speed up user logins. Log in using a network user account, and reboot the desktop. Then, log in
as an administrator, and delete the profile created. When the first network user logs on, some system
files are updated, then login performance usually improves.
Start a new platform layer
To create a platform layer, follow these steps:
• Prepare the layer using Create Platform Layer.
• Deploy a packaging machine in your environment.
• Install the tools and configure the settings for your environment.
© 1999–2024 Cloud Soware Group, Inc. All rights reserved. 265

App Layering
• Finalize the layer.
Follow these steps, starting in the Action bar:
1. Select Layers > Platform Layers. Then select Create Platform Layer.
2. In the Layer Details tab, enter a Layer Name and Version, both required values. Optionally, you
can also enter other values.
3. In the Version Details tab:
a) (Required) Enter a New Version name. For example, enter the soware version or other
identifying information.
b) If you are adding a version to an existing layer, the Base Version field letsyou choose which
version to use as the starting point. The default choice is the latest version.
4. In the OS layer tab, select the OS layer you want to associate with this Platform layer.
5. In the Connector tab, choose a Connector Configuration for the platform where you are creat‑
ing this layer.
6. In the
Platform Types
tab, select
This platform will be used for publishing layered images
,
or This platform will be used for packaging. Then select the hypervisor, provisioning soware,
and connection broker where you are publishing the layered image.
Note: If you are not using provisioning or a connection broker, select None for each of those
options.
7. In the Packaging Disk tab, enter a file name for the packaging disk. This disk is used for the
packaging machine (the virtual machine) where you want to install the tools.
8. In the Icon Assignment tab, select an icon to assign to the layer. This icon represents the layer
in the Layers module.
• To use an existing image, select an image in the image box.
• To import a new image, click Browse and select an image in PNG or JPG format.
• If the layer uses one of the supplied icons and a connector with Oload Compositing se‑
lected, the packaging machine assigns an icon based on the layer
’
s contents.
9. In the Confirm and Complete tab, review the details of the App layer, enter a comment if neces‑
sary, and click Create Layer. Any comments you enter appear in the Information view of the
Audit History.
10. Select the Tasks page, and click the Packaging Disk task. Click the info icon to show the full
task description.
Once the packaging disk has been created, the Tasks bar displays the location of the packaging
disk in your environment.
Next, you can deploy the packaging machine for your layer.
© 1999–2024 Cloud Soware Group, Inc. All rights reserved. 266

App Layering
Deploy a Packaging Machine
The App Layering system creates a packaging machine in the location defined in the connector config‑
uration. The packaging machine is a temporary VM where you install the soware for the layer. Once
you finalize the layer, the packing machine is removed.
XenServer, Hyper‑V, Nutanix AHV, VMware vSphere
The appliance creates the packaging machine in the location defined in the connector configura‑
tion.
1. Go to the App Layering management console, and select the Tasks page.
2. Open the Create Platform layer task to get the name of the packaging machine.
3. Log in to your hypervisor management console, for example: XenServer, Azure, Hyper‑V, Nu‑
tanix, or VMware.
4. From the hypervisor manager console, navigate to the packaging machine. If the packaging
machine is not yet powered on, do so now.
Citrix Provisioning for Hyper‑V: Configuring two network cards
When using dual network cards and running Citrix Provisioning for Hyper‑V, you must configure the
cards as follows on every new version of the Platform layer.
Once your provisioning soware is installed and the required reboots have been completed:
1. Open an administrative command prompt on the packaging machine.
2. Run the command: ipconfig /all
3. Match the IP address of the streaming NIC (Legacy Network Adapter in Hyper‑V) with the correct
adapter name.
4. Renew the DHCP lease on the streaming NIC.
5. Again in an administrative command prompt run ipconfig /release *adapter-name
* followed by ipconfig /renew *adapter-name*. This command forces the App Layer‑
ing drivers to select this adapter as the “primary NIC”.
6. Run Shutdown for Finalize and finalize the layer as you normally would.
Important:
If you select Shutdown for Finalize, but then need to turn the machine back on for any reason,
you must rerun the release and renew commands.
© 1999–2024 Cloud Soware Group, Inc. All rights reserved. 267

App Layering
Azure
1. Go to the App Layering management console and select the Tasks page. Open the Create App
layer task and click the Info icon to see details.
2. Use the link in the task details to navigate to the packaging machine in Azure. The Custom de‑
ployment panel opens.
3. Log in to the Azure portal (https://portal.azure.com).
4. Set the Azure parameters.
• Packaging Machine Name ‑ must conform to Azure virtual machine name requirements.
• Size –virtual machine size.
• Virtual Network and Subnet ‑ for deploying the packaging machine.
IMPORTANT: Make sure the value for the Resource group location matches the Storage
account location that you configured in the connector configuration. If these locations
are not the same, the packaging machine fails to deploy. If your deployment does fail, you
can paste the link into the browser again and start over.
5. Once your packaging machine is powered on, you can install the applications you want to in‑
clude in the layer.
Any other Hypervisor (via Network File Share)
1. Locate the Packaging Disk in the following directory on the Network File Share:
\Unidesk\Packaging Disks
2. Copy the packaging disk to a separate location on your hypervisor. Putting the disk in another
location allows space for the files generated by your hypervisor when you create a new virtual
machine.
IMPORTANT: Do not copy the disk to the Finalize folder until it is ready to finalize. A disk in the
Finalize folder cannot be attached to the new virtual machine that you are going to create next.
3. Create a virtual machine using the packaging disk as the boot disk.
4. Power on the packaging machine.
Once your packaging machine is powered on, you can install your platform tools in the layer.
Install the platform tools on the packaging machine
Next, install the soware for the platform where you publish layered images. Platform tools include
provisioning and connection broker soware that layered images require in the target environment.
Keep in mind, the state of the soware when you finalize the layer is the state the image uses.
© 1999–2024 Cloud Soware Group, Inc. All rights reserved. 268

App Layering
1. Log in remotely to the packaging machine. Be sure to log in using the user account you used to
create the OS.
2. Install the tools that your layered images are configured to run. For example, include your pro‑
visioning, connection broker, and hypervisor tools. Don’t forget your drivers, boot‑level appli‑
cations, and any required files.
3. If the installation requires a system restart, restart it manually. The packaging machine does
not restart automatically.
4. Make sure that the packaging machine is in the state you want it to be in when the image is
booted:
• If the tools you install require any post‑installation setup or registration, complete those
steps now.
• Remove any settings, configurations, files, mapped drives, or applications that you do not
want to include on the packaging machine.
5. (Optional) To customize the image deployed from the ELM before deployment to MCS, follow
these steps:
a) Upgrade your master tools in OS revision 2308 and beyond.
b) Then, create the file:
c:\windows\setup\scripts\kmsdir\Admin_Controlled_Shutdown.txt
Note:
File contents are not important.
c) When the image is deployed from the ELM, the booted image remains running so that you
can do your customizations. A reboot does not aect the machine’s state.
d) Aer you’ve completed your customization, run the command:
c:\windows\setup\scripts\kmsdir\CompleteDeployment.cmd.
At this point, the machine shuts down and is finished with the deployment task. With this,
you can deploy the machine to MCS.
Verify the layer and shut down the packaging machine
Once the tools are installed on the packaging machine, you can verify that the layer is ready to finalize.
Any required post‑installation processing needs to be completed. For example, a reboot or a Microso
ngen process might need to complete.
To verify that outstanding processes are complete, run the Shutdown For Finalize tool. Look for the
Shutdown For Finalize icon on the packaging machine’s desktop.
© 1999–2024 Cloud Soware Group, Inc. All rights reserved. 269

App Layering
Shut down the packaging machine so you can finalize the layer
1. If you are not logged into the packaging machine, remote login using the account set up during
OS layer creation.
2. Double‑click the Shutdown For Finalize icon. A command‑line window displays messages detail‑
ing the layer verification process.
3. If there is an outstanding operation, you are prompted to complete the process. For example,
if a Microso ngen operation must be completed, you can expedite the ngen operation, as
detailed in the section, Layer integrity messages during the finalization process.
4. Once pending operations are done, double‑click the Shutdown For Finalize icon again.
The Layer is now ready to finalize.
• If the connector configuration selected is set to Oload Compositing, the layer is automatically
finalized.
• If you are not using Oload Compositing, finalize the layer manually.
Layer integrity messages during the finalization process
The following layer integrity messages tell you what queued operations must be completed before
the layer is ready to finalize:
• A RunOnce script is outstanding - check and reboot the packaging
machine.
• A post-installation reboot is pending - check and reboot the
packaging machine.
• A Microsoft ngen operation is in progress in the background. -
An MSI install operation is in progress - check the packaging
machine.
• A reboot is pending to update drivers on the boot disk - check
and reboot the packaging machine.
• A Microsoft ngen operation is needed.
• Software Center Client is configured to run, but the SMSCFG.INI
is still present. To learn more about deploying SCCM in a virtual environment, see
the Microso TechNet article, Implementing SCCM in a XenDesktop VDI environment.
For details about what the layer integrity messages mean and how to debug them, see Debugging
Layer Integrity Problems in Citrix App Layering 4.x and later.
You cannotbypass layer integrity messages by shutting down the machine. The App Layering soware
returns you to the packaging machine until the processes have been completed.
© 1999–2024 Cloud Soware Group, Inc. All rights reserved. 270

App Layering
If a Microso ngen operation is in progress, you can try to expedite it, as described in the next sec‑
tion.
Expedite Microso Ngen.exe operations, if necessary
Once all soware updates have been installed, you must allow Ngen.exe to essentially recompile
.NET byte code into native images and construct the registry entries to manage them.
The Ngen.exe executable is the Microso Native Image Generator, which is part of the .NET system.
Windows determines when to run Ngen.exe based on what soware is being installed and what
Windows detects in the configuration.
Important:
When Ngen.exe is running, you must let it complete. An interrupted Ngen.exe operation can
leave you with non‑functioning .NET assemblies or other problems in the .NET system.
Normally, Ngen.exe is a background operation that pauses when there is a foreground activity. To
expedite an Ngen.exe operation, bring the task into the foreground to complete it.
To bring the task into the foreground:
1. Open a command prompt as Administrator.
2. Go to the Microsoft.NET\Framework directory for the version currently in use:
cd C:\Windows\Microsoft.NET\FrameworkNN\vX.X.XXXXX <!--NeedCopy
-->
3. Enter the following Ngen.exe command to run all queued items. This command processes
queued component installs before building assemblies.
ngen eqi 3 <!--NeedCopy-->
The Ngen.exe task moves to the foreground in the command prompt and lists the assemblies
being compiled. It is OK if you see compilation messages.
You can use the Task Manager to see if an instance of MSCORSVW.EXE is running. If it is, allow
it to complete, or run ngen eqi 3.
Caution:
Do not reboot to stop the task. Allow the task to complete!
4. Ensure that all Ngen.exe processes have run to completion.
5. When complete, shut down the virtual machine using the Shutdown For Finalize shortcut avail‑
able on your desktop.
© 1999–2024 Cloud Soware Group, Inc. All rights reserved. 271

App Layering
Finalize the layer manually
Layer finalization is fastest when you use a connector on one of the tested hypervisors. See the next
section for details.
You can also finalize a layer on other hypervisors by using the Network File Share. See the last section
of this article.
XenServer, Azure, Hyper‑V, Nutanix AHV, VMware vSphere
Now that the layer has been verified and shut down, it is ready to finalize.
Hyper‑V:
If you are using a connector with Oload Compositing selected, this finalization process is au‑
tomated and you do not have to do these manual steps.
1. Return to the management console.
2. Select Layers > Platform layers, and the layer version on the Version Information tab you
prepared.
3. Click Finalize to finish creating the layer.
4. Monitor the taskbar to verify that the action is completed successfully.
Once the layer is verified, the packaging machine is removed to minimize the storage space used.
Any other hypervisor (via Network File Share)
Now that the Layer has been verified and shut down, it is ready to finalize.
1. Copy the Packaging Disk from the folder containing the packaging machine files to the Finalize
folder on the Network File Share:
\Unidesk\Finalize
2. Return to the management console.
3. Select Layers > Platform Layers.
4. Select Finalize in the Action bar.
5. Monitor the taskbar to verify that the action completes successfully and that the layer is deploy‑
able.
© 1999–2024 Cloud Soware Group, Inc. All rights reserved. 272

App Layering
Create or clone an app layer
April 26, 2024
An app layer is a virtual disk that includes one or more applications. Typically, an app layer includes
one application. If you include more than one application in a layer, limit it to things that you normally
update at the same time.
Create an app layer from scratch
This section walks you through app layer creation, including:
• Requirements and considerations
• Start a new app layer
• Deploy the packaging machine
• Install the application
• Layer integrity messages you might see
• Verify the layer and shut down the machine
• Expedite Microso Ngen.exe operations, if necessary
• Finalize the layer
Requirements and considerations
An app layer includes one or more applications and related settings. Always install MS Oice in an app
layer, and never in the OS layer.
• Anti virus applications: Always put your antivirus application in an App layer using the instruc‑
tions provided here. Be strategic with your virus definition file updates. Also, be aware of file
marking features, for example, Symantec’s Virtual Image Exception Tool. Consider host‑based
scanning engines, and keep in mind the delay at user logon. Be sure to scan the published lay‑
ered image, not the layer. Scanning is only done on user access on Citrix Virtual Apps and Citrix
Virtual Desktops.
• MS Oice: Use this recipe to install Oice. For VDI deployments of Oice 2010 and later, con‑
sider KMS a requirement. For Oice 2007 and earlier, consider Volume licensing a requirement.
Using other licensing structures is not as convenient, because they require each license to
be activated on each desktop. To persist user settings and data, enable Oice 365 User layer
stores.OST and streaming files. The search indexes are not stored.
• Recipes for layering certain applications: Virtually any application can be layered, but some
are easier to layer if you start with the tips we’ve assembled in our App Layering Recipes forum.
© 1999–2024 Cloud Soware Group, Inc. All rights reserved. 273

App Layering
Before you start, consult the forum for tips and procedures about the specific applications you
are layering.
• Applications that require you to add a local user or administrator. A local user or adminis‑
trator that you add or change while installing an application on an app layer does not persist.
The OS layer preserves any local users or groups that you add, but your app layers do not. Either
add the local user or administrator to the OS layer before installing the application or consider
installing the application on the OS layer.
Start a new app layer
To create a packaging machine where you can install the application:
1. Log in to the management console and select Layers > App Layers.
2. Click Create Layer in the Action bar.
3. Enter a Layer Name and Version, both required values. You can also enter other values.
4. On the OS Layer tab, select the OS Layer you want to associate with this app layer.
5. (Optional) The Prerequisite layers tab gives you the option to specify other app layers that must
be present while installing the apps on this layer. Only use this when the required apps cannot
be included in the same layer. For more information about this advanced feature, see Prerequi‑
site layers in the following sections.
Note: When adding a new version to an existing app layer, you must specify the Prerequisite
layers you need. They are not carried over from version to version.
6. In the Connector tab, choose a connector configuration that includes the credentials for the
platform where you plan to build the layer and the storage location. If the configuration you
need isn’t listed, click New to add one.
7. On the Packaging Disk tab, type a file name for the packaging disk, and choose the disk format.
This disk is used for the packaging machine, the virtual machine where you install the applica‑
tion.
8. On the Icon Assignment tab, choose an icon to assign to the layer. This icon represents the layer
in the Layers Module.
• To use an existing image, select an image in the image dialog box.
• To import a new image, click Browse and select an image in PNG or JPG format.
• If you are using a connector with Oload Compositing selected, and you choose one of
the icons that came with App Layering, the packaging machine attempts to assign an icon
based on the layer’s contents when the layer is finalized.
9. On the Confirm and Complete tab, review the details of the app layer and then click Create
Layer. You can type an optional comment before creating the layer. Your comments appear in
the Information view Audit History. Aer creating the packaging disk, the Tasks bar displays a
link to the packaging disk in your hypervisor where you can deploy the packaging machine.
© 1999–2024 Cloud Soware Group, Inc. All rights reserved. 274

App Layering
10. Select the Tasks page and click the Packaging Disk task. Click the info icon to show the full
task description, including a link to the location where the packaging machine for this layer is
published.
Next, you can deploy the packaging machine for your layer.
Deploy the packaging machine
Select your hypervisor:
• XenServer, Hyper‑V, Nutanix, or vSphere
• Azure
• Other hypervisor (Network File Share)
XenServer, Hyper‑V, Nutanix, vSphere
1. Log in to your hypervisor client (XenServer, Hyper‑V Manager, Nutanix Prism, or vSphere).
2. Log in to the App Layering management console, and select the Tasks page so you can see the
current tasks.
3. Select the Create App layer task and click the info icon to see the full task description.
4. Use the URL provided in the task description to navigate to the packaging machine in your hy‑
pervisor client.
5. The packaging machine is powered on.
You can now install the applications for this layer on the packaging machine.
Azure The appliance opens the Azure Custom deployment template, where you can create the pack‑
aging machine.
1. Log in to the Azure portal (https://portal.azure.com). Note: You must log in before attempting
the next step.
2. Go to the App Layering management console and select the Tasks page. Select the Create App
layer task and click the info icon to see details.
3. Use the link in the task details to navigate to the packaging machine in Azure. The Custom de‑
ployment panel opens.
4. Set the Azure parameters.
• Packaging Machine Name ‑ must conform to Azure virtual machine name requirements.
• Size –virtual machine size.
• Virtual Network and Subnet ‑ for deploying the packaging machine.
IMPORTANT: Make sure the value of the Resource group location matches the Storage
account location that you configured in the connector configuration. If these locations
© 1999–2024 Cloud Soware Group, Inc. All rights reserved. 275

App Layering
are not the same, the packaging machine fails to deploy. If your deployment does fail, you
can paste the link into the browser again and start over.
5. Onceyour packagingmachine is powered on, you can install the application you want to include
in the layer.
Other hypervisor (by way of the appliance’s Network File Share)
1. Locate the packaging disk in the following directory on the Network File Share:
\Unidesk\Packaging Disks
2. Copy the packaging disk to a separate location on your hypervisor. This allows space for the
files generated by your hypervisor when you use the disk to create a new virtual machine.
Important: Do not copy the disk to the Finalize folder until it is ready to finalize. A disk in the
Finalize folder cannot be attached to the new virtual machine that you are going to create next.
3. Create a virtual machine using the packaging disk as the boot disk.
4. Power on the packaging machine.
Once your packaging machine is powered on, you can install the application you want to include in
the layer.
Install the application
When installing your application on the packaging machine, leave the application as you want users
to see it when they log in. The application’s state is what users experience every time they access the
app.
1. Log in remotely to the packaging machine with the User account used to create the operating
system.
2. Install the application, along with any drivers, boot‑level applications, or files required for the
app.
3. If a system restart is required, restart it manually. The packaging machine does not restart au‑
tomatically. If the application you install aects boot‑level components, restart the packaging
machine as part of finalizing the layer.
4. Make sure that the packaging machine is in the state you want it to be in for the user:
• If the application requires any post‑installation setup or registration, complete those steps
now.
• Remove any settings, configurations, files, mapped drives, or applications that you do not
want to include on the packaging machine.
© 1999–2024 Cloud Soware Group, Inc. All rights reserved. 276

App Layering
Verify the layer and shut down the machine
Oncethe applicationis installed on the packaging machine, verify that the layer is readyto be finalized.
A layer is ready to be finalized when all post‑installation processing is complete.
To verify that all outstanding processes are complete, you can run the Shutdown For Finalize tool on
the packaging machine’s desktop.
To use the Shutdown For Finalize tool:
1. If you are not logged into the packaging machine, remote login as the user who created the
machine.
2. Double‑click the Shutdown For Finalize icon. A command‑line window displays messages de‑
tailing the layer verification process.
3. If there is an outstanding operation to be completed before the layer can be finalized, you
are prompted to complete the process. If a Microsoft Ngen.exe operation must be
completed, you might be able to expedite the Ngen.exe operation, as detailed later in this
article.
4. Once any pending operations are complete, double‑click the Shutdown For Finalize icon again.
This shuts down the packaging machine, and the layer is ready to finalize.
Layer integrity messages you might see during the finalization process
The following layer integrity messages tell you what queued operations must be completed before
the layer is ready to finalize:
• A RunOnce script is outstanding ‑ Check and reboot the Packaging Machine.
• A post‑installation reboot is pending ‑ Check and reboot the packaging machine.
• A Microso Ngen.exe operation is in progress in the background.
• An MSI install operation is in progress ‑ Check the packaging machine.
• A reboot is pending to update drivers on the boot disk ‑ Check and reboot the packaging ma‑
chine.
• A Microso Ngen.exe operation is needed.
• Soware Center Client is configured to run, but the SMSCFG.INI is still present. To learn more
about deploying SCCM in a layer, see the article, App Layering Recipe: How to deploy Microso
SCCM in a layer.
For details about what the layer integrity messages mean and how to debug them, see Debugging
Layer Integrity Problems in Citrix App Layering.
You cannot bypass layer integrity messages by shutting down the machine, because the App Layering
soware stops and returns you to the packaging machine until all of the processes have been com‑
pleted.
© 1999–2024 Cloud Soware Group, Inc. All rights reserved. 277

App Layering
If a Microso Ngen.exe operation is in progress, you might be able to expedite it, as described in the
next section.
Expedite Microso Ngen.exe operations, if necessary
Once all soware updates have been installed, you must allow Ngen.exe to essentially recompile
.NET byte code into native images and construct the registry entries to manage them.
Ngen.exe is the Microso Native Image Generator, which is part of the .NET system. Windows deter‑
mines when to run Ngen.exe based on what soware is being installed and what Windows detects
in the configuration.
Important:
When Ngen.exe is running, you must let it complete. An interrupted Ngen.exe operation can
leave you with non‑functioning .NET assemblies or other problems in the .NET system.
Normally, Ngen.exe is a background operation that pauses when there is a foreground activity. If
you want to expedite an Ngen.exe operation, you can bring the task into the foreground to complete
it as quickly as possible.
To bring the task into the foreground:
1. Open a command prompt as Administrator.
2. Go to the Microsoft.NET\Framework directory for the version currently in use:
cd C:\Windows\Microsoft.NET\FrameworkNN\vX.X.XXXXX <!--NeedCopy
-->
3. Enter the following Ngen.exe command to run all queued items. This command processes
queued component installs before building assemblies.
ngen eqi 3 <!--NeedCopy-->
The Ngen.exe task moves to the foreground in the command prompt and lists the assemblies
being compiled. It is OK if you see compilation messages.
You can use the Task Manager to see if an instance of MSCORSVW.EXE is running. If it is, allow
it to complete, or run ngen eqi 3.
Caution:
Do not reboot to stop the task. Allow the task to complete!
4. Ensure that all Ngen.exe processes have run to completion.
5. When complete, shut down the virtual machine using the Shutdown For Finalize shortcut avail‑
able on your desktop.
© 1999–2024 Cloud Soware Group, Inc. All rights reserved. 278

App Layering
Finalize the Layer
Once the soware has been installed and the packaging machine has been verified and shut down,
you are ready to finalize the layer.
Hyper‑V:
If Oload Compositing is selected in your connector configuration, finalization happens auto‑
matically as part of the compositing process.
XenServer, Azure, Hyper‑V, Nutanix AHV, VMware vSphere Now that the Layer has been verified
and shut down, it is ready to finalize.
Hyper‑V:
If you are using a connector with Oload Compositing selected, this finalization process is au‑
tomated and you do not have to do these manual steps.
1. Return to the management console.
2. Select Layers > App layers, and the layer you prepared.
3. Select your layer version on the Version Information tab and click Finalize in the Action bar.
4. Click Finalize to finish creating the layer.
5. Monitor the taskbar to verify that the action is completed successfully.
Once the layer is verified, the packaging machine is removed to minimize the storage space used.
Other hypervisor (Network File Share) Now that the Layer has been verified and shut down, it is
ready to finalize.
1. Copy the Packaging Disk from the folder containing the Packaging Machine files to the Finalize
folder on the Network File Share:
\Unidesk\Finalize
2. Return to the Management Console.
3. Select Layers > App Layers.
4. Select your layer version on the Version Information tab and click Finalize in the Action bar.
5. Monitor the taskbar to verify that the action completes successfully and that the layer is deploy‑
able.
Clone an app layer
You can create an app layer that is the same as an existing layer by cloning a specific version of the
layer. During the cloning process, you are prompted for information specific to the layer. You can
© 1999–2024 Cloud Soware Group, Inc. All rights reserved. 279

App Layering
update the app layer by adding versions to it. Since only one version of a layer is cloned, the new
layer has just one version to start, even if the layer it was cloned from had many.
To clone a layer:
1. Select the app layer that you want to copy and click Clone Layer in the Action bar.
2. Select the Source Layer Version to clone. You can choose the version you want from the drop‑
down menu.
3. Enter a name for the layer, and a description, if the extra information is helpful. Descriptions
are optional.
4. Enter the version, and a description of the version, if the extra information is helpful.
5. On the Icon Assignment tab, select the icon for the new layer.
6. On the Confirm and Clone tab, verify the settings and click the Clone Layer button.
A new layer is created with the same layer properties as the source, except for the icon. The layer
priority is higher than that of the source layer because every new App layer has a higher priority than
the last app layer created. The new layer size could be smaller than the original, but this just indicates
that empty space was removed during cloning. The layer functions the same as the source.
You can use the new layer like any other layer, and it is not associated in any way with the original
layer.
Advanced app layer options
When creating and updating app layers, keep in mind the following advanced features.
• Custom Layer script
• Layer caching
• Prerequisite layers
Custom Layer Script
You can include a script in an app layer that runs once, upon system startup. To configure the script,
edit the properties of the application layer.
Note:
You can also edit the properties for the layer revision either while the revision is being created,
or even aer it has been finalized.
The script runs the first time any layered image that includes the app layer starts. If the app layer is
elastically layered, the Custom Layer script runs when mounting the app layer disk. Custom Layer
© 1999–2024 Cloud Soware Group, Inc. All rights reserved. 280

App Layering
scripts are typically used for apps, such as MS Oice, that require license activation the first time it
starts.
Layer Caching for faster app layer creation
You can use layer caching to speed up layer creation times.
How caching works The first time you create an app layer, if the cache size is set to a large enough
value, a template consisting of the boot disk and the empty packaging disk is saved in the cache. The
boot disk includes the OS layer, Platform layer, and Prerequisite layer (if any) that are specified in the
app layer settings.
Whenever you create an app layer that uses the same OS layer, Prerequisite layer, and Platform layer
combination, the App Layering soware reuses the template, significantly reducing creation time.
If you then create an app layer that uses a dierent OS layer, Prerequisite layer, and Platform layer
combination, the App Layering soware creates a template and adds it to the cache.
© 1999–2024 Cloud Soware Group, Inc. All rights reserved. 281

App Layering
Recommended cache size The recommended cache size depends upon how many OS, Platform,
and Prerequisite layer combinations you require for your app layers. The number of combinations
determines the number of templates saved in the cache.
To estimate the space required for each template:
1. Select the i icon for each OS, Platform, and Prerequisite layer, and look up the Maximum Layer
Size.
2. Add the Maximum Disk Sizes. The total is the Cache size that you need for that template.
To estimate the space required for the cache, add the size you determined for each of your
templates.
Prerequisite layers
Rarely recommended, Prerequisite layers let you include one or more existing app layers on the pack‑
aging disk when creating a layer or adding a version to it.
Use prerequisite layers only if they are required, because they can add something into the layer that is
not required to deploy the current application. This behavior can cause conflict in the future.
When to use Prerequisite layers Prerequisite layers can be required for several reasons:
• When installing the application on the current layer requires the presence of another applica‑
tion. For example, when you install an application that requires Java, and Java is located in a
separate layer.
• When the installation of the soware adds settings to an existing application. For example,
when you install an Oice add‑in, you must install Microso Oice first.
• When two applications change the same registry key, and the second application must add to a
key and not replace it. For example, two applications that both change login keys in Windows,
such as Citrix Agent and Imprivata.
Note
Some of these issues can also be handled by putting the two applications in the same layer rather
than using prerequisite layers.
Prerequisite layer characteristics Prerequisite layers have the following characteristics:
• Prerequisite layers are not included in the app layer that they are used to create.
• The app layer that you create and each of its Prerequisite layers must use the same OS Layer.
• When adding a version to an app layer, Prerequisite layers are not included by default. Each
time you add a version to a layer, you must select one or more Prerequisite layers.
© 1999–2024 Cloud Soware Group, Inc. All rights reserved. 282

App Layering
Layer antivirus apps
February 22, 2024
This article provides the fundamental guidelines for deploying antivirus soware in an App Layering
or User Personalization Layer (UPL) environment.
For additional antivirus‑specific details, see the vendor’s documentation for VDI deployments.
Recommendations for all antivirus soware
Create a new App Layer to install and maintain your chosen antivirus solution. Citrix does not recom‑
mend installing antivirus soware directly on an OS Layer as this makes maintenance more diicult
and oen leads to contamination of the antivirus state among packaged app and platform layers.
Note:
This does not apply to the UPL images where the antivirus soware is required to be installed in
the base image.
The following are key points common to most antivirus deployments in app layering (some apply to
UPL too):
• If you have already installed antivirus soware on your OS Layer, it must be uninstalled and
reinstalled in a new app layer.
– Windows Defender is an exception to this layer advice and is automatically prevented from
contaminating other layers by filters built into the App Layering and UPL soware.
• Avoid combining other applications with antivirus soware on the same app layer.
• Follow the vendor’s guidance for VDI deployment (including for UPL).
• Consider disabling automatic updates of the core antivirus soware. These updates are better
managed through app layer revisions or, with UPL, backups of the base image.
• Daily updates of virus definitions are fine and must not be aected by disabling major updates.
• Add a UserExclusion file to the antivirus layer to block files and directories from persisting in
user layers (including for UPL). See the antivirus vendor’s guidelines for non‑persistent VDI de‑
ployments, for files and/or folders that must not be persisted.
• Add any vendor‑recommended registry exclusions to the antivirus layer (including UPL). These
are relatively rare, but if necessary, contact Citrix support.
In general, Citrix recommends making a new version of the app layer when the antivirus soware has
a major update. Once the layer has been updated, assign it to all the templates that use that antivirus
app, and redeploy new images to take advantage of the changes in the antivirus soware.
© 1999–2024 Cloud Soware Group, Inc. All rights reserved. 283

App Layering
Published images, including the UPL master images, can be started outside of the desktop environ‑
ment to allow antivirus pre‑scanning of the assembled image, depending on the antivirus soware
used.
Elastic layer not enabled
If you are deploying images without elastic layering enabled, consider whether your images are non‑
persistent or persistent:
For persistent machines, you might want to enable auto‑updates to keep the antivirus soware up‑
to‑date.
For non‑persistent machines, you might not want to turn on auto updates, because the updates occur
on the images aer every reboot. (The non‑persistent machine is reverted when it reboots.)
App Layering Recipes
November 20, 2023
You can layer most applications with no issues, but there are a few that require extra care.
• Antivirus applications: For detailed instructions, see layering antivirus apps.
• Application guidance for VDI deployments: For the few applications that require special guid‑
ance in virtual environments, we oer more detailed steps in an online Support forum, called
Application Layer recipes.
Popular App Layering recipes
The following list includes a sampling of recipes for the few applications that require layering guid‑
ance. Unless otherwise noted, these recipes apply to all App Layering versions.
If your application is not listed in the Application Layer recipes forum, you can most likely install it in
a layer without any special guidance.
• Adobe Reader
• AppSense
• Bit9
• Chrome
• Dropbox
• Firefox
• IBM SPSS 21 Licensing Server
© 1999–2024 Cloud Soware Group, Inc. All rights reserved. 284

App Layering
• Java
• MS Oice, including Oice 365
• NVIDIA GRID
• Print Server
• QuickBooks
• SCCM 2012 Client
Deploy App layers as elastic layers
February 9, 2024
With the Elastic layers feature, you can deliver narrowly targeted apps outside of the base image. In
fact, you can assign layers to specific users on demand. With the Elastic layer setting enabled in an
image template, users who log on to the published images can be assigned specific app layers as
elastic layers.
About elastic layers
An elastic layer is an app layer that you assign to individual users and groups for delivery on demand.
Users receive the elastic layers assigned to them in addition to the apps included in the base image.
Elastic layers allow you to give each user a unique set of applications along with the common apps
included in the base image. On session hosts, an elastic layer is used across sessions. On standalone
desktops, elastic layers are used across floating pools and shared groups.
Based on user entitlements, elastic layers are delivered to users’desktops upon login. You can assign
elastic layers to users on session hosts, and also on standalone desktops, as long as the images were
published using App Layering.
Elastic layer assignments
You can deliver a specific app layer version to members of a group each time they log in to their desk‑
tops. You assign the app layer version as an elastic layer. A copy of the layer is then stored in the
appliance’s Network File Share, and delivered on‑demand to the assigned AD users and groups, in
addition to the layers that they receive via the base image.
To use this feature, you add Elastic Assignments specifying which users and groups receive each of the
app layer. You then publish your base image with the Elastic Layering setting enabled.
© 1999–2024 Cloud Soware Group, Inc. All rights reserved. 285

App Layering
How users access elastic layers assigned to them
When users log in to their session or desktop, icons for their elastic layers appear as shortcuts on the
desktop.
A user receives an elastic layer in the following cases:
• The user (an AD user in the management console) is assigned the layer.
• An AD group that the user belongs to is assigned the layer.
• A machine that the user logs into is a member of an AD Group that receives the elastic layer.
• A machine that the user logs into is associated with an AD Group that is assigned to the layer via
the management console.
When a user is assigned more than one version of a layer
When a layer is assigned directly to a user, and indirectly to one or more of the user’s groups, they
receive the most recent directly assigned version. For example:
• If the user is assigned Version 2, and a group that the user belongs to is assigned Version 3, the
user gets Version 2.
• If two or more groups that the user belongs to are assigned dierent versions of the same layer,
the user receives the most recent version of the layer assigned.
When a user receives an app layer both in the base image, and as an elastic layer
When an app layer is included in the base image, do not assign it to the same user as an elastic layer. If
the user does end up with the same layer assigned both ways, they receive the elastic layer, no matter
the version.
Prerequisites
• .NET Framework 4.5 is required on any layered Image where elastic layers are enabled.
• The app layers that you want to assign as elastic layers.
Considerations
App layers with the same OS layer as the layered image
For best results, when assigning app layers as elastic layers, you can assign app layers that have the
same OS layer as the one used in the layered image. However, with this traditional approach, you
© 1999–2024 Cloud Soware Group, Inc. All rights reserved. 286

App Layering
might need to create and manage additional copies of some app layers, one for each OS layer you
deploy with.
OS layer switching for elastic layers
To assign an elastic layer to users on a layered image that uses a dierent OS layer, you need to enable
this ability in the application layer properties by selecting the Allow this App Layer to be elastically
assigned to all Layered Images, regardless of OS layer check box. All elastic layering limitations
are valid when switching OS layers.
When it might work well For simple applications that can be installed on any OS.
Example: Notepad++, WinRAR, 7Zip
When it might not work well For complex applications whose installation depends on the OS in‑
stalled.
Example:
• If you use a Windows 10 OS layer to create the app layer, and the image assigned as a Server
2019 OS layer, then the application might not work as expected.
• Applications that are dependent on a specific version of .Net might not run successfully if the
new OS doesn’t have the correct version of .Net installed.
Note:
• It is recommended that you use the same OS class and OS revisions that are close to each
other. Example: You can use two Windows 10 22H2 revisions that are one week apart.
• When using a dierent OS image, you must validate the layers that you are elastically as‑
signing to any user. If the layers do not validate, you must create an application layer using
the OS layer that is used for the image, and assign the layers to the user without selecting
the Allow this App Layer to be elastically assigned to all Layered Images, regardless of
OS layer check box.
• When adding versions to an app layer, you must use the OS layer included in the original
app layer.
Elastic Layering Limitations
You cannot use elastic layer for the following:
• Microso Oice, Oice 365, Visual Studio.
• Applications with drivers that use the driver store. Example: a printer driver.
© 1999–2024 Cloud Soware Group, Inc. All rights reserved. 287

App Layering
• Applications that modify the network stack or hardware. Example: a VPN client.
• Applications that have boot level drivers. Example: a virus scanner.
An app layer does not preserve a local user or administrator that you add for an app that requires it,
but the OS layer does. Therefore, add the local user or administrator to the OS layer before installing
the application. Once the app layer is working, you can assign it as an elastic layer.
Elastic layer compatibility mode
When a user logs on to a desktop provisioned using a layered image, the elastic layer is composited
into the image aer the user logs on. If an elastic layer doesn’t load correctly, try enabling Elastic
Layer Compatibility Mode. With Compatibility Mode enabled, the elastic layer starts loading before
login is complete.
Important:
Compatibility mode is required when using published applications because the layer must be
mounted before launch. Otherwise, we recommend disabling Compatibility Mode, unless an
elastic layer doesn’t work as expected. Enabling this setting on too many layers slows login
times.
The user account under which elastic layers run
By default, when the first user assigned an elastic layer logs on to their desktop, all elastic layers as‑
signed to the user are mounted. Other users who log on to the machine hosting the layers use the
same connection as the first user. The connection lasts for 10 hours aer the first login, and then all
elastic layers are disconnected. In a shi‑based environment, users on the second shi would be im‑
pacted about two hours into the shi (or, 10 hours aer the initial user logged on for the first shi).
If you are delivering elastic layers in a shi‑based environment, you can change the default account
under which all elastic layers run. Instead of running under the first user who logs in, you can change
the default user for all elastic layers to the ulayer service, which runs under the local SYSTEM ac‑
count. The SYSTEM account corresponds to the domain machine account of the machine that the
ulayer service is running on when accessing the share. The file share containing your elastic layers
requires read-only access, either for all users, or for each machine account.
• To change the account for elastic layers to run under, create the registry DWORD value, and set
it to 1:
HKEY_LOCAL_MACHINE\Software\Unidesk\Ulayer:AsSelfAppAttach to
**1**
© 1999–2024 Cloud Soware Group, Inc. All rights reserved. 288

App Layering
• To revert to running elastic layers under the first user to log in, set the registry DWORD value to
0:
HKEY_LOCAL_MACHINE\Software\Unidesk\Ulayer:AsSelfAppAttach to
**0**
• To remove the setting so that elastic layers can only run in the default mode, remove the DWORD
value:
HKEY_LOCAL_MACHINE\Software\Unidesk\Ulayer:AsSelfAppAttach
Enable elastic layers on your base images
You can enable elastic layers on your base (layered) images by configuring the image template that
you use to publish them:
1. In the management console, select the image template to use for publishing your layered im‑
ages.
2. Select the
Images
tab, and then the image template on which you want to enable elastic layer‑
ing.
3. Select Edit Template from the Action bar.
4. Select the Layered Image Disk tab.
5. In the Elastic layering field, select Application Layering.
6. Select the Confirm and Complete tab, and click Save Template and Publish.
7. Use your provisioning system to distribute the virtual machines.
When the users log in, the desktop includes an icon for each of their elastic app layers.
Run the Elastic Fit analyzer on app layers
Before assigning an app layer elastically, use the Elastic Fit Analyzer to determine the likelihood that
the layer assignment will be successful.
Elastic Fit analysis
In the Layer Details, the Elastic Fit rating indicates how likely it is that the layer works when elastically
assigned.
Good Elastic Fit. This layer works when deployed elastically.
© 1999–2024 Cloud Soware Group, Inc. All rights reserved. 289

App Layering
Poor Elastic Fit. Delivering the layer elastically is not likely to work when deployed elastically. The
layer can behave dierently than it does when it is deployed in a layered image.
Elastic Fit details
You can learn more about an app layer’s Elastic Fit rating by expanding the Elastic Fit Analysis. If the
Elastic Fit is less than ideal, the list of violated rules is displayed.
Low Severity Warning. Delivering the layer elastically is unlikely to cause any change in behavior or
functionality for most applications.
Medium Severity Warning. Delivering the layer elastically can cause minor changes in behavior or
functionality for some applications.
High Severity Warning. Delivering the layer elastically is likely to cause significant changes in behav‑
ior or functionality for many applications.
Note:
If you receive a warning that a master key file change has been detected, and you did not inten‑
tionally change that file, set the value of the DeleteMasterKeys flag in the registry location
HKLM\System\ControlSet001\Services\Uniservice to 1 (true). Now when the app
layer is finalized, master key files are deleted from the layer. This value is not persistent and only
works per revision. It must be set each time a revision of the layer is created.
Analyze an app layer’s Elastic Fit
All new versions of a layer version are analyzed for elastic layering compatibility when they are final‑
ized. To analyze existing app layers for Elastic Fit:
1. Log in to the management console.
2. Select Layers > App Layers.
3. Select the layer to analyze, and click Analyze Layer.
4. On the Select Versions tab, choose the Layer Versions to analyze.
5. On the Confirm and Complete tab, click Analyze Layer Versions. The analysis takes seconds.
6. To see the Elastic Fit Analysis, select the app layers module, move the mouse pointer over the
layer icon and click the Info icon.
© 1999–2024 Cloud Soware Group, Inc. All rights reserved. 290

App Layering
7. Expand the Version Information for each layer version, and look for the Elastic Fit rating.
8. For a detailed report, expand the Elastic Fit Details. If the Elastic Fit is less than ideal, the list
of violated rules will be displayed.
9. You can display the AD tree and hide the violated rules by clicking a button acknowledging that
the layer is unlikely to work as expected.
Upgrading from earlier releases
Aer upgrading from an early App Layering release, the Elastic Fit Detail shows that existing layer
versions have not been analyzed. The versions have a single High severity Elastic Fit Detail, and a Poor
Elastic Fit. For an accurate reading, run the analysis on existing layer versions.
Elastically assign an app layer to AD users and groups
The first time you assign an app layer elastically, we recommend starting with a simple app like
Notepad++ or GIMP.
1. Log in to the management console as an Admin user, and select Layers > App Layers.
2. Select an app layer that you do not plan to include in the base image, and select the app version
you want to assign.
3. Click Update Assignments.
4. Select the version of the app layer that you want to assign users.
5. Skip Image Template Assignment. This is for assigning the layer to an image template.
6. Select the users and groups that you want to receive this app layer version.
7. Review your selections, and click Assign Layers.
When the users log in, there is an icon for each elastic layer they’ve been assigned.
Elastically assign an app layer to users via machine assignments and associations
You can assign layers to a machine by adding the machine to, or associating the machine with, the AD
Group. Then elastically assign the app layers to the AD Group.
The layers assigned to the machine are available to every user who successfully logs into that machine.
The App Layering Servicescans for changes to the machine’s AD group memberships and associations
every 10 minutes. When the users log in, they see an icon for each elastic app layer they’ve been
assigned.
© 1999–2024 Cloud Soware Group, Inc. All rights reserved. 291

App Layering
Use Active Directory to add the machine to the AD Group
Assuming you have a published layered image booted in your environment, you can add the machine
to an AD Group, and assign elastic layers to the AD Group.
1. Use Active Directory (AD) to add the machine to an AD Group.
2. Select an app layer that you do not plan to include in the base image, and elastically assign the
layer to an AD Group.
3. You can wait for AD to propagate the changes and for the App Layering Service, or you can force
the App Layering Service to update its list of machine groups by doing one of the following:
• Wait for the App Layering Service to detect the changes (within 10 minutes by default).
• Restart the App Layering Service.
• Reboot the App Layering Service Machine.
• Run the refresh.groups command:
C:\Program Files\Unidesk\Layering Services\ulayer.exe refresh.groups
Example
You start with an AD User, and AD Group, and a machine that you provisioned using a layered image.
• AD User: Kenya
– Kenya has no elastic assignments.
• AD Group: Marketing
– The Marketing group includes the member Kenya.
• Machine: ElasticTestMachine
– The ElasticTestMachine base image includes the MS Oice App Layer.
In this example, you elastically assign the Chrome App layer to ElasticTestMachine:
1. In AD, you add the machine ElasticTestMachine to the Marketing AD Group.
2. In the management console you elastically assign the Chrome App Layer to the Marketing Group.
3. When Kenya, who is part of the Marketing group, logs into ElasticTestMachine, she receives both
the MS Oice App layer, which is in the base image, and the Chrome App layer.
4. When any user who is not in the Marketing group logs into ElasticTestMachine, they also receive
both Layers: MS Oice because it is in the base image, and Chrome because the ElasticTestMa‑
chine is a member of the Marketing AD Group.
© 1999–2024 Cloud Soware Group, Inc. All rights reserved. 292

App Layering
Manage elastic assignments
You can:
• Add an elastic assignment.
• Update an app layer and elastically assign the new version of the layer.
• Remove elastic assignments.
• Debug an elastic assignment.
Update an app layer and its elastic assignments
You’ve added elastic assignments to an app layer, and users are accessing the app as expected. A new
version of the application is released, so you update it with a new version to the layer. Now you need
to assign the new version to the users who have the layer.
1. Log in to the management console and select Layers > App Layers.
2. Select the elastically assigned app layer that you updated.
3. Click Version Information > Update Assignments.
4. Select the new version.
5. Skip the Image Template Assignment tab.
6. In the Elastic Assignment tab, there’s a list of Users and Groups who have been assigned a
dierent version of the selected layer. Select the users and groups to whom you want to assign
the new version of the layer.
Notes:
• If the list is long, use the Search field to filter the results.
• If the list is empty, click the check box called, Show AD users and groups already at this
version. A list of grayed out names appears. These users have already been assigned the
version.
7. On the Confirm and Complete tab, verify the Users and Groups that you want to receive the new
version.
8. Click Update Assignments.
Remove a layer’s elastic assignments
1. Log in to the management console and select Layers > App Layers.
2. Select the app layer for which you want to remove assignments, and select Remove Assign‑
ments.
© 1999–2024 Cloud Soware Group, Inc. All rights reserved. 293

App Layering
3. Select the assigned templates from which you want to remove the layer. The assignments for
the layer are listed.
If the list is long, use the Search field to filter the results.
4. On the Confirm and Completetab, verify that the correctimagetemplates are selected to receive
the new version.
5. Click Remove Assignments.
Troubleshooting elastic layer issues
You can diagnose the source of an elastic layering issue by finding out whether the layer is being de‑
livered, and whether the layer is working correctly. If needed, collect data for support, as described
here.
Is the issue with layer delivery? Are the things that you’d expect to see when this app is installed
there?
• Do you see the files and registry entries for the layer?
• If the app is supposed to be in the Start menu, is it there?
• If you expect there to be a shortcut for the app on the user’s desktop, is there one?
If you discover that app delivery is an issue, you can collect the following data, open a case, and send
the data to support.
1. Collect the data from these logs:
• Windows App Event log –In the Windows Event Viewer under Windows Logs, export the
application event log as an EVTX file.
• App Layering Service log (ulayersvc.log) –C:\ProgramData\Unidesk\Logs\ulayersvc.log
2. Collect the values of these Registry keys:
• HKEY_LOCAL_MACHINE\SOFTWARE\Unidesk\ULayer:AssignmentFile
• HKEY_LOCAL_MACHINE\SOFTWARE\Unidesk\ULayer:RepositoryPath
3. Collect the contents of the assignment (ElasticLayerAssignments.json) and Layers (Layers.json)
files from the Repository Path.
4. Contact Support.
© 1999–2024 Cloud Soware Group, Inc. All rights reserved. 294

App Layering
Is the issue an operational one? Any of these behaviors can indicate an elastic layering issue:
• The app is being delivered but doesn’t launch correctly.
• An operation within the app doesn’t work correctly.
• A licensing problem or a security issue.
• The app launches, but then misbehaves, for example, it crashes on startup, or starts up but
doesn’t work right.
If the problem with the layer is operational, test the app layer in the base image to rule out general
layering issues:
1. Add the app layer to an image template, and publish a layered image that includes the app layer.
2. Log in as a user who is not assigned the layer elastically, and make sure that the application is
operational in the base image.
3. Contact Support with your findings.
Deploy user layers
March 27, 2024
User layers persist each user’s:
• Profile settings
• Data
• Locally installed applications in non‑persistent VDI environments
When you enable user layers on an image template, systems provisioned using the resulting layered
images provide every user with a user layer.
When a user logs in to a desktop that is user layer‑enabled, a new Search index database is created.
The index incorporates search information from the user layer and any elastic layers. The Search fea‑
ture is only available when the indexing is complete.
This topic explains how to enable user layers on an image template, and the resulting layered images.
Systems that you provision using the images provide every user with a user layer.
Types of user layers
You can enable the following types of user layers:
• Full: All of a user’s data, settings, and locally installed apps are stored on their user layer.
© 1999–2024 Cloud Soware Group, Inc. All rights reserved. 295

App Layering
• Oice 365: (Desktop systems) Only the user’s Outlook data and settings are stored on their user
layer.
• Session Oice 365: (Session hosts) Only the user’s Outlook data and settings are stored on
their user layer.
You can enable a Full user layer, an Oice 365 user layer, or a Session Oice 365 user layer. The full
user layer includes everything that the Oice 365/Session Oice 365 user layer saves, along with the
settings and data for other applications.
Note:
Oice 365 and Session Oice 365 are deprecated.
Requirements
Before enabling user layers, be sure to meet the requirements that apply to the following types of user
layers:
• All types of user layers
• Full user layers
• Oice 365 and Session Oice 365 user layers
All user layers
To enable user layers you need:
• Adequate network bandwidth. Bandwidth and latency have a significant eect on the user layer.
Every write goes across the network.
• Enough storage space allocated for users’data, configuration settings, and their locally installed
apps. (The appliance uses the main storage location for packaging layers, publishing layered
images, and serving up Elastic layers.)
Full user layers
• When using Profile Management with a Full user layer you must clear the deletion of the user’s
information on logo. Depending on how you are deploying the settings, you can clear deletion
using either:
– A Group Policy Object.
– The policy on the Delivery Controller (DDC).
© 1999–2024 Cloud Soware Group, Inc. All rights reserved. 296

App Layering
Oice 365 and Session Oice 365 user layers
• Use a profile manager, such as the Citrix Profile Manager. Otherwise, Outlook assumes that
every user who logs in is new and creates OS files for them.
• The Oice layer must be included in the image template and deployed in the layered image.
However, you can use other Elastic layers with an Oice 365 user layer.
• Microso Oice is supported as an app layer in a published image only, not as an elastic layer.
• Any change to the default location of the search index files is not preserved in the Oice 365
layer.
• This feature has been tested for one desktop per user at a time (Single sign‑on).
Note:
Oice 365 and Session Oice 365 are deprecated.
Compatibility
Full user layers are supported on the following platforms:
• Operating systems:
All operating systems must be configured in single‑user mode to work with user layers. Servers
cannot be used in multi‑user mode. User layers on session hosts are not supported.
– Windows 10, 64‑bit
– Windows 11, 64‑bit (only if deployed to a platform enabled for oload compositing)
– Windows Server 2016, single‑user mode only
– Windows Server 2019, single‑user mode only
• Publishing platforms:
User layers are supported on the following publishing platforms.
– Citrix Virtual Desktops
Applications that are not supported on a user layer
The following applications are not supported on the user layer. Do not install these applications lo‑
cally:
• Enterprise applications: Enterprise applications, such as MS Oice and Visual Studio, must be
installed in app layers. User layers are based on the same technology as elastic layers. As with
elastic layers, never use user layers for these enterprise applications!
• Applications with drivers that use the driver store. Example: a printer driver.
© 1999–2024 Cloud Soware Group, Inc. All rights reserved. 297

App Layering
Note:
You can make printers available using Group Policies. See GPO‑installed printers in the
following section.
• Applications that modify the network stack or hardware. Example: a VPN client.
• Applications that have boot‑level drivers. Example: a virus scanner.
• Applications that require you to add a local user or group. Local users and groups that you add
as part of installing an application only persist in the OS layer. Consider installing an application
on a layer that will be included in the base image, with the required user or administrator added
to the OS layer.
Windows updates
Windows updates must be disabled on the user layer.
Outlook store add‑ins
Citrix Profile Management disables Store add‑ins.
The first time Outlook starts, the Store/Add‑ins icon on the ribbon displays a window with a long list
of add‑ins. During the initial login, if you install add‑ins, they appear on the ribbon on subsequent
logins. If you do not install the add‑ins, the Store/Add‑ins icon displays a blank white window.
GPO‑installed printers
For users on non‑persistent desktops running Windows 10, you can install printers using a Group Pol‑
icy. With a policy in place, the printers are listed in users’Devices and Printers, application printer
settings, and device manager.
To set up GPO‑installed printers:
1. Enable user layers in the image template.
2. Ensure that the desktop is joined to the domain (on the Platform layer).
3. Create a group policy to deploy each network printer, and then assign it to the machine.
4. When logged in as a domain user, verify that the printer is listed in Devices and Printers, Notepad,
and device manager.
© 1999–2024 Cloud Soware Group, Inc. All rights reserved. 298

App Layering
User layer format
User layer virtual disks are created using the VHDX format. You can still use the existing user layer VHD
files without converting or recreating them. However, when both the VHD and VHDX files exist in the
same folder, the VHDX file takes precedence.
How to override VHDX format for user layer virtual disk creation
You can change the behavior to force the user layers that are created to use the VHD format. To over‑
ride this behavior, use the following system registry parameter:
• Path: HKEY_LOCAL_MACHINE\SYSTEM\CurrentControlSet\Services\ulayer
• Name: DefaultUserLayerVHDXDisabled
• Type: DWORD
• Data: 1
User Layer/UPL space reclamation
You can use User Layer/UPL space reclamation to automatically optimizes the VHDX files every time
the user logs o.
How to enable User Layer/UPL space reclamation Before enabling User Layer/UPL space recla‑
mation:
• Optimize drives service defragsvc must be enabled and running
This service is disabled for existing OS layers.
• Citrix recommends creating a new OS layer version before enabling the feature.
You can enable User Layer/UPL space reclamation in either of the following ways:
• Using Citrix Studio
• Using Windows registry editor
– Path: HKLM\SOFTWARE\Policies\Citrix\UserPersonalizationLayerConfig
– Name: UserLayerCompactionEnabled
– Type: DWORD
– Data: 1 (Default value: 0)
This feature is disabled by default.
© 1999–2024 Cloud Soware Group, Inc. All rights reserved. 299

App Layering
Enable user layers on a layered image
To deploy user layers, you enable the layers using the settingsin an image template. For detailedsteps,
see Create or clone an image template. The rest of this article supplies details about sizing, storing,
configuring security on, moving, and repairing user layers. It also covers the steps for customizing
notifications for end users.
User layer location
When an image template has user layers enabled, the images you publish persist users’data, settings,
and locally installed apps.
When user layers are enabled, you must add storage locations for the layers.
Important:
Do not allow user layers to be saved on the appliance’s main file share. Otherwise, space can be
depleted for:
• Upgrading the soware.
• Serving up elastic layers to users.
• Saving files that you are moving to a hypervisor for which there is no supported connector.
The first storage location added to the appliance becomes the default location for user layers that are
not associated with any other storage location. When you add more storage locations, they are listed
in priority order.
You can assign groups of users to each storage location that you add.
Where a user layer is stored when the user belongs to more than one group
If a user belongs to more than one group and those groups are assigned to dierent storage locations,
the person’s user layer is stored in the highest priority storage location.
If you change the priority order of the storage locations that the user is assigned to aer the person’
s user layer was saved to the highest priority location, the data saved up until that point remains in
the original location. To preserve the person’s user layer, you must copy their user layer to the new
highest priority location.
How to specify the user layer file share location on a specific image
You can support a user who needs to access two separate images at the same time, where both im‑
ages:
© 1999–2024 Cloud Soware Group, Inc. All rights reserved. 300

App Layering
• Need the persistence of user layers.
• Were created using the same OS layer.
To configure user layer file share assignments:
1. Add the following Registry key in one or more of your published images before any user logs in:
[HKLM\Soware\Unidesk\ULayer]
“UserLayerSharePath”
You can add the preceding key to the platform layer, to an app layer, or as a machine group policy.
If you add the UserLayerSharePath key to the image before a user logs in, the appliance ignores the
user layer share assignments. Instead, all users on the machine use the specified share for user layer
VHDX or VHDs. The \Users subtree is appended to this key to locate the actual layers.
How to specify a custom user layer path
You can set a custom path by creating a REG_SZ value called CustomUserLayerPath in the HKLM
\Software\Unidesk\Ulayer key. The HKLM\Software\Unidesk\Ulayer key can include
environment variables and Active Directory (AD) attributes.
In the CustomUserLayerPath value, all system variables can be expanded, but the only user vari‑
ables that can be expanded are %USERNAME% and %USERDOMAIN%. The full path is:
<CustomUserLayerPath>\<OSID_OSNAME>
If you set the custom user layer path using GPO, use %<USERNAME>% and %<USERDOMAIN>% to
prevent the GPO from expanding the paths.
• If CustomUserLayerPath is defined, it is used instead of any other path.
• If CustomUserLayerPath is undefined, UserLayerSharePath, which is inside the same
key, is used.
• If UserLayerSharePath is undefined, the StorageLocation listed in the JSON for the
App Layering appliance is used. You can edit the UserLayerSharePath in the management
console, in the System > User Layer Storage Location setting.
• If there is no StorageLocation listed in the JSON from the App Layering appliance, then
RepositoryPath is used. You can edit the RepositoryPath at the same registry location
as CustomUserLayerPath and UserLayerSharePath.
• When CustomUserLayerPath is defined, the path where user layers are created is the ex‑
panded path, plus \<OSID_OSNAME>. All other paths are share paths, and they are appended
to \Users\<Domain_UserName>\<OSID_OSNAME>.
If you use AD attributes, the attributes must be enclosed in hashes (for example, #aAMAccountName#).
Custom AD attributes can be used to define organizational variables, such as locations or users. At‑
tributes are case‑sensitive.
© 1999–2024 Cloud Soware Group, Inc. All rights reserved. 301

App Layering
Examples:
• \\server\share\\#sAMAccountName# stores the user settings in the UNC path
• \\server\share\JohnSmith (if #sAMAccountName# resolves to JohnSmith for the cur‑
rent user)
Where user layers are created on the appliance
On the appliance’s network file share, user layers are created in the Users folder. For example:
1 \MyServer\\*MyShare*\Users
2 <!--NeedCopy-->
Each user has their directory within the Users directory. A user’s directory is named as follows:
1 Users\\*DomainName_username*\\*OS-Layer-ID-in-hex*_*OS-Layer-name*\\*
username*.vhd
2 <!--NeedCopy-->
For example:
• User’s login name: jdoe
• User’s Domain: testdomain1
• OS layer: MyOSLayer (ID is in hexadecimal format: 123456)
• User layer is created in:
1 \MyServer\MyShare\Users\testdomain1_jdoe\123456_MyOSLayer\jdoe.vhd
2 <!--NeedCopy-->
Where users can access their user layer
When Full user layers are created, users can access the entire C:\ (subject to Windows rights and com‑
pany security on the directories).
When Oice 365 layers are created, the user layers directory is redirected to the Oice 365 layer:
1 C:\user\\<username\>\Appdata\local\Microsoft\Outlook
2 <!--NeedCopy-->
Add a storage location
To add a storage location for an image’s user layers:
1. Log in to the management console.
© 1999–2024 Cloud Soware Group, Inc. All rights reserved. 302

App Layering
2. Select System > User Layer Storage Locations. A list of file shares is displayed, except for the
appliance’s main file share.
3. Select Add Storage Location, and enter a Name and Network Path for the new location.
4. Under Assignments, click Add Groups.
5. Expand the directory, select the desired users, and click Save.
6. Click Confirm and Complete to add the storage location.
Once the storage locations are added, you must set security on the user layer folders.
Configure security settings on user layer folders
You can specify more than one storage location for your user layers. For each storage location (includ‑
ing the default location) you need to create a \Users subfolder and secure that location.
A domain administrator must set the security on each user layer folder to the following values:
Setting name Value Apply to
Creator Owner Modify/Delete subfolders and
files*
Subfolders and Files only
Owner Rights Modify Subfolders and Files only
Users or group Create Folder/Append Data;
Traverse Folder/Execute File;
List Folder/Read Data; Read
Attributes
Selected Folder Only
System Full Control Selected Folder, Subfolders,
and Files
Domain Admins, and selected
Admin group
Full Control Selected Folder, Subfolders,
and Files
*On some servers, Creator Owner requires Delete subfolders and files (an advanced permission),
so that App Layering can clean up aer user layer repairs.
To configure security on user layer folders:
1. Log in to the management console.
2. Click System > User Layer Storage Locations. The file shares displayed are the storage loca‑
tions defined for user layers. Say you’ve defined three storage locations so that you can manage
storage for Group1 and Group2 separately from everyone else in the organization:
‘
© 1999–2024 Cloud Soware Group, Inc. All rights reserved. 303

App Layering
• Default location ‑ \\MyDefaultShare\UserLayerFolder\
• Group1 ‑ \\MyGroup1\Share\UserLayerFolder\
• Group2 ‑ \\MyGroup2\Share\UserLayerFolder\
Note: The appliance’s main file share, which is used for storing OS, app, and platform layers,
is not listed as a user layer storage location. For more about the App Layering file share, see
Setting up a file share.
3. Create a \Users subdirectory under each file share:
1 \\MyDefaultShare\UserLayerFolder\Users\
2
3 \\MyGroup1Share\UserLayerFolder\Users\
4
5 \\MyGroup2Share\UserLayerFolder\Users\
6 <!--NeedCopy-->
1. Apply the preceding list of security settings to each subdirectory under \Users.
Apply User personalization layer Studio policies to user layers
When user layers are enabled on a layered image, you can override the default repository path and
layer size for the user layers by configuring the corresponding Citrix Studio Policies:
• User Layer Repository Path: Defines where on the network to access the user layers.
• User Layer Size GB: Defines how large to permit the user layer disks to grow.
If the published image is running a supported version of the VDA, and these policies have been defined,
the path and size defined in the policies are given the highest priority.
An increase to the assigned user layer size takes eect the next time the user logs in. A decrease in
assigned user layer size does not aect existing user layers.
Define the Studio policies for an image’s user layers
To configure the Citrix Studio policies for a layered image’s user layers:
1. In Citrix Studio, select Policies in the navigation pane:
© 1999–2024 Cloud Soware Group, Inc. All rights reserved. 304

App Layering
2. Select Create Policy in the Actions pane. The Create Policy window appears.
3. Type ‘user layer’into the search field. The following two policies appear in the list of available
policies:
• User Layer Repository Path
• User Layer Size GB
Note:
An increase to the assigned user layer size takes eect the next time the user logs in.
A decrease to assigned user layer size does not aect existing user layers.
4. Click Select next to User Layer Repository Path. The Edit Setting window appears.
© 1999–2024 Cloud Soware Group, Inc. All rights reserved. 305

App Layering
5. Enter a path in the format \\server name or address\folder name in the Value
field, Click OK:
© 1999–2024 Cloud Soware Group, Inc. All rights reserved. 306

App Layering
6. Optional: Click Select next to User Layer Size in GB:
© 1999–2024 Cloud Soware Group, Inc. All rights reserved. 307

App Layering
7. The Edit Settings window appears.
8. Optional: Change the default value of ‘0’ to the maximum size (in GB) that the user layer can
grow. Click OK.
Note:
If you keep the default value, the maximum user layer size is 10 GB.
9. Click Next to configure Users and Machines. Click the Delivery Group Assign link highlighted
in this image:
© 1999–2024 Cloud Soware Group, Inc. All rights reserved. 308

App Layering
10. In the Delivery Group menu, select the delivery group created in the previous section. Click OK.
© 1999–2024 Cloud Soware Group, Inc. All rights reserved. 309

App Layering
11. Enter a name for the policy. Click the checkbox to enable the policy, and click Finish.
© 1999–2024 Cloud Soware Group, Inc. All rights reserved. 310

App Layering
Move existing user layers to a new storage location
Copy each user layer storage location to its new location:
1. Ensure that the user layer is not in use.
If a user logs in before you move their user layer, a new user layer is created. No data is lost, but
if it happens, be sure to:
• Move the newly created user layer to the new directory.
• Preserve the user’s ACLs.
2. Browse to the directory containing the user layer VHDX or VHD file.
3. Using the following command, copy each of the user layer VHDX or VHD files from the previous
location to the new one.
1 xcopy Domain1\User1 Domain1_User1\ /O /X /E /H /K
2 <!--NeedCopy-->
1. Verify that all permissions are correct on the following directories, and files within them:
© 1999–2024 Cloud Soware Group, Inc. All rights reserved. 311

App Layering
1 \\\Root\Engineering\Users
2
3 \\\Root\Engineering\Users\Domain1_User1\\...
4
5 \\\Root\Engineering\Users\Domain2_User2\\...
6 <!--NeedCopy-->
If you let users create user layers
If you choose to let users create user layers, you must manually clean up the original directories and
files from your share.
User layer size
By default, the disk space allowed for an image’s user layers is 10 GB per layer.
You can change the default user layer size by:
• Defining a quota for the user layer share
• Setting a Registry override
When using Oice 365 user layers, the Outlook layer defaults to 10 GB, but Outlook setsthe volume size
based on the amount of free disk space. Outlook uses more or less space based on what is available
on the layered image. The size reported is based on the layered image.
Order of precedence
When deploying user layers, the appliance uses the following order of precedence to determine the
user layer size:
• Disk quota on user layer size set using either:
– Microso File Server Resource Manager (FSRM)
– Microso Quota Manager
• A Registry override for user layer disks:
(HKLM\SOFTWARE\Unidesk\ULayer\DefaultUserLayerSizeInGb)
• Default user layer size (10 GB)
Change the user layer size
Increasing to assigned user layer size will take eect the next time the user logs in. Decreasing to
assigned user layer size does not aect existing user layers.
© 1999–2024 Cloud Soware Group, Inc. All rights reserved. 312

App Layering
Define a disk quota for user layer disks
You can set a hard quota on the user layer disk size using either of Microso’s quota tools:
• File Server Resource Manager (FSRM)
• Quota Manager
The quota must be set on the user layer directory, named Users.
Note:
Changing the quota (increasing or decreasing) only impacts new user layers. The maximum size
of existing user layers was previously set and remain unchanged when the quota is updated.
Set maximum size registry overrides
You can override the default user layer max size using the registry on managed machines. The follow‑
ing registry keys are optional. You do not have to configure these keys for normal operation. If you
need one of these keys, add it manually using a layer or a GPO/GPP.
Registry Root: HKLM\Soware\Unidesk\Ulayer
Key Type Default Value Description
UseQuotaIfAvailable String True; False True to enable
discovery and use of
quotas. False to
disable.
DefaultUserLayerSizeInGbDWord User defined The size of the user
layer in GB (for
example 5, 10, 23, …)
When not specified the
default is 10.
© 1999–2024 Cloud Soware Group, Inc. All rights reserved. 313

App Layering
Key Type Default Value Description
QuotaQuerySleepMS DWord User defined The number of
milliseconds to wait
aer creating the
directory for the user
layer before checking
to see if it has a quota.
Some quota systems
take time to apply the
quota to the new
directory, for example,
FSRM. The default
quota is 1000.
Repair a user layer
The user layer repair feature lets you remove an app and its files from a person’s user layer. You can
use this feature aer delivering an app to users who have already installed the app locally on their
user layer. The repair feature removes conflicting files whether you deliver the new app layer as part
of the base image or as an elastic layer.
• Example 1: You create an app layer that includes the file, you.txt, and provide the app layer
elastically to users. When a user changes the file, the changes are stored in their user layer. If
their changes break the app, or the file was corrupted, the user layer repair feature lets you
clean up the problem file by removing it from the user layer. The user then sees the file that is
provided elastically as part of the app layer.
• Example 2: A user deletes an app that is assigned to them elastically. Because the user layer
takes precedence, once the user
’
s local copy of the app is deleted, the user no longer sees that
version of the app. The user sees the app layer that is assigned as an elastic layer.
• Example 3: A user installs an application locally, and sometime later the administrator creates
an app layer for the same application. The user layer repair feature removes any conflicting files
installed by the app from the user layer so that the user then sees the version supplied in the
app layer.
How user layer repair works
The appliance generates user layer repair JSON files that you can use to clean up or restore the user
layer. You manually copy the JSON files to the user layers that need the repair.
© 1999–2024 Cloud Soware Group, Inc. All rights reserved. 314

App Layering
If the repair upload folders do not exist on the network share they are created automatically. The
appliance writes the repair JSON files to the following directories on the File share:
1 <StorageLocationShare>\Unidesk\Layers\App\Repair\
2 <StorageLocationShare>\Unidesk\Layers\App\PackageAppRules
3 <!--NeedCopy-->
The Repair directory contains the JSON files for each version of each layer that the appliance knows
about. Whenever you finalize a new app layer or a version of it, the appliance generates and uploads
the repair files.
The repair files for each layer include:
1 UserLayerRepair_LayerIdInDecimal_RevisionIdInDecimal.json
2 UserLayerRepair_<layer id>_<layer version>.json
3 <!--NeedCopy-->
To see the layer ID in the console, click the Layer tab, select the layer, and click the i icon. The layer
ID is displayed along with other layer details.
The PackageAppRules directory contains the package app rules for each version of a user layer.
How long does it take to repair a layer?
The repair process time varies based on how large the layer is and how many objects need to be
deleted.
A repair of a layer that needs to be mounted but has no actual operations to perform adds about 5
seconds to the login process. Login time is reduced to 2 seconds when the app layer is included in the
image.
The time varies depending on the operations. For a typical app layer, it is less than 10 seconds, so 12–
15 in total.
Repair a user layer
To repair the user layer for a user:
1. Identify the version of an app layer that must be repaired.
2. Locate the pre‑generated UserLayerRepair files. If the files have not been generated, contact
App Layering Support. Your Support engineer can generate the repair files manually for you.
3. Copy the user layer repair files directly to the user’s VHDX or VHD location. The next time the
user logs in, a repair operation occurs.
If the user layer repair task is completed, the UserLayerRepair.JSON file is removed.
© 1999–2024 Cloud Soware Group, Inc. All rights reserved. 315

App Layering
Note:
If a JSON Rules file exists on the share and has been modified by the user, it is not overwrit‑
ten. This allows users to modify those files as desired.
Log files for user layer repairs
The log file, ulayersvc.log, contains the output of the user layer repair executable.
1 C:\ProgramData\Unidesk\Logs\ulayersvc.log
2 <!--NeedCopy-->
Any changes made during the cleanup are logged there, along with any other changes that the service
logs.
What happens if a repair fails?
In the event of a failure, the user receives a message that the repair has failed and that they must
contact their admin. You can configure the message in the same place as the other storage location
messages.
A repair failure can occur in the following cases:
• Bad UserLayerRepair.json formatting (unlikely, since the JSON files are generated).
• Cannot find a specified app layer’s .VHD or in‑image package_app_rules file.
• Failure to attach an app layer’s VHD file.
• Unexpected (random) exceptions interrupting the repair process.
If any of these issues occur, the UserLayerRepair.JSON file is NOT removed, and processing of remain‑
ing JSON files stops.
To identify the exact reasons for the failure, review the user’s ulayersvc.log file. You can then allow
the repair to run again on subsequent logons. Assuming the cause of the failure is resolved, the repair
eventually succeeds, and the UserLayerRepair.JSON files are removed.
Update layer
February 8, 2023
The steps for updating the soware in an OS, platform, or app layer are virtually the same. You add a
version to the layer, install the upgrade or patch on the packaging machine, verify, and then finalize
the layer. Once updated, you deploy the new layer version, which varies based on the type of layer.
© 1999–2024 Cloud Soware Group, Inc. All rights reserved. 316

App Layering
The platform layer is the highest priority layer and critical for the deployment of images, especially
with regards to devices, such as your networks. Whenever you update the infrastructure soware,
you must add a new version to the platform layer.
You add a version to the platform layer using the new OS layer as the base. Once the packaging ma‑
chine has started, shut down the machine for finalization. The platform layer gathers the critical com‑
ponents from the new OS layer version, and updates them in the platform so that they match the OS
version.
Add a version to the layer
For example, to add a version to an OS layer:
1. In the Citrix App Layering Management Console, select Layers > OS Layers
2. Select an OS layer and click Add Version on the Version Information tab.
3. In Version Details:
a) For Base Version, select the version to use as the base for the new layer version. The
default is the latest version.
b) Enter a name for the New Version. This can be the OS version or other identifying infor‑
mation.
4. Select a Connector configuration for the hypervisor where you create your layer.
5. Enter a file name for the Packaging Disk, and select the disk format to use if you are using the
appliance’s File Share, instead of a connector configuration. This disk is used for the packaging
machine (the virtual machine) where you install the application.
6. Verify your settings and click Add Version. This runs a task to create an OS version. When the
task completes, it shows a status of Action Required. When you select the task and click View
Details, the following text displays:
“The Packaging Disk has been published. The virtual machine ‘<…>’can be found in folder ‘<…>’in
data center ‘<…>’. Power on this virtual machine to install your application. When the installation is
complete, power o the virtual machine before clicking Finalize on the Action bar.”
Next, you can deploy a packaging machine for this OS layer version.
Deploy a packaging machine to your hypervisor
The packaging machine is a virtual machine where you install the updates or applications to include
in the layer. The packaging machine is a temporary virtual machine that is deleted once the OS layer
has been finalized.
The task description contains directions to navigate to the location in your hypervisor where the pack‑
aging machine for this layer has been created.
© 1999–2024 Cloud Soware Group, Inc. All rights reserved. 317

App Layering
1. To create the packaging machine in your hypervisor, begin with the expanded packaging disk
task shown in step 2.
2. Log into your hypervisor client.
3. Back in the management console, use the instructions in the expanded packaging disk task to
navigate to the packaging machine.
Install the OS update
1. Remote log into the packaging machine. Be sure to log in to the User account you used to create
the OS.
2. Install any updates or applications you want to include in the new OS layer version, such as
Windows Updates or antivirus applications.
3. If an application installation requires a system restart, restart it manually. The packaging ma‑
chine does not restart automatically.
4. Make sure the packaging machine is in the state you want it to be for the user:
a) If the applications you install requireany post‑installation setup or application registration,
complete those steps now.
b) Remove any settings, configurations, files, mapped drives, or applications that you do not
want to include on the packaging machine.
Next, you shut down the packaging machine and verify that the layer is ready to finalize.
Note:
When you upgrade Windows 10 from one major version to another (1703 to 1709, for instance),
the previous Windows installation is le in a C:\Windows.old folder. In App Layering, you must
not delete this folder. Our soware needs to copy our drivers and other files from Windows.old
to Windows once the upgrade is completely finished. We will clean up Windows.old when you
Finalize the OS layer.
Verify the Layer and shut down the packaging machine
The next step is to verify that the layer is ready to be finalized. To be ready for finalization, any required
post‑installation processing, for example, a reboot or a Microso ngen process, must complete.
To verify that any outstanding processes are complete, you can run the Shutdown For Finalize tool
(icon below), which appears on the Packaging Machine’s desktop.
To use the Shutdown For Finalize tool:
1. If you are not logged into the packaging machine, remote login as the user who created the
machine.
© 1999–2024 Cloud Soware Group, Inc. All rights reserved. 318

App Layering
2. Double‑click the Shutdown For Finalize icon. A command line window displays messages de‑
tailing the layer verification process.
3. If there is an outstanding operation that must be completed before the layer can be finalized,
you are prompted to complete it. For example, if a Microso ngen operation must complete,
you can try to expedite the ngen operation, as detailed below.
4. Once any pending operations are complete, double‑click the Shutdown For Finalize icon again.
This shuts down the Packaging Machine.
The layer is ready to finalize.
If the connector configuration you selected is set to Oload Compositing, the layer is automatically
finalized. Otherwise, the next step is to finalize the layer manually, as described in the next proce‑
dure.
Layer integrity messages
The following layer integrity messages tell you what queued operations must be completed before
the layer is ready to finalize:
• A RunOnce script is outstanding - please check and reboot the
Packaging Machine.
• A post-installation reboot is pending - please check and reboot
the packaging machine.
• A Microsoft ngen operation is in progress in the background. ‑ An
MSI install operation is in progress - please check the packaging
machine.
• A reboot is pending to update drivers on the boot disk - please
check and reboot the packaging machine.
• A Microsoft ngen operation is needed.
• Software Center Client is configured to run, but the SMSCFG.INI
is still present. To learn more about deploying SCCM in a virtual
environment, see the Microsoft TechNet article, [Implementing
SCCM in a XenDesktop VDI environment](https://social.technet.
microsoft.com/wiki/contents/articles/23923.implementing-sccm-in-a
-xendesktop-vdi-environment.aspx).
For details about what the layer integrity messages mean and how to debug them, see Debugging
Layer Integrity Problems in Citrix App Layering 4.x and later.
You cannotbypass layer integrity messages by shutting down the machine. The App Layering soware
stops and returns you to the packaging machine until the processes have completed.
© 1999–2024 Cloud Soware Group, Inc. All rights reserved. 319

App Layering
If a Microso ngen operation is in progress, you may be able to expedite it, as described in the next
section.
Expedite Microso Ngen.exe operations, if necessary
Once all soware updates have been installed, you must allow Ngen.exe to essentially recompile
.NET byte code into native images and construct the registry entries to manage them.
Ngen.exe is the Microso Native Image Generator, which is part of the .NET system. Windows deter‑
mines when to run Ngen.exe based on what soware is being installed and what Windows detects
in the configuration.
Important:
When Ngen.exe is running, you must let it complete. An interrupted Ngen.exe operation can
leave you with non‑functioning .NET assemblies or other problems in the .NET system.
Normally, Ngen.exe is a background operation that pauses when there is foreground activity. If you
want to expedite an Ngen.exe operation, you can bring the task into the foreground to complete it
as quickly as possible.
To bring the task into the foreground:
1. Open a command prompt as Administrator.
2. Go to the Microsoft.NET\Framework directory for the version currently in use:
cd C:\Windows\Microsoft.NET\FrameworkNN\vX.X.XXXXX <!--NeedCopy
-->
3. If using .NET Framework 3 or later, enter the following Ngen.exe command to run
all queued items. This command processes queued component installs before building
assemblies.
ngen eqi 3 <!--NeedCopy-->
The Ngen.exe task moves to the foreground in the command prompt, and lists the assemblies
being compiled. It is OK if you see compilation messages.
Ensure that all Ngen.exe processes have run to completion. You can use the Task Manager
to see if an instance of MSCORSVW.EXE is running. If it is, allow it to complete, or run ngen
eqi 3.
Caution:
Do not reboot to stop the task. Allow the task to complete!
© 1999–2024 Cloud Soware Group, Inc. All rights reserved. 320

App Layering
4. If using .NET Framework 2 or earlier, enter the following Ngen.exe command to run the
queued items.
“‘ ngen update /force
1 This brings the ngen task to the foreground in the command prompt,
and lists the assemblies being compiled.
2
3 >**Note:**
4 >It's okay if you see **compilation failed** messages.
5 Look in the Task Manager to see if an instance of MSWORD.EXE is
running. If it is, you must allow it to complete, or rerun '
ngen update /force`. Do not reboot to stop the task. Allow it
to complete.
6
7 Check the status of an `Ngen.exe` operation by opening a command
prompt as Administrator and running this command: ```ngen queue
status<!--NeedCopy-->
Caution:
Do not reboot to stop the task. Allow the task to complete!
5. When all operations are complete, shut down the virtual machine using the Shutdown For Fi‑
nalize shortcut available on your desktop.
Finalize the layer manually
Once the packaging machine is created and any apps or updates installed, you can finalize the layer.
Note: When you finalize a new version of an OS layer, the system deletes the packaging machine so
as not to incur more costs.
When a layer is ready to finalize:
1. Return to the management console.
2. In the Layers module, select the layer.
3. Select Finalize in the Action bar.
4. Monitor the Taskbar to verify that the action completes successfully and that the layer is deploy‑
able.
Export and import layers
June 14, 2022
© 1999–2024 Cloud Soware Group, Inc. All rights reserved. 321

App Layering
The layer Export and import feature lets you export layers from your App Layering appliance, and im‑
port the layers into an appliance installed in another location in your environment. For example, you
can use this feature to move layers from an appliance in an on‑premises environment to an appliance
in a cloud environment. Or, from a proof‑of‑concept environment to production.
The appliance runs an analysis on each layer it imports to determine its suitability for elastic layering.
The results of the analysis are included in the layer details.
Before you start
Before exporting or importing layers, please meet the following requirements, and review related con‑
siderations.
Requirements
To export and import layers you need the following:
• The appliance that contains the layers you want to export.
• The appliance to which you want to move the layers.
• A configured SMB Network File Share that is:
– Reachable by both appliances.
– Has enough space for all exported layers, plus the meta data and icons for the layers.
• Information required:
– The path, user name, and password for the SMB Network File Share to which you want to
export the layers.
– Administrator name and password for the management console.
Considerations
Consider the following points when exporting and importing layers.
If file names on the File Share include special characters Since the File Share does not support
some special characters, layer names with special characters are temporarily changed to underscores
(_) on the File Share. All unsupported characters are changed.
For example, a layer named “Notepad++”becomes “Notepad__”when exported. When the layers are
imported onto the new appliance, the original name is restored, and it again appears as “Notepad++”
.
© 1999–2024 Cloud Soware Group, Inc. All rights reserved. 322

App Layering
Run no more than one import or export at a time Only one import or export should be run at a
time.
The required OS layer must be included in your layer export You can copy exported layers to
a dierent File Share for import, but be sure to move the required OS layer file along with the other
layer files. The appliance imports the OS layer first, because the OS layer is required to import other
layers.
Naming layers for export All layers are exported to the following directory on the File Share:
\network‑file‑share\Unidesk\Exported Layers\
The exported file names reflect the Layer Name, Layer Version Name, and Layer GUIDs.
Selecting layers When selecting layers, the icons not only indicate which layers are selected, they
also indicate whether a folder contains layers that have already been exported or imported, depend‑
ing on which operation you are engaged in.
When exporting layers:
• If an icon is partially selected, it means that the folder includes some layers that are not selected.
• If an icon is grayed out, it means that the layer cannot be selected for export, most likely because
the layer has already been exported. Hover over the layer for a message about why it cannot be
selected.
When importing layers:
• If an icon is partially selected, it means that the folder includes some layers that are not selected.
• If an icon is grayedout, it means that the layer cannotbe selected for import, most likely because
the layer has already been imported. Hover over the layer for a message about why it cannot
be selected.
Searching layers The Search box allows you to find all layers and versions containing the search
text. Searches are not case sensitive.
Remember, when you select a folder, the UI only selects the subset of layers that are visible. When a
folder you select has a partially selected icon, it means that some of the selected layers have already
been exported or imported. You can view those layers, which are normally hidden, by selecting the
Show versions which cannot be selected check box above the list.
© 1999–2024 Cloud Soware Group, Inc. All rights reserved. 323

App Layering
Search speed aected by the number of subdirectory levels When exporting a layer, if your sub‑
directories are several levels deep, our soware scans every level under that directory, and therefore
takes longer to display directories.
Deleting exported layers You can delete an exported layer from the database only when it is not
included in an image template.
Export layers
1. In the App Layering management console, select Layers > Export.
2. Enter the path of the File Share where you want to export the layers. The App Layering soware
appends the following path to the Universal Naming Convention (UNC) you specify:
\Unidesk\Exported Layers\
3. Enter the Username and Password for an administrator who has Full Access to the File.
4. Click Connect. If necessary, adjust the credentials until the test is successful. You cannot pro‑
ceed until there is a connection to the File Share.
5. Choose the layers for export:
a) Under Version Selection, click Edit Selection to reveal folders of your OS layer versions,
Platform layers, and App layers.
b) If you have already exported to the selected location, you can click the Show versions
which cannot be selected check box to reveal the layers previously exported to this loca‑
tion.
c) Select the layers and versions to export, then click Save.
6. Click Confirm and Complete to verify the space available does not exceed the estimated file
size. When space is suicient, the Export Layers button becomes available. You can optionally
enter a comment. A Layer Export task is created where you can track progress.
7. If you cancel the export before the OS layer is fully exported, be sure to re‑export all of the layers
again, including the OS layer.
8. If you create more layers aer the initial export, run another export to the same location. Only
the new layers are exported.
Warning
Do not attempt to edit or rename any of the exported files.
© 1999–2024 Cloud Soware Group, Inc. All rights reserved. 324

App Layering
Import layers
When importing layers from one appliance into another, if two layers have the same name even
though the contents of the layer are dierent, the layer that is imported has a “1”appended to the
name. If other layers with the same name are imported, the “1”is incremented.
Note:
To import an app or platform layer, the OS layer must exist on the appliance, or be imported at
the same time. You can import several layers at a time, and the OS layer is always processed
before any dependent layers.
1. Log into the App Layering management console and select Layers > Import.
Note:
You can deselect individual layers in the folder, as explained in step #4 below.
2. Enter the path to the File Share where you exported layers. The following is appended to the
URL you specify.
\Unidesk\Exported Layers\
3. Enter the Username and Password for an administrator who has Full Access to the File Share.
4. Click Connect. If necessary, adjust the credentials until the test is successful.
The system compares the contents of the appliance with that of the selected File Share, and
prepares to import the layers that have not yet been imported.
5. Choose the layers for import:
a) Click Edit Selection to expand the OS layer that includes the layers you want to import,
and select one of the subfolders to import. This selects every layer and version available
for import in the folder.
b) If you want to see the layers that have already been imported from this location, make
them visible by clicking the check box Show versions which cannot be selected.
c) If one of the folders includes layers that you do
not
want to import, deselect each of those
layers.
6. Verify the layers to be imported, then click Confirm and Complete.
• Verify the layers queued up for import. Only layers that have not yet been imported from
the File Share are listed.
• Verify that there is enough space on the appliance’s local storage for the layers. The system
does not allow the import to proceed until there is enough space for the layers.
© 1999–2024 Cloud Soware Group, Inc. All rights reserved. 325

App Layering
Important
If you cancel an OS layer import, all layer imports that rely on the OS layer are canceled.
7. When all settings are valid, click Import Layers. An Import task is created where you can track
progress.
Once the layers are imported, an “Elastic Fit Analysis”is run on the layers, allowing you to see
which layers can be elastically assigned.
Exclude files from layers (Advanced feature)
November 13, 2023
You can exclude specific files and folders from a composited layer to prevent files from persisting on a
user’s desktop. For example, you can exclude antivirus soware files and folders that must not persist
for a desktop from one login to the next.
The exclusions you define are applied to a composited layer, once that is part of a published image.
This feature isn’t enforced on a packaging machine, only on a published image where the layers have
been composited. That means that you define the exclusions while creating the layer, include the
layer in the image template, and then publish the image.
Default exclusions
The Gold Image tool updates maintain a folder of .txt files to introduce and accumulate default exclu‑
sions for the App Layer file system. OS layers must be updated with the latest tool versions to ensure
the correct and full set of exclusions are in place.
The location for these defaultexclusionsis C:\Windows\Setup\Scripts\CitrixDefaultExclusions
\. Customers don’t need to do anything with this folder or its contents. Any new exclusions can be
removed through an OS layer revision if they cause problems for a customer.
Note:
Future Gold Image tool installations will overwrite local changes made by customers, so report‑
ing issues with any default exclusions is recommended.
This feature complements the user exclusions delivery method and follows the same format, restric‑
tions, and usage as c:\Program Files\Unidesk\Uniservice\UserExclusions\ files
would.
© 1999–2024 Cloud Soware Group, Inc. All rights reserved. 326

App Layering
The two new defaultexclusions files are FsLogixExclusions.txt and GroupPolicyHistoryExclusions
.txt.
Limitation
Excluded files and folders on elastic layers aren’t processed. Exclusions can only be processed when
present in the image.
Specify files and folders to exclude
In the C:\Program Files\Unidesk\Uniservice\UserExclusions\ folder, create one or
more .txt files that specify paths to be excluded.
All valid paths to files and directories are excluded and then read from the image. All changes to those
files and directories on the writable layer no longer persist.
If one of the files you create contains an invalid path, processing of that file stops and moves to the
next .txt file within the \UserExclusions folder.
You can also use a * character to wildcard one directory for exclusion. For example, C:\Users
\*\AppData\Local\Temp\, where * indicates any user name. In this case, any user name that
matches the rest of the path fits the exclusion rule, allowing the administrator to skip the user’s \
Temp directory for all users who use that image.
For each exclusion rule, you can only wildcard one directory (use one *) in a single path. You can’t
exclude multiple directories with one *. For example, using the rule C:\Top\*\Bottom\ excludes
the files in directories C:\Top\First\Bottom\, C:\Top\Second\Bottom\, and so on. But
files in the directory C:\Top\First\Second\Bottom\ aren’t excluded, because there are two
directories between \Top\ and \Bottom\ rather than one.
There’s no limit to the number of exclusion rules that you can set containing a wildcard (*).
Examples
Exclude a file:
1 c:\test\test.txt
2 <!--NeedCopy-->
Exclude a directory:
1 c:\test\
2 <!--NeedCopy-->
© 1999–2024 Cloud Soware Group, Inc. All rights reserved. 327

App Layering
Restrictions
The following restrictions apply to exclusions.
Directory name
• Begin the path with C:\
• End with a Backslash (\)
Exclusions These top‑level directories can’t be excluded:
• C:\
• C:\Program Files\
• C:\Program Files (x86)\
• C:\ProgramData\
• C:\Windows\
• C:\Users\
The following characters and expressions aren’t allowed in exclusions:
• No question marks (?)
• No regular expressions (no %x%)
• No forward slash (/)
• No network (\\)
• No path to a dierent directory (\..\)
• No quotation marks (“)
• No colon (:) aer C:\
Log
Log messages are available in:
1 C:\Program Files\Unidesk\Uniservice\Log\Log0.txt
2 <!--NeedCopy-->
Messages written to the log:
• User exclusion added: Includes the details about the file or directory.
• Failed to add user exclusion: Includes details about the unsupported exclusions.
© 1999–2024 Cloud Soware Group, Inc. All rights reserved. 328

App Layering
Publish
February 20, 2019
The Citrix App Layering service lets you publish layered images as disks compatible with your platform.
You can use a layered image to provision virtual machines, as you would with any other image.
About layered images
Layered Images are bootable images composited from an OS layer, a Platform layer, and any number
of App layers.
You publish layered images from an image template. The image template lets you specify the layers
to include in the layered images. You can also specify the following:
• The connector configuration to use to access a location in your environment.
• Whether to enable Elastic layers for delivering applications to users when they log in.
• Whether to enable User layers, which persist users’application data and settings.
Layered images for provisioning systems
The way you specify which layers to include in a layered image is by saving the combination of layers
you want for a particular group of users in an image template. You then use this template to publish
a layered image to your chosen platform.
When you need to update the layered image, you simply edit the image template to add or remove
layer assignments and publish a new version of the image.
Create or clone an image template
March 22, 2024
An image template stores the list of layers to include in the layered images that you publish. From
a single template, you can publish as many layered images as you need to provision systems in a
particular location.
Once you create an image template from scratch, you can clone the template to quickly create a set
of templates that have the same settings.
© 1999–2024 Cloud Soware Group, Inc. All rights reserved. 329

App Layering
When you upgrade the soware in an App or Platform layer, you then update your image templates to
use the new layer version. To deliver the new layer version to users, you can republish your layered
images and use the updated images to provision your systems.
Requirements
To create an image template, use
• OS layer
• Platform layer (Optional)
Important:
If using the Platform layer, it must have the same hardware settings as the OS layer. You
choose these settings when deploying the virtual machine for the OS and Platform layers.
• App layers (Optional)
– You don’t need to include App layers when you create an image template.
– You can add App layers to an image template and then republish your layered images at
any time.
You can create an image template without App layers. This is useful for testing your OS layer before
using it to create App layers.
Create an image template from scratch
To create an image template:
1. In the App Layering management console, select the Images module, then click Create Tem‑
plate.
2. Enter a Name for the template and notes in the Description field (optional), so you can identify
the template when choosing one for publishing a layered image.
3. Select one of the Available OS Layers. If there is more than one layer version, the most recent
version is selected by default. You can select an older version from the drop‑down menu.
4. (Optional) Select the App Layers > Edit Selection thatyou want to include in the layered images
that you publish using this template.
5. (Optional) Select a Platform layer with the tools and hardware settings for the required image
target.
© 1999–2024 Cloud Soware Group, Inc. All rights reserved. 330

App Layering
6. Choose a Connector Configuration for the platform where you are creating this layer. If the
configuration you need isn’t listed, you must create the connector configuration from the Con‑
nectors page.
7. Edit the following fields, as needed:
• Layered Image Disk File name (Auto‑populated): The name for the layered image disk
is auto‑populated from the template name.
• Defragmented Layered Image Disk: When enabled, the layered image disk will be de‑
fragmented. This option is available for Oload Compositing connectors only.
• Layered Image Partition Size: The default disk size of 100 GB is recommended.
• Layered Image Disk Format: The default disk format is VHD, but you can also select VMDK
or QCOW2. If you are publishing to the appliance’s File Share instead of using a connector
configuration, this setting allows you to choose a disk format compatible with the environ‑
ment to which you are copying the disk.
• Sysprep: The options available depend upon the hypervisor or Provisioning Service spec‑
ified in your connector configuration:
– Azure, Hyper‑V, XenServer, Nutanix, vSphere: Defaults to Generalized Oline. (For
Azure, this is the only option.)
– Machine creation, Citrix Provisioning, View: Not generalized is the only option for Ma‑
chine creation, Citrix Provisioning, and View running on any of the hypervisors.
– File Share: Defaults to Not generalized, if using a File Share instead of a connector
configuration.
• Elastic Layering: Select the Application Layering option to activate Elastic Layering on
this layered image.
• User Layer: When enabled in System Settings, you can select Full User layers (Labs), Of‑
fice 365 (desktop), or Session Oice 365 (server OS) option. Choose the Full option to save
the settings and data for users independent of specific applications. Choose Oice 365 or
Session Oice 365 to save the settings and data for Outlook 365 running on a desktop
system or a session host.
8. Select Confirm and Complete, and enter any comments you would like for this layer.
9. Click
Create Template
to save your changes, or
Create Template and Publish
to save the tem‑
plate and then publish the layered images.
The new template icon appears in the Images module.
Clone an image template
You can create a copy of an image template by cloning it. Each clone is a stand‑alone copy of the orig‑
inal. The audit history shows that the template was cloned “Created (Cloned),”and indicates which
© 1999–2024 Cloud Soware Group, Inc. All rights reserved. 331

App Layering
image it was cloned from, “Cloned from template‑name.”
The first clone is named the same as the original template, with “‑ Copy”appended to it. Each sub‑
sequent clone has “‑ CopyN”appended instead, where N is an incrementing sequence number. The
sequence number is incremented to the first available number, rather than the number aer the last
one already in use. The maximum number is 1000.
To clone an image template:
1. In the App Layering management console, select the Images module.
2. In the Images module, select an image template, and click Clone on the Action bar or popup
menu. A copy of the template is created with “‑ Copy (1)”appended to the name.
You can rename and edit the clone for your purposes.
Next step
You can now use the image template to Publish layered images from image template
Publish layered images from template
March 22, 2024
Layered images are virtual machines composited from the layers and settings specified in an image
template. Using an image template, you can publish as many layered images as you need to a location
in your Provisioning Service or hypervisor that you specify in the connector configuration.
When layered images are published, you can use scripts to perform important layer‑specific steps. For
example, you can activate Microso Oice, which may need to be done before the virtual machine is
used as a master disk for your deployment tools.
The mechanism used to run these scripts can vary, including our own kmssetup.cmd functionality,
run‑once support, or even running the scripts manually. Aer all of the scripts run or other manual
steps are taken and the virtual machine is in the desired state, a guest OS shutdown is initiated ei‑
ther by the scripts or manually. If you use the
kmssetup.cmd functionality, there is a documented
process for initiating a shutdown aer all layer scripts and other
kmssetup functionality are com‑
plete.
To publish a layered image:
1. In the Images module, select one or more image templates that you want to publish.
2. On the Action menu, select Publish Layered Image.
© 1999–2024 Cloud Soware Group, Inc. All rights reserved. 332

App Layering
3. On the Confirm and Complete page, select Publish Layered Images. For each ImageTemplate,
this starts a task called Publishing Layered Image.
4. Check the taskbar, and when the disk for this image is created, click the link in the task descrip‑
tion to advance to the next stage.
The link leads you to a virtual machine whose state of creation depends upon the platform you
are publishing to:
• XenServer, MS Hyper‑V, Nutanix (or provisioning service on it): The virtual machine
is created, but o. Log in as a guest, and let the machine run any scripts specified in the
connector configuration.
• Azure (or Machine creation for Azure): A window for creating a virtual machine is open,
but incomplete. Enter the values required, finish creating the machine, and power it on.
The machine runs any scripts specified in the connector configuration.
– An Azure connector is used specifically for layer creation.
– A Machine creation for Azure connector is used specifically for template publishing.
• Google Cloud: Create a VM from the Google Cloud Image on the Google Cloud console,
and power it on as the guest operating system.
• VMware Cloud: Create a VM using a VMware Virtual Machine template, and power it on as
the guest operating system.
Note:
A VMware Virtual Machine template, rather than a standard VM template, is
required for the virtual machine’s network to work correctly.
5. When the virtual machine is in the desired state, shut it down. The task status changes to Done.
6. Use the information in the task description to navigate to the image in your environment.
Possible error message
If you receive the following error and you want to log into the published image to make changes, it
must be through the local user and not a domain user.
This system was not shut down properly. Please log off immediately
and contact your system administrator.
© 1999–2024 Cloud Soware Group, Inc. All rights reserved. 333

App Layering
Manage image template
June 14, 2022
Whenever you create a new layer or add a new version to an existing one, you can:
• Update the layers selected in your image template(s).
• Use the template(s) to publish new versions of your layered images.
• Use the new layered images to manually provision your systems.
You can change or delete a template without aecting any previously published layered images, be‑
cause an image is not associated with the template used to create it.
Update image templates with a new layer version
When you add a new version to an app layer or an OS layer, you can quickly identify the image tem‑
plates that include the layer, and select which templates to update with the new version.
1. In the App Layering management console, select Layers, and then select subtab for the type of
layer you are updating.
2. Select the Layer you updated, then the new version of the layer you want to assign.
3. Click Update Assignments. Image templates that include this layer are listed.
4. Select the image templates to which you want to assign the layer or layer version.
5. Click Save.
6. Click Confirm and Complete.
Edit any image template setting
When you want to change the settings that you use to publish any of your layered images, you can edit
the image template you originally used to publish the layered image(s) and publish a new version of
the image(s).
1. In the App Layering management console, select Images.
2. Select the template you want to edit, and click Edit Template.
3. You can change the Name, Description, and Icon for the Image.
4. Select a dierent version of your chosen OS layer by expanding the layer and choosing a dier‑
ent one.
5. Add or remove app layers to include in the layered images that you publish using this template.
If there is more than one version of a layer, you can choose a dierent version by expanding the
layer and choosing a dierent one.
© 1999–2024 Cloud Soware Group, Inc. All rights reserved. 334

App Layering
6. Change the location to which the Layered Image is published by selecting a dierent Connector
Configuration.
7. Change the selected Platform Layer, if for example, you are publishing to a dierent environ‑
ment.
8. Edit the Layered Image Disk details, for example, to enable elastic layering on the image.
9. Click Confirm and Complete, and enter comments for this layer.
10. Click Save Template Changes, or click Save Template and Publish to publish the layered im‑
ages aer saving the template.
Delete an image template
When you no longer need an image template, you can remove it from the management console.
An image template cannot be deleted while it is being used to publish layered images.
1. In the management console, select Images.
2. Select the template you want to delete, and click Delete Template.
3. Enter any comments you would like, and click Delete Template.
Manage
July 23, 2018
This section explains how to manage the App Layering service, including:
• System settings
• Storage
• Appliance settings
• App Layering services
• Users
• Firewall ports
System settings
March 14, 2024
You can specify settings for the following system configuration parameters by clicking the Edit button
of each option, making your changes, and then clicking the Save button.
© 1999–2024 Cloud Soware Group, Inc. All rights reserved. 335

App Layering
This section describes each appliance setting.
Monitoring and Storage
The following services run on the App Layering appliance:
• Management service
• Layering service
• BITS server service
For more details, go to App Layering services.
Directory Services
You can configure the appliance to connect to a directory service, for example, Active Directory. When
you connect to your directory service, you create one or more Directory Junctions to access specific
domains or OUs. The appliance does not modify the directory service you connect to. The soware
caches the attributes for each directory service entry so that if the connection to the directory service
is lost temporarily, the soware can use the cached information for management tasks.
For more details, go to Directory service.
User Layer Storage Locations
The appliance’s local storage is a layer repository where the appliance creates, composites, and stores
layers and layered images. To check the amount of free space in the appliance’s local storage, you can
see how much disk space is used in the System module of the management appliance.
For more details, go to Storage.
Network File Share
The Network File Share is used to:
• Package layers using the Network File Share, rather than a connector for your hypervisor.
• Publish layered Images to the Network File Share, rather than using a connector for your pub‑
lishing platform.
• Serve Elastic Layers.
• Upgrade the App Layering soware.
© 1999–2024 Cloud Soware Group, Inc. All rights reserved. 336

App Layering
Configure Network File Share
To configure the Network File Share, specify the following values:
• SMB File Share Path
• User Name and password
Test Network File Share
Then, test the connection to the file share by clicking Test SMB File Share. The test returns a message
stating either Success or Failed to mount network file share path. You can enter a
comment describing your changes.
HTTP certificate settings
Displays the currently set security certificate. Use the Upload and Generate buttons to upload an
existing certificate or to generate a new one. Optionally, enter a comment that describes the changes
you made.
Trusted certificates
When you enter the URL for the application, you are automatically redirected to a secure connection.
If you specify HTTPS as the protocol in the URL, and the application does not include a security certifi‑
cate from a Certificate Authority, you are prompted to bypass the security warnings the first time you
access the application.
To eliminate the security warning, upload a trusted certificate that you create.
Requirements The requirements for the trusted certificate are:
• It must be a Privacy Enhanced Mail (PEM) certificate.
• It must include both the certificate and the key.
• It does not include a passphrase.
Create a CSR You need to generate a CSR file to give to the Certificate Provider for a certificate re‑
quest. Since ELM is based on CentOS Linux, OpenSSL is included. Use the OpenSSL CSR Wizard from
DigiCert to generate the required OpenSSL command. You can then use Putty to log on to the console
and paste in the OpenSSL command, which generates the CSR. Refer to the OpenSSL commands in
the OpenSSL Quick Reference Guide.
© 1999–2024 Cloud Soware Group, Inc. All rights reserved. 337

App Layering
Uploading the certificate
1. Create the PEM certificate.
2. Log in to the App Layering CacheCloud Infrastructure Management utility.
3. Select Configuration > Upload SSL Certificate in the le pane.
4. Browse to the self‑signed PEM certificate file and click Upload.
5. Restart the Management Appliance.
Notification settings
You can configure automatic email notification settings for yourself or other users.
Set up email notifications from the appliance
To set up email notifications, complete the following fields. All fields are required.
1. In the Mail Server field, enter the name of your email server or SMTP relay server.
2. In the Mail Server Port field, enter the number of the port that the email server uses for commu‑
nication.
3. In the User Name field, enter the user name for the email account you want to use for sending
4. In the Password field, enter the password for the email account.
5. In the From field, enter an email address to identify the source of the email message. For exam‑
From box of the received notification:
6. In the Recipient List box, enter the email addresses that must receive notifications. Use a
comma or semicolon to separate the email addresses.
7. Click Test Email Configuration to verify that the settings for the email server and account work
correctly. If the test succeeds, the soware displays a success message and sends the recipients
a confirmation email.
8. Enter a comment, if necessary, and click Save to save the email settings. Any comments you
enter appear in the Information view Audit History.
© 1999–2024 Cloud Soware Group, Inc. All rights reserved. 338

App Layering
Security and retention settings
• Specify the number of minutes of inactivity before the management console logs you out.
• Specify the number of days that the appliance must retain completed Tasks before deleting
them.
• Specify the number of days that the appliance must retain audit log files. Aer that time elapses,
the soware begins to overwrite the audit log.
• Specify the maximum disk space to use for all logs (in MB) and the number of days that the log
files must be retained.
• Optionally, enter a comment that describes the changes you made.
About
This section displays more information about the Enterprise Layer Manager (ELM), such as ELM Ver‑
sion, the Hypervisor being used, and where to go for support.
Storage
May 17, 2019
The appliance’s local storage is a layer repository where the appliance creates, composites, and stores
layers and layered images. To check the amount of free space in the appliance’s local storage, you can
see how much disk space is used in the System module of the management appliance.
1. Log into the management console and select System > Manage Appliance.
2. In the Services table, the Local Storage for the layering service shows how much space is used
and how much is free.
Note
• Disk space is shown in 1024‑based Gigabytes, not metric.
• Free space is updated every time a layering service job completes. If you want to make
sure the page has been refreshed, click the Refresh icon just above the Manage Appli‑
ance subtab.
• When creating a layer or adding a Version to it, extra space is temporarily required to
build the Packaging Disk. You can calculate the amount of space needed during layer
creation by adding the following layer sizes:
– The size of the OS layer version you’re using.
© 1999–2024 Cloud Soware Group, Inc. All rights reserved. 339

App Layering
– The size of the writable disk you want for the app layer.
– The size of any prerequisite layers (if you have any).
Add a disk to locally attached storage
When you install the appliance, it comes equipped with an additional 300 GB data disk that is used as
a layer repository. You can expand the appliance’s local storage by adding another disk to it.
Aer adding a disk to the appliance virtual machine using your hypervisor console, do the following
steps:
1. Log into your management console.
2. Select System > Manage Appliance.
3. Select Expand Storage. The Disk Selection tab is displayed of disks that are attached to the
system and are not part of the layer repository.
4. Select the check box for each disk that you want to use to expand the layer repository. If a check
box is grayed out and a yellow icon with an ! (exclamation point) is displayed, it means that the
attached disk is not eligible for use (for example, if the disk is not blank). Once the attached disk
is blank and unpartitioned, you will be able to use it to expand the appliance’s local storage.
5. On the Confirm and Complete tab, click Expand Storage.
6. According to best practice, once the disk has been added, reboot the appliance so that the disk
becomes active.
Add space to an existing disk in locally attached storage
If it is not possible to add a new disk, you can add space to an existing local storage disk as follows.
1. Log into your hypervisor’s management console, and follow the normal procedure to increase
the size of the local storage disk. (You may have more than one of these disks, and can expand
each one of them.)
2. Log into the management console and select System > Manage Appliance.
3. Select Expand Storage. A list of expanded disks is displayed. (You might also see attached disks
that are not yet part of the layer repository, but you can ignore those.)
4. Notice that the New Size of the disk you expanded is larger than the Current Size.
5. Select the check box for the disk that you want to expand to the New Size.
6. On the Confirm and Complete tab, click Expand Storage.
Add storage locations for user layers
When you enable user layers on a layered image, the data and settings for each user are persisted
between sessions.
© 1999–2024 Cloud Soware Group, Inc. All rights reserved. 340

App Layering
When deploying with user layers enabled, you can add storage locations for those layers, rather than
allowing user data to be saved on the appliance’s main file share.
When configuring user layer storage locations:
• You can assign groups of users to each location.
• The first storage location added to the appliance becomes the default location for user layers
not associated with any other storage location.
• Storage locations are listed in priority order.
• If a user belongs to more than one group and those groups are assigned to dierent storage
locations, the person’s user layer will be stored in the highest priority storage location. Once
the person’s user layer is saved to the highest priority location, if you change the priority order
of the storage locations that the user is assigned to, data saved up until that point will remain
in the previously highest priority location. To preserve the person’s user layer, you must copy
the their user layer to the new highest priority location.
Create user layer storage locations
To add a storage location:
1. Log into the management console.
2. Select System > User Layer Storage Locations.
3. Select Add Storage Location. A list is displayed of file shares, except for the appliance’s main
file share.
4. Select Add Storage Location, and enter a Name and Network Path for the new location.
5. On the User Layer Assignments tab, expand the directory tree and select the check box(es) for
one or more groups to add to the new storage location.
6. On the Confirm and Complete tab, click Add Storage Location.
Next, you must set security on the user layer folders.
Configure security on user layer folders
You can specify more than one storage location for your user layers. For each storage location (includ‑
ing the default location) you need to create a /Users subfolder and secure that location.
The security on each user layer folder must be set to the following values by a domain administrator:
Setting name Value Apply to
Creator Owner Modify Subfolders and Files only
© 1999–2024 Cloud Soware Group, Inc. All rights reserved. 341

App Layering
Setting name Value Apply to
Owner Rights Modify Subfolders and Files only
Users or group Create Folder/Append Data,
Traverse Folder/Execute File,
List Folder/Read Data, Read
Attributes
Selected Folder Only
System Full Control Selected Folder, Subfolders
and Files
Domain Admins, and selected
Admin group
Full Control Selected Folder, Subfolders
and Files
Set security on the user layer folders
1. Log into the management console.
2. Select System > User Layer Storage Locations. The file shares displayed are the storage loca‑
tions defined for user layers. For example, say you’ve defined three storage locations so that
you can more easily manage storage for Group1 and Group2 separate from everyone else in the
organization:
• Default location ‑ \MyDefaultShare\UserLayerFolder\
• Group1 ‑ \MyGroup1\Share\UserLayerFolder\
• Group2 ‑ \MyGroup2\Share\UserLayerFolder
Note: The appliance’s main file share, which is used for storing OS, app, and platform lay‑
ers, is not listed as a user layer storage location.
3. Create a \Users subdirectory under each file share:
• \MyDefaultShare\UserLayerFolder\Users\
• \MyGroup1Share\UserLayerFolder\Users\
• \MyGroup2Share\UserLayerFolder\Users\
4. Apply the security settings listed above to each /Users subdirectory.
Appliance settings
July 30, 2019
© 1999–2024 Cloud Soware Group, Inc. All rights reserved. 342

App Layering
The Citrix App Layering appliance is a virtual appliance that uses Enterprise Layer Manager (ELM) tech‑
nology. The appliance coordinates communication and manages copies of your layers and image
templates.
Based on CentOS, the appliance hosts the management console. The console lets you create and
manage layers. It also lets you publish layered images using those layers.
You can log into the Appliance Configuration utility to modify the following administrator settings:
• Password
• Network address
• NTP servers
• Time Zone
Note
Appliance settings are not available for editing in Azure.
Before you start
Make sure that:
• The App Layering appliance is running in your hypervisor.
• You have the password for an account with administrator privileges
Log into the appliance using an account with administrator privileges
Using either your hypervisor console or SSH, log into the appliance as administrator. (The first time
you log in, you use the default password, Unidesk1) The Appliance Configuration utility opens.
Configure networking (includes Static IP Address option)
You can change the appliance’s IP address and DNS servers. The default DNS settings are retrieved
using Dynamic Host Configuration Protocol (DHCP).
If DHCP is not available and you select Static, you are prompted to enter the IP addresses for your
DNS servers.
Note:
If you change your appliance’s IP address, you must Manually register the App Layering agent
with the appliance so that the appliance can communicate with the agent.
To change the appliance IP address:
© 1999–2024 Cloud Soware Group, Inc. All rights reserved. 343

App Layering
1. Using either your hypervisor console or SSH, log into the appliance as administrator. (The first
time you log in, use the default password, Unidesk1) The Appliance Configuration utility opens.
2. At the Action prompt, enter C (for Configure Networking), and press Return.
3. At the next prompt, type D for Dynamic (DHCP) or S for Static.
If you choose Static, you are prompted for the IP address and Subnet mask. Also enter the
default addresses for the Gateway and DNS server.
4. When prompted, enter Y to save settings.
5. At the Action prompt, enter Q to quit.
6. Restart the appliance.
Synchronize the system clock with NTP servers
You can synchronize the system clock on the appliance by configuring NTP servers. You can specify:
• How many NTP servers you need, with 6 being the maximum.
• Add and remove NTP servers, as needed.
Where possible your existing servers are used as defaults.
1. Using either your hypervisor console or SSH, log into the appliance as administrator. (The first
time you log in, you use the default password, Unidesk1) The Appliance Configuration utility
opens.
2. At the Action prompt, enter N for NTP servers change, and press Return. A list of your current
NTP servers is displayed.
3. At the prompt, specify how many NTP servers you need by typing a number from 0 to 6.
0 ‑ All servers are removed (you receive a warning).
1–6 ‑ You are prompted to accept or replace each of the current servers.
4. For each server, press Enter to acceptthe current value. Or, enter a new server address (Example:
3.pool.ntp.org). Once the last address is entered, an NTP Server Summary is displayed.
5. Enter S to save the settings.
6. At the Action prompt, enter Q to quit.
7. Restart the appliance.
Change the Time Zone
1. Using either your hypervisor console or SSH, log into the appliance as administrator. (The first
time you log in, you use the default password, Unidesk1) The Appliance Configuration utility
opens.
2. At the Action prompt, enter T for Timezone change, and press Return. The current time zone is
displayed.
© 1999–2024 Cloud Soware Group, Inc. All rights reserved. 344

App Layering
3. Press Enter to display available timezones. The time zones listed are in alphabetical order, start‑
ing with the
4. Advance through the timezone codes until you see yours:
Enter ‑ Advances one line at a time.
Page Up Page Down ‑ Displays the next or previous screen full of choices.
Or search the timezones:
Type Slash (/) and part of the name you are looking for.
5. When your timezone is displayed, press Q to get to the prompt.
6. Type the number for your timezone. The timezone you entered is displayed.
7. Press Enter to complete the change.
8. At the Action prompt, enter Q to quit.
9. Restart the appliance.
App Layering services
May 30, 2019
The following services run on the App Layering appliance:
• Management service
• Layering service
• BITS server service
The services are displayed on the System tab.
Management service
The App Layering appliance uses the Management service to communicate with the following servers,
agents, and platform soware:
• Active Directory
• Windows file servers
• Network time servers
• Unix file servers
• DHCP server
• App Layering agents
• Your hypervisor and provisioning service
The firewall ports for each of the above components must be open. For details, see Firewall ports.
© 1999–2024 Cloud Soware Group, Inc. All rights reserved. 345

App Layering
Layering service
The Layering service manages your layers and image templates. The appliance keeps a set of master
layers on its local storage, and Elastic layers on the appliance’s File Share.
Note: Elastic layers are copies of App layers stored on the appliance’s File Share. Elastic layers are
delivered upon user login, rather than as part of the layered image.
On the System module, the Layering service shows the amount of available space on each of your File
Shares.
BITS Server service
The App Layering appliance copies files to and from the appliance using Microso’s BITS Server ser‑
vice and the location specified in the connector configuration.
Firewall ports for the BITS Server service
Open the firewall ports for the BITS Server service. For details, see Firewall ports.
BITS Server logs
BITS Server produces its own logs, which you can find here:
/var/log/Unidesk
The logs are based on the log4net configuration settings, which you can find in the following loca‑
tion:
source\BitsServer\Citrix.AppLayering.BitsServer\log4net.config
If you want to change the Uploads folder location
You can mount another volume to use for BITS uploads by configuring the path to the volume for both
the BITS server and the Hyper‑V connector.
1. Mount the new volume.
2. Edit the Uploads folder location for BITS Server in the following json file:
/var/aspnetcore/bits-server/appsettings.Production.json
Change default UploadFolder settings of /mnt/repository/Uploads to the new location, for ex‑
ample /mnt/test/Uploads.
© 1999–2024 Cloud Soware Group, Inc. All rights reserved. 346

App Layering
3. Locate the connector configuration file:
/usr/local/lib/node_modules/unidesk-hyperv-connector/config.json
Change the default upload folder (called fileUploadFolderPath) from /mnt/repository/Uploads
to the new location:
4. Restart both services:
1 systemctl restart kestrel-bits-server
2 systemctl restart unidesk-hyperv-connector
3 <!--NeedCopy-->
5. Update the group and permissions on the new Uploads folder:
1 chmod 770 /mnt/test/Uploads
2 chmod g+s /mnt/test/Uploads
3 chgrp apache /mnt/test/Uploads
4 <!--NeedCopy-->
Directory service
June 14, 2022
You can configure the appliance to connect to a directory service, for example, Active Directory. When
you connect to your directory service, you will create one or more Directory Junctions to access spe‑
cific domains or OUs. The appliance does not modify the directory service you connect to. The so‑
ware caches the attributes for each directory service entry, so that if the connection to the directory
service is lost temporarily, the soware can use the cached information for management tasks.
When creating a Directory Junction, you use the following industry standard acronyms:
• OU ‑ Organizational Unit
• DC ‑ Domain Component
About connecting the appliance to a directory service
In the Management Console, the System > Directory Services displays information on Users and
Groups.
Supported protocols
When binding to a directory service, the App Layering appliance is compatible with the following se‑
cure socket and transport layer protocols:
© 1999–2024 Cloud Soware Group, Inc. All rights reserved. 347

App Layering
• Secure Socket Layer:
– SSL 3.0
• Transport Layer Security:
– TLS 1.1
– TLS 1.2
What happens when you add Directory Junctions
Each Directory Junction that you create specifies a starting node in the directory tree. A new directory
junction cannot include users who are already members of another junction, and junctions cannot be
nested.
If you add a Parent Directory Junction, all of its children are migrated to that junction. All imported
Users and Groups will be moved to the Parent, along with all Elastic Assignments. Aer being moved,
the Child Directory Junctions are deleted.
**If you’re creating several Distinguished Names
**
The system compares the Domain Component first—the portions of the DistinguishedName that start
with “DC=”. Please be aware that in Distinguished Names, order matters. For example, DC=A,DC=B
is dierent than DC=B,DC=A. The system adds separate Directory Junctions if their DC components
dier, or if their DC components match and the remaining components do not overlap. Directory
Junctions are merged if their DC components match and their other components are related.
User attributes are imported from the directory service
The App Layering soware imports and caches user and group attributes from your directory service
when:
• You assign administrator privileges to a user.
• The values of the attributes change in the directory service.
The attributes that the soware caches are read only. All changes to the attributes for directory service
users come from the directory server.
Imported attributes are synchronized regularly
The soware synchronizes the information it caches for directory service users with the directory ser‑
vice every 12 hours. If the soware discovers that a user is no longer an object in the directory ser‑
© 1999–2024 Cloud Soware Group, Inc. All rights reserved. 348

App Layering
vice, it classifies the user as abandoned (you can view this information in the Information view for the
user).
Create a directory junction
1. Click System > Directory Services.
2. Click Add Directory Junction.
3. Specify the details for the directory server:
• Server address ‑ The name for the server that you use for the directory service (IP Address
or DNS Name).
• Port ‑ Specify the port number for communicating with the directory server.
• Use SSL ‑ Click to enable Secure Sockets Layer (SSL) communication.
If certificate errors occur, a list of these errors displays. If you are sure it is safe to ignore
them, click Accept and Continue.
• Bind Distinguished Name (DN) ‑ To determine the correct syntax for the Bind DN or user
name, see the documentation for your directory. The following examples show some of
the ways you can specify a user for the directory service:
– domain\username
– username@domain.com.
• Bind Password ‑ Type the password.
• Base Distinguished Name ‑ Specify where the soware starts searching for users and
groups in the remote directory service.
• Directory Junction Name ‑ The name of the folder that you see in the tree view. You can
use any name, including the name of a domain in your directory service tree.
4. CLick Confirm and Complete.
Users
May 23, 2023
This section explains how to manage your users and user groups.
For more information on assigning user roles, see Assign roles.
For more information on connecting to a directory service, see Connect to a directory service.
© 1999–2024 Cloud Soware Group, Inc. All rights reserved. 349

App Layering
Users and groups
May 23, 2023
When you first install the App Layering appliance and log onto the management console, there is a
built‑in administrator account that you can use to get started. This administrator has the rights to
perform all App Layering operations. You can edit this user’s properties, including the name, pass‑
word, and contact info. Be sure to change the password for this built‑in administrator account as part
of installing and configuring the appliance.
Local users and groups
The OS layer preserves any local users or groups that you add, but app layers, platform layers, user
layers, and elasticlayers do not. Forexample, users and groups that you add or changewhile installing
an application on an app layer, platform layer, or user layer don’t persist. Either add the local user or
administrator to the OS layer before installing the application, or consider installing the application
on the OS layer.
AD users and groups
Other than the built‑in administrator account, all users and groups are actually AD users and groups
imported via one or more directory junctions. Once your directory junctions are created, you can
assign roles to each user. You can see the roles assigned to a user in the User Details. For configuration
details, see Connect to a directory service.
Roles
Roles determine the App Layering modules a user can manage. When you assign roles to Directory
Service users and groups, they can use their Directory Service credentials to log into the management
console. For more information on assigning user roles, see Assign roles.
Firewall ports
April 3, 2024
The App Layering appliance communicates with your hypervisor, provisioning service, and the App
Layering agent. This article details the ports that the appliance uses to communicate both internally
© 1999–2024 Cloud Soware Group, Inc. All rights reserved. 350

App Layering
with other App Layering‑related services, and externally with servers, such as NTP servers. Be sure to
open the necessary ports in your firewall before you install the App Layering appliance.
During App Layering installation, you open ports that the appliance uses to interact with services on
the virtual server where it is hosted. If there is a firewall between the App Layering appliance and the
machine on which you are running the App Layering agent or one of the App Layering connectors, you
must manually open the port in the firewall used for that purpose. If during installation you changed
any of the ports from the default setting, be sure to open the correct port.
The App Layering appliance uses the TCP/IP protocol, and IPv4 is required. There are three main
classes of communication:
• Accessing and managing the appliance.
• Talking to other App Layering agent service.
• Talking directly to hypervisors that don’t require the agent.
Note:
The App Layering appliance must be connected to a network file share.
Admin user
By default, App Layering uses the following ports in your firewall for the Admin User to interact with
the Management console on the App Layering appliance virtual machine.
App Layering appliance
The connector services for the various hypervisors and provisioning services listed below all run on
the App Layering appliance.
App Layering
Destination Activity Protocol Ports
Appliance Management console TCP 80, 443
Legacy Azure
connector service
Communication TCP 3000 (HTTP), 3500
(HTTPS)
BITS Server Disk upload TCP 3015 (HTTP), 3515
(HTTPS)
Citrix Provisioning
connector service
Communication TCP 3009 (HTTP), 3509
(HTTPS)
Google connector
service ‑ Google Cloud
Communication TCP 3016 (HTTP), 3516
(HTTPS)
© 1999–2024 Cloud Soware Group, Inc. All rights reserved. 351

App Layering
App Layering
Destination Activity Protocol Ports
Hyper‑V connector
service
Communication TCP 3012 (HTTP), 3512
(HTTPS)
Internal connections
By default, the App Layering service uses the following ports in your firewall for internal connections
between the appliance and each of its destinations.
In the table, the following shorthand is used:
• Appliance ‑ The App Layering virtual appliance.
• Agent ‑ refers to the App Layering agent.
• Admin user ‑ A management console user who is assigned the App Layering Admin role.
• Compositing machine ‑ A virtual machine used to create and update layers using the App Lay‑
ering compositing engine, including:
– Virtual machine created when you use a connector with Oload compositing enabled to
create a layer, add a version to a layer, or publish a layered image.
– Virtual machine in which the ImportOsLayer.ps1 script runs to import the OS image
as a new OS layer.
App Layering
Source
App Layering
Destination Activity Protocol Ports
Agent Appliance Initial registration TCP 443
Appliance Agent Communication TCP 8016
Agent Appliance Log deliveries
from agent
TCP 8787
Appliance vCenter, ESXI
hosts
Communication
with datastore via
ESXI host
TCP 443
Appliance Active directory LDAP TCP 389, 636
Appliance Compositing
machine
Communication TCP 443
Compositing
machine
Appliance Communication TCP 443
Compositing
machine
Appliance Layer disk access
via iSCSI
TCP 3260
© 1999–2024 Cloud Soware Group, Inc. All rights reserved. 352

App Layering
App Layering
Source
App Layering
Destination Activity Protocol Ports
Admin user Appliance Legacy Azure
connector
communication
TCP 3000 (HTTP),
3500 (HTTPS)
Appliance Azure Communication TCP 443
Admin user Appliance Citrix
Provisioning
connector
communication
TCP 3009 (HTTP),
3509 (HTTPS)
Agent on Citrix
Provisioning
server
Appliance Disk download TCP 3009 (HTTP),
3509 (HTTPS)
Admin user Appliance Hyper‑V
connector
communication
TCP 3012 (HTTP),
3512 (HTTPS)
Agent on Hyper‑V
server
Appliance Disk download TCP 3012 (HTTP),
3512 (HTTPS)
Agent on Hyper‑V
server
Appliance Disk upload TCP 3015 (HTTP),
3515 (HTTPS)
Appliance vSphere Communication TCP 443
Appliance XenServer Communication TCP 5900
Appliance Prism Disk upload TCP 2222
Appliance Prism Communication TCP 9440
External connection
By default, use the following port in your firewall for external connections between the App Layering
appliance and the destination listed below.
Note:
These URLs are only accessible by the appliance using the credentials defined for it. Attempting
to browse these sites results in an error message.
© 1999–2024 Cloud Soware Group, Inc. All rights reserved. 353

App Layering
App Layering
Destination Activity Protocol Ports
<https://
applayeringwebapi
.azurewebsites.
net>
API Access TCP 443
<http://alcdn.
citrix.com/>
Download upgrade
media
TCP 80
OS image, a XenServer requirement
Destination Activity Protocol Ports
XenServer Communication TCP 5900
Key ports
Basic appliance management and access (always required)
• HTTP ‑ Port 80
• HTTPS ‑ Port 443
• SSH ‑ Port 22
Servers
• Active Directory server ‑ Port 389 ‑ LDAP protocol
• Active Directory server ‑ Port 636 ‑ LDAPS protocol
• Active Directory server ‑ Port 53 ‑ DNS protocol
• Windows file servers, SMB ‑ Port 445 ‑ SMB protocol
• Network time servers ‑ Port 123 ‑ NTP protocol
• Unix file servers ‑ Port 2049 ‑ NFS protocol
• DHCP server, DHCP ‑ Port 67 ‑ UDP protocol
• App Layering appliance ‑ Port 68 ‑ DHCP protocol
App Layering agent
The agent uses the following ports for communications with itself and the appliance.
© 1999–2024 Cloud Soware Group, Inc. All rights reserved. 354
• Appliance to agent server:
– Commands from appliance/SOAP ‑ Port 8016
• Agent server to appliance:
– Registration ‑ Port 443 HTTPS
– Log export ‑ Port 8787
– Citrix Provisioning disk download ‑ Ports 3009 HTTP, 3509 HTTPS
– Hyper‑V disk download ‑ Ports 3012 HTTP, 3512 HTTPS
– Hyper‑V disk upload ‑ Ports 3015 HTTP, 3515 HTTPS
Connectors to hypervisors and provisioning services
Connectors on the appliance allow the appliance to communicate directly with the supported hyper‑
visors and provisioning services using the following ports.
• XenServer ‑ Port 5900
• Citrix Provisioning ‑ Port 8016 (App Layering agent)
• Google Cloud ‑ Port 443
• Microso Azure management ‑ Port 443
• Microso Hyper‑V ‑ Port 8016 (App Layering agent)
• Nutanix AHV ‑ Port 2222, 9440
• VMware vSphere ‑ Port 443 (Virtual Center, and ESX hosts for disk transfers)

App Layering
© 2024 Cloud Soware Group, Inc. All rights reserved. Cloud Soware Group, the Cloud Soware Group logo, and other
marks appearing herein are property of Cloud Soware Group, Inc. and/or one or more of its subsidiaries, and may be
registered with the U.S. Patent and Trademark Oice and in other countries. All other marks are the property of their
respective owner(s).
© 1999–2024 Cloud Soware Group, Inc. All rights reserved. 356
