

This work is licensed under a Creative Commons Attribution-NonCommercial-ShareAlike 4.0
International License.
ISBN 978-0-9997730-5-5

From Containers to Kubernetes with
Node.js
Kathleen Juell
DigitalOcean, New York City, New York, USA
2020-05

From Containers to Kubernetes with
Node.js
1. About DigitalOcean
2. Preface - Getting Started with this Book
3. Introduction
4. How To Build a Node.js Application with Docker
5. How To Integrate MongoDB with Your Node Application
6. Containerizing a Node.js Application for Development With
Docker Compose
7. How To Migrate a Docker Compose Workflow to Kubernetes
8. How To Scale a Node.js Application with MongoDB on
Kubernetes Using Helm
9. How To Secure a Containerized Node.js Application with Nginx,
Let’s Encrypt, and Docker Compose

About DigitalOcean
DigitalOcean is a cloud services platform delivering the simplicity
developers love and businesses trust to run production applications at
scale. It provides highly available, secure and scalable compute, storage
and networking solutions that help developers build great software faster.
Founded in 2012 with offices in New York and Cambridge, MA,
DigitalOcean offers transparent and affordable pricing, an elegant user
interface, and one of the largest libraries of open source resources
available. For more information, please visit
https://www.digitalocean.com or follow @digitalocean on Twitter.

Preface - Getting Started with this Book
To work with the examples in this book, we recommend that you have a
local development environment running Ubuntu 18.04. For examples that
model pushing code to production, we recommend that you provision a
remote Ubuntu 18.04 server. This will be important as you begin exploring
how to deploy to production with containers and SSL certificates.
When working with Kubernetes, we also recommend that you have a
local machine or server with the kubectl command line tool installed.
Each chapter of the book will also have clear requirements that pertain
to the instructions it covers.

Introduction
About this Book
This book is designed as an introduction to containers and Kubernetes by
way of Node.js. Containers are the basis for distributed, repeatable
workflows with orchestrators such as Kubernetes, and they allow
developers and operators to develop applications consistently across
environments and deploy in a repeatable and predictable fashion.
The examples in this book focus on Node.js, a JavaScript runtime, and
demonstrate how to develop an application that communicates with a
MongoDB backend. Though the chapters of the book cover cumulative
topics – from how to develop a stateless application, to adding storage, to
containerization – they can also be used as independent guides.
Feel free to use the chapters in order, or jump to the discussion that best
suits your purpose.
Motivation for this Book
Often, resources on development and deployment are relatively
independent of one another: guides on containers and Kubernetes rarely
cover application development, and tutorials on languages and frameworks
are often focused on languages and other nuances rather than on
deployment.
This book is designed to be a full-stack introduction to containers and
Kubernetes by way of Node.js application development. It assumes that
readers want an introduction not only to the fundamentals of

containerization, but also to the basics of working with Node and a NoSQL
database backend.
Learning Goals and Outcomes
The goal for this guide is to serve readers interested in Node application
development, as well as readers who would like to learn more about
working with containers and container orchestrators. It assumes a shared
interest in moving away from highly individuated local environments, in
favor of repeatable, reproducible application environments that ensure
consistency and ultimately resiliency over time.

How To Build a Node.js Application with
Docker
Written by Kathleen Juell
The first chapter of this book will introduce you to building a Node.js
application with the Express framework. Once you have the application
built and working locally, you will turn it into an image that you can run
with the Docker container engine. From there, you’ll learn how to publish
the image to Docker Hub so that it can be run as a container on any system
that supports Docker images. Finally, you’ll use the image from Docker
Hub to run your application as a container, which will demonstrate how
you can develop a workflow that moves code from a local development
environment all the way to a production-ready application that is deployed
using containers.
The Docker platform allows developers to package and run applications
as containers. A container is an isolated process that runs on a shared
operating system, offering a lighter weight alternative to virtual machines.
Though containers are not new, they offer benefits — including process
isolation and environment standardization — that are growing in
importance as more developers use distributed application architectures.
When building and scaling an application with Docker, the starting
point is typically creating an image for your application, which you can
then run in a container. The image includes your application code,
libraries, configuration files, environment variables, and runtime. Using

an image ensures that the environment in your container is standardized
and contains only what is necessary to build and run your application.
In this tutorial, you will create an application image for a static website
that uses the Express framework and Bootstrap. You will then build a
container using that image and push it to Docker Hub for future use.
Finally, you will pull the stored image from your Docker Hub repository
and build another container, demonstrating how you can recreate and scale
your application.
Prerequisites
To follow this tutorial, you will need: - One Ubuntu 18.04 server, set up
following this Initial Server Setup guide. - Docker installed on your server,
following Steps 1 and 2 of How To Install and Use Docker on Ubuntu
18.04. - Node.js and npm installed, following these instructions on
installing with the PPA managed by NodeSource. - A Docker Hub account.
For an overview of how to set this up, refer to this introduction on getting
started with Docker Hub.
Step 1 — Installing Your Application Dependencies
To create your image, you will first need to make your application files,
which you can then copy to your container. These files will include your
application’s static content, code, and dependencies.
First, create a directory for your project in your non-root user’s home
directory. We will call ours node_project, but you should feel free to
replace this with something else:
mkdir node_project

Navigate to this directory:
cd node_project
This will be the root directory of the project.
Next, create a package.json file with your project’s dependencies
and other identifying information. Open the file with nano or your
favorite editor:
nano package.json
Add the following information about the project, including its name,
author, license, entrypoint, and dependencies. Be sure to replace the author
information with your own name and contact details:

~/node_project/package.json
{
"name": "nodejs-image-demo",
"version": "1.0.0",
"description": "nodejs image demo",
"author": "Sammy the Shark <[email protected]>",
"license": "MIT",
"main": "app.js",
"keywords": [
"nodejs",
"bootstrap",
"express"
],
"dependencies": {
"express": "^4.16.4"
}
}
This file includes the project name, author, and license under which it is
being shared. Npm recommends making your project name short and
descriptive, and avoiding duplicates in the npm registry. We’ve listed the
MIT license in the license field, permitting the free use and distribution of
the application code.
Additionally, the file specifies: - "main": The entrypoint for the
application, app.js. You will create this file next. - "dependencies":
The project dependencies — in this case, Express 4.16.4 or above.

Though this file does not list a repository, you can add one by following
these guidelines on adding a repository to your package.json file. This
is a good addition if you are versioning your application.
Save and close the file when you’ve finished making changes.
To install your project’s dependencies, run the following command:
npm install
This will install the packages you’ve listed in your package.json
file in your project directory.
We can now move on to building the application files.
Step 2 — Creating the Application Files
We will create a website that offers users information about sharks. Our
application will have a main entrypoint, app.js, and a views directory
that will include the project’s static assets. The landing page,
index.html, will offer users some preliminary information and a link
to a page with more detailed shark information, sharks.html. In the
views directory, we will create both the landing page and
sharks.html.
First, open app.js in the main project directory to define the project’s
routes:
nano app.js
The first part of the file will create the Express application and Router
objects, and define the base directory and port as constants:

~/node_project/app.js
const express = require('express');
const app = express();
const router = express.Router();
const path = __dirname + '/views/';
const port = 8080;
The require function loads the express module, which we then use
to create the app and router objects. The router object will perform
the routing function of the application, and as we define HTTP method
routes we will add them to this object to define how our application will
handle requests.
This section of the file also sets a couple of constants, path and port:
- path: Defines the base directory, which will be the views subdirectory
within the current project directory. - port: Tells the app to listen on and
bind to port 8080.
Next, set the routes for the application using the router object:

~/node_project/app.js
...
router.use(function (req,res,next) {
console.log('/' + req.method);
next();
});
router.get('/', function(req,res){
res.sendFile(path + 'index.html');
});
router.get('/sharks', function(req,res){
res.sendFile(path + 'sharks.html');
});
The router.use function loads a middleware function that will log
the router’s requests and pass them on to the application’s routes. These
are defined in the subsequent functions, which specify that a GET request
to the base project URL should return the index.html page, while a
GET request to the /sharks route should return sharks.html.
Finally, mount the router middleware and the application’s static
assets and tell the app to listen on port 8080:

~/node_project/app.js
...
app.use(express.static(path));
app.use('/', router);
app.listen(port, function () {
console.log('Example app listening on port 8080!')
})
The finished app.js file will look like this:

~/node_project/app.js
const express = require('express');
const app = express();
const router = express.Router();
const path = __dirname + '/views/';
const port = 8080;
router.use(function (req,res,next) {
console.log('/' + req.method);
next();
});
router.get('/', function(req,res){
res.sendFile(path + 'index.html');
});
router.get('/sharks', function(req,res){
res.sendFile(path + 'sharks.html');
});
app.use(express.static(path));
app.use('/', router);
app.listen(port, function () {
console.log('Example app listening on port 8080!')
})

Save and close the file when you are finished.
Next, let’s add some static content to the application. Start by creating
the views directory:
mkdir views
Open the landing page file, index.html:
nano views/index.html
Add the following code to the file, which will import Boostrap and
create a jumbotron component with a link to the more detailed
sharks.html info page:

~/node_project/views/index.html
<!DOCTYPE html>
<html lang="en">
<head>
<title>About Sharks</title>
<meta charset="utf-8">
<meta name="viewport" content="width=device-width, initial-
scale=1">
<link rel="stylesheet"
href="https://stackpath.bootstrapcdn.com/bootstrap/4.1.3/css/bootst
rap.min.css" integrity="sha384-
MCw98/SFnGE8fJT3GXwEOngsV7Zt27NXFoaoApmYm81iuXoPkFOJwJ8ERdknLPMO"
crossorigin="anonymous">
<link href="css/styles.css" rel="stylesheet">
<link href="https://fonts.googleapis.com/css?
family=Merriweather:400,700" rel="stylesheet" type="text/css">
</head>
<body>
<nav class="navbar navbar-dark bg-dark navbar-static-top
navbar-expand-md">
<div class="container">
<button type="button" class="navbar-toggler collapsed"
data-toggle="collapse" data-target="#bs-example-navbar-collapse-1"
aria-expanded="false"> <span class="sr-only">Toggle
navigation</span>

</button> <a class="navbar-brand" href="#">Everything
Sharks</a>
<div class="collapse navbar-collapse" id="bs-example-
navbar-collapse-1">
<ul class="nav navbar-nav mr-auto">
<li class="active nav-item"><a href="/"
class="nav-link">Home</a>
</li>
<li class="nav-item"><a href="/sharks"
class="nav-link">Sharks</a>
</li>
</ul>
</div>
</div>
</nav>
<div class="jumbotron">
<div class="container">
<h1>Want to Learn About Sharks?</h1>
<p>Are you ready to learn about sharks?</p>
<br>
<p><a class="btn btn-primary btn-lg" href="/sharks"
role="button">Get Shark Info</a>
</p>
</div>
</div>
<div class="container">
<div class="row">

<div class="col-lg-6">
<h3>Not all sharks are alike</h3>
<p>Though some are dangerous, sharks generally do
not attack humans. Out of the 500 species known to researchers,
only 30 have been known to attack humans.
</p>
</div>
<div class="col-lg-6">
<h3>Sharks are ancient</h3>
<p>There is evidence to suggest that sharks lived
up to 400 million years ago.
</p>
</div>
</div>
</div>
</body>
</html>
The top-level navbar here allows users to toggle between the Home and
Sharks pages. In the navbar-nav subcomponent, we are using
Bootstrap’s active class to indicate the current page to the user. We’ve
also specified the routes to our static pages, which match the routes we
defined in app.js:

~/node_project/views/index.html
...
<div class="collapse navbar-collapse" id="bs-example-navbar-
collapse-1">
<ul class="nav navbar-nav mr-auto">
<li class="active nav-item"><a href="/" class="nav-
link">Home</a>
</li>
<li class="nav-item"><a href="/sharks" class="nav-
link">Sharks</a>
</li>
</ul>
</div>
...
Additionally, we’ve created a link to our shark information page in our
jumbotron’s button:

~/node_project/views/index.html
...
<div class="jumbotron">
<div class="container">
<h1>Want to Learn About Sharks?</h1>
<p>Are you ready to learn about sharks?</p>
<br>
<p><a class="btn btn-primary btn-lg" href="/sharks"
role="button">Get Shark Info</a>
</p>
</div>
</div>
...
There is also a link to a custom style sheet in the header:
~/node_project/views/index.html
...
<link href="css/styles.css" rel="stylesheet">
...
We will create this style sheet at the end of this step.
Save and close the file when you are finished.
With the application landing page in place, we can create our shark
information page, sharks.html, which will offer interested users more
information about sharks.
Open the file:

nano views/sharks.html
Add the following code, which imports Bootstrap and the custom style
sheet and offers users detailed information about certain sharks:

~/node_project/views/sharks.html
<!DOCTYPE html>
<html lang="en">
<head>
<title>About Sharks</title>
<meta charset="utf-8">
<meta name="viewport" content="width=device-width, initial-
scale=1">
<link rel="stylesheet"
href="https://stackpath.bootstrapcdn.com/bootstrap/4.1.3/css/bootst
rap.min.css" integrity="sha384-
MCw98/SFnGE8fJT3GXwEOngsV7Zt27NXFoaoApmYm81iuXoPkFOJwJ8ERdknLPMO"
crossorigin="anonymous">
<link href="css/styles.css" rel="stylesheet">
<link href="https://fonts.googleapis.com/css?
family=Merriweather:400,700" rel="stylesheet" type="text/css">
</head>
<nav class="navbar navbar-dark bg-dark navbar-static-top navbar-
expand-md">
<div class="container">
<button type="button" class="navbar-toggler collapsed"
data-toggle="collapse" data-target="#bs-example-navbar-collapse-1"
aria-expanded="false"> <span class="sr-only">Toggle
navigation</span>
</button> <a class="navbar-brand" href="/">Everything
Sharks</a>

<div class="collapse navbar-collapse" id="bs-example-
navbar-collapse-1">
<ul class="nav navbar-nav mr-auto">
<li class="nav-item"><a href="/" class="nav-
link">Home</a>
</li>
<li class="active nav-item"><a href="/sharks"
class="nav-link">Sharks</a>
</li>
</ul>
</div>
</div>
</nav>
<div class="jumbotron text-center">
<h1>Shark Info</h1>
</div>
<div class="container">
<div class="row">
<div class="col-lg-6">
<p>
<div class="caption">Some sharks are known to be
dangerous to humans, though many more are not. The sawshark, for
example, is not considered a threat to humans.
</div>
<img
src="https://assets.digitalocean.com/articles/docker_node_image/saw
shark.jpg" alt="Sawshark">

</p>
</div>
<div class="col-lg-6">
<p>
<div class="caption">Other sharks are known to be
friendly and welcoming!</div>
<img
src="https://assets.digitalocean.com/articles/docker_node_image/sam
my.png" alt="Sammy the Shark">
</p>
</div>
</div>
</div>
</html>
Note that in this file, we again use the active class to indicate the
current page.
Save and close the file when you are finished.
Finally, create the custom CSS style sheet that you’ve linked to in
index.html and sharks.html by first creating a css folder in the
views directory:
mkdir views/css
Open the style sheet:
nano views/css/styles.css
Add the following code, which will set the desired color and font for our
pages:

~/node_project/views/css/styles.css
.navbar {
margin-bottom: 0;
}
body {
background: #020A1B;
color: #ffffff;
font-family: 'Merriweather', sans-serif;
}
h1,
h2 {
font-weight: bold;
}
p {
font-size: 16px;
color: #ffffff;
}
.jumbotron {
background: #0048CD;
color: white;
text-align: center;
}

.jumbotron p {
color: white;
font-size: 26px;
}
.btn-primary {
color: #fff;
text-color: #000000;
border-color: white;
margin-bottom: 5px;
}
img,
video,
audio {
margin-top: 20px;
max-width: 80%;
}
div.caption: {
float: left;
clear: both;
}
In addition to setting font and color, this file also limits the size of the
images by specifying a max-width of 80%. This will prevent them from
taking up more room than we would like on the page.

Save and close the file when you are finished.
With the application files in place and the project dependencies
installed, you are ready to start the application.
If you followed the initial server setup tutorial in the prerequisites, you
will have an active firewall permitting only SSH traffic. To permit traffic
to port 8080 run:
sudo ufw allow 8080
To start the application, make sure that you are in your project’s root
directory:
cd ~/node_project
Start the application with node app.js:
node app.js
Navigate your browser to http://your_server_ip:8080. You
will see the following landing page:
Application Landing Page

Click on the Get Shark Info button. You will see the following
information page:
Shark Info Page
You now have an application up and running. When you are ready, quit
the server by typing CTRL+C. We can now move on to creating the
Dockerfile that will allow us to recreate and scale this application as
desired.
Step 3 — Writing the Dockerfile
Your Dockerfile specifies what will be included in your application
container when it is executed. Using a Dockerfile allows you to define
your container environment and avoid discrepancies with dependencies or
runtime versions.
Following these guidelines on building optimized containers, we will
make our image as efficient as possible by minimizing the number of

image layers and restricting the image’s function to a single purpose —
recreating our application files and static content.
In your project’s root directory, create the Dockerfile:
nano Dockerfile
Docker images are created using a succession of layered images that
build on one another. Our first step will be to add the base image for our
application that will form the starting point of the application build.
Let’s use the node:10-alpine image, since at the time of writing
this is the recommended LTS version of Node.js. The alpine image is
derived from the Alpine Linux project, and will help us keep our image
size down. For more information about whether or not the alpine image
is the right choice for your project, please see the full discussion under the
Image Variants section of the Docker Hub Node image page.
Add the following FROM instruction to set the application’s base image:
~/node_project/Dockerfile
FROM node:10-alpine
This image includes Node.js and npm. Each Dockerfile must begin with
a FROM instruction.
By default, the Docker Node image includes a non-root node user that
you can use to avoid running your application container as root. It is a
recommended security practice to avoid running containers as root and to
restrict capabilities within the container to only those required to run its
processes. We will therefore use the node user’s home directory as the
working directory for our application and set them as our user inside the

container. For more information about best practices when working with
the Docker Node image, see this best practices guide.
To fine-tune the permissions on our application code in the container,
let’s create the node_modules subdirectory in /home/node along
with the app directory. Creating these directories will ensure that they
have the permissions we want, which will be important when we create
local node modules in the container with npm install. In addition to
creating these directories, we will set ownership on them to our node user:
~/node_project/Dockerfile
...
RUN mkdir -p /home/node/app/node_modules && chown -R node:node
/home/node/app
For more information on the utility of consolidating RUN instructions,
see this discussion of how to manage container layers.
Next, set the working directory of the application to
/home/node/app:
~/node_project/Dockerfile
...
WORKDIR /home/node/app
If a WORKDIR isn’t set, Docker will create one by default, so it’s a good
idea to set it explicitly.
Next, copy the package.json and package-lock.json (for npm
5+) files:

~/node_project/Dockerfile
...
COPY package*.json ./
Adding this COPY instruction before running npm install or
copying the application code allows us to take advantage of Docker’s
caching mechanism. At each stage in the build, Docker will check to see if
it has a layer cached for that particular instruction. If we change
package.json, this layer will be rebuilt, but if we don’t, this
instruction will allow Docker to use the existing image layer and skip
reinstalling our node modules.
To ensure that all of the application files are owned by the non-root
node user, including the contents of the node_modules directory, switch
the user to node before running npm install:
~/node_project/Dockerfile
...
USER node
After copying the project dependencies and switching our user, we can
run npm install:
~/node_project/Dockerfile
...
RUN npm install

Next, copy your application code with the appropriate permissions to
the application directory on the container:
~/node_project/Dockerfile
...
COPY --chown=node:node . .
This will ensure that the application files are owned by the non-root
node user.
Finally, expose port 8080 on the container and start the application:
~/node_project/Dockerfile
...
EXPOSE 8080
CMD [ "node", "app.js" ]
EXPOSE does not publish the port, but instead functions as a way of
documenting which ports on the container will be published at runtime.
CMD runs the command to start the application — in this case, node
app.js. Note that there should only be one CMD instruction in each
Dockerfile. If you include more than one, only the last will take effect.
There are many things you can do with the Dockerfile. For a complete
list of instructions, please refer to Docker’s Dockerfile reference
documentation.
The complete Dockerfile looks like this:

~/node_project/Dockerfile
FROM node:10-alpine
RUN mkdir -p /home/node/app/node_modules && chown -R node:node
/home/node/app
WORKDIR /home/node/app
COPY package*.json ./
USER node
RUN npm install
COPY --chown=node:node . .
EXPOSE 8080
CMD [ "node", "app.js" ]
Save and close the file when you are finished editing.
Before building the application image, let’s add a .dockerignore
file. Working in a similar way to a .gitignore file, .dockerignore
specifies which files and directories in your project directory should not
be copied over to your container.
Open the .dockerignore file:

nano .dockerignore
Inside the file, add your local node modules, npm logs, Dockerfile, and
.dockerignore file:
~/node_project/.dockerignore
node_modules
npm-debug.log
Dockerfile
.dockerignore
If you are working with Git then you will also want to add your .git
directory and .gitignore file.
Save and close the file when you are finished.
You are now ready to build the application image using the docker
build command. Using the -t flag with docker build will allow
you to tag the image with a memorable name. Because we are going to
push the image to Docker Hub, let’s include our Docker Hub username in
the tag. We will tag the image as nodejs-image-demo, but feel free to
replace this with a name of your own choosing. Remember to also replace
your_dockerhub_username with your own Docker Hub username:
docker build -t your_dockerhub_username/nodejs-
image-demo .
The . specifies that the build context is the current directory.
It will take a minute or two to build the image. Once it is complete,
check your images:
docker images

You will see the following output:
Output
REPOSITORY TAG
IMAGE ID CREATED SIZE
your_dockerhub_username/nodejs-image-demo latest
1c723fb2ef12 8 seconds ago 73MB
node 10-alpine
f09e7c96b6de 3 weeks ago 70.7MB
It is now possible to create a container with this image using docker
run. We will include three flags with this command: - -p: This publishes
the port on the container and maps it to a port on our host. We will use port
80 on the host, but you should feel free to modify this as necessary if you
have another process running on that port. For more information about
how this works, see this discussion in the Docker docs on port binding. - -
d: This runs the container in the background. - --name: This allows us to
give the container a memorable name.
Run the following command to build the container:
docker run --name nodejs-image-demo -p 80:8080 -d
your_dockerhub_username/nodejs-image-demo
Once your container is up and running, you can inspect a list of your
running containers with docker ps:
docker ps
You will see the following output:

Output
CONTAINER ID IMAGE
COMMAND CREATED STATUS PORTS
NAMES
e50ad27074a7 your_dockerhub_username/nodejs-image-demo
"node app.js" 8 seconds ago Up 7 seconds
0.0.0.0:80->8080/tcp nodejs-image-demo
With your container running, you can now visit your application by
navigating your browser to http://your_server_ip. You will see
your application landing page once again:
Application Landing Page
Now that you have created an image for your application, you can push
it to Docker Hub for future use.

Step 4 — Using a Repository to Work with Images
By pushing your application image to a registry like Docker Hub, you
make it available for subsequent use as you build and scale your
containers. We will demonstrate how this works by pushing the application
image to a repository and then using the image to recreate our container.
The first step to pushing the image is to log in to the Docker Hub
account you created in the prerequisites:
docker login -u your_dockerhub_username
When prompted, enter your Docker Hub account password. Logging in
this way will create a ~/.docker/config.json file in your user’s
home directory with your Docker Hub credentials.
You can now push the application image to Docker Hub using the tag
you created earlier, your_dockerhub_username/nodejs-image-
demo:
docker push your_dockerhub_username/nodejs-image-
demo
Let’s test the utility of the image registry by destroying our current
application container and image and rebuilding them with the image in our
repository.
First, list your running containers:
docker ps
You will see the following output:

Output
CONTAINER ID IMAGE
COMMAND CREATED STATUS PORTS
NAMES
e50ad27074a7 your_dockerhub_username/nodejs-image-demo
"node app.js" 3 minutes ago Up 3 minutes
0.0.0.0:80->8080/tcp nodejs-image-demo
Using the CONTAINER ID listed in your output, stop the running
application container. Be sure to replace the highlighted ID below with
your own CONTAINER ID:
docker stop e50ad27074a7
List your all of your images with the -a flag:
docker images -a
You will see the following output with the name of your image,
your_dockerhub_username/nodejs-image-demo, along with
the node image and the other images from your build:

Output
REPOSITORY TAG
IMAGE ID CREATED SIZE
your_dockerhub_username/nodejs-image-demo latest
1c723fb2ef12 7 minutes ago 73MB
<none> <none>
2e3267d9ac02 4 minutes ago 72.9MB
<none> <none>
8352b41730b9 4 minutes ago 73MB
<none> <none>
5d58b92823cb 4 minutes ago 73MB
<none> <none>
3f1e35d7062a 4 minutes ago 73MB
<none> <none>
02176311e4d0 4 minutes ago 73MB
<none> <none>
8e84b33edcda 4 minutes ago 70.7MB
<none> <none>
6a5ed70f86f2 4 minutes ago 70.7MB
<none> <none>
776b2637d3c1 4 minutes ago 70.7MB
node 10-alpine
f09e7c96b6de 3 weeks ago 70.7MB
Remove the stopped container and all of the images, including unused
or dangling images, with the following command:

docker system prune -a
Type y when prompted in the output to confirm that you would like to
remove the stopped container and images. Be advised that this will also
remove your build cache.
You have now removed both the container running your application
image and the image itself. For more information on removing Docker
containers, images, and volumes, please see How To Remove Docker
Images, Containers, and Volumes.
With all of your images and containers deleted, you can now pull the
application image from Docker Hub:
docker pull your_dockerhub_username/nodejs-image-
demo
List your images once again:
docker images
You will see your application image:
Output
REPOSITORY TAG
IMAGE ID CREATED SIZE
your_dockerhub_username/nodejs-image-demo latest
1c723fb2ef12 11 minutes ago 73MB
You can now rebuild your container using the command from Step 3:
docker run --name nodejs-image-demo -p 80:8080 -d
your_dockerhub_username/nodejs-image-demo
List your running containers:

docker ps
Output
CONTAINER ID IMAGE
COMMAND CREATED STATUS PORTS
NAMES
f6bc2f50dff6 your_dockerhub_username/nodejs-image-demo
"node app.js" 4 seconds ago Up 3 seconds
0.0.0.0:80->8080/tcp nodejs-image-demo
Visit http://your_server_ip once again to view your running
application.
Conclusion
In this tutorial you created a static web application with Express and
Bootstrap, as well as a Docker image for this application. You used this
image to create a container and pushed the image to Docker Hub. From
there, you were able to destroy your image and container and recreate
them using your Docker Hub repository.
If you are interested in learning more about how to work with tools like
Docker Compose and Docker Machine to create multi-container setups,
you can look at the following guides: - How To Install Docker Compose on
Ubuntu 18.04. - How To Provision and Manage Remote Docker Hosts with
Docker Machine on Ubuntu 18.04.
For general tips on working with container data, see: - How To Share
Data between Docker Containers. - How To Share Data Between the


How To Integrate MongoDB with Your
Node Application
Written by Kathleen Juell
In this chapter, you will continue to build on the Node.js application
from the previous chapter by incorporating MongoDB, a database that
allows you to store JSON objects. Integrating MongoDB into your
application will allow you to structure your code using a Model View
Controller (MVC) architecture.
This application structure will help keep your application, data, and
presentation logic separate from each other, which will facilitate testing
and development as you build more features into the example application.
By the end of this chapter, you will have an application that accepts user
input, saves it, and displays it as a web page that is retrieved from
MongoDB.
As you work with Node.js, you may find yourself developing a project
that stores and queries data. In this case, you will need to choose a
database solution that makes sense for your application’s data and query
types.
In this tutorial, you will integrate a MongoDB database with an existing
Node application. NoSQL databases like MongoDB can be useful if your
data requirements include scalability and flexibility. MongoDB also
integrates well with Node since it is designed to work asynchronously with
JSON objects.

To integrate MongoDB into your project, you will use the Object
Document Mapper (ODM) Mongoose to create schemas and models for
your application data. This will allow you to organize your application
code following the model-view-controller (MVC) architectural pattern,
which lets you separate the logic of how your application handles user
input from how your data is structured and rendered to the user. Using this
pattern can facilitate future testing and development by introducing a
separation of concerns into your codebase.
At the end of the tutorial, you will have a working shark information
application that will take a user’s input about their favorite sharks and
display the results in the browser:
Shark Output
Prerequisites

A local development machine or server running Ubuntu 18.04, along
with a non-root user with sudo privileges and an active firewall. For
guidance on how to set these up on an 18.04 server, please see this
Initial Server Setup guide.
Node.js and npm installed on your machine or server, following these
instructions on installing with the PPA managed by NodeSource.
MongoDB installed on your machine or server, following Step 1 of
How To Install MongoDB in Ubuntu 18.04.
Step 1 — Creating a Mongo User
Before we begin working with the application code, we will create an
administrative user that will have access to our application’s database.
This user will have administrative privileges on any database, which will
give you the flexibility to switch and create new databases as needed.
First, check that MongoDB is running on your server:
sudo systemctl status mongodb
The following output indicates that MongoDB is running:
Output
● mongodb.service - An object/document-oriented database
Loaded: loaded (/lib/systemd/system/mongodb.service; enabled;
vendor preset: enabled)
Active: active (running) since Thu 2019-01-31 21:07:25 UTC;
21min ago
...

Next, open the Mongo shell to create your user:
mongo
This will drop you into an administrative shell:
Output
MongoDB shell version v3.6.3
connecting to: mongodb://127.0.0.1:27017
MongoDB server version: 3.6.3
...
>
You will see some administrative warnings when you open the shell due
to your unrestricted access to the admin database. You can learn more
about restricting this access by reading How To Install and Secure
MongoDB on Ubuntu 16.04, for when you move into a production setup.
For now, you can use your access to the admin database to create a user
with userAdminAnyDatabase privileges, which will allow password-
protected access to your application’s databases.
In the shell, specify that you want to use the admin database to create
your user:
use admin
Next, create a role and password by adding a username and password
with the db.createUser command. After you type this command, the
shell will prepend three dots before each line until the command is
complete. Be sure to replace the user and password provided here with
your own username and password:

db.createUser(
{
user: "sammy",
pwd: "your_password",
roles: [ { role: "userAdminAnyDatabase", db:
"admin" } ]
}
)
This creates an entry for the user sammy in the admin database. The
username you select and the admin database will serve as identifiers for
your user.
The output for the entire process will look like this, including the
message indicating that the entry was successful:

Output
> db.createUser(
... {
... user: "sammy",
... pwd: "your_password",
... roles: [ { role: "userAdminAnyDatabase", db: "admin" } ]
... }
...)
Successfully added user: {
"user" : "sammy",
"roles" : [
{
"role" : "userAdminAnyDatabase",
"db" : "admin"
}
]
}
With your user and password created, you can now exit the Mongo
shell:
exit
Now that you have created your database user, you can move on to
cloning the starter project code and adding the Mongoose library, which
will allow you to implement schemas and models for the collections in
your databases.

Step 2 — Adding Mongoose and Database Information to
the Project
Our next steps will be to clone the application starter code and add
Mongoose and our MongoDB database information to the project.
In your non-root user’s home directory, clone the nodejs-image-
demo repository from the DigitalOcean Community GitHub account. This
repository includes the code from the setup described in How To Build a
Node.js Application with Docker.
Clone the repository into a directory called node_project:
git clone https://github.com/do-community/nodejs-
image-demo.git node_project
Change to the node_project directory:
cd node_project
Before modifying the project code, let’s take a look at the project’s
structure using the tree command.
Tip: tree is a useful command for viewing file and directory structures
from the command line. You can install it with the following command:
sudo apt install tree
To use it, cd into a given directory and type tree. You can also provide
the path to the starting point with a command like:
tree /home/sammy/sammys-project
Type the following to look at the node_project directory:
tree
The structure of the current project looks like this:

Output
├── Dockerfile
├── README.md
├── app.js
├── package-lock.json
├── package.json
└── views
├── css
│ └── styles.css
├── index.html
└── sharks.html
We will be adding directories to this project as we move through the
tutorial, and tree will be a useful command to help us track our progress.
Next, add the mongoose npm package to the project with the npm
install command:
npm install mongoose
This command will create a node_modules directory in your project
directory, using the dependencies listed in the project’s package.json
file, and will add mongoose to that directory. It will also add mongoose
to the dependencies listed in your package.json file. For a more
detailed discussion of package.json, please see Step 1 in How To
Build a Node.js Application with Docker.
Before creating any Mongoose schemas or models, we will add our
database connection information so that our application will be able to
connect to our database.

In order to separate your application’s concerns as much as possible,
create a separate file for your database connection information called
db.js. You can open this file with nano or your favorite editor:
nano db.js
First, import the mongoose module using the require function:
~/node_project/db.js
This will give you access to Mongoose’s built-in methods, which you
will use to create the connection to your database.
Next, add the following constants to define information for Mongo’s
connection URI. Though the username and password are optional, we will
include them so that we can require authentication for our database. Be
sure to replace the username and password listed below with your own
information, and feel free to call the database something other than
'sharkinfo' if you would prefer:
~/node_project/db.js
const mongoose = require('mongoose');
const MONGO_USERNAME = 'sammy';
const MONGO_PASSWORD = 'your_password';
const MONGO_HOSTNAME = '127.0.0.1';
const MONGO_PORT = '27017';
const MONGO_DB = 'sharkinfo';
const mongoose = require('mongoose');

Because we are running our database locally, we have used
127.0.0.1 as the hostname. This would change in other development
contexts: for example, if you are using a separate database server or
working with multiple nodes in a containerized workflow.
Finally, define a constant for the URI and create the connection using
the mongoose.connect() method:
~/node_project/db.js
...
const url =
`mongodb://${MONGO_USERNAME}:${MONGO_PASSWORD}@${MONGO_HOSTNAME}:${
MONGO_PORT}/${MONGO_DB}?authSource=admin`;
mongoose.connect(url, {useNewUrlParser: true});
Note that in the URI we’ve specified the authSource for our user as
the admin database. This is necessary since we have specified a username
in our connection string. Using the useNewUrlParser flag with
mongoose.connect() specifies that we want to use Mongo’s new
URL parser.
Save and close the file when you are finished editing.
As a final step, add the database connection information to the app.js
file so that the application can use it. Open app.js:
nano app.js
The first lines of the file will look like this:

~/node_project/app.js
Below the router constant definition, located near the top of the file,
add the following line:
~/node_project/app.js
This tells the application to use the database connection information
specified in db.js.
Save and close the file when you are finished editing.
With your database information in place and Mongoose added to your
project, you are ready to create the schemas and models that will shape the
data in your sharks collection.
const express = require('express');
const app = express();
const router = express.Router();
const path = __dirname + '/views/';
...
...
const router = express.Router();
const db = require('./db');
const path = __dirname + '/views/';
...

Step 3 — Creating Mongoose Schemas and Models
Our next step will be to think about the structure of the sharks collection
that users will be creating in the sharkinfo database with their input.
What structure do we want these created documents to have? The shark
information page of our current application includes some details about
different sharks and their behaviors:
Shark Info Page
In keeping with this theme, we can have users add new sharks with
details about their overall character. This goal will shape how we create
our schema.
To keep your schemas and models distinct from the other parts of your
application, create a models directory in the current project directory:
mkdir models
Next, open a file called sharks.js to create your schema and model:

nano models/sharks.js
Import the mongoose module at the top of the file:
~/node_project/models/sharks.js
Below this, define a Schema object to use as the basis for your shark
schema:
~/node_project/models/sharks.js
You can now define the fields you would like to include in your schema.
Because we want to create a collection with individual sharks and
information about their behaviors, let’s include a name key and a
character key. Add the following Shark schema below your constant
definitions:
~/node_project/models/sharks.js
const mongoose = require('mongoose');
const mongoose = require('mongoose');
const Schema = mongoose.Schema;
...
const Shark = new Schema ({
name: { type: String, required: true },
character: { type: String, required: true },
});

This definition includes information about the type of input we expect
from users — in this case, a string — and whether or not that input is
required.
Finally, create the Shark model using Mongoose’s model() function.
This model will allow you to query documents from your collection and
validate new documents. Add the following line at the bottom of the file:
~/node_project/models/sharks.js
This last line makes our Shark model available as a module using the
module.exports property. This property defines the values that the
module will export, making them available for use elsewhere in the
application.
The finished models/sharks.js file looks like this:
...
module.exports = mongoose.model('Shark', Shark)

~/node_project/models/sharks.js
Save and close the file when you are finished editing.
With the Shark schema and model in place, you can start working on
the logic that will determine how your application will handle user input.
Step 4 — Creating Controllers
Our next step will be to create the controller component that will
determine how user input gets saved to our database and returned to the
user.
First, create a directory for the controller:
mkdir controllers
Next, open a file in that folder called sharks.js:
nano controllers/sharks.js
At the top of the file, we’ll import the module with our Shark model
so that we can use it in our controller’s logic. We’ll also import the path
const mongoose = require('mongoose');
const Schema = mongoose.Schema;
const Shark = new Schema ({
name: { type: String, required: true },
character: { type: String, required: true },
});
module.exports = mongoose.model('Shark', Shark)

module to access utilities that will allow us to set the path to the form
where users will input their sharks.
Add the following require functions to the beginning of the file:
~/node_project/controllers/sharks.js
Next, we’ll write a sequence of functions that we will export with the
controller module using Node’s exports shortcut. These functions will
include the three tasks related to our user’s shark data: - Sending users the
shark input form. - Creating a new shark entry. - Displaying the sharks
back to users.
To begin, create an index function to display the sharks page with the
input form. Add this function below your imports:
~/node_project/controllers/sharks.js
Next, below the index function, add a function called create to
make a new shark entry in your sharks collection:
const path = require('path');
const Shark = require('../models/sharks');
...
exports.index = function (req, res) {
res.sendFile(path.resolve('views/sharks.html'));
};

~/node_project/controllers/sharks.js
This function will be called when a user posts shark data to the form on
the sharks.html page. We will create the route with this POST
endpoint later in the tutorial when we create our application’s routes. With
the body of the POST request, our create function will make a new
shark document object, here called newShark, using the Shark model
that we’ve imported. We’ve added a console.log method to output the
shark entry to the console in order to check that our POST method is
working as intended, but you should feel free to omit this if you would
prefer.
Using the newShark object, the create function will then call
Mongoose’s model.save() method to make a new shark document
using the keys you defined in the Shark model. This callback function
...
exports.create = function (req, res) {
var newShark = new Shark(req.body);
console.log(req.body);
newShark.save(function (err) {
if(err) {
res.status(400).send('Unable to save shark to database')
} else {
res.redirect('/sharks/getshark');
}
});
};

follows the standard Node callback pattern: callback(error,
results). In the case of an error, we will send a message reporting the
error to our users, and in the case of success, we will use the
res.redirect() method to send users to the endpoint that will render
their shark information back to them in the browser.
Finally, the list function will display the collection’s contents back to
the user. Add the following code below the create function:
~/node_project/controllers/sharks.js
This function uses the Shark model with Mongoose’s
model.find() method to return the sharks that have been entered into
the sharks collection. It does this by returning the query object — in this
case, all of the entries in the sharks collection — as a promise, using
...
exports.list = function (req, res) {
Shark.find({}).exec(function (err, sharks) {
if (err) {
return res.send(500, err);
}
res.render('getshark', {
sharks: sharks
});
});
};


~/node_project/controllers/sharks.js
const path = require('path');
const Shark = require('../models/sharks');
exports.index = function (req, res) {
res.sendFile(path.resolve('views/sharks.html'));
};
exports.create = function (req, res) {
var newShark = new Shark(req.body);
console.log(req.body);
newShark.save(function (err) {
if(err) {
res.status(400).send('Unable to save shark to database')
} else {
res.redirect('/sharks/getshark');
}
});
};
exports.list = function (req, res) {
Shark.find({}).exec(function (err, sharks) {
if (err) {
return res.send(500, err);
}
res.render('getshark', {

Keep in mind that though we are not using arrow functions here, you
may wish to include them as you iterate on this code in your own
development process.
Save and close the file when you are finished editing.
Before moving on to the next step, you can run tree again from your
node_project directory to view the project’s structure at this point.
This time, for the sake of brevity, we’ll tell tree to omit the
node_modules directory using the -I option:
tree -I node_modules
With the additions you’ve made, your project’s structure will look like
this:
sharks: sharks
});
});
};

Output
├── Dockerfile
├── README.md
├── app.js
├── controllers
│ └── sharks.js
├── db.js
├── models
│ └── sharks.js
├── package-lock.json
├── package.json
└── views
├── css
│ └── styles.css
├── index.html
└── sharks.html
Now that you have a controller component to direct how user input gets
saved and returned to the user, you can move on to creating the views that
will implement your controller’s logic.
Step 5 — Using EJS and Express Middleware to Collect
and Render Data
To enable our application to work with user data, we will do two things:
first, we will include a built-in Express middleware function,
urlencoded(), that will enable our application to parse our user’s

entered data. Second, we will add template tags to our views to enable
dynamic interaction with user data in our code.
To work with Express’s urlencoded() function, first open your
app.js file:
nano app.js
Above your express.static() function, add the following line:
~/node_project/app.js
Adding this function will enable access to the parsed POST data from
our shark information form. We are specifying true with the extended
option to enable greater flexibility in the type of data our application will
parse (including things like nested objects). Please see the function
documentation for more information about options.
Save and close the file when you are finished editing.
Next, we will add template functionality to our views. First, install the
ejs package with npm install:
npm install ejs
Next, open the sharks.html file in the views folder:
nano views/sharks.html
In Step 3, we looked at this page to determine how we should write our
Mongoose schema and model:
...
app.use(express.urlencoded({ extended: true }));
app.use(express.static(path));
...

Shark Info Page
Now, rather than having a two column layout, we will introduce a third
column with a form where users can input information about sharks.
As a first step, change the dimensions of the existing columns to 4 to
create three equal-sized columns. Note that you will need to make this
change on the two lines that currently read <div class="col-lg-
6">. These will both become <div class="col-lg-4">:

~/node_project/views/sharks.html
...
<div class="container">
<div class="row">
<div class="col-lg-4">
<p>
<div class="caption">Some sharks are known to be
dangerous to humans, though many more are not. The sawshark, for
example, is not considered a threat to humans.
</div>
<img
src="https://assets.digitalocean.com/articles/docker_node_image/saw
shark.jpg" alt="Sawshark">
</p>
</div>
<div class="col-lg-4">
<p>
<div class="caption">Other sharks are known to be
friendly and welcoming!</div>
<img
src="https://assets.digitalocean.com/articles/docker_node_image/sam
my.png" alt="Sammy the Shark">
</p>
</div>
</div>
</div>

</html>
For an introduction to Bootstrap’s grid system, including its row and
column layouts, please see this introduction to Bootstrap.
Next, add another column that includes the named endpoint for the
POST request with the user’s shark data and the EJS template tags that
will capture that data. This column will go below the closing </p> and
</div> tags from the preceding column and above the closing tags for
the row, container, and HTML document. These closing tags are already in
place in your code; they are also marked below with comments. Leave
them in place as you add the following code to create the new column:

~/node_project/views/sharks.html
...
</p> <!-- closing p from previous column -->
</div> <!-- closing div from previous column -->
<div class="col-lg-4">
<p>
<form action="/sharks/addshark" method="post">
<div class="caption">Enter Your Shark</div>
<input type="text" placeholder="Shark Name"
name="name" <%=sharks[i].name; %>
<input type="text" placeholder="Shark
Character" name="character" <%=sharks[i].character; %>
<button type="submit">Submit</button>
</form>
</p>
</div>
</div> <!-- closing div for row -->
</div> <!-- closing div for container -->
</html> <!-- closing html tag -->
In the form tag, you are adding a "/sharks/addshark" endpoint
for the user’s shark data and specifying the POST method to submit it. In
the input fields, you are specifying fields for "Shark Name" and
"Shark Character", aligning with the Shark model you defined
earlier.

To add the user input to your sharks collection, you are using EJS
template tags (<%=, %>) along with JavaScript syntax to map the user’s
entries to the appropriate fields in the newly created document. For more
about JavaScript objects, please see our article on Understanding
JavaScript Objects. For more on EJS template tags, please see the EJS
documentation.
The entire container with all three columns, including the column with
your shark input form, will look like this when finished:

~/node_project/views/sharks.html
...
<div class="container">
<div class="row">
<div class="col-lg-4">
<p>
<div class="caption">Some sharks are known to be
dangerous to humans, though many more are not. The sawshark, for
example, is not considered a threat to humans.
</div>
<img
src="https://assets.digitalocean.com/articles/docker_node_image/saw
shark.jpg" alt="Sawshark">
</p>
</div>
<div class="col-lg-4">
<p>
<div class="caption">Other sharks are known to be
friendly and welcoming!</div>
<img
src="https://assets.digitalocean.com/articles/docker_node_image/sam
my.png" alt="Sammy the Shark">
</p>
</div>
<div class="col-lg-4">
<p>
<form action="/sharks/addshark" method="post">

<div class="caption">Enter Your Shark</div>
<input type="text" placeholder="Shark Name"
name="name" <%=sharks[i].name; %>
<input type="text" placeholder="Shark
Character" name="character" <%=sharks[i].character; %>
<button type="submit">Submit</button>
</form>
</p>
</div>
</div>
</div>
</html>
Save and close the file when you are finished editing.
Now that you have a way to collect your user’s input, you can create an
endpoint to display the returned sharks and their associated character
information.
Copy the newly modified sharks.html file to a file called
getshark.html:
cp views/sharks.html views/getshark.html
Open getshark.html:
nano views/getshark.html
Inside the file, we will modify the column that we used to create our
sharks input form by replacing it with a column that will display the
sharks in our sharks collection. Again, your code will go between the
existing </p> and </div> tags from the preceding column and the

closing tags for the row, container, and HTML document. Remember to
leave these tags in place as you add the following code to create the
column:
~/node_project/views/getshark.html
...
</p> <!-- closing p from previous column -->
</div> <!-- closing div from previous column -->
<div class="col-lg-4">
<p>
<div class="caption">Your Sharks</div>
<ul>
<% sharks.forEach(function(shark) { %>
<p>Name: <%= shark.name %></p>
<p>Character: <%= shark.character %></p>
<% }); %>
</ul>
</p>
</div>
</div> <!-- closing div for row -->
</div> <!-- closing div for container -->
</html> <!-- closing html tag -->
Here you are using EJS template tags and the forEach() method to
output each value in your sharks collection, including information about

the most recently added shark.
The entire container with all three columns, including the column with
your sharks collection, will look like this when finished:

~/node_project/views/getshark.html
...
<div class="container">
<div class="row">
<div class="col-lg-4">
<p>
<div class="caption">Some sharks are known to be
dangerous to humans, though many more are not. The sawshark, for
example, is not considered a threat to humans.
</div>
<img
src="https://assets.digitalocean.com/articles/docker_node_image/saw
shark.jpg" alt="Sawshark">
</p>
</div>
<div class="col-lg-4">
<p>
<div class="caption">Other sharks are known to be
friendly and welcoming!</div>
<img
src="https://assets.digitalocean.com/articles/docker_node_image/sam
my.png" alt="Sammy the Shark">
</p>
</div>
<div class="col-lg-4">
<p>
<div class="caption">Your Sharks</div>

<ul>
<% sharks.forEach(function(shark) { %>
<p>Name: <%= shark.name %></p>
<p>Character: <%= shark.character %></p>
<% }); %>
</ul>
</p>
</div>
</div>
</div>
</html>
Save and close the file when you are finished editing.
In order for the application to use the templates you’ve created, you will
need to add a few lines to your app.js file. Open it again:
nano app.js
Above where you added the express.urlencoded() function, add
the following lines:

~/node_project/app.js
The app.engine method tells the application to map the EJS
template engine to HTML files, while app.set defines the default view
engine.
Your app.js file should now look like this:
...
app.engine('html', require('ejs').renderFile);
app.set('view engine', 'html');
app.use(express.urlencoded({ extended: true }));
app.use(express.static(path));
...

~/node_project/app.js
const express = require('express');
const app = express();
const router = express.Router();
const db = require('./db');
const path = __dirname + '/views/';
const port = 8080;
router.use(function (req,res,next) {
console.log('/' + req.method);
next();
});
router.get('/',function(req,res){
res.sendFile(path + 'index.html');
});
router.get('/sharks',function(req,res){
res.sendFile(path + 'sharks.html');
});
app.engine('html', require('ejs').renderFile);
app.set('view engine', 'html');
app.use(express.urlencoded({ extended: true }));
app.use(express.static(path));

Now that you have created views that can work dynamically with user
data, it’s time to create your project’s routes to bring together your views
and controller logic.
Step 6 — Creating Routes
The final step in bringing the application’s components together will be
creating routes. We will separate our routes by function, including a route
to our application’s landing page and another route to our sharks page. Our
sharks route will be where we integrate our controller’s logic with the
views we created in the previous step.
First, create a routes directory:
mkdir routes
Next, open a file called index.js in this directory:
nano routes/index.js
This file will first import the express, router, and path objects,
allowing us to define the routes we want to export with the router
object, and making it possible to work dynamically with file paths. Add
the following code at the top of the file:
app.use('/', router);
app.listen(port, function () {
console.log('Example app listening on port 8080!')
})

~/node_project/routes/index.js
Next, add the following router.use function, which loads a
middleware function that will log the router’s requests and pass them on to
the application’s route:
~/node_project/routes/index.js
Requests to our application’s root will be directed here first, and from
here users will be directed to our application’s landing page, the route we
will define next. Add the following code below the router.use function
to define the route to the landing page:
const express = require('express');
const router = express.Router();
const path = require('path');
...
router.use (function (req,res,next) {
console.log('/' + req.method);
next();
});

~/node_project/routes/index.js
When users visit our application, the first place we want to send them is
to the index.html landing page that we have in our views directory.
Finally, to make these routes accessible as importable modules
elsewhere in the application, add a closing expression to the end of the file
to export the router object:
~/node_project/routes/index.js
The finished file will look like this:
...
router.get('/',function(req,res){
res.sendFile(path.resolve('views/index.html'));
});
...
module.exports = router;

~/node_project/routes/index.js
Save and close this file when you are finished editing.
Next, open a file called sharks.js to define how the application
should use the different endpoints and views we’ve created to work with
our user’s shark input:
nano routes/sharks.js
At the top of the file, import the express and router objects:
~/node_project/routes/sharks.js
const express = require('express');
const router = express.Router();
const path = require('path');
router.use (function (req,res,next) {
console.log('/' + req.method);
next();
});
router.get('/',function(req,res){
res.sendFile(path.resolve('views/index.html'));
});
module.exports = router;
const express = require('express');
const router = express.Router();

Next, import a module called shark that will allow you to work with
the exported functions you defined with your controller:
~/node_project/routes/sharks.js
Now you can create routes using the index, create, and list
functions you defined in your sharks controller file. Each route will be
associated with the appropriate HTTP method: GET in the case of
rendering the main sharks information landing page and returning the list
of sharks to the user, and POST in the case of creating a new shark entry:
const express = require('express');
const router = express.Router();
const shark = require('../controllers/sharks');

~/node_project/routes/sharks.js
Each route makes use of the related function in
controllers/sharks.js, since we have made that module
accessible by importing it at the top of this file.
Finally, close the file by attaching these routes to the router object
and exporting them:
~/node_project/routes/index.js
...
router.get('/', function(req, res){
shark.index(req,res);
});
router.post('/addshark', function(req, res) {
shark.create(req,res);
});
router.get('/getshark', function(req, res) {
shark.list(req,res);
});
...
module.exports = router;

The finished file will look like this:
~/node_project/routes/sharks.js
Save and close the file when you are finished editing.
The last step in making these routes accessible to your application will
be to add them to app.js. Open that file again:
nano app.js
Below your db constant, add the following import for your routes:
const express = require('express');
const router = express.Router();
const shark = require('../controllers/sharks');
router.get('/', function(req, res){
shark.index(req,res);
});
router.post('/addshark', function(req, res) {
shark.create(req,res);
});
router.get('/getshark', function(req, res) {
shark.list(req,res);
});
module.exports = router;

~/node_project/app.js
Next, replace the app.use function that currently mounts your
router object with the following line, which will mount the sharks
router module:
~/node_project/app.js
You can now delete the routes that were previously defined in this file,
since you are importing your application’s routes using the sharks router
module.
The final version of your app.js file will look like this:
...
const db = require('./db');
const sharks = require('./routes/sharks');
...
app.use(express.static(path));
app.use('/sharks', sharks);
app.listen(port, function () {
console.log("Example app listening on port 8080!")
})

~/node_project/app.js
Save and close the file when you are finished editing.
You can now run tree again to see the final structure of your project:
tree -I node_modules
Your project structure will now look like this:
const express = require('express');
const app = express();
const router = express.Router();
const db = require('./db');
const sharks = require('./routes/sharks');
const path = __dirname + '/views/';
const port = 8080;
app.engine('html', require('ejs').renderFile);
app.set('view engine', 'html');
app.use(express.urlencoded({ extended: true }));
app.use(express.static(path));
app.use('/sharks', sharks);
app.listen(port, function () {
console.log('Example app listening on port 8080!')
})

Output
├── Dockerfile
├── README.md
├── app.js
├── controllers
│ └── sharks.js
├── db.js
├── models
│ └── sharks.js
├── package-lock.json
├── package.json
├── routes
│ ├── index.js
│ └── sharks.js
└── views
├── css
│ └── styles.css
├── getshark.html
├── index.html
└── sharks.html
With all of your application components created and in place, you are
now ready to add a test shark to your database!
If you followed the initial server setup tutorial in the prerequisites, you
will need to modify your firewall, since it currently only allows SSH
traffic. To permit traffic to port 8080 run:
sudo ufw allow 8080

Start the application:
node app.js
Next, navigate your browser to http://your_server_ip:8080.
You will see the following landing page:
Application Landing Page
Click on the Get Shark Info button. You will see the following
information page, with the shark input form added:

Shark Info Form
In the form, add a shark of your choosing. For the purpose of this
demonstration, we will add Megalodon Shark to the Shark Name field,
and Ancient to the Shark Character field:
Filled Shark Form

Click on the Submit button. You will see a page with this shark
information displayed back to you:
Shark Output
You will also see output in your console indicating that the shark has
been added to your collection:
Output
Example app listening on port 8080!
{ name: 'Megalodon Shark', character: 'Ancient' }
If you would like to create a new shark entry, head back to the Sharks
page and repeat the process of adding a shark.
You now have a working shark information application that allows users
to add information about their favorite sharks.

Conclusion
In this tutorial, you built out a Node application by integrating a
MongoDB database and rewriting the application’s logic using the MVC
architectural pattern. This application can act as a good starting point for a
fully-fledged CRUD application.
For more resources on the MVC pattern in other contexts, please see our
Django Development series or How To Build a Modern Web Application
to Manage Customer Information with Django and React on Ubuntu 18.04.
For more information on working with MongoDB, please see our library
of tutorials on MongoDB.

Containerizing a Node.js Application for
Development With Docker Compose
Written by Kathleen Juell
In the previous chapters, you created a Docker image that you used to
run your application as a container. You also integrated an external
database layer for persistent data. In this chapter you will create two
images, one for the application and another for the MongoDB database.
Once you have images of both components, you will learn how to run them
together using Docker Compose.
If you are actively developing an application, using Docker can simplify
your workflow and the process of deploying your application to
production. Working with containers in development offers the following
benefits: - Environments are consistent, meaning that you can choose the
languages and dependencies you want for your project without worrying
about system conflicts. - Environments are isolated, making it easier to
troubleshoot issues and onboard new team members. - Environments are
portable, allowing you to package and share your code with others.
This tutorial will show you how to set up a development environment
for a Node.js application using Docker. You will create two containers —
one for the Node application and another for the MongoDB database —
with Docker Compose. Because this application works with Node and
MongoDB, our setup will do the following: - Synchronize the application
code on the host with the code in the container to facilitate changes during
development. - Ensure that changes to the application code work without a

restart. - Create a user and password-protected database for the
application’s data. - Persist this data.
At the end of this tutorial, you will have a working shark information
application running on Docker containers:
Complete Shark Collection
Prerequisites
To follow this tutorial, you will need: - A development server running
Ubuntu 18.04, along with a non-root user with sudo privileges and an
active firewall. For guidance on how to set these up, please see this Initial
Server Setup guide. - Docker installed on your server, following Steps 1
and 2 of How To Install and Use Docker on Ubuntu 18.04. - Docker
Compose installed on your server, following Step 1 of How To Install
Docker Compose on Ubuntu 18.04.
Step 1 — Cloning the Project and Modifying Dependencies

The first step in building this setup will be cloning the project code and
modifying its package.json file, which includes the project’s
dependencies. We will add nodemon to the project’s
devDependencies, specifying that we will be using it during
development. Running the application with nodemon ensures that it will
be automatically restarted whenever you make changes to your code.
First, clone the nodejs-mongo-mongoose repository from the
DigitalOcean Community GitHub account. This repository includes the
code from the setup described in How To Integrate MongoDB with Your
Node Application, which explains how to integrate a MongoDB database
with an existing Node application using Mongoose.
Clone the repository into a directory called node_project:
git clone https://github.com/do-community/nodejs-
mongo-mongoose.git node_project
Navigate to the node_project directory:
cd node_project
Open the project’s package.json file using nano or your favorite
editor:
nano package.json
Beneath the project dependencies and above the closing curly brace,
create a new devDependencies object that includes nodemon:

~/node_project/package.json
...
"dependencies": {
"ejs": "^2.6.1",
"express": "^4.16.4",
"mongoose": "^5.4.10"
},
"devDependencies": {
"nodemon": "^1.18.10"
}
}
Save and close the file when you are finished editing.
With the project code in place and its dependencies modified, you can
move on to refactoring the code for a containerized workflow.
Step 2 — Configuring Your Application to Work with
Containers
Modifying our application for a containerized workflow means making
our code more modular. Containers offer portability between
environments, and our code should reflect that by remaining as decoupled
from the underlying operating system as possible. To achieve this, we will
refactor our code to make greater use of Node’s process.env property,
which returns an object with information about your user environment at
runtime. We can use this object in our code to dynamically assign
configuration information at runtime with environment variables.

Let’s begin with app.js, our main application entrypoint. Open the
file:
nano app.js
Inside, you will see a definition for a port constant, as well a listen
function that uses this constant to specify the port the application will
listen on:
~/home/node_project/app.js
...
const port = 8080;
...
app.listen(port, function () {
console.log('Example app listening on port 8080!');
});
Let’s redefine the port constant to allow for dynamic assignment at
runtime using the process.env object. Make the following changes to
the constant definition and listen function:
~/home/node_project/app.js
...
const port = process.env.PORT || 8080;
...
app.listen(port, function () {
console.log(`Example app listening on ${port}!`);
});

Our new constant definition assigns port dynamically using the value
passed in at runtime or 8080. Similarly, we’ve rewritten the listen
function to use a template literal, which will interpolate the port value
when listening for connections. Because we will be mapping our ports
elsewhere, these revisions will prevent our having to continuously revise
this file as our environment changes.
When you are finished editing, save and close the file.
Next, we will modify our database connection information to remove
any configuration credentials. Open the db.js file, which contains this
information:
nano db.js
Currently, the file does the following things: - Imports Mongoose, the
Object Document Mapper (ODM) that we’re using to create schemas and
models for our application data. - Sets the database credentials as
constants, including the username and password. - Connects to the
database using the mongoose.connect method.
For more information about the file, please see Step 3 of How To
Integrate MongoDB with Your Node Application.
Our first step in modifying the file will be redefining the constants that
include sensitive information. Currently, these constants look like this:

~/node_project/db.js
...
const MONGO_USERNAME = 'sammy';
const MONGO_PASSWORD = 'your_password';
const MONGO_HOSTNAME = '127.0.0.1';
const MONGO_PORT = '27017';
const MONGO_DB = 'sharkinfo';
...
Instead of hardcoding this information, you can use the process.env
object to capture the runtime values for these constants. Modify the block
to look like this:
~/node_project/db.js
...
const {
MONGO_USERNAME,
MONGO_PASSWORD,
MONGO_HOSTNAME,
MONGO_PORT,
MONGO_DB
} = process.env;
...
Save and close the file when you are finished editing.

At this point, you have modified db.js to work with your application’s
environment variables, but you still need a way to pass these variables to
your application. Let’s create an .env file with values that you can pass
to your application at runtime.
Open the file:
nano .env
This file will include the information that you removed from db.js:
the username and password for your application’s database, as well as the
port setting and database name. Remember to update the username,
password, and database name listed here with your own information:
~/node_project/.env
MONGO_USERNAME=sammy
MONGO_PASSWORD=your_password
MONGO_PORT=27017
MONGO_DB=sharkinfo
Note that we have removed the host setting that originally appeared in
db.js. We will now define our host at the level of the Docker Compose
file, along with other information about our services and containers.
Save and close this file when you are finished editing.
Because your .env file contains sensitive information, you will want to
ensure that it is included in your project’s .dockerignore and
.gitignore files so that it does not copy to your version control or
containers.
Open your .dockerignore file:

nano .dockerignore
Add the following line to the bottom of the file:
~/node_project/.dockerignore
...
.gitignore
.env
Save and close the file when you are finished editing.
The .gitignore file in this repository already includes .env, but
feel free to check that it is there:
nano .gitignore
~~/node_project/.gitignore
...
.env
...
At this point, you have successfully extracted sensitive information
from your project code and taken measures to control how and where this
information gets copied. Now you can add more robustness to your
database connection code to optimize it for a containerized workflow.
Step 3 — Modifying Database Connection Settings
Our next step will be to make our database connection method more robust
by adding code that handles cases where our application fails to connect to

our database. Introducing this level of resilience to your application code
is a recommended practice when working with containers using Compose.
Open db.js for editing:
nano db.js
You will see the code that we added earlier, along with the url constant
for Mongo’s connection URI and the Mongoose connect method:
~/node_project/db.js
...
const {
MONGO_USERNAME,
MONGO_PASSWORD,
MONGO_HOSTNAME,
MONGO_PORT,
MONGO_DB
} = process.env;
const url =
`mongodb://${MONGO_USERNAME}:${MONGO_PASSWORD}@${MONGO_HOSTNAME}:${
MONGO_PORT}/${MONGO_DB}?authSource=admin`;
mongoose.connect(url, {useNewUrlParser: true});
Currently, our connect method accepts an option that tells Mongoose
to use Mongo’s new URL parser. Let’s add a few more options to this
method to define parameters for reconnection attempts. We can do this by
creating an options constant that includes the relevant information, in

addition to the new URL parser option. Below your Mongo constants, add
the following definition for an options constant:
~/node_project/db.js
...
const {
MONGO_USERNAME,
MONGO_PASSWORD,
MONGO_HOSTNAME,
MONGO_PORT,
MONGO_DB
} = process.env;
const options = {
useNewUrlParser: true,
reconnectTries: Number.MAX_VALUE,
reconnectInterval: 500,
connectTimeoutMS: 10000,
};
...
The reconnectTries option tells Mongoose to continue trying to
connect indefinitely, while reconnectInterval defines the period
between connection attempts in milliseconds. connectTimeoutMS
defines 10 seconds as the period that the Mongo driver will wait before
failing the connection attempt.

We can now use the new options constant in the Mongoose connect
method to fine tune our Mongoose connection settings. We will also add a
promise to handle potential connection errors.
Currently, the Mongoose connect method looks like this:
~/node_project/db.js
...
mongoose.connect(url, {useNewUrlParser: true});
Delete the existing connect method and replace it with the following
code, which includes the options constant and a promise:
~/node_project/db.js
...
mongoose.connect(url, options).then( function() {
console.log('MongoDB is connected');
})
.catch( function(err) {
console.log(err);
});
In the case of a successful connection, our function logs an appropriate
message; otherwise it will catch and log the error, allowing us to
troubleshoot.
The finished file will look like this:

~/node_project/db.js
const mongoose = require('mongoose');
const {
MONGO_USERNAME,
MONGO_PASSWORD,
MONGO_HOSTNAME,
MONGO_PORT,
MONGO_DB
} = process.env;
const options = {
useNewUrlParser: true,
reconnectTries: Number.MAX_VALUE,
reconnectInterval: 500,
connectTimeoutMS: 10000,
};
const url =
`mongodb://${MONGO_USERNAME}:${MONGO_PASSWORD}@${MONGO_HOSTNAME}:${
MONGO_PORT}/${MONGO_DB}?authSource=admin`;
mongoose.connect(url, options).then( function() {
console.log('MongoDB is connected');
})
.catch( function(err) {

console.log(err);
});
Save and close the file when you have finished editing.
You have now added resiliency to your application code to handle cases
where your application might fail to connect to your database. With this
code in place, you can move on to defining your services with Compose.
Step 4 — Defining Services with Docker Compose
With your code refactored, you are ready to write the docker-
compose.yml file with your service definitions. A service in Compose is
a running container, and service definitions — which you will include in
your docker-compose.yml file — contain information about how
each container image will run. The Compose tool allows you to define
multiple services to build multi-container applications.
Before defining our services, however, we will add a tool to our project
called wait-for to ensure that our application only attempts to connect
to our database once the database startup tasks are complete. This wrapper
script uses netcat to poll whether or not a specific host and port are
accepting TCP connections. Using it allows you to control your
application’s attempts to connect to your database by testing whether or
not the database is ready to accept connections.
Though Compose allows you to specify dependencies between services
using the depends_on option, this order is based on whether or not the
container is running rather than its readiness. Using depends_on won’t
be optimal for our setup, since we want our application to connect only

when the database startup tasks, including adding a user and password to
the admin authentication database, are complete. For more information
on using wait-for and other tools to control startup order, please see the
relevant recommendations in the Compose documentation.
Open a file called wait-for.sh:
nano wait-for.sh
Paste the following code into the file to create the polling function:

~/node_project/app/wait-for.sh
#!/bin/sh
# original script: https://github.com/eficode/wait-
for/blob/master/wait-for
TIMEOUT=15
QUIET=0
echoerr() {
if [ "$QUIET" -ne 1 ]; then printf "%s\n" "$*" 1>&2; fi
}
usage() {
exitcode="$1"
cat << USAGE >&2
Usage:
$cmdname host:port [-t timeout] [-- command args]
-q | --quiet Do not output any status
messages
-t TIMEOUT | --timeout=timeout Timeout in seconds, zero for
no timeout
-- COMMAND ARGS Execute command with args
after the test finishes
USAGE
exit "$exitcode"
}

wait_for() {
for i in `seq $TIMEOUT` ; do
nc -z "$HOST" "$PORT" > /dev/null 2>&1
result=$?
if [ $result -eq 0 ] ; then
if [ $# -gt 0 ] ; then
exec "$@"
fi
exit 0
fi
sleep 1
done
echo "Operation timed out" >&2
exit 1
}
while [ $# -gt 0 ]
do
case "$1" in
*:* )
HOST=$(printf "%s\n" "$1"| cut -d : -f 1)
PORT=$(printf "%s\n" "$1"| cut -d : -f 2)
shift 1
;;
-q | --quiet)

QUIET=1
shift 1
;;
-t)
TIMEOUT="$2"
if [ "$TIMEOUT" = "" ]; then break; fi
shift 2
;;
--timeout=*)
TIMEOUT="${1#*=}"
shift 1
;;
--)
shift
break
;;
--help)
usage 0
;;
*)
echoerr "Unknown argument: $1"
usage 1
;;
esac
done
if [ "$HOST" = "" -o "$PORT" = "" ]; then

echoerr "Error: you need to provide a host and port to test."
usage 2
fi
wait_for "$@"
Save and close the file when you are finished adding the code.
Make the script executable:
chmod +x wait-for.sh
Next, open the docker-compose.yml file:
nano docker-compose.yml
First, define the nodejs application service by adding the following
code to the file:

~/node_project/docker-compose.yml
version: '3'
services:
nodejs:
build:
context: .
dockerfile: Dockerfile
image: nodejs
container_name: nodejs
restart: unless-stopped
env_file: .env
environment:
- MONGO_USERNAME=$MONGO_USERNAME
- MONGO_PASSWORD=$MONGO_PASSWORD
- MONGO_HOSTNAME=db
- MONGO_PORT=$MONGO_PORT
- MONGO_DB=$MONGO_DB
ports:
- "80:8080"
volumes:
- .:/home/node/app
- node_modules:/home/node/app/node_modules
networks:
- app-network
command: ./wait-for.sh db:27017 --
/home/node/app/node_modules/.bin/nodemon app.js

The nodejs service definition includes the following options: -
build: This defines the configuration options, including the context
and dockerfile, that will be applied when Compose builds the
application image. If you wanted to use an existing image from a registry
like Docker Hub, you could use the image instruction instead, with
information about your username, repository, and image tag. - context:
This defines the build context for the image build — in this case, the
current project directory. - dockerfile: This specifies the
Dockerfile in your current project directory as the file Compose will
use to build the application image. For more information about this file,
please see How To Build a Node.js Application with Docker. - image,
container_name: These apply names to the image and container. -
restart: This defines the restart policy. The default is no, but we have
set the container to restart unless it is stopped. - env_file: This tells
Compose that we would like to add environment variables from a file
called .env, located in our build context. - environment: Using this
option allows you to add the Mongo connection settings you defined in the
.env file. Note that we are not setting NODE_ENV to development,
since this is Express’s default behavior if NODE_ENV is not set. When
moving to production, you can set this to production to enable view
caching and less verbose error messages. Also note that we have specified
the db database container as the host, as discussed in Step 2. - ports:
This maps port 80 on the host to port 8080 on the container. - volumes:
We are including two types of mounts here: - The first is a bind mount that
mounts our application code on the host to the /home/node/app
directory on the container. This will facilitate rapid development, since
any changes you make to your host code will be populated immediately in

the container. - The second is a named volume, node_modules. When
Docker runs the npm install instruction listed in the application
Dockerfile, npm will create a new node_modules directory on the
container that includes the packages required to run the application. The
bind mount we just created will hide this newly created node_modules
directory, however. Since node_modules on the host is empty, the bind
will map an empty directory to the container, overriding the new
node_modules directory and preventing our application from starting.
The named node_modules volume solves this problem by persisting the
contents of the /home/node/app/node_modules directory and
mounting it to the container, hiding the bind.
**Keep the following points in mind when using
this approach**:
- Your bind will mount the contents of the
`node_modules` directory on the container to the
host and this directory will be owned by `root`,
since the named volume was created by Docker.
- If you have a pre-existing `node_modules`
directory on the host, it will override the
`node_modules` directory created on the container.
The setup that we're building in this tutorial
assumes that you do **not** have a pre-existing
`node_modules` directory and that you won't be
working with `npm` on your host. This is in
keeping with a [twelve-factor approach to
application development](https://12factor.net/),

which minimizes dependencies between execution
environments.
networks: This specifies that our application service will join the
app-network network, which we will define at the bottom on the
file.
command: This option lets you set the command that should be
executed when Compose runs the image. Note that this will override
the CMD instruction that we set in our application Dockerfile.
Here, we are running the application using the wait-for script,
which will poll the db service on port 27017 to test whether or not
the database service is ready. Once the readiness test succeeds, the
script will execute the command we have set,
/home/node/app/node_modules/.bin/nodemon app.js,
to start the application with nodemon. This will ensure that any
future changes we make to our code are reloaded without our having
to restart the application.
Next, create the db service by adding the following code below the
application service definition:

~/node_project/docker-compose.yml
...
db:
image: mongo:4.1.8-xenial
container_name: db
restart: unless-stopped
env_file: .env
environment:
- MONGO_INITDB_ROOT_USERNAME=$MONGO_USERNAME
- MONGO_INITDB_ROOT_PASSWORD=$MONGO_PASSWORD
volumes:
- dbdata:/data/db
networks:
- app-network
Some of the settings we defined for the nodejs service remain the same,
but we’ve also made the following changes to the image,
environment, and volumes definitions: - image: To create this
service, Compose will pull the 4.1.8-xenial Mongo image from
Docker Hub. We are pinning a particular version to avoid possible future
conflicts as the Mongo image changes. For more information about
version pinning, please see the Docker documentation on Dockerfile best
practices. - MONGO_INITDB_ROOT_USERNAME,
MONGO_INITDB_ROOT_PASSWORD: The mongo image makes these
environment variables available so that you can modify the initialization
of your database instance. MONGO_INITDB_ROOT_USERNAME and
MONGO_INITDB_ROOT_PASSWORD together create a root user in the

admin authentication database and ensure that authentication is enabled
when the container starts. We have set
MONGO_INITDB_ROOT_USERNAME and
MONGO_INITDB_ROOT_PASSWORD using the values from our .env
file, which we pass to the db service using the env_file option. Doing
this means that our sammy application user will be a root user on the
database instance, with access to all of the administrative and operational
privileges of that role. When working in production, you will want to
create a dedicated application user with appropriately scoped privileges.
Note: Keep in mind that these variables will not take effect if you start
the container with an existing data directory in place.
dbdata:/data/db: The named volume dbdata will persist the
data stored in Mongo’s default data directory, /data/db. This will
ensure that you don’t lose data in cases where you stop or remove
containers.
We’ve also added the db service to the app-network network with
the networks option.
As a final step, add the volume and network definitions to the bottom of
the file:

~/node_project/docker-compose.yml
...
networks:
app-network:
driver: bridge
volumes:
dbdata:
node_modules:
The user-defined bridge network app-network enables
communication between our containers since they are on the same Docker
daemon host. This streamlines traffic and communication within the
application, as it opens all ports between containers on the same bridge
network, while exposing no ports to the outside world. Thus, our db and
nodejs containers can communicate with each other, and we only need to
expose port 80 for front-end access to the application.
Our top-level volumes key defines the volumes dbdata and
node_modules. When Docker creates volumes, the contents of the
volume are stored in a part of the host filesystem,
/var/lib/docker/volumes/, that’s managed by Docker. The
contents of each volume are stored in a directory under
/var/lib/docker/volumes/ and get mounted to any container that
uses the volume. In this way, the shark information data that our users will
create will persist in the dbdata volume even if we remove and recreate
the db container.
The finished docker-compose.yml file will look like this:

~/node_project/docker-compose.yml
version: '3'
services:
nodejs:
build:
context: .
dockerfile: Dockerfile
image: nodejs
container_name: nodejs
restart: unless-stopped
env_file: .env
environment:
- MONGO_USERNAME=$MONGO_USERNAME
- MONGO_PASSWORD=$MONGO_PASSWORD
- MONGO_HOSTNAME=db
- MONGO_PORT=$MONGO_PORT
- MONGO_DB=$MONGO_DB
ports:
- "80:8080"
volumes:
- .:/home/node/app
- node_modules:/home/node/app/node_modules
networks:
- app-network
command: ./wait-for.sh db:27017 --
/home/node/app/node_modules/.bin/nodemon app.js

db:
image: mongo:4.1.8-xenial
container_name: db
restart: unless-stopped
env_file: .env
environment:
- MONGO_INITDB_ROOT_USERNAME=$MONGO_USERNAME
- MONGO_INITDB_ROOT_PASSWORD=$MONGO_PASSWORD
volumes:
- dbdata:/data/db
networks:
- app-network
networks:
app-network:
driver: bridge
volumes:
dbdata:
node_modules:
Save and close the file when you are finished editing.
With your service definitions in place, you are ready to start the
application.
Step 5 — Testing the Application

With your docker-compose.yml file in place, you can create your
services with the docker-compose up command. You can also test
that your data will persist by stopping and removing your containers with
docker-compose down.
First, build the container images and create the services by running
docker-compose up with the -d flag, which will then run the
nodejs and db containers in the background:
docker-compose up -d
You will see output confirming that your services have been created:
Output
...
Creating db ... done
Creating nodejs ... done
You can also get more detailed information about the startup processes
by displaying the log output from the services:
docker-compose logs
You will see something like this if everything has started correctly:

Output
...
nodejs | [nodemon] starting `node app.js`
nodejs | Example app listening on 8080!
nodejs | MongoDB is connected
...
db | 2019-02-22T17:26:27.329+0000 I ACCESS [conn2]
Successfully authenticated as principal sammy on admin
You can also check the status of your containers with docker-
compose ps:
docker-compose ps
You will see output indicating that your containers are running:
Output
Name Command State Ports
-------------------------------------------------------------------
---
db docker-entrypoint.sh mongod Up 27017/tcp
nodejs ./wait-for.sh db:27017 -- ... Up 0.0.0.0:80-
>8080/tcp
With your services running, you can visit
http://your_server_ip in the browser. You will see a landing page
that looks like this:

Application Landing Page
Click on the Get Shark Info button. You will see a page with an entry
form where you can enter a shark name and a description of that shark’s
general character:
Shark Info Form

In the form, add a shark of your choosing. For the purpose of this
demonstration, we will add Megalodon Shark to the Shark Name field,
and Ancient to the Shark Character field:
Filled Shark Form
Click on the Submit button. You will see a page with this shark
information displayed back to you:

Shark Output
As a final step, we can test that the data you’ve just entered will persist
if you remove your database container.
Back at your terminal, type the following command to stop and remove
your containers and network:
docker-compose down
Note that we are not including the --volumes option; hence, our
dbdata volume is not removed.
The following output confirms that your containers and network have
been removed:

Output
Stopping nodejs ... done
Stopping db ... done
Removing nodejs ... done
Removing db ... done
Removing network node_project_app-network
Recreate the containers:
docker-compose up -d
Now head back to the shark information form:
Shark Info Form
Enter a new shark of your choosing. We’ll go with Whale Shark and
Large:

Enter New Shark
Once you click Submit, you will see that the new shark has been added
to the shark collection in your database without the loss of the data you’ve
already entered:
Complete Shark Collection

Your application is now running on Docker containers with data
persistence and code synchronization enabled.
Conclusion
By following this tutorial, you have created a development setup for your
Node application using Docker containers. You’ve made your project more
modular and portable by extracting sensitive information and decoupling
your application’s state from your application code. You have also
configured a boilerplate docker-compose.yml file that you can revise
as your development needs and requirements change.
As you develop, you may be interested in learning more about designing
applications for containerized and Cloud Native workflows. Please see
Architecting Applications for Kubernetes and Modernizing Applications
for Kubernetes for more information on these topics.
To learn more about the code used in this tutorial, please see How To
Build a Node.js Application with Docker and How To Integrate MongoDB
with Your Node Application. For information about deploying a Node
application with an Nginx reverse proxy using containers, please see How
To Secure a Containerized Node.js Application with Nginx, Let’s Encrypt,
and Docker Compose.

How To Migrate a Docker Compose
Workflow to Kubernetes
Written by Kathleen Juell
So far you have built a containerized application and database, and
learned how to manage and run your containers using Docker Compose.
This chapter will explain how to migrate from running your application
with Docker Compose to Kubernetes. Kubernetes will help you scale your
application and make it resilient so that deployments and bugs don’t cause
downtime.
To migrate from Docker Compose to Kubernetes, you’ll learn how to
create Kubernetes objects that duplicate the functionality in your
docker-compose.yml file. Once your application is running in
Kubernetes, you will be able to scale and manage it using tools like Helm,
which you will learn about in the next chapter.
When building modern, stateless applications, containerizing your
application’s components is the first step in deploying and scaling on
distributed platforms. If you have used Docker Compose in development,
you will have modernized and containerized your application by: -
Extracting necessary configuration information from your code. -
Offloading your application’s state. - Packaging your application for
repeated use.
You will also have written service definitions that specify how your
container images should run.

To run your services on a distributed platform like Kubernetes, you will
need to translate your Compose service definitions to Kubernetes objects.
This will allow you to scale your application with resiliency. One tool that
can speed up the translation process to Kubernetes is kompose, a
conversion tool that helps developers move Compose workflows to
container orchestrators like Kubernetes or OpenShift.
In this tutorial, you will translate Compose services to Kubernetes
objects using kompose. You will use the object definitions that kompose
provides as a starting point and make adjustments to ensure that your
setup will use Secrets, Services, and PersistentVolumeClaims in the way
that Kubernetes expects. By the end of the tutorial, you will have a single-
instance Node.js application with a MongoDB database running on a
Kubernetes cluster. This setup will mirror the functionality of the code
described in Containerizing a Node.js Application with Docker Compose
and will be a good starting point to build out a production-ready solution
that will scale with your needs.
Prerequisites
A Kubernetes 1.10+ cluster with role-based access control (RBAC)
enabled. This setup will use a DigitalOcean Kubernetes cluster, but
you are free to create a cluster using another method.
The kubectl command-line tool installed on your local machine or
development server and configured to connect to your cluster. You
can read more about installing kubectl in the official
documentation.

Docker installed on your local machine or development server. If you
are working with Ubuntu 18.04, follow Steps 1 and 2 of How To
Install and Use Docker on Ubuntu 18.04; otherwise, follow the
official documentation for information about installing on other
operating systems. Be sure to add your non-root user to the docker
group, as described in Step 2 of the linked tutorial.
A Docker Hub account. For an overview of how to set this up, refer to
this introduction to Docker Hub.
Step 1 — Installing kompose
To begin using kompose, navigate to the project’s GitHub Releases page,
and copy the link to the current release (version 1.18.0 as of this writing).
Paste this link into the following curl command to download the latest
version of kompose:
curl -L
https://github.com/kubernetes/kompose/releases/dow
nload/v1.18.0/kompose-linux-amd64 -o kompose
For details about installing on non-Linux systems, please refer to the
installation instructions.
Make the binary executable:
chmod +x kompose
Move it to your PATH:
sudo mv ./kompose /usr/local/bin/kompose
To verify that it has been installed properly, you can do a version check:
kompose version
If the installation was successful, you will see output like the following:

Output
1.18.0 (06a2e56)
With kompose installed and ready to use, you can now clone the
Node.js project code that you will be translating to Kubernetes.
Step 2 — Cloning and Packaging the Application
To use our application with Kubernetes, we will need to clone the project
code and package the application so that the kubelet service can pull the
image.
Our first step will be to clone the node-mongo-docker-dev repository
from the DigitalOcean Community GitHub account. This repository
includes the code from the setup described in Containerizing a Node.js
Application for Development With Docker Compose, which uses a demo
Node.js application to demonstrate how to set up a development
environment using Docker Compose. You can find more information about
the application itself in the series From Containers to Kubernetes with
Node.js.
Clone the repository into a directory called node_project:
git clone https://github.com/do-community/node-
mongo-docker-dev.git node_project
Navigate to the node_project directory:
cd node_project
The node_project directory contains files and directories for a
shark information application that works with user input. It has been
modernized to work with containers: sensitive and specific configuration

information has been removed from the application code and refactored to
be injected at runtime, and the application’s state has been offloaded to a
MongoDB database.
For more information about designing modern, stateless applications,
please see Architecting Applications for Kubernetes and Modernizing
Applications for Kubernetes.
The project directory includes a Dockerfile with instructions for
building the application image. Let’s build the image now so that you can
push it to your Docker Hub account and use it in your Kubernetes setup.
Using the docker build command, build the image with the -t
flag, which allows you to tag it with a memorable name. In this case, tag
the image with your Docker Hub username and name it node-
kubernetes or a name of your own choosing:
docker build -t your_dockerhub_username/node-
kubernetes .
The . in the command specifies that the build context is the current
directory.
It will take a minute or two to build the image. Once it is complete,
check your images:
docker images
You will see the following output:

Output
REPOSITORY TAG IMAGE
ID CREATED SIZE
your_dockerhub_username/node-kubernetes latest
9c6f897e1fbc 3 seconds ago 90MB
node 10-alpine
94f3c8956482 12 days ago 71MB
Next, log in to the Docker Hub account you created in the prerequisites:
docker login -u your_dockerhub_username
When prompted, enter your Docker Hub account password. Logging in
this way will create a ~/.docker/config.json file in your user’s
home directory with your Docker Hub credentials.
Push the application image to Docker Hub with the docker push
command. Remember to replace your_dockerhub_username with
your own Docker Hub username:
docker push your_dockerhub_username/node-
kubernetes
You now have an application image that you can pull to run your
application with Kubernetes. The next step will be to translate your
application service definitions to Kubernetes objects.
Step 3 — Translating Compose Services to Kubernetes
Objects with kompose
Our Docker Compose file, here called docker-compose.yaml, lays
out the definitions that will run our services with Compose. A service in

Compose is a running container, and service definitions contain
information about how each container image will run. In this step, we will
translate these definitions to Kubernetes objects by using kompose to
create yaml files. These files will contain specs for the Kubernetes
objects that describe their desired state.
We will use these files to create different types of objects: Services,
which will ensure that the Pods running our containers remain accessible;
Deployments, which will contain information about the desired state of
our Pods; a PersistentVolumeClaim to provision storage for our database
data; a ConfigMap for environment variables injected at runtime; and a
Secret for our application’s database user and password. Some of these
definitions will be in the files kompose will create for us, and others we
will need to create ourselves.
First, we will need to modify some of the definitions in our docker-
compose.yaml file to work with Kubernetes. We will include a
reference to our newly-built application image in our nodejs service
definition and remove the bind mounts, volumes, and additional
commands that we used to run the application container in development
with Compose. Additionally, we’ll redefine both containers’ restart
policies to be in line with the behavior Kubernetes expects.
Open the file with nano or your favorite editor:
nano docker-compose.yaml
The current definition for the nodejs application service looks like
this:

~/node_project/docker-compose.yaml
...
services:
nodejs:
build:
context: .
dockerfile: Dockerfile
image: nodejs
container_name: nodejs
restart: unless-stopped
env_file: .env
environment:
- MONGO_USERNAME=$MONGO_USERNAME
- MONGO_PASSWORD=$MONGO_PASSWORD
- MONGO_HOSTNAME=db
- MONGO_PORT=$MONGO_PORT
- MONGO_DB=$MONGO_DB
ports:
- "80:8080"
volumes:
- .:/home/node/app
- node_modules:/home/node/app/node_modules
networks:
- app-network
command: ./wait-for.sh db:27017 --
/home/node/app/node_modules/.bin/nodemon app.js
...

Make the following edits to your service definition: - Use your node-
kubernetes image instead of the local Dockerfile. - Change the
container restart policy from unless-stopped to always. -
Remove the volumes list and the command instruction.
The finished service definition will now look like this:
~/node_project/docker-compose.yaml
...
services:
nodejs:
image: your_dockerhub_username/node-kubernetes
container_name: nodejs
restart: always
env_file: .env
environment:
- MONGO_USERNAME=$MONGO_USERNAME
- MONGO_PASSWORD=$MONGO_PASSWORD
- MONGO_HOSTNAME=db
- MONGO_PORT=$MONGO_PORT
- MONGO_DB=$MONGO_DB
ports:
- "80:8080"
networks:
- app-network
...

Next, scroll down to the db service definition. Here, make the following
edits: - Change the restart policy for the service to always. - Remove
the .env file. Instead of using values from the .env file, we will pass the
values for our MONGO_INITDB_ROOT_USERNAME and
MONGO_INITDB_ROOT_PASSWORD to the database container using the
Secret we will create in Step 4.
The db service definition will now look like this:
~/node_project/docker-compose.yaml
...
db:
image: mongo:4.1.8-xenial
container_name: db
restart: always
environment:
- MONGO_INITDB_ROOT_USERNAME=$MONGO_USERNAME
- MONGO_INITDB_ROOT_PASSWORD=$MONGO_PASSWORD
volumes:
- dbdata:/data/db
networks:
- app-network
...
Finally, at the bottom of the file, remove the node_modules volumes
from the top-level volumes key. The key will now look like this:

~/node_project/docker-compose.yaml
...
volumes:
dbdata:
Save and close the file when you are finished editing.
Before translating our service definitions, we will need to write the
.env file that kompose will use to create the ConfigMap with our non-
sensitive information. Please see Step 2 of Containerizing a Node.js
Application for Development With Docker Compose for a longer
explanation of this file.
In that tutorial, we added .env to our .gitignore file to ensure that
it would not copy to version control. This means that it did not copy over
when we cloned the node-mongo-docker-dev repository in Step 2 of this
tutorial. We will therefore need to recreate it now.
Create the file:
nano .env
kompose will use this file to create a ConfigMap for our application.
However, instead of assigning all of the variables from the nodejs
service definition in our Compose file, we will add only the MONGO_DB
database name and the MONGO_PORT. We will assign the database
username and password separately when we manually create a Secret
object in Step 4.
Add the following port and database name information to the .env file.
Feel free to rename your database if you would like:

~/node_project/.env
MONGO_PORT=27017
MONGO_DB=sharkinfo
Save and close the file when you are finished editing.
You are now ready to create the files with your object specs. kompose
offers multiple options for translating your resources. You can: - Create
yaml files based on the service definitions in your docker-
compose.yaml file with kompose convert. - Create Kubernetes
objects directly with kompose up. - Create a Helm chart with kompose
convert -c.
For now, we will convert our service definitions to yaml files and then
add to and revise the files kompose creates.
Convert your service definitions to yaml files with the following
command:
kompose convert
You can also name specific or multiple Compose files using the -f flag.
After you run this command, kompose will output information about the
files it has created:
Output
INFO Kubernetes file "nodejs-service.yaml" created
INFO Kubernetes file "db-deployment.yaml" created
INFO Kubernetes file "dbdata-persistentvolumeclaim.yaml" created
INFO Kubernetes file "nodejs-deployment.yaml" created
INFO Kubernetes file "nodejs-env-configmap.yaml" created

These include yaml files with specs for the Node application Service,
Deployment, and ConfigMap, as well as for the dbdata
PersistentVolumeClaim and MongoDB database Deployment.
These files are a good starting point, but in order for our application’s
functionality to match the setup described in Containerizing a Node.js
Application for Development With Docker Compose we will need to make
a few additions and changes to the files kompose has generated.
Step 4 — Creating Kubernetes Secrets
In order for our application to function in the way we expect, we will need
to make a few modifications to the files that kompose has created. The
first of these changes will be generating a Secret for our database user and
password and adding it to our application and database Deployments.
Kubernetes offers two ways of working with environment variables:
ConfigMaps and Secrets. kompose has already created a ConfigMap with
the non-confidential information we included in our .env file, so we will
now create a Secret with our confidential information: our database
username and password.
The first step in manually creating a Secret will be to convert your
username and password to base64, an encoding scheme that allows you to
uniformly transmit data, including binary data.
Convert your database username:
echo -n 'your_database_username' | base64
Note down the value you see in the output.
Next, convert your password:
echo -n 'your_database_password' | base64

Take note of the value in the output here as well.
Open a file for the Secret:
nano secret.yaml
Note: Kubernetes objects are typically defined using YAML, which
strictly forbids tabs and requires two spaces for indentation. If you would
like to check the formatting of any of your yaml files, you can use a linter
or test the validity of your syntax using kubectl create with the --
dry-run and --validate flags:
kubectl create -f your_yaml_file.yaml --dry-run --
validate=true
In general, it is a good idea to validate your syntax before creating
resources with kubectl.
Add the following code to the file to create a Secret that will define
your MONGO_USERNAME and MONGO_PASSWORD using the encoded
values you just created. Be sure to replace the dummy values here with
your encoded username and password:
~/node_project/secret.yaml
apiVersion: v1
kind: Secret
metadata:
name: mongo-secret
data:
MONGO_USERNAME: your_encoded_username
MONGO_PASSWORD: your_encoded_password

We have named the Secret object mongo-secret, but you are free to
name it anything you would like.
Save and close this file when you are finished editing. As you did with
your .env file, be sure to add secret.yaml to your .gitignore file
to keep it out of version control.
With secret.yaml written, our next step will be to ensure that our
application and database Pods both use the values we added to the file.
Let’s start by adding references to the Secret to our application
Deployment.
Open the file called nodejs-deployment.yaml:
nano nodejs-deployment.yaml
The file’s container specifications include the following environment
variables defined under the env key:

~/node_project/nodejs-deployment.yaml
apiVersion: extensions/v1beta1
kind: Deployment
...
spec:
containers:
- env:
- name: MONGO_DB
valueFrom:
configMapKeyRef:
key: MONGO_DB
name: nodejs-env
- name: MONGO_HOSTNAME
value: db
- name: MONGO_PASSWORD
- name: MONGO_PORT
valueFrom:
configMapKeyRef:
key: MONGO_PORT
name: nodejs-env
- name: MONGO_USERNAME
We will need to add references to our Secret to the MONGO_USERNAME
and MONGO_PASSWORD variables listed here, so that our application will
have access to those values. Instead of including a configMapKeyRef
key to point to our nodejs-env ConfigMap, as is the case with the
values for MONGO_DB and MONGO_PORT, we’ll include a

secretKeyRef key to point to the values in our mongo-secret
secret.
Add the following Secret references to the MONGO_USERNAME and
MONGO_PASSWORD variables:

~/node_project/nodejs-deployment.yaml
apiVersion: extensions/v1beta1
kind: Deployment
...
spec:
containers:
- env:
- name: MONGO_DB
valueFrom:
configMapKeyRef:
key: MONGO_DB
name: nodejs-env
- name: MONGO_HOSTNAME
value: db
- name: MONGO_PASSWORD
valueFrom:
secretKeyRef:
name: mongo-secret
key: MONGO_PASSWORD
- name: MONGO_PORT
valueFrom:
configMapKeyRef:
key: MONGO_PORT
name: nodejs-env
- name: MONGO_USERNAME
valueFrom:

secretKeyRef:
name: mongo-secret
key: MONGO_USERNAME
Save and close the file when you are finished editing.
Next, we’ll add the same values to the db-deployment.yaml file.
Open the file for editing:
nano db-deployment.yaml
In this file, we will add references to our Secret for following variable
keys: MONGO_INITDB_ROOT_USERNAME and
MONGO_INITDB_ROOT_PASSWORD. The mongo image makes these
variables available so that you can modify the initialization of your
database instance. MONGO_INITDB_ROOT_USERNAME and
MONGO_INITDB_ROOT_PASSWORD together create a root user in the
admin authentication database and ensure that authentication is enabled
when the database container starts.
Using the values we set in our Secret ensures that we will have an
application user with root privileges on the database instance, with
access to all of the administrative and operational privileges of that role.
When working in production, you will want to create a dedicated
application user with appropriately scoped privileges.
Under the MONGO_INITDB_ROOT_USERNAME and
MONGO_INITDB_ROOT_PASSWORD variables, add references to the
Secret values:

~/node_project/db-deployment.yaml
apiVersion: extensions/v1beta1
kind: Deployment
...
spec:
containers:
- env:
- name: MONGO_INITDB_ROOT_PASSWORD
valueFrom:
secretKeyRef:
name: mongo-secret
key: MONGO_PASSWORD
- name: MONGO_INITDB_ROOT_USERNAME
valueFrom:
secretKeyRef:
name: mongo-secret
key: MONGO_USERNAME
image: mongo:4.1.8-xenial
...
Save and close the file when you are finished editing.
With your Secret in place, you can move on to creating your database
Service and ensuring that your application container only attempts to
connect to the database once it is fully set up and initialized.
Step 5 — Creating the Database Service and an
Application Init Container

Now that we have our Secret, we can move on to creating our database
Service and an Init Container that will poll this Service to ensure that our
application only attempts to connect to the database once the database
startup tasks, including creating the MONGO_INITDB user and password,
are complete.
For a discussion of how to implement this functionality in Compose,
please see Step 4 of Containerizing a Node.js Application for Development
with Docker Compose.
Open a file to define the specs for the database Service:
nano db-service.yaml
Add the following code to the file to define the Service:

~/node_project/db-service.yaml
apiVersion: v1
kind: Service
metadata:
annotations:
kompose.cmd: kompose convert
kompose.version: 1.18.0 (06a2e56)
creationTimestamp: null
labels:
io.kompose.service: db
name: db
spec:
ports:
- port: 27017
targetPort: 27017
selector:
io.kompose.service: db
status:
loadBalancer: {}
The selector that we have included here will match this Service
object with our database Pods, which have been defined with the label
io.kompose.service: db by kompose in the db-
deployment.yaml file. We’ve also named this service db.
Save and close the file when you are finished editing.
Next, let’s add an Init Container field to the containers array in
nodejs-deployment.yaml. This will create an Init Container that we

can use to delay our application container from starting until the db
Service has been created with a Pod that is reachable. This is one of the
possible uses for Init Containers; to learn more about other use cases,
please see the official documentation.
Open the nodejs-deployment.yaml file:
nano nodejs-deployment.yaml
Within the Pod spec and alongside the containers array, we are
going to add an initContainers field with a container that will poll
the db Service.
Add the following code below the ports and resources fields and
above the restartPolicy in the nodejs containers array:

~/node_project/nodejs-deployment.yaml
apiVersion: extensions/v1beta1
kind: Deployment
...
spec:
containers:
...
name: nodejs
ports:
- containerPort: 8080
resources: {}
initContainers:
- name: init-db
image: busybox
command: ['sh', '-c', 'until nc -z db:27017; do echo
waiting for db; sleep 2; done;']
restartPolicy: Always
...
This Init Container uses the BusyBox image, a lightweight image that
includes many UNIX utilities. In this case, we’ll use the netcat utility to
poll whether or not the Pod associated with the db Service is accepting
TCP connections on port 27017.
This container command replicates the functionality of the wait-for
script that we removed from our docker-compose.yaml file in Step
3. For a longer discussion of how and why our application used the wait-

for script when working with Compose, please see Step 4 of
Containerizing a Node.js Application for Development with Docker
Compose.
Init Containers run to completion; in our case, this means that our Node
application container will not start until the database container is running
and accepting connections on port 27017. The db Service definition
allows us to guarantee this functionality regardless of the exact location of
the database container, which is mutable.
Save and close the file when you are finished editing.
With your database Service created and your Init Container in place to
control the startup order of your containers, you can move on to checking
the storage requirements in your PersistentVolumeClaim and exposing
your application service using a LoadBalancer.
Step 6 — Modifying the PersistentVolumeClaim and
Exposing the Application Frontend
Before running our application, we will make two final changes to ensure
that our database storage will be provisioned properly and that we can
expose our application frontend using a LoadBalancer.
First, let’s modify the storage resource defined in the
PersistentVolumeClaim that kompose created for us. This Claim allows us
to dynamically provision storage to manage our application’s state.
To work with PersistentVolumeClaims, you must have a StorageClass
created and configured to provision storage resources. In our case, because
we are working with DigitalOcean Kubernetes, our default StorageClass

provisioner is set to dobs.csi.digitalocean.com —
DigitalOcean Block Storage.
We can check this by typing:
kubectl get storageclass
If you are working with a DigitalOcean cluster, you will see the
following output:
Output
NAME PROVISIONER AGE
do-block-storage (default) dobs.csi.digitalocean.com 76m
If you are not working with a DigitalOcean cluster, you will need to
create a StorageClass and configure a provisioner of your choice. For
details about how to do this, please see the official documentation.
When kompose created dbdata-
persistentvolumeclaim.yaml, it set the storage resource to
a size that does not meet the minimum size requirements of our
provisioner. We will therefore need to modify our
PersistentVolumeClaim to use the minimum viable DigitalOcean Block
Storage unit: 1GB. Please feel free to modify this to meet your storage
requirements.
Open dbdata-persistentvolumeclaim.yaml:
nano dbdata-persistentvolumeclaim.yaml
Replace the storage value with 1Gi:

~/node_project/dbdata-persistentvolumeclaim.yaml
apiVersion: v1
kind: PersistentVolumeClaim
metadata:
creationTimestamp: null
labels:
io.kompose.service: dbdata
name: dbdata
spec:
accessModes:
- ReadWriteOnce
resources:
requests:
storage: 1Gi
status: {}
Also note the accessMode: ReadWriteOnce means that the volume
provisioned as a result of this Claim will be read-write only by a single
node. Please see the documentation for more information about different
access modes.
Save and close the file when you are finished.
Next, open nodejs-service.yaml:
nano nodejs-service.yaml
We are going to expose this Service externally using a DigitalOcean
Load Balancer. If you are not using a DigitalOcean cluster, please consult
the relevant documentation from your cloud provider for information

about their load balancers. Alternatively, you can follow the official
Kubernetes documentation on setting up a highly available cluster with
kubeadm, but in this case you will not be able to use
PersistentVolumeClaims to provision storage.
Within the Service spec, specify LoadBalancer as the Service type:
~/node_project/nodejs-service.yaml
apiVersion: v1
kind: Service
...
spec:
type: LoadBalancer
ports:
...
When we create the nodejs Service, a load balancer will be
automatically created, providing us with an external IP where we can
access our application.
Save and close the file when you are finished editing.
With all of our files in place, we are ready to start and test the
application.
Step 7 — Starting and Accessing the Application
It’s time to create our Kubernetes objects and test that our application is
working as expected.

To create the objects we’ve defined, we’ll use kubectl create with
the -f flag, which will allow us to specify the files that kompose created
for us, along with the files we wrote. Run the following command to create
the Node application and MongoDB database Services and Deployments,
along with your Secret, ConfigMap, and PersistentVolumeClaim:
kubectl create -f nodejs-service.yaml,nodejs-
deployment.yaml,nodejs-env-configmap.yaml,db-
service.yaml,db-deployment.yaml,dbdata-
persistentvolumeclaim.yaml,secret.yaml
You will see the following output indicating that the objects have been
created:
Output
service/nodejs created
deployment.extensions/nodejs created
configmap/nodejs-env created
service/db created
deployment.extensions/db created
persistentvolumeclaim/dbdata created
secret/mongo-secret created
To check that your Pods are running, type:
kubectl get pods
You don’t need to specify a Namespace here, since we have created our
objects in the default Namespace. If you are working with multiple
Namespaces, be sure to include the -n flag when running this command,
along with the name of your Namespace.

You will see the following output while your db container is starting
and your application Init Container is running:
Output
NAME READY STATUS RESTARTS
AGE
db-679d658576-kfpsl 0/1 ContainerCreating 0
10s
nodejs-6b9585dc8b-pnsws 0/1 Init:0/1 0
10s
Once that container has run and your application and database
containers have started, you will see this output:
Output
NAME READY STATUS RESTARTS AGE
db-679d658576-kfpsl 1/1 Running 0 54s
nodejs-6b9585dc8b-pnsws 1/1 Running 0 54s
The Running STATUS indicates that your Pods are bound to nodes and
that the containers associated with those Pods are running. READY
indicates how many containers in a Pod are running. For more
information, please consult the documentation on Pod lifecycles.
Note: If you see unexpected phases in the STATUS column, remember
that you can troubleshoot your Pods with the following commands:

kubectl describe pods your_pod
kubectl logs your_pod
With your containers running, you can now access the application. To
get the IP for the LoadBalancer, type:
kubectl get svc
You will see the following output:
Output
NAME TYPE CLUSTER-IP EXTERNAL-IP
PORT(S) AGE
db ClusterIP 10.245.189.250 <none>
27017/TCP 93s
kubernetes ClusterIP 10.245.0.1 <none>
443/TCP 25m12s
nodejs LoadBalancer 10.245.15.56 your_lb_ip
80:30729/TCP 93s
The EXTERNAL_IP associated with the nodejs service is the IP
address where you can access the application. If you see a <pending>
status in the EXTERNAL_IP column, this means that your load balancer is
still being created.
Once you see an IP in that column, navigate to it in your browser:
http://your_lb_ip.
You should see the following landing page:

Application Landing Page
Click on the Get Shark Info button. You will see a page with an entry
form where you can enter a shark name and a description of that shark’s
general character:
Shark Info Form

In the form, add a shark of your choosing. To demonstrate, we will add
Megalodon Shark to the Shark Name field, and Ancient to the Shark
Character field:
Filled Shark Form
Click on the Submit button. You will see a page with this shark
information displayed back to you:

Shark Output
You now have a single instance setup of a Node.js application with a
MongoDB database running on a Kubernetes cluster.
Conclusion
The files you have created in this tutorial are a good starting point to build
from as you move toward production. As you develop your application,
you can work on implementing the following: - Centralized logging and
monitoring. Please see the relevant discussion in Modernizing
Applications for Kubernetes for a general overview. You can also look at
How To Set Up an Elasticsearch, Fluentd and Kibana (EFK) Logging Stack
on Kubernetes to learn how to set up a logging stack with Elasticsearch,
Fluentd, and Kibana. Also check out An Introduction to Service Meshes
for information about how service meshes like Istio implement this
functionality. - Ingress Resources to route traffic to your cluster. This is a
good alternative to a LoadBalancer in cases where you are running

multiple Services, which each require their own LoadBalancer, or where
you would like to implement application-level routing strategies (A/B &
canary tests, for example). For more information, check out How to Set Up
an Nginx Ingress with Cert-Manager on DigitalOcean Kubernetes and the
related discussion of routing in the service mesh context in An
Introduction to Service Meshes. - Backup strategies for your Kubernetes
objects. For guidance on implementing backups with Velero (formerly
Heptio Ark) with DigitalOcean’s Kubernetes product, please see How To
Back Up and Restore a Kubernetes Cluster on DigitalOcean Using Heptio
Ark.

How To Scale a Node.js Application with
MongoDB on Kubernetes Using Helm
Written by Kathleen Juell
At this point in the book you have learned how to build a Node.js
application using Docker images, and run it as a container. You have also
learned how to add a database to store persistent data, and coordinate
running the application and database using Docker Compose, followed by
Kubernetes.
In this chapter you will learn how to scale your application on
Kubernetes using Helm. By the end of this chapter, you will be able to run
multiple copies of your application with MongoDB on Kubernetes, using
Helm to scale the application up or down as you see fit.
Kubernetes is a system for running modern, containerized applications
at scale. With it, developers can deploy and manage applications across
clusters of machines. And though it can be used to improve efficiency and
reliability in single-instance application setups, Kubernetes is designed to
run multiple instances of an application across groups of machines.
When creating multi-service deployments with Kubernetes, many
developers opt to use the Helm package manager. Helm streamlines the
process of creating multiple Kubernetes resources by offering charts and
templates that coordinate how these objects interact. It also offers pre-
packaged charts for popular open-source projects.
In this tutorial, you will deploy a Node.js application with a MongoDB
database onto a Kubernetes cluster using Helm charts. You will use the

official Helm MongoDB replica set chart to create a StatefulSet object
consisting of three Pods, a Headless Service, and three
PersistentVolumeClaims. You will also create a chart to deploy a multi-
replica Node.js application using a custom application image. The setup
you will build in this tutorial will mirror the functionality of the code
described in Containerizing a Node.js Application with Docker Compose
and will be a good starting point to build a resilient Node.js application
with a MongoDB data store that can scale with your needs.
Prerequisites
To complete this tutorial, you will need: - A Kubernetes 1.10+ cluster with
role-based access control (RBAC) enabled. This setup will use a
DigitalOcean Kubernetes cluster, but you are free to create a cluster using
another method. - The kubectl command-line tool installed on your
local machine or development server and configured to connect to your
cluster. You can read more about installing kubectl in the official
documentation. - Helm installed on your local machine or development
server and Tiller installed on your cluster, following the directions
outlined in Steps 1 and 2 of How To Install Software on Kubernetes
Clusters with the Helm Package Manager. - Docker installed on your local
machine or development server. If you are working with Ubuntu 18.04,
follow Steps 1 and 2 of How To Install and Use Docker on Ubuntu 18.04;
otherwise, follow the official documentation for information about
installing on other operating systems. Be sure to add your non-root user to
the docker group, as described in Step 2 of the linked tutorial. - A

Docker Hub account. For an overview of how to set this up, refer to this
introduction to Docker Hub.
Step 1 — Cloning and Packaging the Application
To use our application with Kubernetes, we will need to package it so that
the kubelet agent can pull the image. Before packaging the application,
however, we will need to modify the MongoDB connection URI in the
application code to ensure that our application can connect to the members
of the replica set that we will create with the Helm mongodb-
replicaset chart.
Our first step will be to clone the node-mongo-docker-dev repository
from the DigitalOcean Community GitHub account. This repository
includes the code from the setup described in Containerizing a Node.js
Application for Development With Docker Compose, which uses a demo
Node.js application with a MongoDB database to demonstrate how to set
up a development environment with Docker Compose. You can find more
information about the application itself in the series From Containers to
Kubernetes with Node.js.
Clone the repository into a directory called node_project:
git clone https://github.com/do-community/node-
mongo-docker-dev.git node_project
Navigate to the node_project directory:
cd node_project
The node_project directory contains files and directories for a
shark information application that works with user input. It has been
modernized to work with containers: sensitive and specific configuration

information has been removed from the application code and refactored to
be injected at runtime, and the application’s state has been offloaded to a
MongoDB database.
For more information about designing modern, containerized
applications, please see Architecting Applications for Kubernetes and
Modernizing Applications for Kubernetes.
When we deploy the Helm mongodb-replicaset chart, it will
create: - A StatefulSet object with three Pods — the members of the
MongoDB replica set. Each Pod will have an associated
PersistentVolumeClaim and will maintain a fixed identity in the event of
rescheduling. - A MongoDB replica set made up of the Pods in the
StatefulSet. The set will include one primary and two secondaries. Data
will be replicated from the primary to the secondaries, ensuring that our
application data remains highly available.
For our application to interact with the database replicas, the MongoDB
connection URI in our code will need to include both the hostnames of the
replica set members as well as the name of the replica set itself. We
therefore need to include these values in the URI.
The file in our cloned repository that specifies database connection
information is called db.js. Open that file now using nano or your
favorite editor:
nano db.js
Currently, the file includes constants that are referenced in the database
connection URI at runtime. The values for these constants are injected
using Node’s process.env property, which returns an object with
information about your user environment at runtime. Setting values
dynamically in our application code allows us to decouple the code from

the underlying infrastructure, which is necessary in a dynamic, stateless
environment. For more information about refactoring application code in
this way, see Step 2 of Containerizing a Node.js Application for
Development With Docker Compose and the relevant discussion in The
12-Factor App.
The constants for the connection URI and the URI string itself currently
look like this:
~/node_project/db.js
...
const {
MONGO_USERNAME,
MONGO_PASSWORD,
MONGO_HOSTNAME,
MONGO_PORT,
MONGO_DB
} = process.env;
...
const url =
`mongodb://${MONGO_USERNAME}:${MONGO_PASSWORD}@${MONGO_HOSTNAME}:${
MONGO_PORT}/${MONGO_DB}?authSource=admin`;
...
In keeping with a 12FA approach, we do not want to hard code the
hostnames of our replica instances or our replica set name into this URI

string. The existing MONGO_HOSTNAME constant can be expanded to
include multiple hostnames — the members of our replica set — so we
will leave that in place. We will need to add a replica set constant to the
options section of the URI string, however.
Add MONGO_REPLICASET to both the URI constant object and the
connection string:
~/node_project/db.js
...
const {
MONGO_USERNAME,
MONGO_PASSWORD,
MONGO_HOSTNAME,
MONGO_PORT,
MONGO_DB,
MONGO_REPLICASET
} = process.env;
...
const url =
`mongodb://${MONGO_USERNAME}:${MONGO_PASSWORD}@${MONGO_HOSTNAME}:${
MONGO_PORT}/${MONGO_DB}?
replicaSet=${MONGO_REPLICASET}&authSource=admin`;
...

Using the replicaSet option in the options section of the URI allows
us to pass in the name of the replica set, which, along with the hostnames
defined in the MONGO_HOSTNAME constant, will allow us to connect to
the set members.
Save and close the file when you are finished editing.
With your database connection information modified to work with
replica sets, you can now package your application, build the image with
the docker build command, and push it to Docker Hub.
Build the image with docker build and the -t flag, which allows
you to tag the image with a memorable name. In this case, tag the image
with your Docker Hub username and name it node-replicas or a name
of your own choosing:
docker build -t your_dockerhub_username/node-
replicas .
The . in the command specifies that the build context is the current
directory.
It will take a minute or two to build the image. Once it is complete,
check your images:
docker images
You will see the following output:

Output
REPOSITORY TAG IMAGE
ID CREATED SIZE
your_dockerhub_username/node-replicas latest
56a69b4bc882 7 seconds ago 90.1MB
node 10-alpine
aa57b0242b33 6 days ago 71MB
Next, log in to the Docker Hub account you created in the prerequisites:
docker login -u your_dockerhub_username
When prompted, enter your Docker Hub account password. Logging in
this way will create a ~/.docker/config.json file in your non-root
user’s home directory with your Docker Hub credentials.
Push the application image to Docker Hub with the docker push
command. Remember to replace your_dockerhub_username with
your own Docker Hub username:
docker push your_dockerhub_username/node-replicas
You now have an application image that you can pull to run your
replicated application with Kubernetes. The next step will be to configure
specific parameters to use with the MongoDB Helm chart.
Step 2 — Creating Secrets for the MongoDB Replica Set
The stable/mongodb-replicaset chart provides different options
when it comes to using Secrets, and we will create two to use with our
chart deployment: - A Secret for our replica set keyfile that will function
as a shared password between replica set members, allowing them to

authenticate other members. - A Secret for our MongoDB admin user, who
will be created as a root user on the admin database. This role will allow
you to create subsequent users with limited permissions when deploying
your application to production.
With these Secrets in place, we will be able to set our preferred
parameter values in a dedicated values file and create the StatefulSet
object and MongoDB replica set with the Helm chart.
First, let’s create the keyfile. We will use the openssl command with
the rand option to generate a 756 byte random string for the keyfile:
openssl rand -base64 756 > key.txt
The output generated by the command will be base64 encoded, ensuring
uniform data transmission, and redirected to a file called key.txt,
following the guidelines stated in the mongodb-replicaset chart
authentication documentation. The key itself must be between 6 and 1024
characters long, consisting only of characters in the base64 set.
You can now create a Secret called keyfilesecret using this file
with kubectl create:
kubectl create secret generic keyfilesecret --
from-file=key.txt
This will create a Secret object in the default namespace, since we
have not created a specific namespace for our setup.
You will see the following output indicating that your Secret has been
created:
Output
secret/keyfilesecret created

Remove key.txt:
rm key.txt
Alternatively, if you would like to save the file, be sure restrict its
permissions and add it to your .gitignore file to keep it out of version
control.
Next, create the Secret for your MongoDB admin user. The first step
will be to convert your desired username and password to base64.
Convert your database username:
echo -n 'your_database_username' | base64
Note down the value you see in the output.
Next, convert your password:
echo -n 'your_database_password' | base64
Take note of the value in the output here as well.
Open a file for the Secret:
nano secret.yaml
Note: Kubernetes objects are typically defined using YAML, which
strictly forbids tabs and requires two spaces for indentation. If you would
like to check the formatting of any of your YAML files, you can use a
linter or test the validity of your syntax using kubectl create with
the --dry-run and --validate flags:
kubectl create -f your_yaml_file.yaml --dry-run --
validate=true
In general, it is a good idea to validate your syntax before creating
resources with kubectl.
Add the following code to the file to create a Secret that will define a
user and password with the encoded values you just created. Be sure to

replace the dummy values here with your own encoded username and
password:
~/node_project/secret.yaml
apiVersion: v1
kind: Secret
metadata:
name: mongo-secret
data:
user: your_encoded_username
password: your_encoded_password
Here, we’re using the key names that the mongodb-replicaset
chart expects: user and password. We have named the Secret object
mongo-secret, but you are free to name it anything you would like.
Save and close the file when you are finished editing.
Create the Secret object with the following command:
kubectl create -f secret.yaml
You will see the following output:
Output
secret/mongo-secret created
Again, you can either remove secret.yaml or restrict its permissions
and add it to your .gitignore file.

With your Secret objects created, you can move on to specifying the
parameter values you will use with the mongodb-replicaset chart
and creating the MongoDB deployment.
Step 3 — Configuring the MongoDB Helm Chart and
Creating a Deployment
Helm comes with an actively maintained repository called stable that
contains the chart we will be using: mongodb-replicaset. To use this
chart with the Secrets we’ve just created, we will create a file with
configuration parameter values called mongodb-values.yaml and
then install the chart using this file.
Our mongodb-values.yaml file will largely mirror the default
values.yaml file in the mongodb-replicaset chart repository. We
will, however, make the following changes to our file: - We will set the
auth parameter to true to ensure that our database instances start with
authorization enabled. This means that all clients will be required to
authenticate for access to database resources and operations. - We will add
information about the Secrets we created in the previous Step so that the
chart can use these values to create the replica set keyfile and admin user.
- We will decrease the size of the PersistentVolumes associated with each
Pod in the StatefulSet to use the minimum viable DigitalOcean Block
Storage unit, 1GB, though you are free to modify this to meet your storage
requirements.
Before writing the mongodb-values.yaml file, however, you
should first check that you have a StorageClass created and configured to
provision storage resources. Each of the Pods in your database StatefulSet

will have a sticky identity and an associated PersistentVolumeClaim,
which will dynamically provision a PersistentVolume for the Pod. If a Pod
is rescheduled, the PersistentVolume will be mounted to whichever node
the Pod is scheduled on (though each Volume must be manually deleted if
its associated Pod or StatefulSet is permanently deleted).
Because we are working with DigitalOcean Kubernetes, our default
StorageClass provisioner is set to
dobs.csi.digitalocean.com — DigitalOcean Block Storage —
which we can check by typing:
kubectl get storageclass
If you are working with a DigitalOcean cluster, you will see the
following output:
Output
NAME PROVISIONER AGE
do-block-storage (default) dobs.csi.digitalocean.com 21m
If you are not working with a DigitalOcean cluster, you will need to
create a StorageClass and configure a provisioner of your choice. For
details about how to do this, please see the official documentation.
Now that you have ensured that you have a StorageClass configured,
open mongodb-values.yaml for editing:
nano mongodb-values.yaml
You will set values in this file that will do the following: - Enable
authorization. - Reference your keyfilesecret and mongo-secret
objects. - Specify 1Gi for your PersistentVolumes. - Set your replica set

name to db. - Specify 3 replicas for the set. - Pin the mongo image to the
latest version at the time of writing: 4.1.9.
Paste the following code into the file:

~/node_project/mongodb-values.yaml
replicas: 3
port: 27017
replicaSetName: db
podDisruptionBudget: {}
auth:
enabled: true
existingKeySecret: keyfilesecret
existingAdminSecret: mongo-secret
imagePullSecrets: []
installImage:
repository: unguiculus/mongodb-install
tag: 0.7
pullPolicy: Always
copyConfigImage:
repository: busybox
tag: 1.29.3
pullPolicy: Always
image:
repository: mongo
tag: 4.1.9
pullPolicy: Always
extraVars: {}
metrics:
enabled: false
image:

repository: ssalaues/mongodb-exporter
tag: 0.6.1
pullPolicy: IfNotPresent
port: 9216
path: /metrics
socketTimeout: 3s
syncTimeout: 1m
prometheusServiceDiscovery: true
resources: {}
podAnnotations: {}
securityContext:
enabled: true
runAsUser: 999
fsGroup: 999
runAsNonRoot: true
init:
resources: {}
timeout: 900
resources: {}
nodeSelector: {}
affinity: {}
tolerations: []
extraLabels: {}
persistentVolume:
enabled: true
#storageClass: "-"
accessModes:

- ReadWriteOnce
size: 1Gi
annotations: {}
serviceAnnotations: {}
terminationGracePeriodSeconds: 30
tls:
enabled: false
configmap: {}
readinessProbe:
initialDelaySeconds: 5
timeoutSeconds: 1
failureThreshold: 3
periodSeconds: 10
successThreshold: 1
livenessProbe:
initialDelaySeconds: 30
timeoutSeconds: 5
failureThreshold: 3
periodSeconds: 10
successThreshold: 1
The persistentVolume.storageClass parameter is commented
out here: removing the comment and setting its value to "-" would
disable dynamic provisioning. In our case, because we are leaving this
value undefined, the chart will choose the default provisioner — in
our case, dobs.csi.digitalocean.com.

Also note the accessMode associated with the persistentVolume
key: ReadWriteOnce means that the provisioned volume will be read-
write only by a single node. Please see the documentation for more
information about different access modes.
To learn more about the other parameters included in the file, see the
configuration table included with the repo.
Save and close the file when you are finished editing.
Before deploying the mongodb-replicaset chart, you will want to
update the stable repo with the helm repo update command:
helm repo update
This will get the latest chart information from the stable repository.
Finally, install the chart with the following command:
helm install --name mongo -f mongodb-values.yaml
stable/mongodb-replicaset
Note: Before installing a chart, you can run helm install with the -
-dry-run and --debug options to check the generated manifests for
your release:
helm install --name your_release_name -f
your_values_file.yaml --dry-run --debug your_chart
Note that we are naming the Helm release mongo. This name will refer
to this particular deployment of the chart with the configuration options
we’ve specified. We’ve pointed to these options by including the -f flag
and our mongodb-values.yaml file.
Also note that because we did not include the --namespace flag with
helm install, our chart objects will be created in the default
namespace.

Once you have created the release, you will see output about its status,
along with information about the created objects and instructions for
interacting with them:
Output
NAME: mongo
LAST DEPLOYED: Tue Apr 16 21:51:05 2019
NAMESPACE: default
STATUS: DEPLOYED
RESOURCES:
==> v1/ConfigMap
NAME DATA AGE
mongo-mongodb-replicaset-init 1 1s
mongo-mongodb-replicaset-mongodb 1 1s
mongo-mongodb-replicaset-tests 1 0s
...
You can now check on the creation of your Pods with the following
command:
kubectl get pods
You will see output like the following as the Pods are being created:
Output
NAME READY STATUS RESTARTS AGE
mongo-mongodb-replicaset-0 1/1 Running 0 67s
mongo-mongodb-replicaset-1 0/1 Init:0/3 0 8s

The READY and STATUS outputs here indicate that the Pods in our
StatefulSet are not fully ready: the Init Containers associated with the
Pod’s containers are still running. Because StatefulSet members are
created in sequential order, each Pod in the StatefulSet must be Running
and Ready before the next Pod will be created.
Once the Pods have been created and all of their associated containers
are running, you will see this output:
Output
NAME READY STATUS RESTARTS AGE
mongo-mongodb-replicaset-0 1/1 Running 0 2m33s
mongo-mongodb-replicaset-1 1/1 Running 0 94s
mongo-mongodb-replicaset-2 1/1 Running 0 36s
The Running STATUS indicates that your Pods are bound to nodes and
that the containers associated with those Pods are running. READY
indicates how many containers in a Pod are running. For more
information, please consult the documentation on Pod lifecycles.
Note: If you see unexpected phases in the STATUS column, remember
that you can troubleshoot your Pods with the following commands:
kubectl describe pods your_pod
kubectl logs your_pod
Each of the Pods in your StatefulSet has a name that combines the name
of the StatefulSet with the ordinal index of the Pod. Because we created
three replicas, our StatefulSet members are numbered 0-2, and each has a
stable DNS entry comprised of the following elements:

$(statefulset-name)-$(ordinal).$(service
name).$(namespace).svc.cluster.local.
In our case, the StatefulSet and the Headless Service created by the
mongodb-replicaset chart have the same names:
kubectl get statefulset
Output
NAME READY AGE
mongo-mongodb-replicaset 3/3 4m2s
kubectl get svc
Output
NAME TYPE CLUSTER-IP
EXTERNAL-IP PORT(S) AGE
kubernetes ClusterIP 10.245.0.1 <none>
443/TCP 42m
mongo-mongodb-replicaset ClusterIP None <none>
27017/TCP 4m35s
mongo-mongodb-replicaset-client ClusterIP None <none>
27017/TCP 4m35s
This means that the first member of our StatefulSet will have the
following DNS entry:
mongo-mongodb-replicaset-0.mongo-mongodb-
replicaset.default.svc.cluster.local

Because we need our application to connect to each MongoDB instance,
it’s essential that we have this information so that we can communicate
directly with the Pods, rather than with the Service. When we create our
custom application Helm chart, we will pass the DNS entries for each Pod
to our application using environment variables.
With your database instances up and running, you are ready to create the
chart for your Node application.
Step 4 — Creating a Custom Application Chart and
Configuring Parameters
We will create a custom Helm chart for our Node application and modify
the default files in the standard chart directory so that our application can
work with the replica set we have just created. We will also create files to
define ConfigMap and Secret objects for our application.
First, create a new chart directory called nodeapp with the following
command:
helm create nodeapp
This will create a directory called nodeapp in your
~/node_project folder with the following resources: - A
Chart.yaml file with basic information about your chart. - A
values.yaml file that allows you to set specific parameter values, as
you did with your MongoDB deployment. - A .helmignore file with
file and directory patterns that will be ignored when packaging charts. - A
templates/ directory with the template files that will generate
Kubernetes manifests. - A templates/tests/ directory for test files. -
A charts/ directory for any charts that this chart depends on.

The first file we will modify out of these default files is
values.yaml. Open that file now:
nano nodeapp/values.yaml
The values that we will set here include: - The number of replicas. - The
application image we want to use. In our case, this will be the node-
replicas image we created in Step 1. - The ServiceType. In this case,
we will specify LoadBalancer to create a point of access to our application
for testing purposes. Because we are working with a DigitalOcean
Kubernetes cluster, this will create a DigitalOcean Load Balancer when we
deploy our chart. In production, you can configure your chart to use
Ingress Resources and Ingress Controllers to route traffic to your Services.
- The targetPort to specify the port on the Pod where our application will
be exposed.
We will not enter environment variables into this file. Instead, we will
create templates for ConfigMap and Secret objects and add these values to
our application Deployment manifest, located at
~/node_project/nodeapp/templates/deployment.yaml.
Configure the following values in the values.yaml file:

~/node_project/nodeapp/values.yaml
# Default values for nodeapp.
# This is a YAML-formatted file.
# Declare variables to be passed into your templates.
replicaCount: 3
image:
repository: your_dockerhub_username/node-replicas
tag: latest
pullPolicy: IfNotPresent
nameOverride: ""
fullnameOverride: ""
service:
type: LoadBalancer
port: 80
targetPort: 8080
...
Save and close the file when you are finished editing.
Next, open a secret.yaml file in the nodeapp/templates
directory:
nano nodeapp/templates/secret.yaml

In this file, add values for your MONGO_USERNAME and
MONGO_PASSWORD application constants. These are the constants that
your application will expect to have access to at runtime, as specified in
db.js, your database connection file. As you add the values for these
constants, remember to the use the base64-encoded values that you used
earlier in Step 2 when creating your mongo-secret object. If you need
to recreate those values, you can return to Step 2 and run the relevant
commands again.
Add the following code to the file:
~/node_project/nodeapp/templates/secret.yaml
apiVersion: v1
kind: Secret
metadata:
name: {{ .Release.Name }}-auth
data:
MONGO_USERNAME: your_encoded_username
MONGO_PASSWORD: your_encoded_password
The name of this Secret object will depend on the name of your Helm
release, which you will specify when you deploy the application chart.
Save and close the file when you are finished.
Next, open a file to create a ConfigMap for your application:
nano nodeapp/templates/configmap.yaml
In this file, we will define the remaining variables that our application
expects: MONGO_HOSTNAME, MONGO_PORT, MONGO_DB, and

MONGO_REPLICASET. Our MONGO_HOSTNAME variable will include the
DNS entry for each instance in our replica set, since this is what the
MongoDB connection URI requires.
According to the Kubernetes documentation, when an application
implements liveness and readiness checks, SRV records should be used
when connecting to the Pods. As discussed in Step 3, our Pod SRV records
follow this pattern: $(statefulset-
name)-$(ordinal).$(service
name).$(namespace).svc.cluster.local. Since our MongoDB
StatefulSet implements liveness and readiness checks, we should use these
stable identifiers when defining the values of the MONGO_HOSTNAME
variable.
Add the following code to the file to define the MONGO_HOSTNAME,
MONGO_PORT, MONGO_DB, and MONGO_REPLICASET variables. You
are free to use another name for your MONGO_DB database, but your
MONGO_HOSTNAME and MONGO_REPLICASET values must be written as
they appear here:

~/node_project/nodeapp/templates/configmap.yaml
apiVersion: v1
kind: ConfigMap
metadata:
name: {{ .Release.Name }}-config
data:
MONGO_HOSTNAME: "mongo-mongodb-replicaset-0.mongo-mongodb-
replicaset.default.svc.cluster.local,mongo-mongodb-replicaset-
1.mongo-mongodb-replicaset.default.svc.cluster.local,mongo-mongodb-
replicaset-2.mongo-mongodb-replicaset.default.svc.cluster.local"
MONGO_PORT: "27017"
MONGO_DB: "sharkinfo"
MONGO_REPLICASET: "db"
Because we have already created the StatefulSet object and replica set,
the hostnames that are listed here must be listed in your file exactly as
they appear in this example. If you destroy these objects and rename your
MongoDB Helm release, then you will need to revise the values included
in this ConfigMap. The same applies for MONGO_REPLICASET, since we
specified the replica set name with our MongoDB release.
Also note that the values listed here are quoted, which is the expectation
for environment variables in Helm.
Save and close the file when you are finished editing.
With your chart parameter values defined and your Secret and
ConfigMap manifests created, you can edit the application Deployment
template to use your environment variables.

Step 5 — Integrating Environment Variables into Your Helm
Deployment
With the files for our application Secret and ConfigMap in place, we will
need to make sure that our application Deployment can use these values.
We will also customize the liveness and readiness probes that are already
defined in the Deployment manifest.
Open the application Deployment template for editing:
nano nodeapp/templates/deployment.yaml
Though this is a YAML file, Helm templates use a different syntax from
standard Kubernetes YAML files in order to generate manifests. For more
information about templates, see the Helm documentation.
In the file, first add an env key to your application container
specifications, below the imagePullPolicy key and above ports:

~/node_project/nodeapp/templates/deployment.yaml
apiVersion: apps/v1
kind: Deployment
metadata:
...
spec:
containers:
- name: {{ .Chart.Name }}
image: "{{ .Values.image.repository }}:{{ .Values.image.tag
}}"
imagePullPolicy: {{ .Values.image.pullPolicy }}
env:
ports:
Next, add the following keys to the list of env variables:

~/node_project/nodeapp/templates/deployment.yaml
apiVersion: apps/v1
kind: Deployment
metadata:
...
spec:
containers:
- name: {{ .Chart.Name }}
image: "{{ .Values.image.repository }}:{{ .Values.image.tag
}}"
imagePullPolicy: {{ .Values.image.pullPolicy }}
env:
- name: MONGO_USERNAME
valueFrom:
secretKeyRef:
key: MONGO_USERNAME
name: {{ .Release.Name }}-auth
- name: MONGO_PASSWORD
valueFrom:
secretKeyRef:
key: MONGO_PASSWORD
name: {{ .Release.Name }}-auth
- name: MONGO_HOSTNAME
valueFrom:
configMapKeyRef:
key: MONGO_HOSTNAME

name: {{ .Release.Name }}-config
- name: MONGO_PORT
valueFrom:
configMapKeyRef:
key: MONGO_PORT
name: {{ .Release.Name }}-config
- name: MONGO_DB
valueFrom:
configMapKeyRef:
key: MONGO_DB
name: {{ .Release.Name }}-config
- name: MONGO_REPLICASET
valueFrom:
configMapKeyRef:
key: MONGO_REPLICASET
name: {{ .Release.Name }}-config
Each variable includes a reference to its value, defined either by a
secretKeyRef key, in the case of Secret values, or
configMapKeyRef for ConfigMap values. These keys point to the
Secret and ConfigMap files we created in the previous Step.
Next, under the ports key, modify the containerPort definition to
specify the port on the container where our application will be exposed:

~/node_project/nodeapp/templates/deployment.yaml
apiVersion: apps/v1
kind: Deployment
metadata:
...
spec:
containers:
...
env:
...
ports:
- name: http
containerPort: 8080
protocol: TCP
...
Next, let’s modify the liveness and readiness checks that are included in
this Deployment manifest by default. These checks ensure that our
application Pods are running and ready to serve traffic: - Readiness probes
assess whether or not a Pod is ready to serve traffic, stopping all requests
to the Pod until the checks succeed. - Liveness probes check basic
application behavior to determine whether or not the application in the
container is running and behaving as expected. If a liveness probe fails,
Kubernetes will restart the container.
For more about both, see the relevant discussion in Architecting
Applications for Kubernetes.

In our case, we will build on the httpGet request that Helm has
provided by default and test whether or not our application is accepting
requests on the /sharks endpoint. The kubelet service will perform
the probe by sending a GET request to the Node server running in the
application Pod’s container and listening on port 8080. If the status code
for the response is between 200 and 400, then the kubelet will conclude
that the container is healthy. Otherwise, in the case of a 400 or 500 status,
kubelet will either stop traffic to the container, in the case of the
readiness probe, or restart the container, in the case of the liveness probe.
Add the following modification to the stated path for the liveness and
readiness probes:

~/node_project/nodeapp/templates/deployment.yaml
apiVersion: apps/v1
kind: Deployment
metadata:
...
spec:
containers:
...
env:
...
ports:
- name: http
containerPort: 8080
protocol: TCP
livenessProbe:
httpGet:
path: /sharks
port: http
readinessProbe:
httpGet:
path: /sharks
port: http
Save and close the file when you are finished editing.
You are now ready to create your application release with Helm. Run the
following helm install command, which includes the name of the

release and the location of the chart directory:
helm install --name nodejs ./nodeapp
Remember that you can run helm install with the --dry-run
and --debug options first, as discussed in Step 3, to check the generated
manifests for your release.
Again, because we are not including the --namespace flag with
helm install, our chart objects will be created in the default
namespace.
You will see the following output indicating that your release has been
created:

Output
NAME: nodejs
LAST DEPLOYED: Wed Apr 17 18:10:29 2019
NAMESPACE: default
STATUS: DEPLOYED
RESOURCES:
==> v1/ConfigMap
NAME DATA AGE
nodejs-config 4 1s
==> v1/Deployment
NAME READY UP-TO-DATE AVAILABLE AGE
nodejs-nodeapp 0/3 3 0 1s
...
Again, the output will indicate the status of the release, along with
information about the created objects and how you can interact with them.
Check the status of your Pods:
kubectl get pods

Output
NAME READY STATUS RESTARTS AGE
mongo-mongodb-replicaset-0 1/1 Running 0 57m
mongo-mongodb-replicaset-1 1/1 Running 0 56m
mongo-mongodb-replicaset-2 1/1 Running 0 55m
nodejs-nodeapp-577df49dcc-b5fq5 1/1 Running 0 117s
nodejs-nodeapp-577df49dcc-bkk66 1/1 Running 0 117s
nodejs-nodeapp-577df49dcc-lpmt2 1/1 Running 0 117s
Once your Pods are up and running, check your Services:
kubectl get svc
Output
NAME TYPE CLUSTER-IP
EXTERNAL-IP PORT(S) AGE
kubernetes ClusterIP 10.245.0.1
<none> 443/TCP 96m
mongo-mongodb-replicaset ClusterIP None
<none> 27017/TCP 58m
mongo-mongodb-replicaset-client ClusterIP None
<none> 27017/TCP 58m
nodejs-nodeapp LoadBalancer 10.245.33.46
your_lb_ip 80:31518/TCP 3m22s
The EXTERNAL_IP associated with the nodejs-nodeapp Service is
the IP address where you can access the application from outside of the

cluster. If you see a <pending> status in the EXTERNAL_IP column,
this means that your load balancer is still being created.
Once you see an IP in that column, navigate to it in your browser:
http://your_lb_ip.
You should see the following landing page:
Application Landing Page
Now that your replicated application is working, let’s add some test data
to ensure that replication is working between members of the replica set.
Step 6 — Testing MongoDB Replication
With our application running and accessible through an external IP
address, we can add some test data and ensure that it is being replicated
between the members of our MongoDB replica set.

First, make sure you have navigated your browser to the application
landing page:
Application Landing Page
Click on the Get Shark Info button. You will see a page with an entry
form where you can enter a shark name and a description of that shark’s
general character:

Shark Info Form
In the form, add an initial shark of your choosing. To demonstrate, we
will add Megalodon Shark to the Shark Name field, and Ancient to
the Shark Character field:
Filled Shark Form

Click on the Submit button. You will see a page with this shark
information displayed back to you:
Shark Output
Now head back to the shark information form by clicking on Sharks in
the top navigation bar:
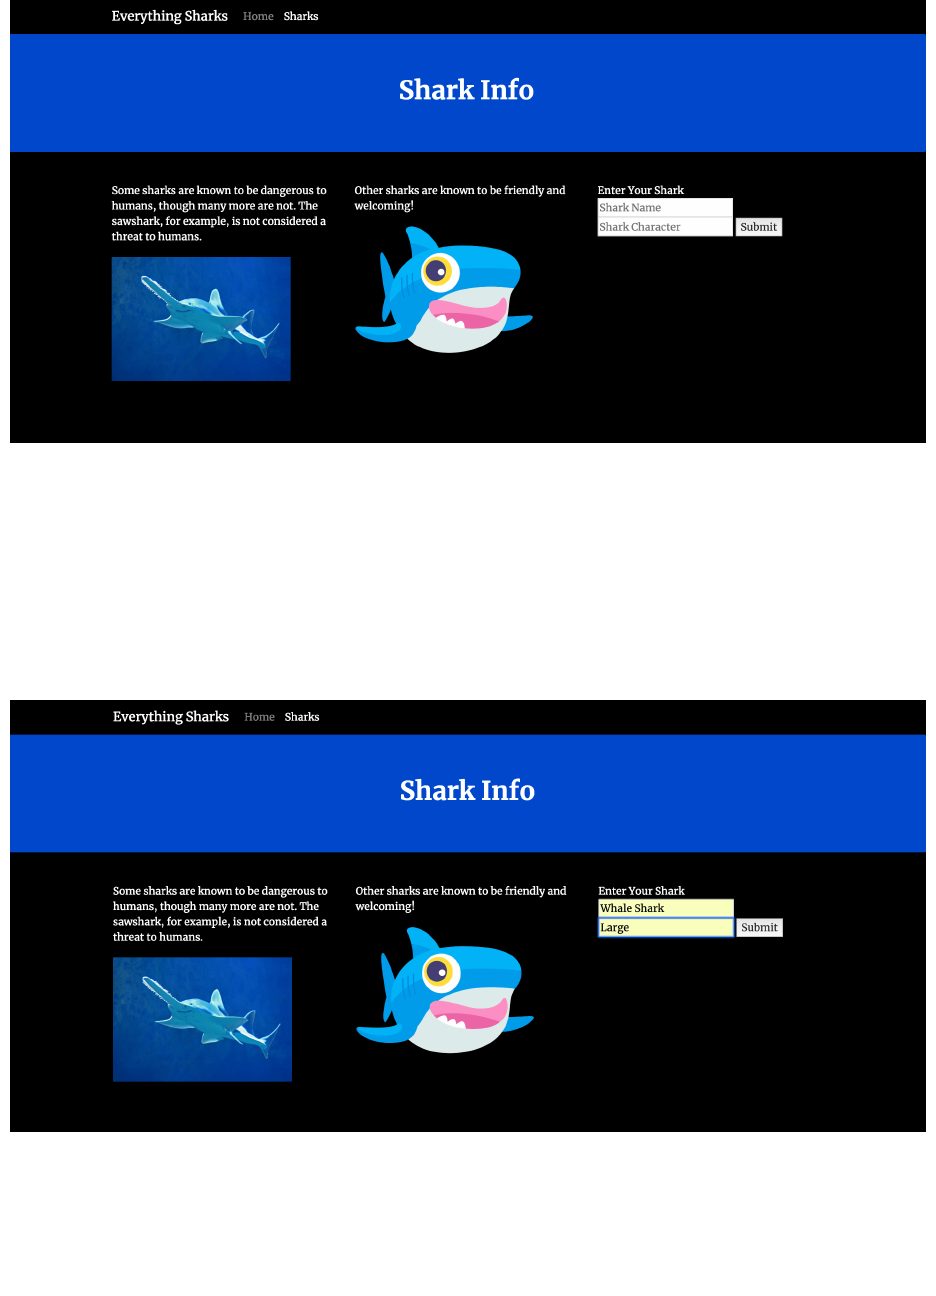
Shark Info Form
Enter a new shark of your choosing. We’ll go with Whale Shark and
Large:
Enter New Shark

Once you click Submit, you will see that the new shark has been added
to the shark collection in your database:
Complete Shark Collection
Let’s check that the data we’ve entered has been replicated between the
primary and secondary members of our replica set.
Get a list of your Pods:
kubectl get pods

Output
NAME READY STATUS RESTARTS AGE
mongo-mongodb-replicaset-0 1/1 Running 0 74m
mongo-mongodb-replicaset-1 1/1 Running 0 73m
mongo-mongodb-replicaset-2 1/1 Running 0 72m
nodejs-nodeapp-577df49dcc-b5fq5 1/1 Running 0 5m4s
nodejs-nodeapp-577df49dcc-bkk66 1/1 Running 0 5m4s
nodejs-nodeapp-577df49dcc-lpmt2 1/1 Running 0 5m4s
To access the mongo shell on your Pods, you can use the kubectl
exec command and the username you used to create your mongo-
secret in Step 2. Access the mongo shell on the first Pod in the
StatefulSet with the following command:
kubectl exec -it mongo-mongodb-replicaset-0 --
mongo -u your_database_username -p --
authenticationDatabase admin
When prompted, enter the password associated with this username:
Output
MongoDB shell version v4.1.9
Enter password:
You will be dropped into an administrative shell:

Output
MongoDB server version: 4.1.9
Welcome to the MongoDB shell.
...
db:PRIMARY>
Though the prompt itself includes this information, you can manually
check to see which replica set member is the primary with the
rs.isMaster() method:
rs.isMaster()
You will see output like the following, indicating the hostname of the
primary:

Output
db:PRIMARY> rs.isMaster()
{
"hosts" : [
"mongo-mongodb-replicaset-0.mongo-mongodb-
replicaset.default.svc.cluster.local:27017",
"mongo-mongodb-replicaset-1.mongo-mongodb-
replicaset.default.svc.cluster.local:27017",
"mongo-mongodb-replicaset-2.mongo-mongodb-
replicaset.default.svc.cluster.local:27017"
],
...
"primary" : "mongo-mongodb-replicaset-0.mongo-mongodb-
replicaset.default.svc.cluster.local:27017",
...
Next, switch to your sharkinfo database:
use sharkinfo
Output
switched to db sharkinfo
List the collections in the database:
show collections

Output
sharks
Output the documents in the collection:
db.sharks.find()
You will see the following output:
Output
{ "_id" : ObjectId("5cb7702c9111a5451c6dc8bb"), "name" : "Megalodon
Shark", "character" : "Ancient", "__v" : 0 }
{ "_id" : ObjectId("5cb77054fcdbf563f3b47365"), "name" : "Whale
Shark", "character" : "Large", "__v" : 0 }
Exit the MongoDB Shell:
exit
Now that we have checked the data on our primary, let’s check that it’s
being replicated to a secondary. kubectl exec into mongo-
mongodb-replicaset-1 with the following command:
kubectl exec -it mongo-mongodb-replicaset-1 --
mongo -u your_database_username -p --
authenticationDatabase admin
Once in the administrative shell, we will need to use the
db.setSlaveOk() method to permit read operations from the
secondary instance:
db.setSlaveOk(1)
Switch to the sharkinfo database:

use sharkinfo
Output
switched to db sharkinfo
Permit the read operation of the documents in the sharks collection:
db.setSlaveOk(1)
Output the documents in the collection:
db.sharks.find()
You should now see the same information that you saw when running
this method on your primary instance:
Output
db:SECONDARY> db.sharks.find()
{ "_id" : ObjectId("5cb7702c9111a5451c6dc8bb"), "name" : "Megalodon
Shark", "character" : "Ancient", "__v" : 0 }
{ "_id" : ObjectId("5cb77054fcdbf563f3b47365"), "name" : "Whale
Shark", "character" : "Large", "__v" : 0 }
This output confirms that your application data is being replicated
between the members of your replica set.
Conclusion
You have now deployed a replicated, highly-available shark information
application on a Kubernetes cluster using Helm charts. This demo
application and the workflow outlined in this tutorial can act as a starting

point as you build custom charts for your application and take advantage
of Helm’s stable repository and other chart repositories.
As you move toward production, consider implementing the following:
- Centralized logging and monitoring. Please see the relevant discussion in
Modernizing Applications for Kubernetes for a general overview. You can
also look at How To Set Up an Elasticsearch, Fluentd and Kibana (EFK)
Logging Stack on Kubernetes to learn how to set up a logging stack with
Elasticsearch, Fluentd, and Kibana. Also check out An Introduction to
Service Meshes for information about how service meshes like Istio
implement this functionality. - Ingress Resources to route traffic to your
cluster. This is a good alternative to a LoadBalancer in cases where you
are running multiple Services, which each require their own LoadBalancer,
or where you would like to implement application-level routing strategies
(A/B & canary tests, for example). For more information, check out How
to Set Up an Nginx Ingress with Cert-Manager on DigitalOcean
Kubernetes and the related discussion of routing in the service mesh
context in An Introduction to Service Meshes. - Backup strategies for your
Kubernetes objects. For guidance on implementing backups with Velero
(formerly Heptio Ark) with DigitalOcean’s Kubernetes product, please see
How To Back Up and Restore a Kubernetes Cluster on DigitalOcean Using
Heptio Ark.
To learn more about Helm, see An Introduction to Helm, the Package
Manager for Kubernetes, How To Install Software on Kubernetes Clusters
with the Helm Package Manager, and the Helm documentation.

How To Secure a Containerized Node.js
Application with Nginx, Let’s Encrypt, and
Docker Compose
Written by Kathleen Juell
In this final chapter, you will learn how to secure your application using
Nginx as a reverse proxy, and Let’s Encrypt, a free Transport Layer
Security (TLS) certificate provider. Using a TLS certificate means that
web traffic to your application will be secured using HTTPS to encrypt
requests.
You will use containers to build, run, and manage your application and
database like in Chapter 3 of this book. You will add the Nginx reverse
proxy and learn how to configure it with TLS. By the end of this chapter,
you will have a secure application that uses an automatically acquired and
renewed TLS certificate, and you will coordinate running everything using
Docker Compose.
There are multiple ways to enhance the flexibility and security of your
Node.js application. Using a reverse proxy like Nginx offers you the
ability to load balance requests, cache static content, and implement
Transport Layer Security (TLS). Enabling encrypted HTTPS on your
server ensures that communication to and from your application remains
secure.
Implementing a reverse proxy with TLS/SSL on containers involves a
different set of procedures from working directly on a host operating
system. For example, if you were obtaining certificates from Let’s Encrypt

for an application running on a server, you would install the required
software directly on your host. Containers allow you to take a different
approach. Using Docker Compose, you can create containers for your
application, your web server, and the Certbot client that will enable you to
obtain your certificates. By following these steps, you can take advantage
of the modularity and portability of a containerized workflow.
In this tutorial, you will deploy a Node.js application with an Nginx
reverse proxy using Docker Compose. You will obtain TLS/SSL
certificates for the domain associated with your application and ensure
that it receives a high security rating from SSL Labs. Finally, you will set
up a cron job to renew your certificates so that your domain remains
secure.
Prerequisites
To follow this tutorial, you will need: - An Ubuntu 18.04 server, a non-root
user with sudo privileges, and an active firewall. For guidance on how to
set these up, please see this Initial Server Setup guide. - Docker and
Docker Compose installed on your server. For guidance on installing
Docker, follow Steps 1 and 2 of How To Install and Use Docker on Ubuntu
18.04. For guidance on installing Compose, follow Step 1 of How To
Install Docker Compose on Ubuntu 18.04. - A registered domain name.
This tutorial will use example.com throughout. You can get one for free at
Freenom, or use the domain registrar of your choice. - Both of the
following DNS records set up for your server. You can follow this
introduction to DigitalOcean DNS for details on how to add them to a
DigitalOcean account, if that’s what you’re using:

An A record with example.com pointing to your server’s public IP
address.
An A record with www.example.com pointing to your server’s
public IP address.
Step 1 — Cloning and Testing the Node Application
As a first step, we will clone the repository with the Node application
code, which includes the Dockerfile that we will use to build our
application image with Compose. We can first test the application by
building and running it with the docker run command, without a
reverse proxy or SSL.
In your non-root user’s home directory, clone the nodejs-image-
demo repository from the DigitalOcean Community GitHub account. This
repository includes the code from the setup described in How To Build a
Node.js Application with Docker.
Clone the repository into a directory called node_project:
git clone https://github.com/do-community/nodejs-
image-demo.git node_project
Change to the node_project directory:
cd node_project
In this directory, there is a Dockerfile that contains instructions for
building a Node application using the Docker node:10 image and the
contents of your current project directory. You can look at the contents of
the Dockerfile by typing:
cat Dockerfile

Output
FROM node:10-alpine
RUN mkdir -p /home/node/app/node_modules && chown -R node:node
/home/node/app
WORKDIR /home/node/app
COPY package*.json ./
USER node
RUN npm install
COPY --chown=node:node . .
EXPOSE 8080
CMD [ "node", "app.js" ]
These instructions build a Node image by copying the project code from
the current directory to the container and installing dependencies with
npm install. They also take advantage of Docker’s caching and image
layering by separating the copy of package.json and package-
lock.json, containing the project’s listed dependencies, from the copy
of the rest of the application code. Finally, the instructions specify that the

container will be run as the non-root node user with the appropriate
permissions set on the application code and node_modules directories.
For more information about this Dockerfile and Node image best
practices, please see the complete discussion in Step 3 of How To Build a
Node.js Application with Docker.
To test the application without SSL, you can build and tag the image
using docker build and the -t flag. We will call the image node-
demo, but you are free to name it something else:
docker build -t node-demo .
Once the build process is complete, you can list your images with
docker images:
docker images
You will see the following output, confirming the application image
build:
Output
REPOSITORY TAG IMAGE ID CREATED
SIZE
node-demo latest 23961524051d 7
seconds ago 73MB
node 10-alpine 8a752d5af4ce 3 weeks
ago 70.7MB
Next, create the container with docker run. We will include three
flags with this command: - -p: This publishes the port on the container
and maps it to a port on our host. We will use port 80 on the host, but you

should feel free to modify this as necessary if you have another process
running on that port. For more information about how this works, see this
discussion in the Docker docs on port binding. - -d: This runs the
container in the background. - --name: This allows us to give the
container a memorable name.
Run the following command to build the container:
docker run --name node-demo -p 80:8080 -d node-
demo
Inspect your running containers with docker ps:
docker ps
You will see output confirming that your application container is
running:
Output
CONTAINER ID IMAGE COMMAND CREATED
STATUS PORTS NAMES
4133b72391da node-demo "node app.js" 17
seconds ago Up 16 seconds 0.0.0.0:80->8080/tcp node-
demo
You can now visit your domain to test your setup:
http://example.com. Remember to replace example.com with
your own domain name. Your application will display the following
landing page:

Application Landing Page
Now that you have tested the application, you can stop the container and
remove the images. Use docker ps again to get your CONTAINER ID:
docker ps
Output
CONTAINER ID IMAGE COMMAND CREATED
STATUS PORTS NAMES
4133b72391da node-demo "node app.js" 17
seconds ago Up 16 seconds 0.0.0.0:80->8080/tcp node-
demo
Stop the container with docker stop. Be sure to replace the
CONTAINER ID listed here with your own application CONTAINER ID:
docker stop 4133b72391da

You can now remove the stopped container and all of the images,
including unused and dangling images, with docker system prune
and the -a flag:
docker system prune -a
Type y when prompted in the output to confirm that you would like to
remove the stopped container and images. Be advised that this will also
remove your build cache.
With your application image tested, you can move on to building the
rest of your setup with Docker Compose.
Step 2 — Defining the Web Server Configuration
With our application Dockerfile in place, we can create a configuration
file to run our Nginx container. We will start with a minimal configuration
that will include our domain name, document root, proxy information, and
a location block to direct Certbot’s requests to the .well-known
directory, where it will place a temporary file to validate that the DNS for
our domain resolves to our server.
First, create a directory in the current project directory for the
configuration file:
mkdir nginx-conf
Open the file with nano or your favorite editor:
nano nginx-conf/nginx.conf
Add the following server block to proxy user requests to your Node
application container and to direct Certbot’s requests to the .well-
known directory. Be sure to replace example.com with your own
domain name:

~/node_project/nginx-conf/nginx.conf
server {
listen 80;
listen [::]:80;
root /var/www/html;
index index.html index.htm index.nginx-debian.html;
server_name example.com www.example.com;
location / {
proxy_pass http://nodejs:8080;
}
location ~ /.well-known/acme-challenge {
allow all;
root /var/www/html;
}
}
This server block will allow us to start the Nginx container as a reverse
proxy, which will pass requests to our Node application container. It will
also allow us to use Certbot’s webroot plugin to obtain certificates for our
domain. This plugin depends on the HTTP-01 validation method, which
uses an HTTP request to prove that Certbot can access resources from a
server that responds to a given domain name.

Once you have finished editing, save and close the file. To learn more
about Nginx server and location block algorithms, please refer to this
article on Understanding Nginx Server and Location Block Selection
Algorithms.
With the web server configuration details in place, we can move on to
creating our docker-compose.yml file, which will allow us to create
our application services and the Certbot container we will use to obtain
our certificates.
Step 3 — Creating the Docker Compose File
The docker-compose.yml file will define our services, including the
Node application and web server. It will specify details like named
volumes, which will be critical to sharing SSL credentials between
containers, as well as network and port information. It will also allow us to
specify specific commands to run when our containers are created. This
file is the central resource that will define how our services will work
together.
Open the file in your current directory:
nano docker-compose.yml
First, define the application service:

~/node_project/docker-compose.yml
The nodejs service definition includes the following: - build: This
defines the configuration options, including the context and
dockerfile, that will be applied when Compose builds the application
image. If you wanted to use an existing image from a registry like Docker
Hub, you could use the image instruction instead, with information about
your username, repository, and image tag. - context: This defines the
build context for the application image build. In this case, it’s the current
project directory. - dockerfile: This specifies the Dockerfile that
Compose will use for the build — the Dockerfile you looked at in Step 1. -
image, container_name: These apply names to the image and
container. - restart: This defines the restart policy. The default is no,
but we have set the container to restart unless it is stopped.
Note that we are not including bind mounts with this service, since our
setup is focused on deployment rather than development. For more
version: '3'
services:
nodejs:
build:
context: .
dockerfile: Dockerfile
image: nodejs
container_name: nodejs
restart: unless-stopped

information, please see the Docker documentation on bind mounts and
volumes.
To enable communication between the application and web server
containers, we will also add a bridge network called app-network
below the restart definition:
~/node_project/docker-compose.yml
A user-defined bridge network like this enables communication between
containers on the same Docker daemon host. This streamlines traffic and
communication within your application, since it opens all ports between
containers on the same bridge network, while exposing no ports to the
outside world. Thus, you can be selective about opening only the ports you
need to expose your frontend services.
Next, define the webserver service:
services:
nodejs:
...
networks:
- app-network

~/node_project/docker-compose.yml
Some of the settings we defined for the nodejs service remain the
same, but we’ve also made the following changes: - image: This tells
Compose to pull the latest Alpine-based Nginx image from Docker Hub.
For more information about alpine images, please see Step 3 of How To
Build a Node.js Application with Docker. - ports: This exposes port 80
to enable the configuration options we’ve defined in our Nginx
configuration.
...
webserver:
image: nginx:mainline-alpine
container_name: webserver
restart: unless-stopped
ports:
- "80:80"
volumes:
- web-root:/var/www/html
- ./nginx-conf:/etc/nginx/conf.d
- certbot-etc:/etc/letsencrypt
- certbot-var:/var/lib/letsencrypt
depends_on:
- nodejs
networks:
- app-network

We have also specified the following named volumes and bind mounts:
- web-root:/var/www/html: This will add our site’s static assets,
copied to a volume called web-root, to the the /var/www/html
directory on the container. - ./nginx-conf:/etc/nginx/conf.d:
This will bind mount the Nginx configuration directory on the host to the
relevant directory on the container, ensuring that any changes we make to
files on the host will be reflected in the container. - certbot-
etc:/etc/letsencrypt: This will mount the relevant Let’s Encrypt
certificates and keys for our domain to the appropriate directory on the
container. - certbot-var:/var/lib/letsencrypt: This mounts
Let’s Encrypt’s default working directory to the appropriate directory on
the container.
Next, add the configuration options for the certbot container. Be sure
to replace the domain and email information with your own domain name
and contact email:

~/node_project/docker-compose.yml
This definition tells Compose to pull the certbot/certbot image from
Docker Hub. It also uses named volumes to share resources with the Nginx
container, including the domain certificates and key in certbot-etc,
the Let’s Encrypt working directory in certbot-var, and the
application code in web-root.
Again, we’ve used depends_on to specify that the certbot
container should be started once the webserver service is running.
We’ve also included a command option that specifies the command to
run when the container is started. It includes the certonly subcommand
with the following options: - --webroot: This tells Certbot to use the
webroot plugin to place files in the webroot folder for authentication. - --
webroot-path: This specifies the path of the webroot directory. - --
email: Your preferred email for registration and recovery. - --agree-
...
certbot:
image: certbot/certbot
container_name: certbot
volumes:
- certbot-etc:/etc/letsencrypt
- certbot-var:/var/lib/letsencrypt
- web-root:/var/www/html
depends_on:
- webserver
command: certonly --webroot --webroot-path=/var/www/html --email

tos: This specifies that you agree to ACME’s Subscriber Agreement. - --
no-eff-email: This tells Certbot that you do not wish to share your
email with the Electronic Frontier Foundation (EFF). Feel free to omit this
if you would prefer. - --staging: This tells Certbot that you would like
to use Let’s Encrypt’s staging environment to obtain test certificates.
Using this option allows you to test your configuration options and avoid
possible domain request limits. For more information about these limits,
please see Let’s Encrypt’s rate limits documentation. - -d: This allows
you to specify domain names you would like to apply to your request. In
this case, we’ve included example.com and www.example.com. Be
sure to replace these with your own domain preferences.
As a final step, add the volume and network definitions. Be sure to
replace the username here with your own non-root user:

~/node_project/docker-compose.yml
Our named volumes include our Certbot certificate and working
directory volumes, and the volume for our site’s static assets, web-root.
In most cases, the default driver for Docker volumes is the local driver,
which on Linux accepts options similar to the mount command. Thanks
to this, we are able to specify a list of driver options with driver_opts
that mount the views directory on the host, which contains our
application’s static assets, to the volume at runtime. The directory
contents can then be shared between containers. For more information
about the contents of the views directory, please see Step 2 of How To
Build a Node.js Application with Docker.
...
volumes:
certbot-etc:
certbot-var:
web-root:
driver: local
driver_opts:
type: none
device: /home/sammy/node_project/views/
o: bind
networks:
app-network:
driver: bridge

The docker-compose.yml file will look like this when finished:

~/node_project/docker-compose.yml
version: '3'
services:
nodejs:
build:
context: .
dockerfile: Dockerfile
image: nodejs
container_name: nodejs
restart: unless-stopped
networks:
- app-network
webserver:

image: nginx:mainline-alpine<^>
container_name: webserver
restart: unless-stopped
ports:
- "80:80"
volumes:
- web-root:/var/www/html
- ./nginx-conf:/etc/nginx/conf.d
- certbot-etc:/etc/letsencrypt
- certbot-var:/var/lib/letsencrypt
depends_on:
- nodejs
networks:
- app-network
certbot:
image: certbot/certbot
container_name: certbot
volumes:
- certbot-etc:/etc/letsencrypt
- certbot-var:/var/lib/letsencrypt
- web-root:/var/www/html
depends_on:
- webserver
command: certonly --webroot --webroot-path=/var/www/html --email
volumes:
certbot-etc:
certbot-var:
web-root:
driver: local
driver_opts:
type: none
device: /home/sammy/node_project/views/
o: bind
networks:

With the service definitions in place, you are ready to start the
containers and test your certificate requests.
Step 4 — Obtaining SSL Certificates and Credentials
We can start our containers with docker-compose up, which will
create and run our containers and services in the order we have specified.
If our domain requests are successful, we will see the correct exit status in
our output and the right certificates mounted in the
/etc/letsencrypt/live folder on the webserver container.
Create the services with docker-compose up and the -d flag,
which will run the nodejs and webserver containers in the
background:
docker-compose up -d
You will see output confirming that your services have been created:
Output
Creating nodejs ... done
Creating webserver ... done
Creating certbot ... done
Using docker-compose ps, check the status of your services:
docker-compose ps
app-network:
driver: bridge

If everything was successful, your nodejs and webserver services
should be Up and the certbot container will have exited with a 0 status
message:
Output
Name Command State Ports
-------------------------------------------------------------------
-----
certbot certbot certonly --webroot ... Exit 0
nodejs node app.js Up 8080/tcp
webserver nginx -g daemon off; Up 0.0.0.0:80-
>80/tcp
If you see anything other than Up in the State column for the nodejs
and webserver services, or an exit status other than 0 for the certbot
container, be sure to check the service logs with the docker-compose
logs command:
docker-compose logs service_name
You can now check that your credentials have been mounted to the
webserver container with docker-compose exec:
docker-compose exec webserver ls -la
/etc/letsencrypt/live
If your request was successful, you will see output like this:

Output
total 16
drwx------ 3 root root 4096 Dec 23 16:48 .
drwxr-xr-x 9 root root 4096 Dec 23 16:48 ..
-rw-r--r-- 1 root root 740 Dec 23 16:48 README
drwxr-xr-x 2 root root 4096 Dec 23 16:48 example.com
Now that you know your request will be successful, you can edit the
certbot service definition to remove the --staging flag.
Open docker-compose.yml:
nano docker-compose.yml
Find the section of the file with the certbot service definition, and
replace the --staging flag in the command option with the --force-
renewal flag, which will tell Certbot that you want to request a new
certificate with the same domains as an existing certificate. The certbot
service definition should now look like this:

~/node_project/docker-compose.yml
...
certbot:
image: certbot/certbot
container_name: certbot
volumes:
- certbot-etc:/etc/letsencrypt
- certbot-var:/var/lib/letsencrypt
- web-root:/var/www/html
depends_on:
- webserver
command: certonly --webroot --webroot-path=/var/www/html --
email [email protected] --agree-tos --no-eff-email --force-renewal
-d example.com -d www.example.com
...
You can now run docker-compose up to recreate the certbot
container and its relevant volumes. We will also include the --no-deps
option to tell Compose that it can skip starting the webserver service,
since it is already running:
docker-compose up --force-recreate --no-deps
certbot
You will see output indicating that your certificate request was
successful:

Output
certbot | IMPORTANT NOTES:
certbot | - Congratulations! Your certificate and chain have
been saved at:
certbot | /etc/letsencrypt/live/example.com/fullchain.pem
certbot | Your key file has been saved at:
certbot | /etc/letsencrypt/live/example.com/privkey.pem
certbot | Your cert will expire on 2019-03-26. To obtain a
new or tweaked
certbot | version of this certificate in the future, simply
run certbot
certbot | again. To non-interactively renew *all* of your
certificates, run
certbot | "certbot renew"
certbot | - Your account credentials have been saved in your
Certbot
certbot | configuration directory at /etc/letsencrypt. You
should make a
certbot | secure backup of this folder now. This
configuration directory will
certbot | also contain certificates and private keys
obtained by Certbot so
certbot | making regular backups of this folder is ideal.
certbot | - If you like Certbot, please consider supporting
our work by:
certbot |

certbot | Donating to ISRG / Let's Encrypt:
https://letsencrypt.org/donate
certbot | Donating to EFF:
https://eff.org/donate-le
certbot |
certbot exited with code 0
With your certificates in place, you can move on to modifying your
Nginx configuration to include SSL.
Step 5 — Modifying the Web Server Configuration and
Service Definition
Enabling SSL in our Nginx configuration will involve adding an HTTP
redirect to HTTPS and specifying our SSL certificate and key locations. It
will also involve specifying our Diffie-Hellman group, which we will use
for Perfect Forward Secrecy.
Since you are going to recreate the webserver service to include
these additions, you can stop it now:
docker-compose stop webserver
Next, create a directory in your current project directory for your Diffie-
Hellman key:
mkdir dhparam
Generate your key with the openssl command:
sudo openssl dhparam -out
/home/sammy/node_project/dhparam/dhparam-2048.pem
2048

It will take a few moments to generate the key.
To add the relevant Diffie-Hellman and SSL information to your Nginx
configuration, first remove the Nginx configuration file you created
earlier:
rm nginx-conf/nginx.conf
Open another version of the file:
nano nginx-conf/nginx.conf
Add the following code to the file to redirect HTTP to HTTPS and to
add SSL credentials, protocols, and security headers. Remember to replace
example.com with your own domain:

~/node_project/nginx-conf/nginx.conf
server {
listen 80;
listen [::]:80;
server_name example.com www.example.com;
location ~ /.well-known/acme-challenge {
allow all;
root /var/www/html;
}
location / {
rewrite ^ https://$host$request_uri? permanent;
}
}
server {
listen 443 ssl http2;
listen [::]:443 ssl http2;
server_name example.com www.example.com;
server_tokens off;
ssl_certificate
/etc/letsencrypt/live/example.com/fullchain.pem;

ssl_certificate_key
/etc/letsencrypt/live/example.com/privkey.pem;
ssl_buffer_size 8k;
ssl_dhparam /etc/ssl/certs/dhparam-2048.pem;
ssl_protocols TLSv1.2 TLSv1.1 TLSv1;
ssl_prefer_server_ciphers on;
ssl_ciphers
ECDH+AESGCM:ECDH+AES256:ECDH+AES128:DH+3DES:!ADH:!AECDH:!MD5;
ssl_ecdh_curve secp384r1;
ssl_session_tickets off;
ssl_stapling on;
ssl_stapling_verify on;
resolver 8.8.8.8;
location / {
try_files $uri @nodejs;
}
location @nodejs {
proxy_pass http://nodejs:8080;

add_header X-Frame-Options "SAMEORIGIN" always;
add_header X-XSS-Protection "1; mode=block" always;
add_header X-Content-Type-Options "nosniff" always;
add_header Referrer-Policy "no-referrer-when-
downgrade" always;
add_header Content-Security-Policy "default-src *
data: 'unsafe-eval' 'unsafe-inline'" always;
# add_header Strict-Transport-Security "max-
age=31536000; includeSubDomains; preload" always;
# enable strict transport security only if you
understand the implications
}
root /var/www/html;
index index.html index.htm index.nginx-debian.html;
}
The HTTP server block specifies the webroot for Certbot renewal
requests to the .well-known/acme-challenge directory. It also
includes a rewrite directive that directs HTTP requests to the root
directory to HTTPS.
The HTTPS server block enables ssl and http2. To read more about
how HTTP/2 iterates on HTTP protocols and the benefits it can have for
website performance, please see the introduction to How To Set Up Nginx
with HTTP/2 Support on Ubuntu 18.04. This block also includes a series of
options to ensure that you are using the most up-to-date SSL protocols and
ciphers and that OSCP stapling is turned on. OSCP stapling allows you to

offer a time-stamped response from your certificate authority during the
initial TLS handshake, which can speed up the authentication process.
The block also specifies your SSL and Diffie-Hellman credentials and
key locations.
Finally, we’ve moved the proxy pass information to this block,
including a location block with a try_files directive, pointing requests
to our aliased Node.js application container, and a location block for that
alias, which includes security headers that will enable us to get A ratings
on things like the SSL Labs and Security Headers server test sites. These
headers include X-Frame-Options, X-Content-Type-Options,
Referrer Policy, Content-Security-Policy, and X-XSS-
Protection. The HTTP Strict Transport Security (HSTS)
header is commented out — enable this only if you understand the
implications and have assessed its “preload” functionality.
Once you have finished editing, save and close the file.
Before recreating the webserver service, you will need to add a few
things to the service definition in your docker-compose.yml file,
including relevant port information for HTTPS and a Diffie-Hellman
volume definition.
Open the file:
nano docker-compose.yml
In the webserver service definition, add the following port mapping
and the dhparam named volume:

~/node_project/docker-compose.yml
Next, add the dhparam volume to your volumes definitions:
...
webserver:
image: nginx:latest
container_name: webserver
restart: unless-stopped
ports:
- "80:80"
- "443:443"
volumes:
- web-root:/var/www/html
- ./nginx-conf:/etc/nginx/conf.d
- certbot-etc:/etc/letsencrypt
- certbot-var:/var/lib/letsencrypt
- dhparam:/etc/ssl/certs
depends_on:
- nodejs
networks:
- app-network

~/node_project/docker-compose.yml
Similarly to the web-root volume, the dhparam volume will mount
the Diffie-Hellman key stored on the host to the webserver container.
Save and close the file when you are finished editing.
Recreate the webserver service:
docker-compose up -d --force-recreate --no-deps
webserver
Check your services with docker-compose ps:
docker-compose ps
You should see output indicating that your nodejs and webserver
services are running:
...
volumes:
...
dhparam:
driver: local
driver_opts:
type: none
device: /home/sammy/node_project/dhparam/
o: bind

Output
Name Command State
Ports
-------------------------------------------------------------------
---------------------------
certbot certbot certonly --webroot ... Exit 0
nodejs node app.js Up 8080/tcp
webserver nginx -g daemon off; Up 0.0.0.0:443-
>443/tcp, 0.0.0.0:80->80/tcp
Finally, you can visit your domain to ensure that everything is working
as expected. Navigate your browser to https://example.com,
making sure to substitute example.com with your own domain name.
You will see the following landing page:
Application Landing Page

You should also see the lock icon in your browser’s security indicator. If
you would like, you can navigate to the SSL Labs Server Test landing page
or the Security Headers server test landing page. The configuration options
we’ve included should earn your site an A rating on both.
Step 6 — Renewing Certificates
Let’s Encrypt certificates are valid for 90 days, so you will want to set up
an automated renewal process to ensure that they do not lapse. One way to
do this is to create a job with the cron scheduling utility. In this case, we
will schedule a cron job using a script that will renew our certificates and
reload our Nginx configuration.
Open a script called ssl_renew.sh in your project directory:
nano ssl_renew.sh
Add the following code to the script to renew your certificates and
reload your web server configuration:
~/node_project/ssl_renew.sh
#!/bin/bash
COMPOSE="/usr/local/bin/docker-compose --no-ansi"
DOCKER="/usr/bin/docker"
cd /home/<^>sammy<^>/<^>node_project<^>/
$COMPOSE run certbot renew --dry-run && $COMPOSE kill -s SIGHUP webs
$DOCKER system prune -af

This script first assigns the docker-compose binary to a variable
called COMPOSE, and specifies the --no-ansi option, which will run
docker-compose commands without ANSI control characters. It then
does the same with the docker binary. Finally, it changes to the
~/node_project directory and runs the following docker-compose
commands: - docker-compose run: This will start a certbot
container and override the command provided in our certbot service
definition. Instead of using the certonly subcommand, we’re using the
renew subcommand here, which will renew certificates that are close to
expiring. We’ve included the --dry-run option here to test our script. -
docker-compose kill: This will send a SIGHUP signal to the
webserver container to reload the Nginx configuration. For more
information on using this process to reload your Nginx configuration,
please see this Docker blog post on deploying the official Nginx image
with Docker.
It then runs docker system prune to remove all unused containers
and images.
Close the file when you are finished editing. Make it executable:
chmod +x ssl_renew.sh
Next, open your root crontab file to run the renewal script at a
specified interval:
sudo crontab -e
If this is your first time editing this file, you will be asked to choose an
editor:

crontab
no crontab for root - using an empty one
Select an editor. To change later, run 'select-editor'.
1. /bin/ed
2. /bin/nano <---- easiest
3. /usr/bin/vim.basic
4. /usr/bin/vim.tiny
Choose 1-4 [2]:
...
At the bottom of the file, add the following line:
crontab
...
*/5 * * * * /home/sammy/node_project/ssl_renew.sh >>
/var/log/cron.log 2>&1
This will set the job interval to every five minutes, so you can test
whether or not your renewal request has worked as intended. We have also
created a log file, cron.log, to record relevant output from the job.
After five minutes, check cron.log to see whether or not the renewal
request has succeeded:
tail -f /var/log/cron.log
You should see output confirming a successful renewal:

Output
- - - - - - - - - - - - - - - - - - - - - - - - - - - - - - - - - -
- - - - - -
** DRY RUN: simulating 'certbot renew' close to cert expiry
** (The test certificates below have not been saved.)
Congratulations, all renewals succeeded. The following certs have
been renewed:
/etc/letsencrypt/live/example.com/fullchain.pem (success)
** DRY RUN: simulating 'certbot renew' close to cert expiry
** (The test certificates above have not been saved.)
- - - - - - - - - - - - - - - - - - - - - - - - - - - - - - - - - -
- - - - - -
Killing webserver ... done
You can now modify the crontab file to set a daily interval. To run the
script every day at noon, for example, you would modify the last line of
the file to look like this:
crontab
...
0 12 * * * /home/sammy/node_project/ssl_renew.sh >>
/var/log/cron.log 2>&1
You will also want to remove the --dry-run option from your
ssl_renew.sh script:

~/node_project/ssl_renew.sh
Your cron job will ensure that your Let’s Encrypt certificates don’t
lapse by renewing them when they are eligible. You can also set up log
rotation with the Logrotate utility to rotate and compress your log files.
Conclusion
You have used containers to set up and run a Node application with an
Nginx reverse proxy. You have also secured SSL certificates for your
application’s domain and set up a cron job to renew these certificates
when necessary.
If you are interested in learning more about Let’s Encrypt plugins,
please see our articles on using the Nginx plugin or the standalone plugin.
You can also learn more about Docker Compose by looking at the
following resources: - How To Install Docker Compose on Ubuntu 18.04. -
How To Configure a Continuous Integration Testing Environment with
Docker and Docker Compose on Ubuntu 16.04. - How To Set Up Laravel,
Nginx, and MySQL with Docker Compose.
#!/bin/bash
COMPOSE="/usr/local/bin/docker-compose --no-ansi"
DOCKER="/usr/bin/docker"
cd /home/<^>sammy<^>/<^>node_project<^>/
$COMPOSE run certbot renew && $COMPOSE kill -s SIGHUP webserver
$DOCKER system prune -af

